Characterization of a backlit in transparent mode with the I1 Pro 3 + XRite
Here is a more economical, less fragile and more "transportable" alternative solution than the imposing measurement tables offering the reading of scales in transparency mode for the characterization of backlit media for example.
This functionality is available from version 1.31.0 of Coraye
Prerequisites:
- Coraye software RGB Profiler or CMYK Profiler modules
Please note that it is also possible to use this functionality in the Print Control module
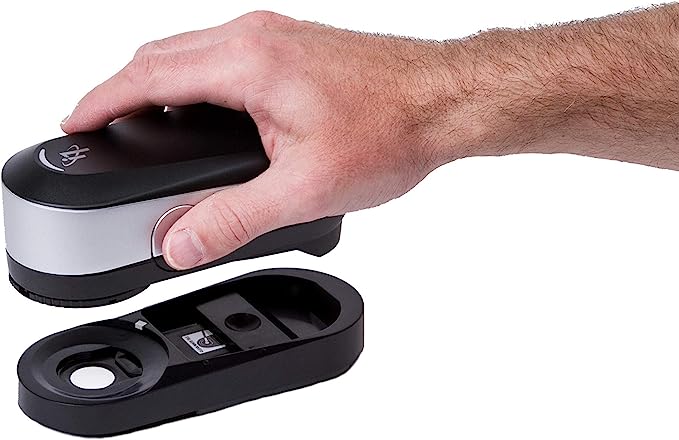
- XRite I1 Pro 3 PLUS spectrophotometer
- LED Tracing Light Pad light table in A3 or A2 format
- Printed targets on transparent Backlit type support
Choice of light table:
It is important to choose a homogeneous and sufficiently large light table.
Start of the procedure
In order to avoid rewriting the entire procedure of the RGB Profiler and CMYK Profiler modules, we will assume that you have created and printed the targets on your transparent Backlit support.
We will therefore start this tutorial at the step where we will launch the measurement of the target.
Important: Make sure your spectrophotometer is connected to a USB port directly on your computer and not to a USB hub
The XRite I1 Pro 3 PLUS are powered via the USB port,.
If the power supply from the USB port is not sufficient, the spectro will be recognized, but at the time of calibration the software will go into error.
Note: There is no limitation on the number of patches making up the targets intended to be measured in "transmissive" mode,
IMPORTANT:
To facilitate the measurement of the target in transmissive mode with the I1 Pro 3 +, it is advisable to create sufficiently large patches (20x20 mm) with 4 mm "Auto" separators and a 35 mm stop zone.
If you are using an A3 or A2 light table, you can create targets in 500x600 mm format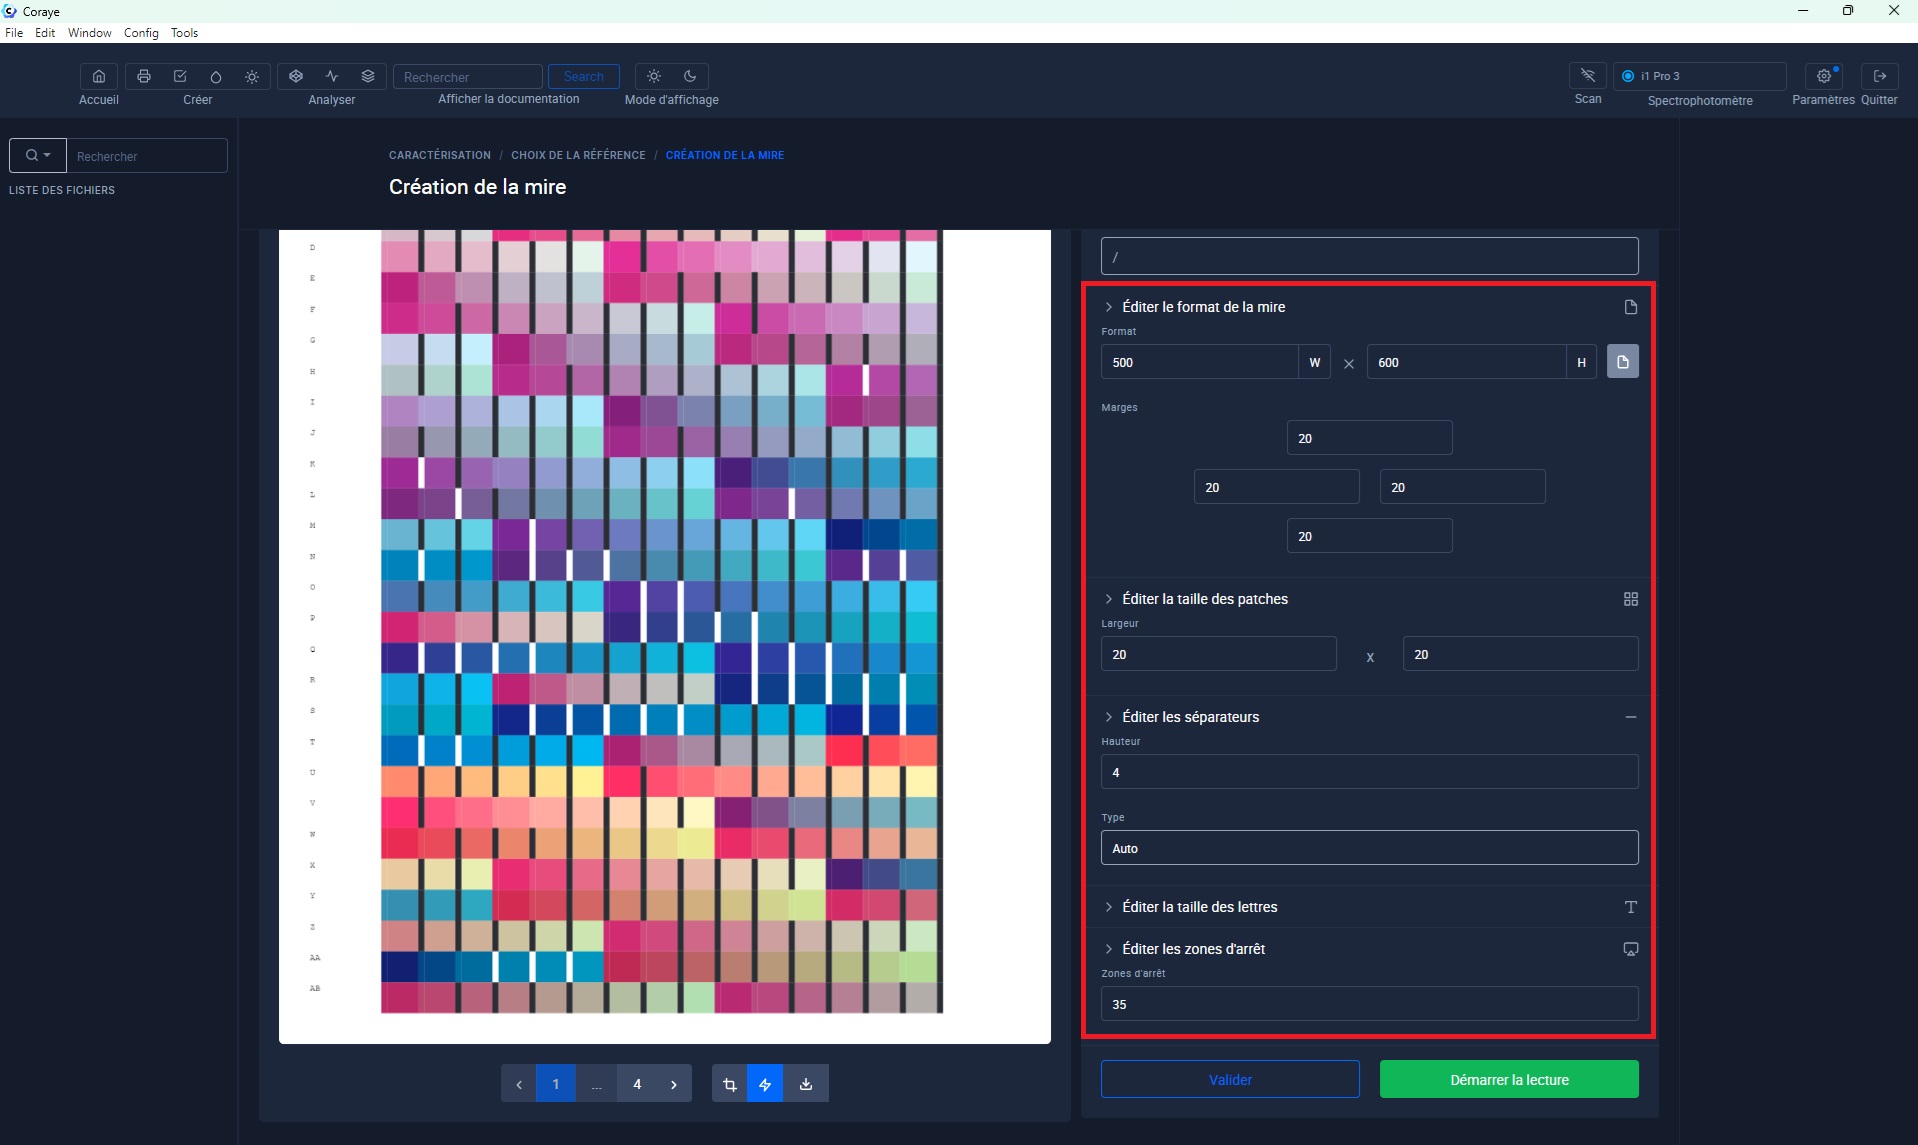
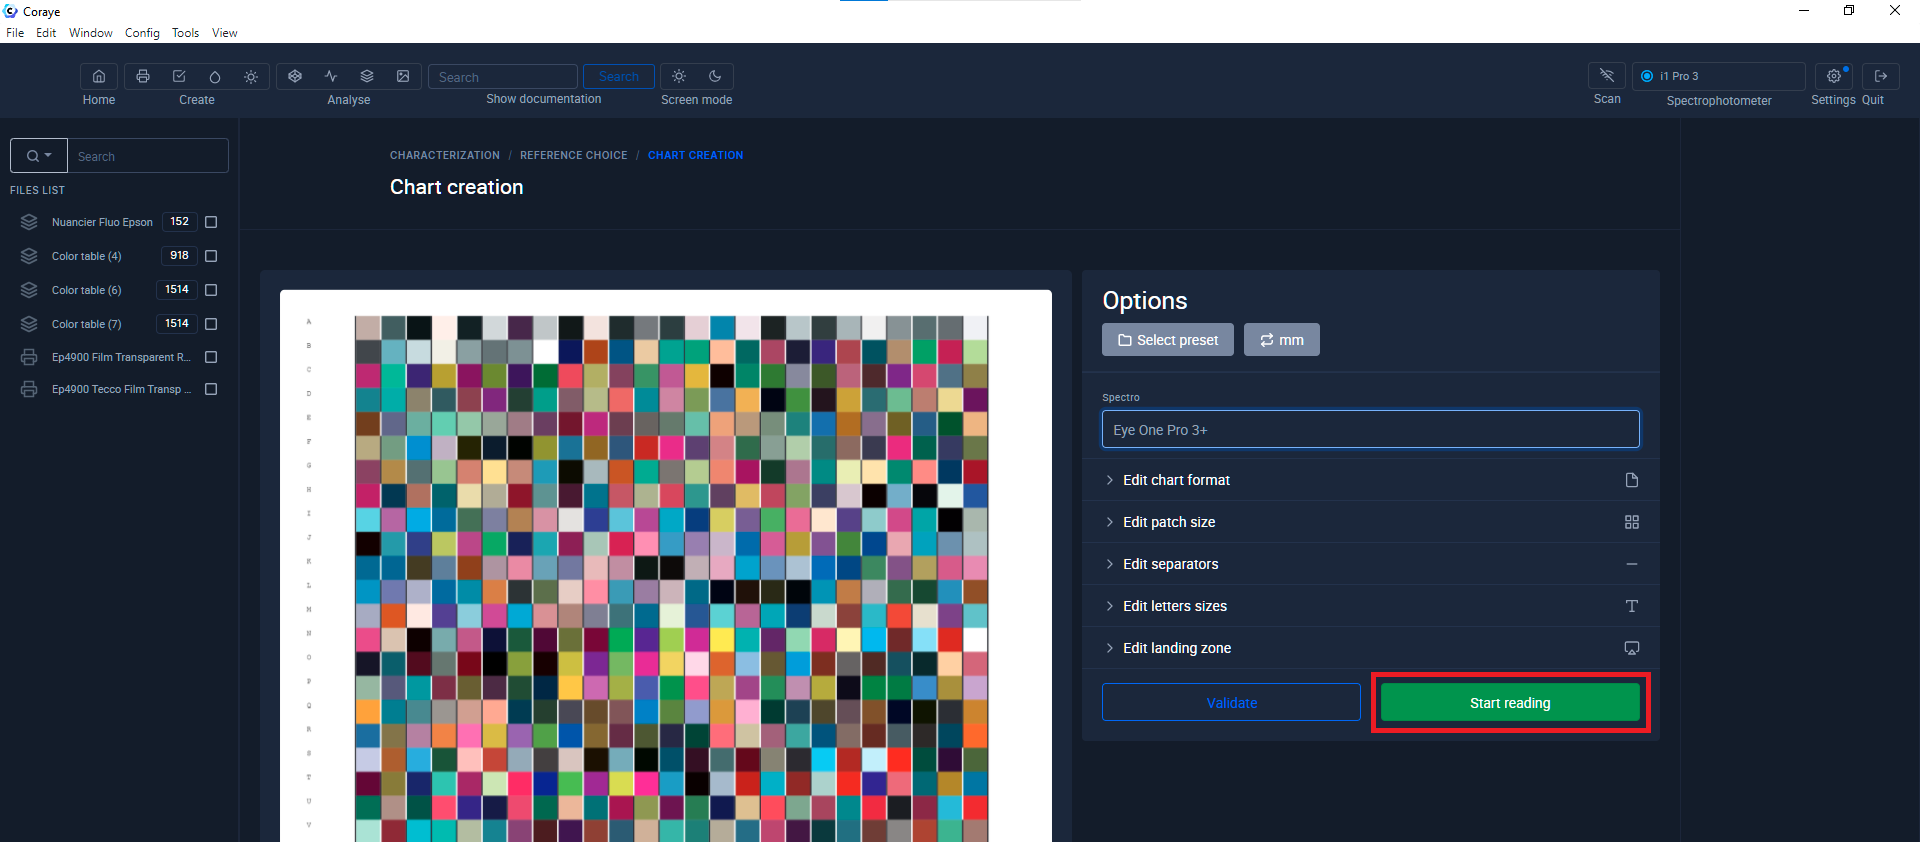
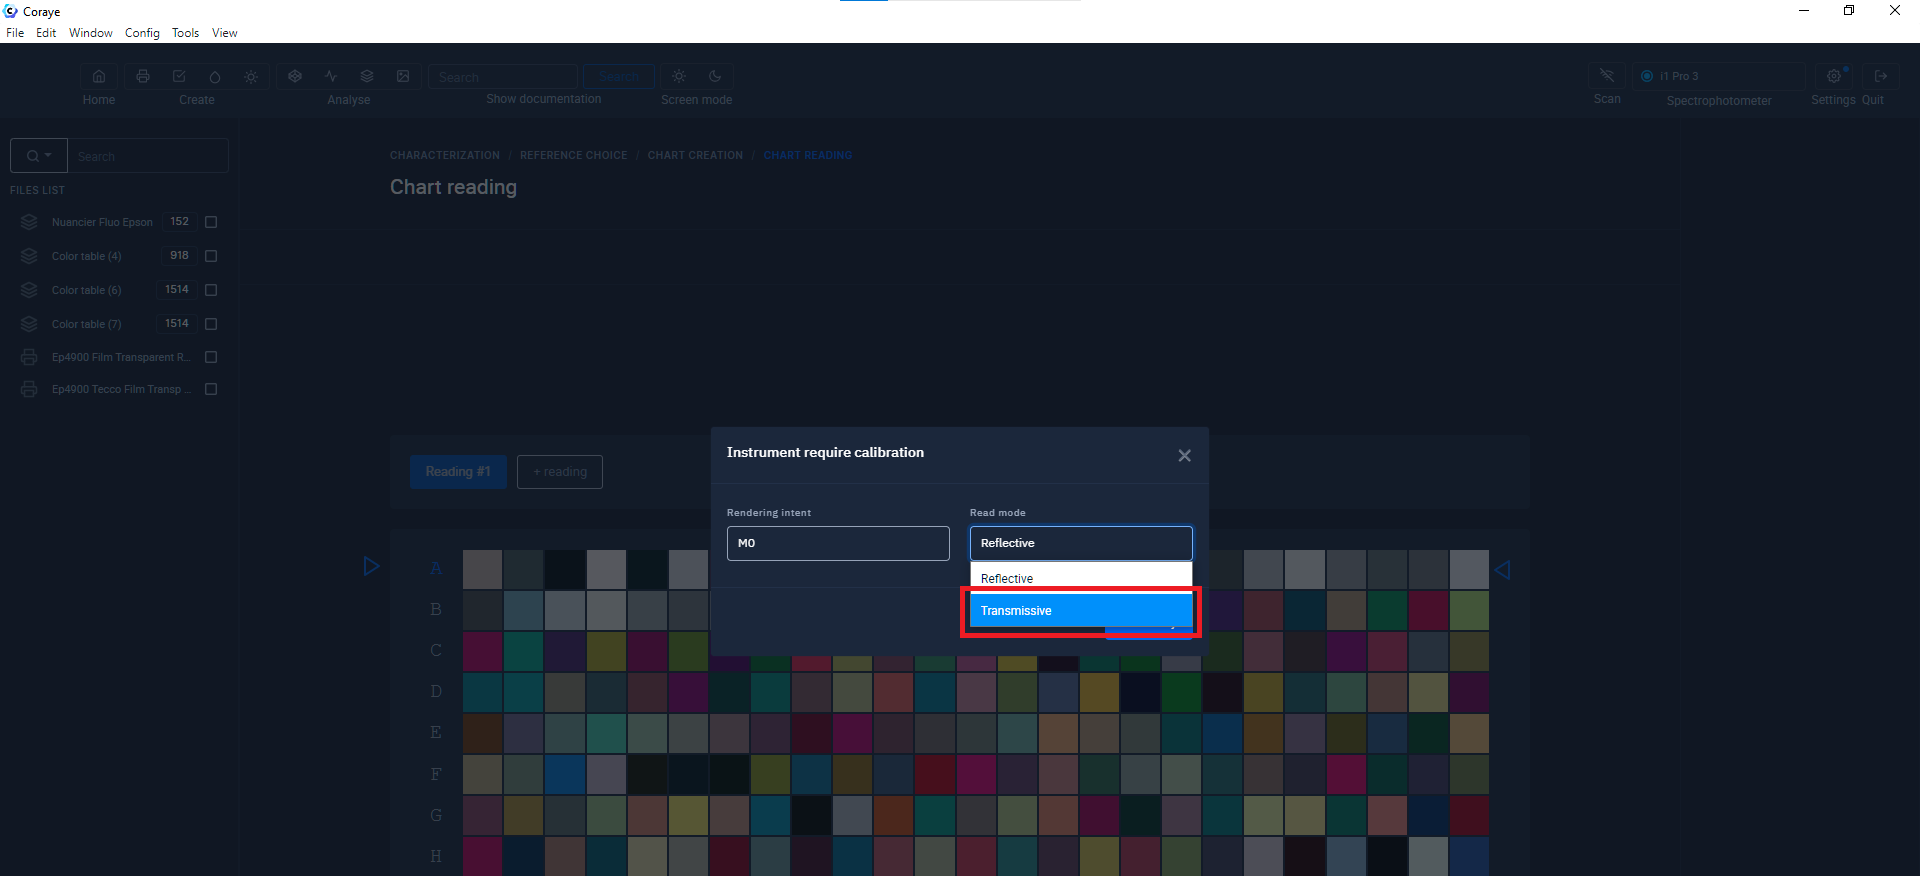
Click the "Start Reading" button
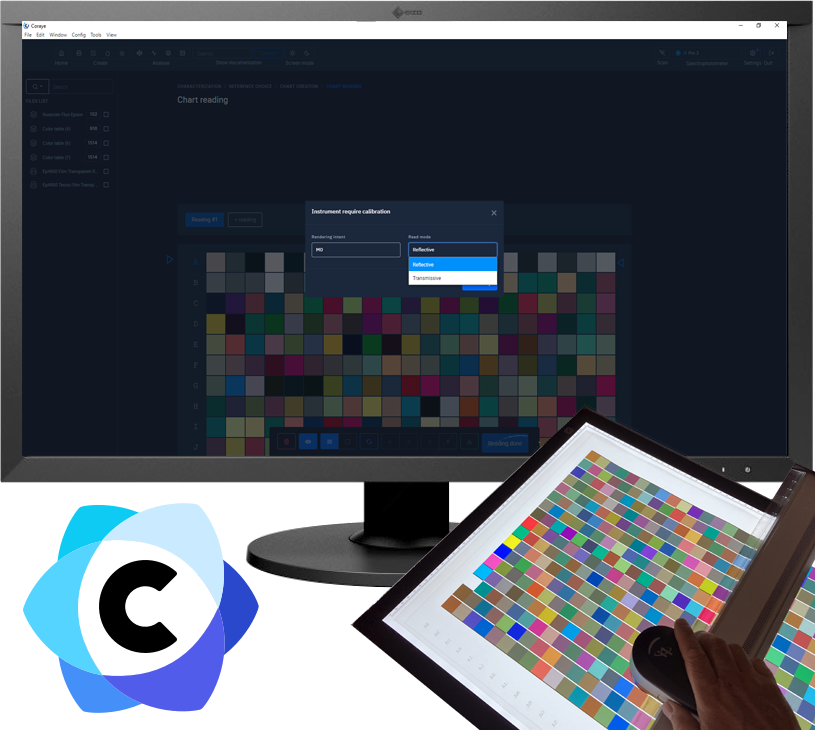
Choice of measurement mode: Transmissive mode"
Calibrating the I1 Pro 3 PLUS spectrophotometer
Before clicking on the "Start calibration" button, position the I1 Pro 3 PLUS on its base.
Make sure that the white calibration ceramic is not covered by the protection
Click on the "Start calibration" button

Measuring the illuminant of the light table
This step is important because the value of the light source measured on the table will allow the spectral values to be used as a reference.
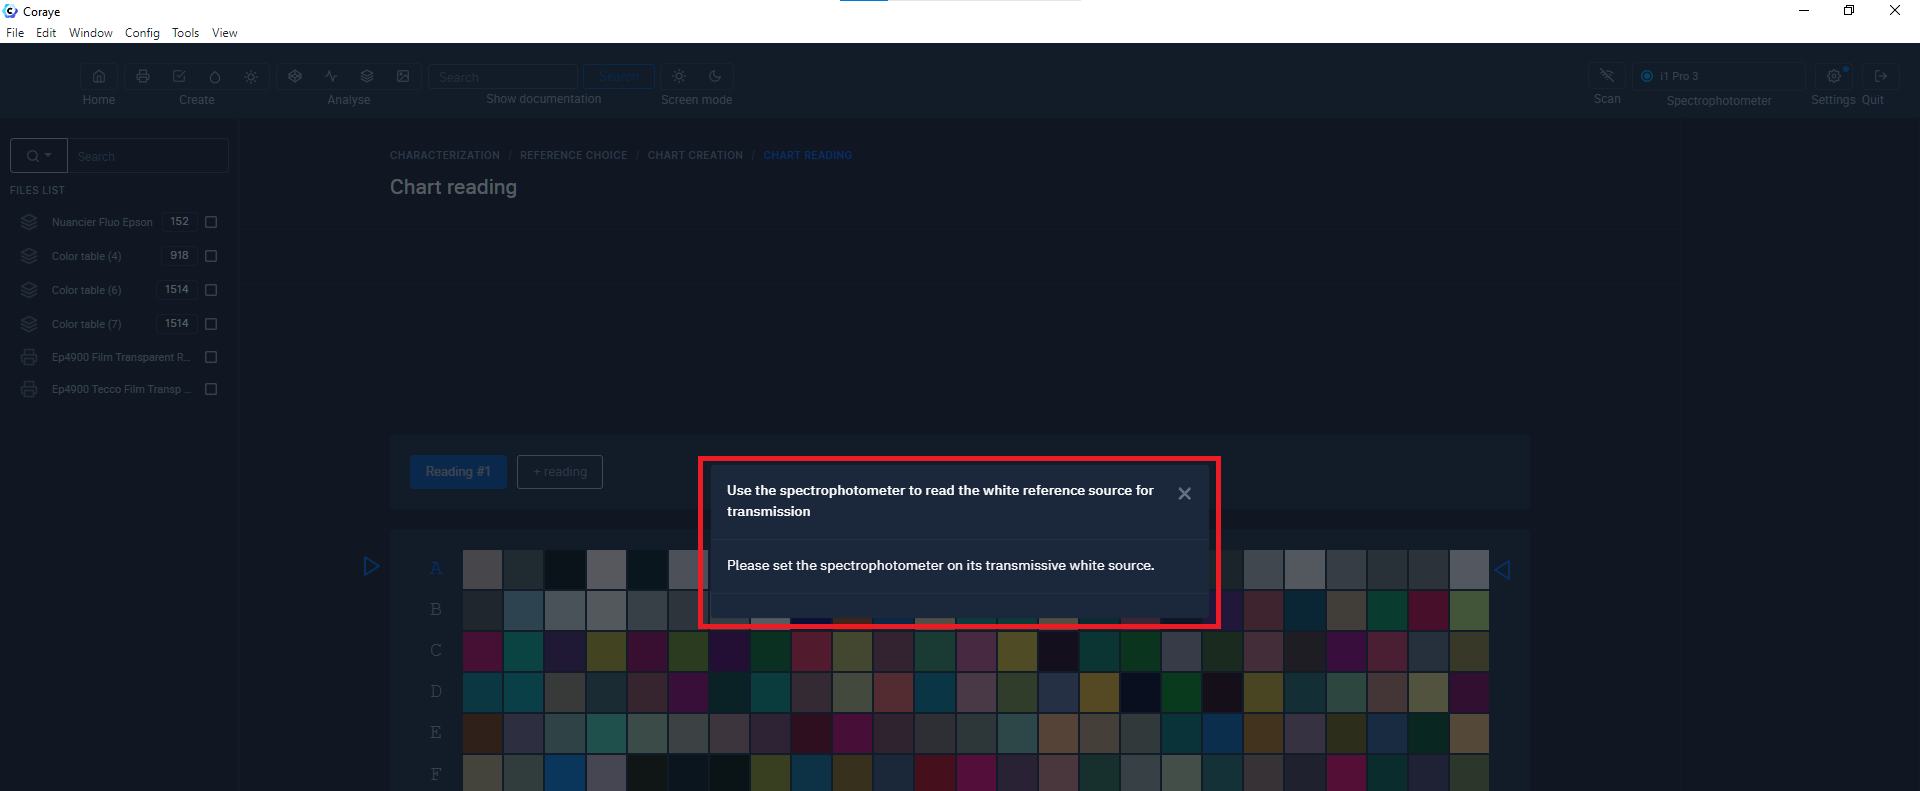
Measure the light table directly with your spectrophotometer.
 Mesure de la lumière de référence
Warning: Do not change the light output of the table after measuring it.
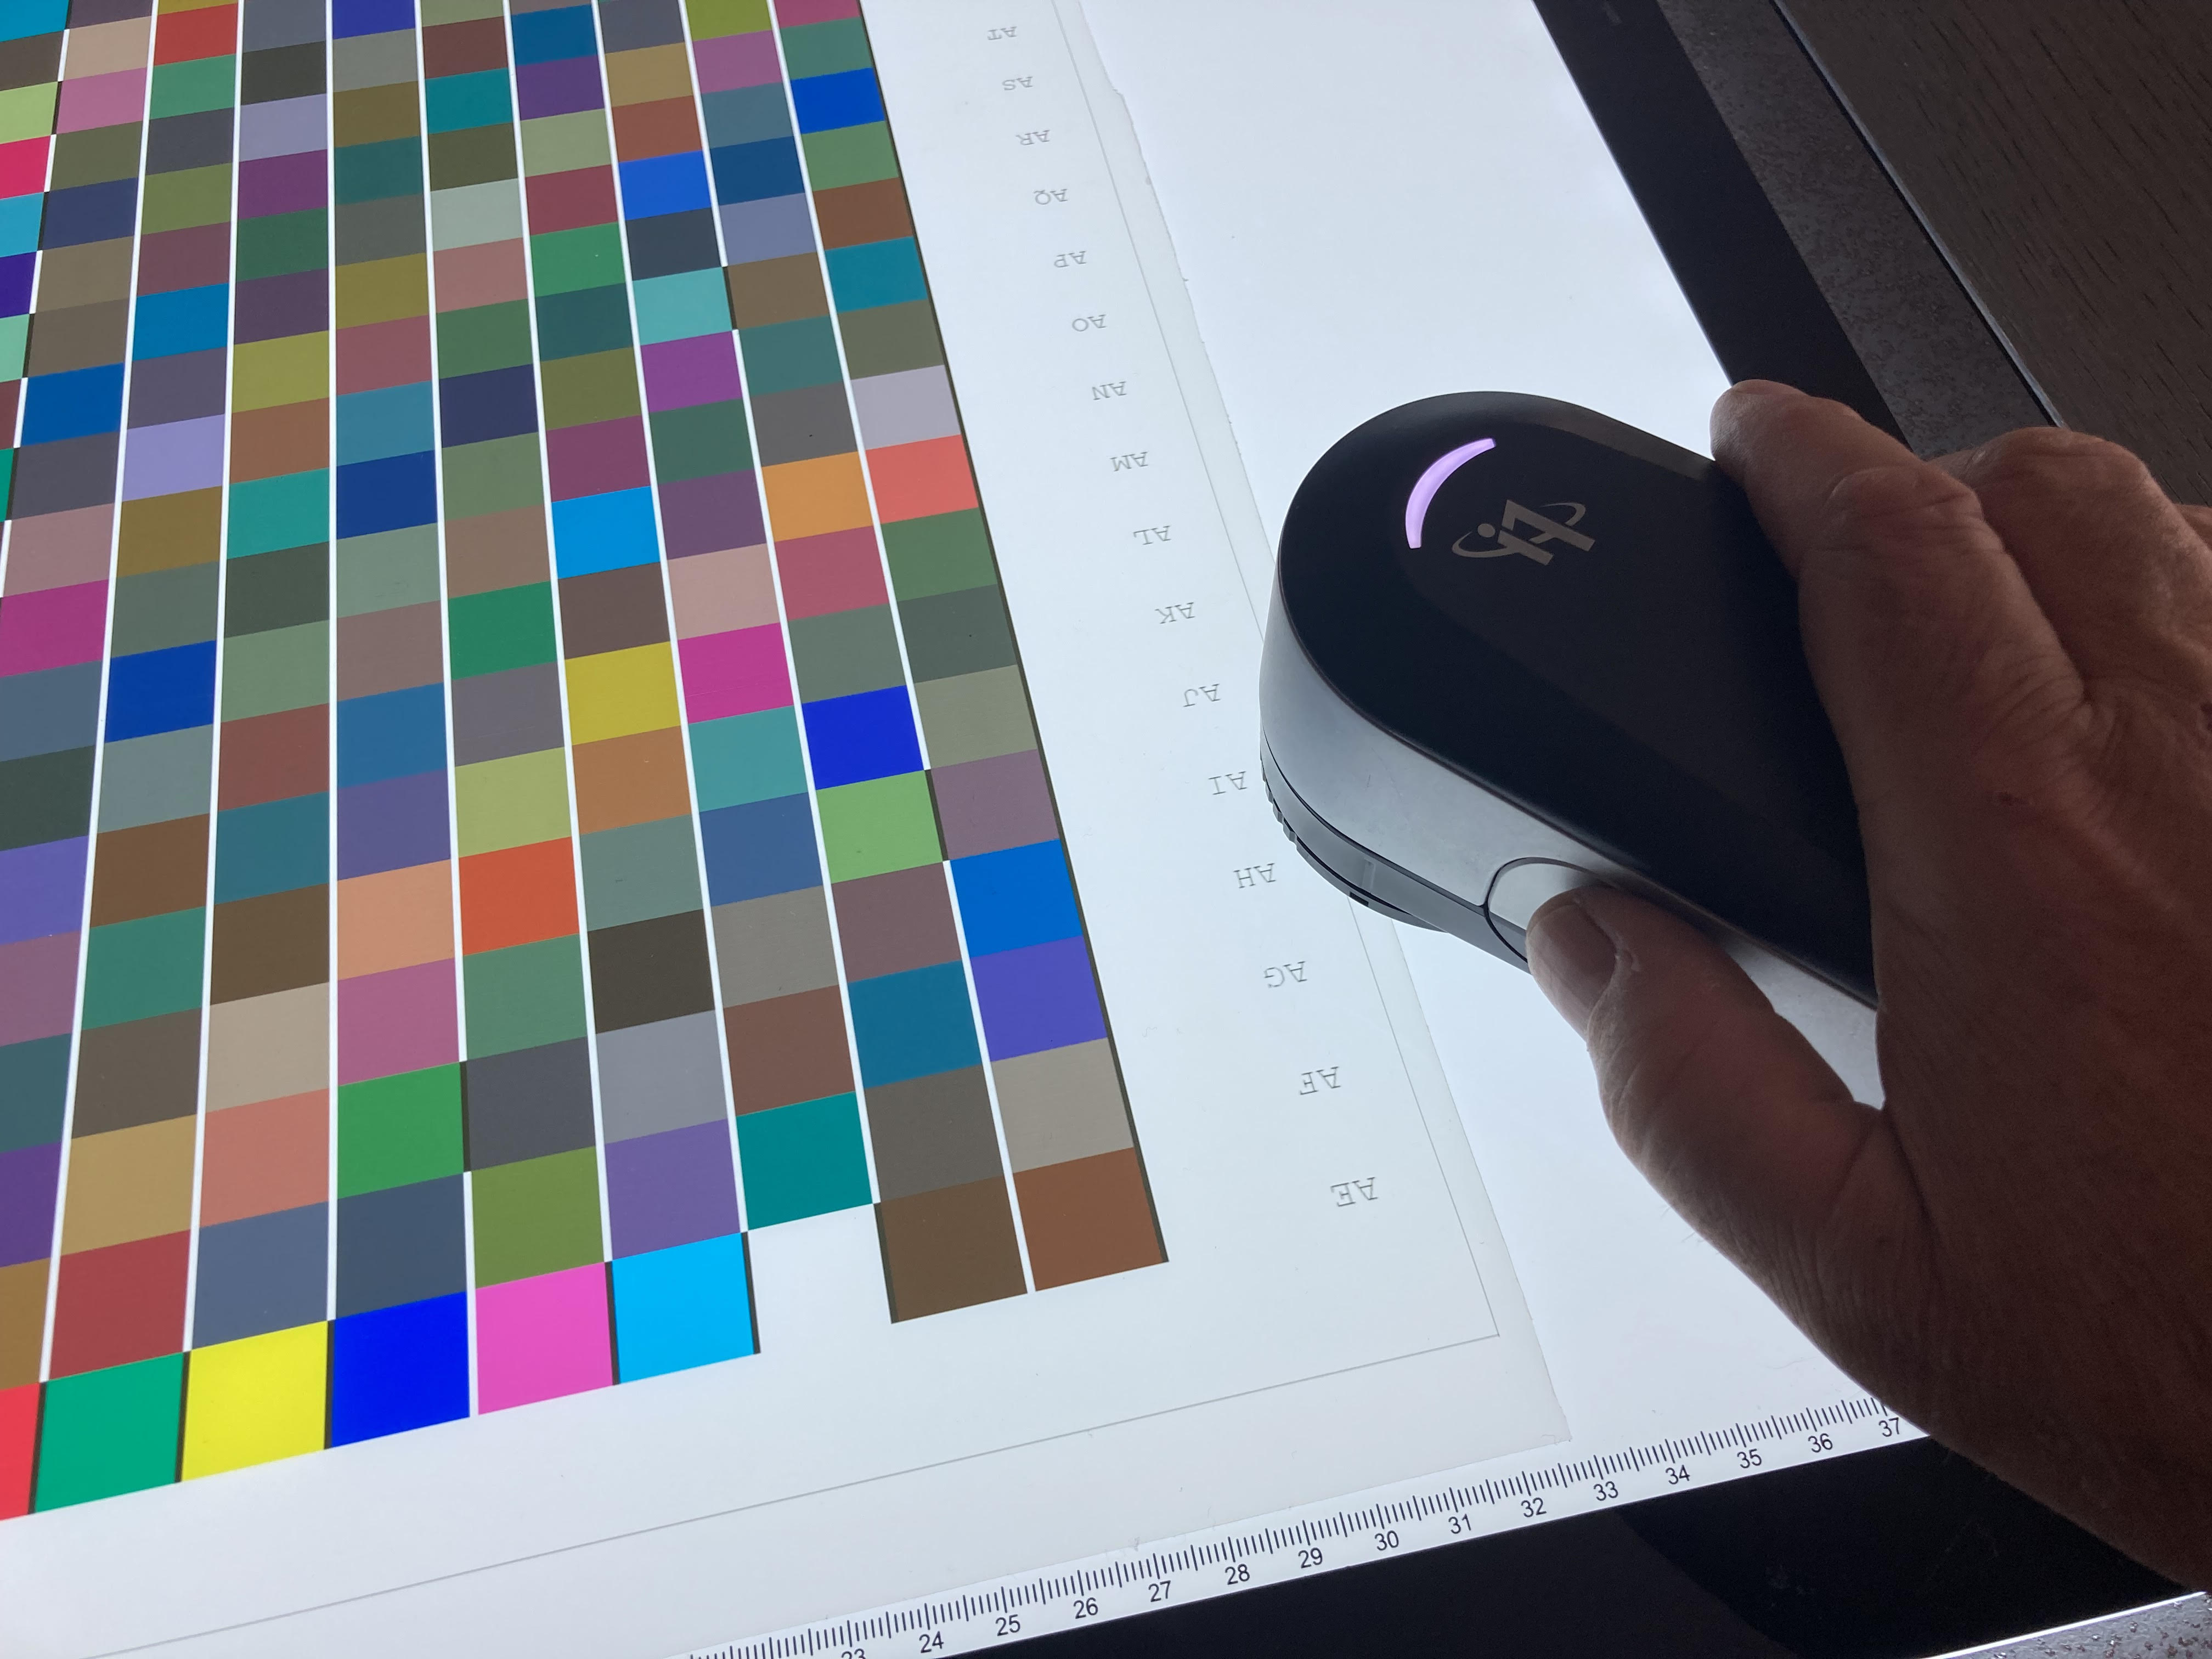
Measuring the target
From now on you can start measuring line by line
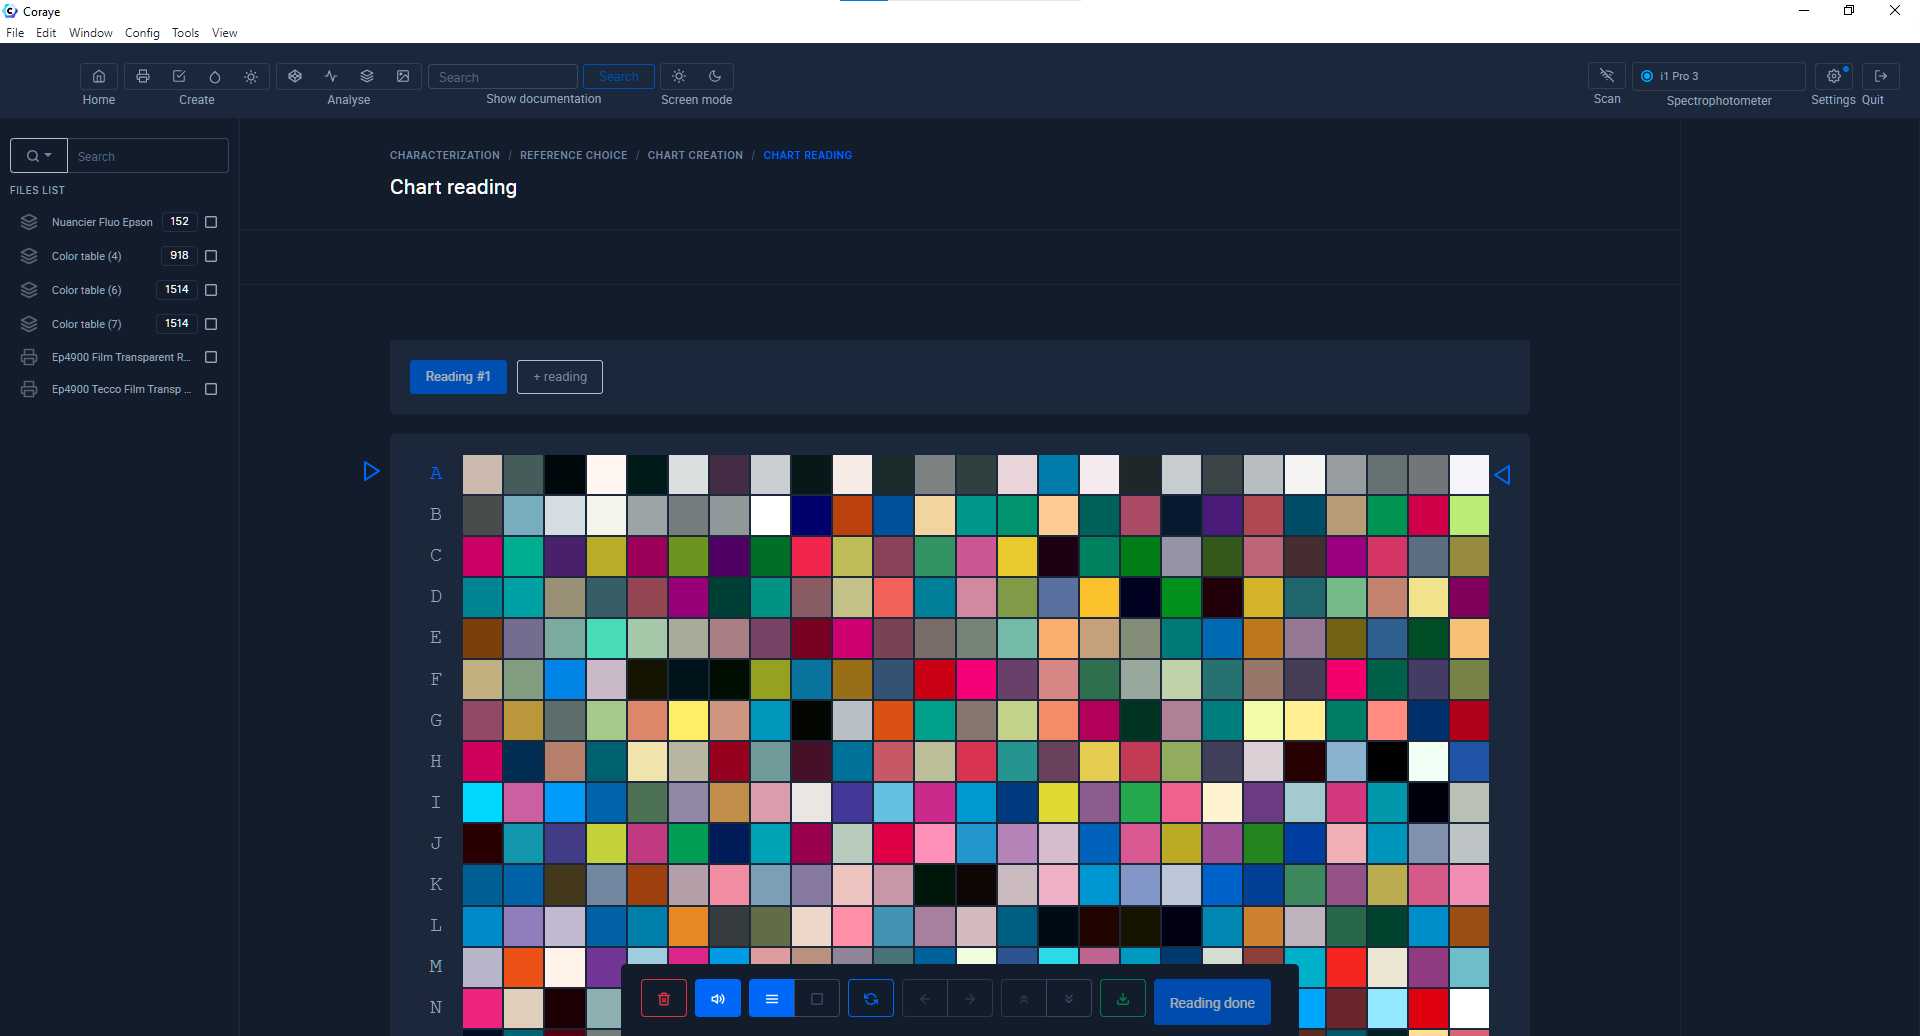
Caution! The measurement rate must be slower than for measuring a range measured in reflective mode.

The cadence must be slower than for measuring a target measured in reflective mode.
Calculating the Profile
When the reading of the target is finished, you can resume the normal procedure for creating your ICC profile.