Show density
Because a workshop spectro-densitometer is expensive, the use of the spectrophotometer, which already equips your copier or your proofing system, can, thanks to Coraye, serve as a densitometer.
Introduction
This feature, offered by Coraye, cannot replace a workshop densitometer if the spectrophotometer you have does not support M3 mode (polarizing filter).
To be able to measure a wet ink density, your densitometer must be equipped with a polarizing filter in order to obtain the same density values between wet ink and dry ink.
Regarding color values (Lab), measurement should always be performed on dry inks.
However, if you do not have a workshop spectrodensitometer, but only a workshop densitometer, Coraye will be able, thanks to this functionality, to allow you to determine the optimum density values corresponding to the Lab values of the primary colors and additional information recommended by the ISO 12647 standard.
Hereinafter, a sheet explaining the ISO 12647 standard: ISO 12647
Measure your primary colors
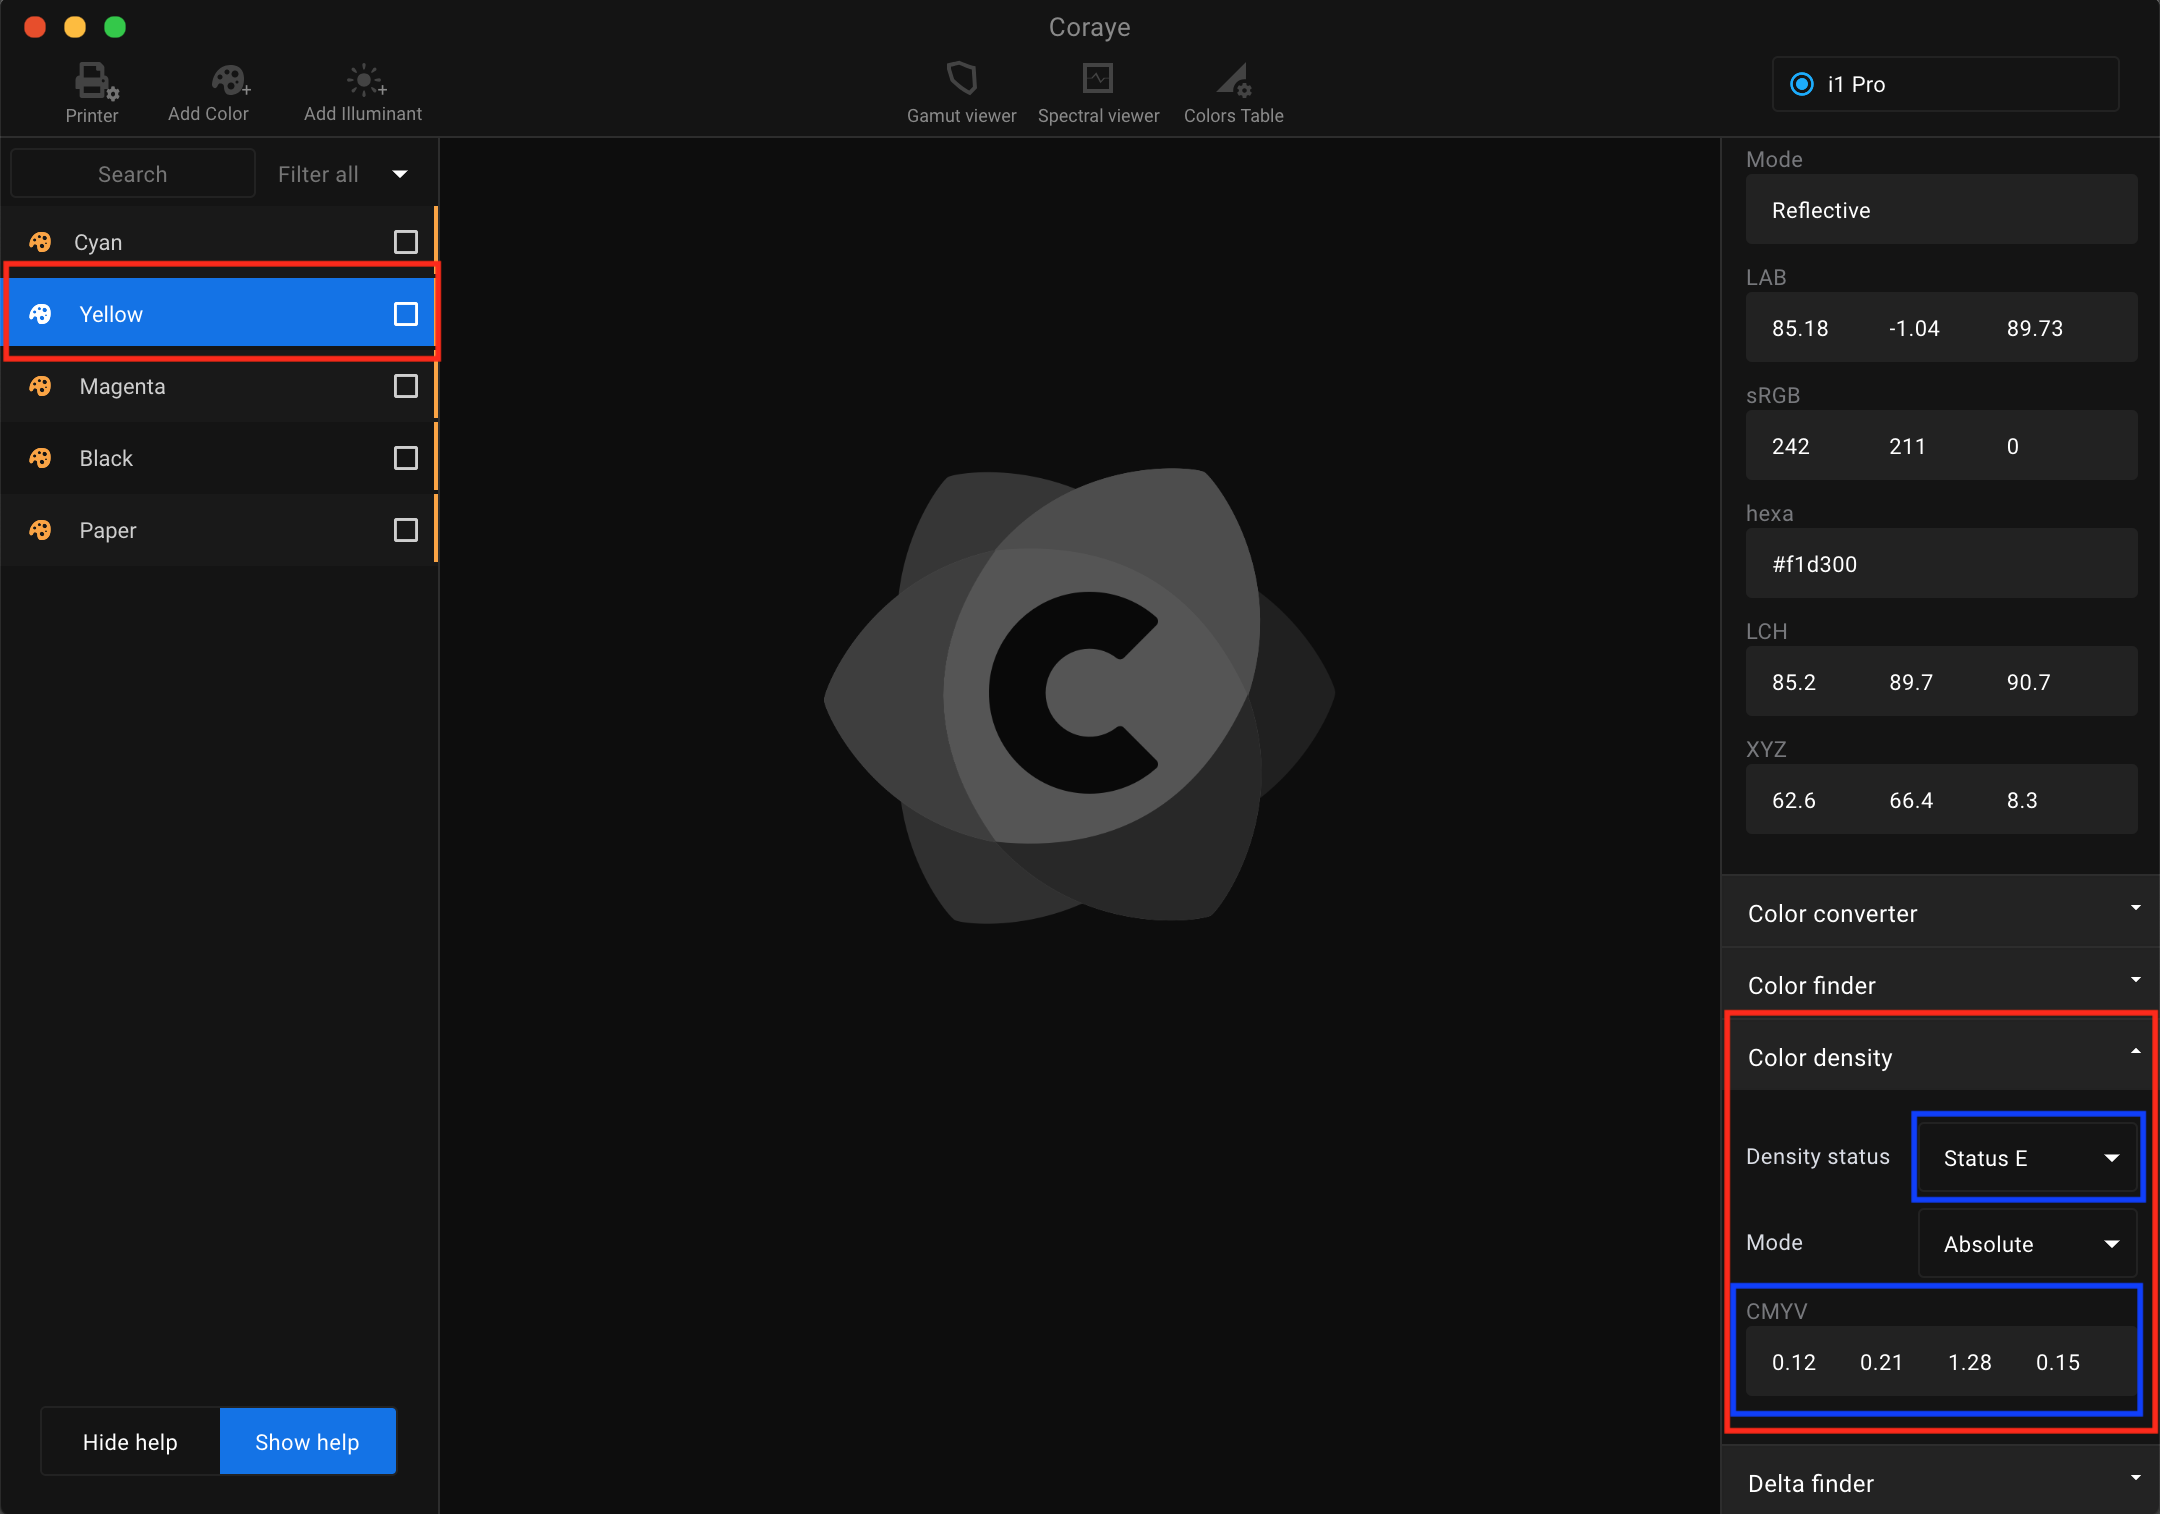
The first thing to do is read your solid color samples Cyan, Magenta, Yellow, and Black, for example.
Remember to read the paper value, on an unprinted area, if you want to get the relative density values.
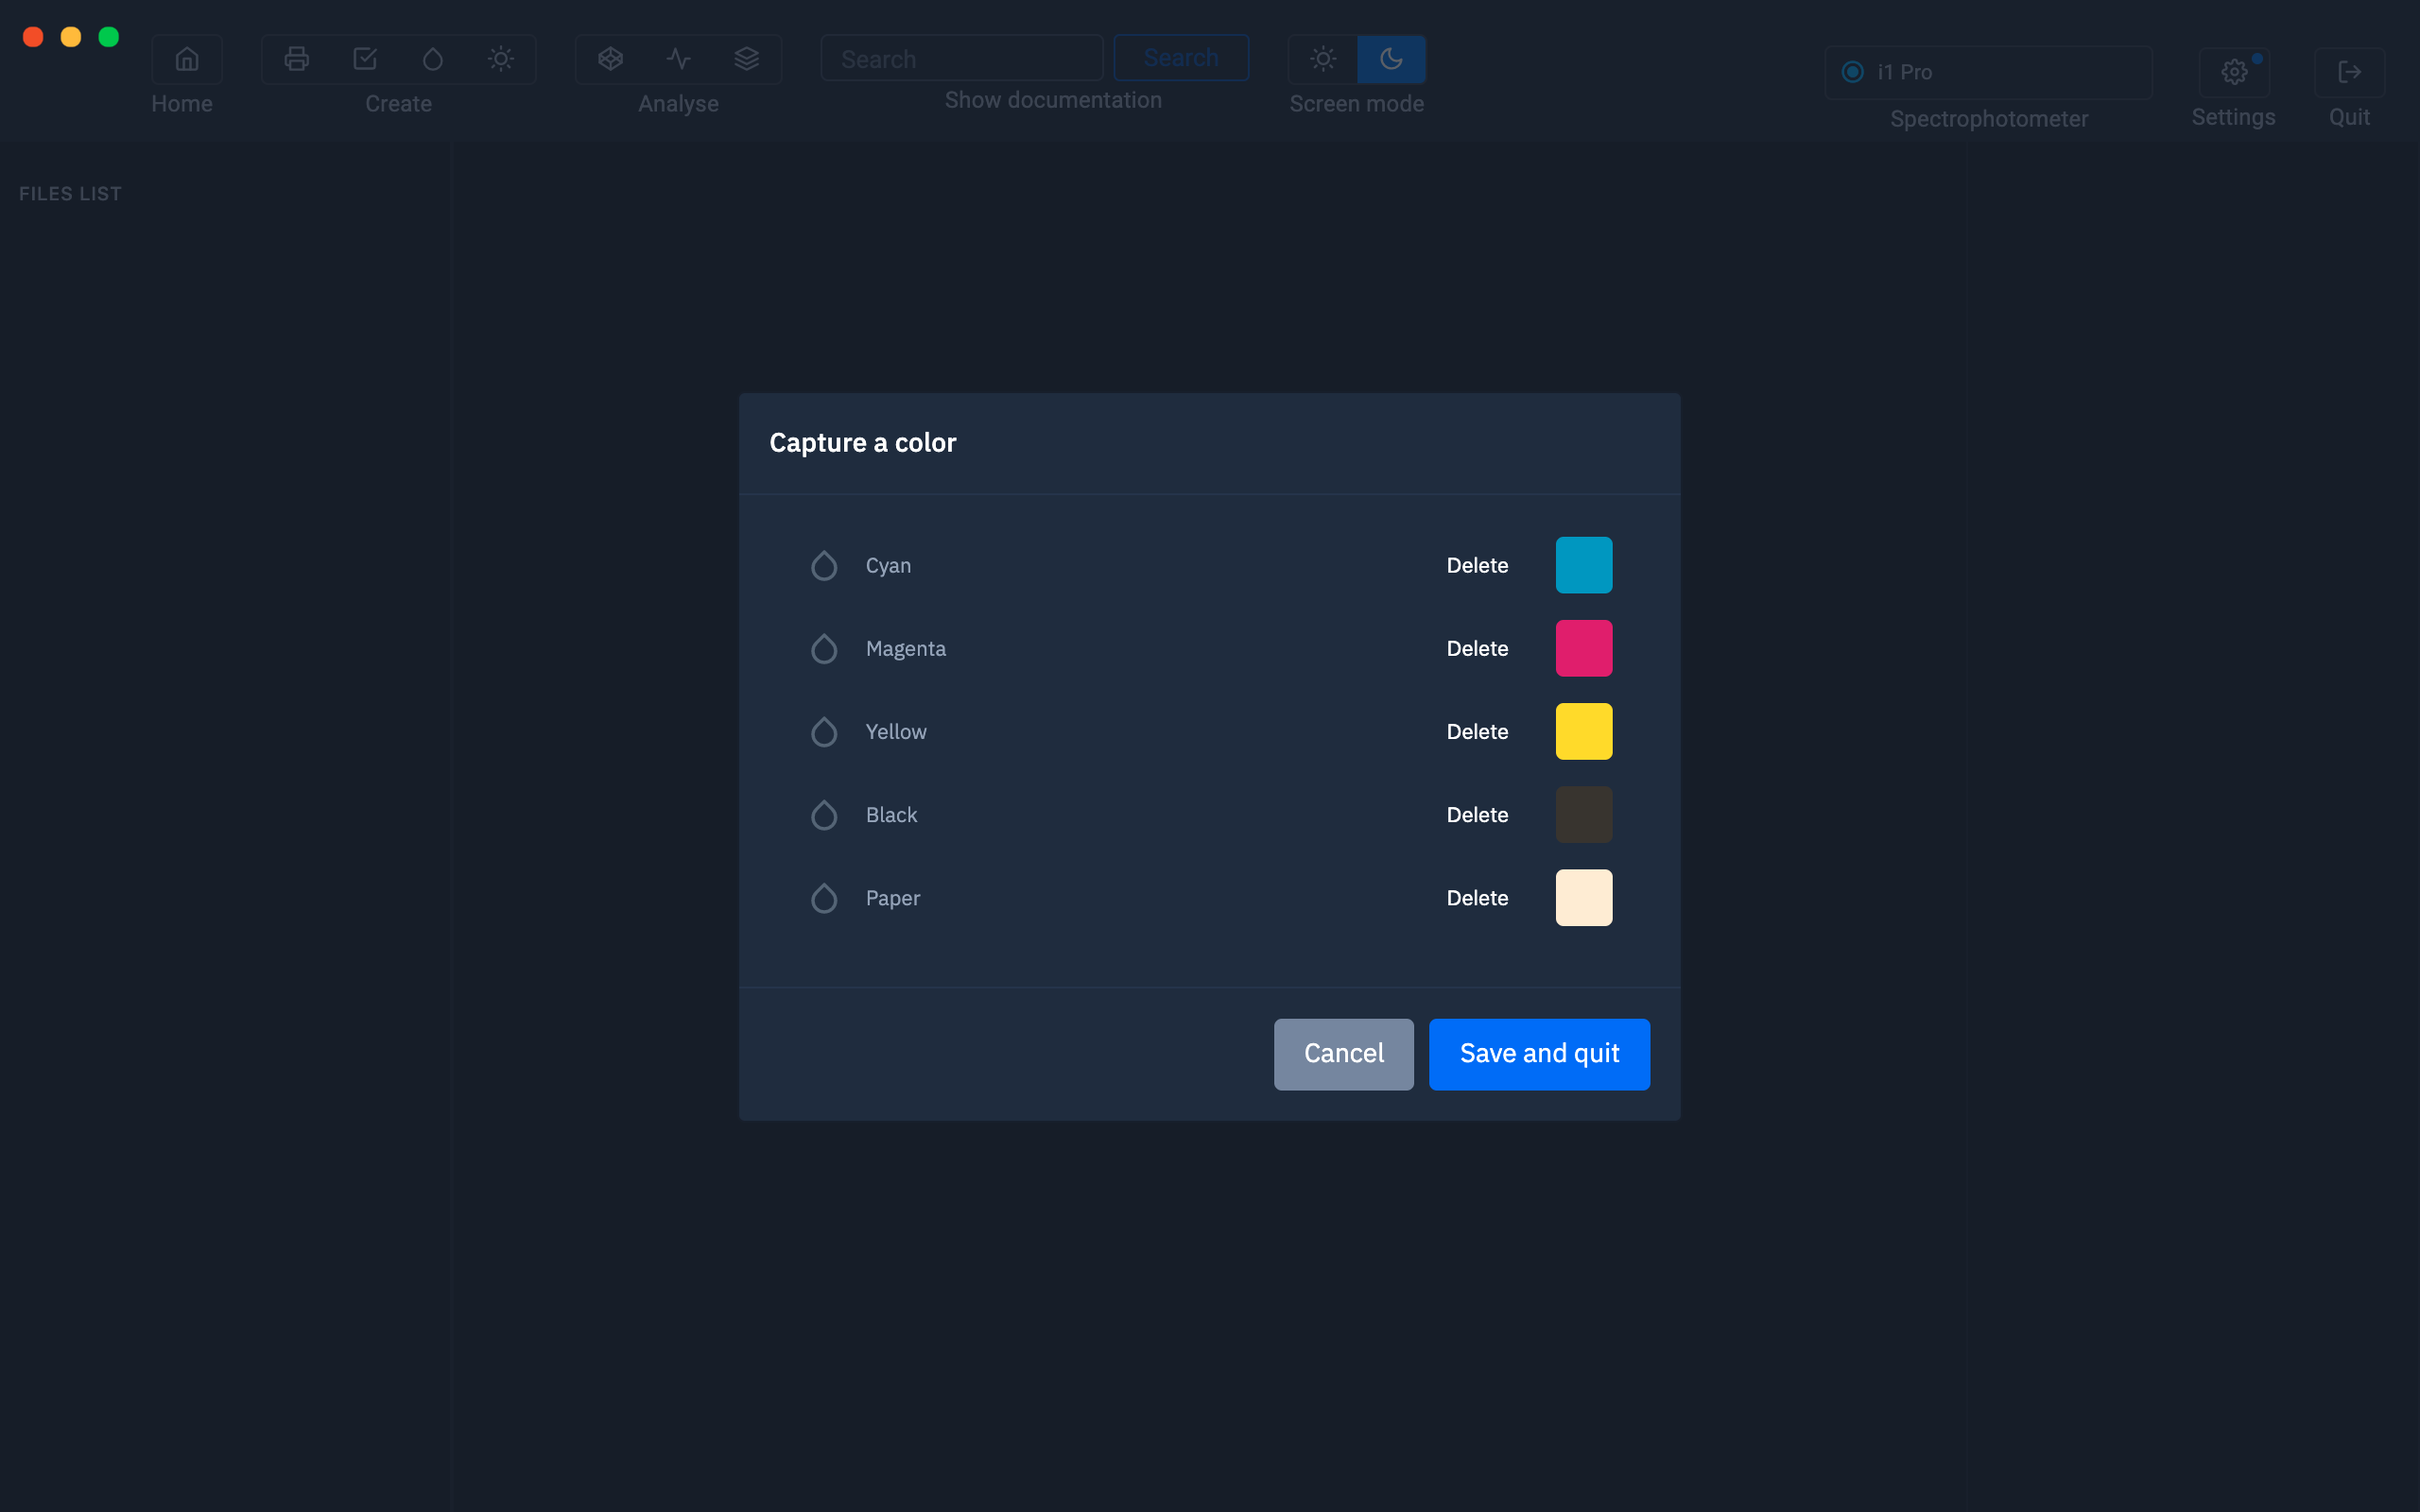
Capture primary colors and paper
Get your density values
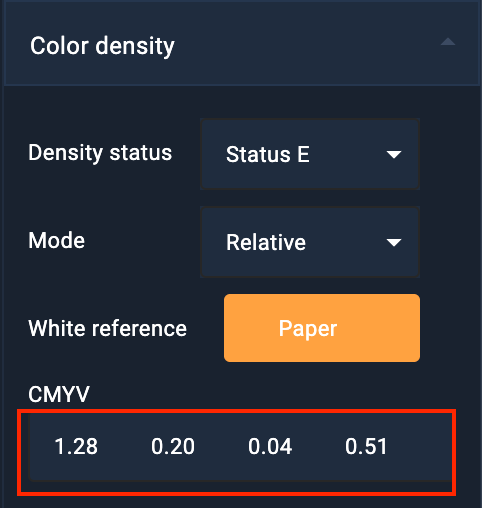
To see the density values, simply select your color in the left column, then move to the right column to view the values in the " Color Density ."
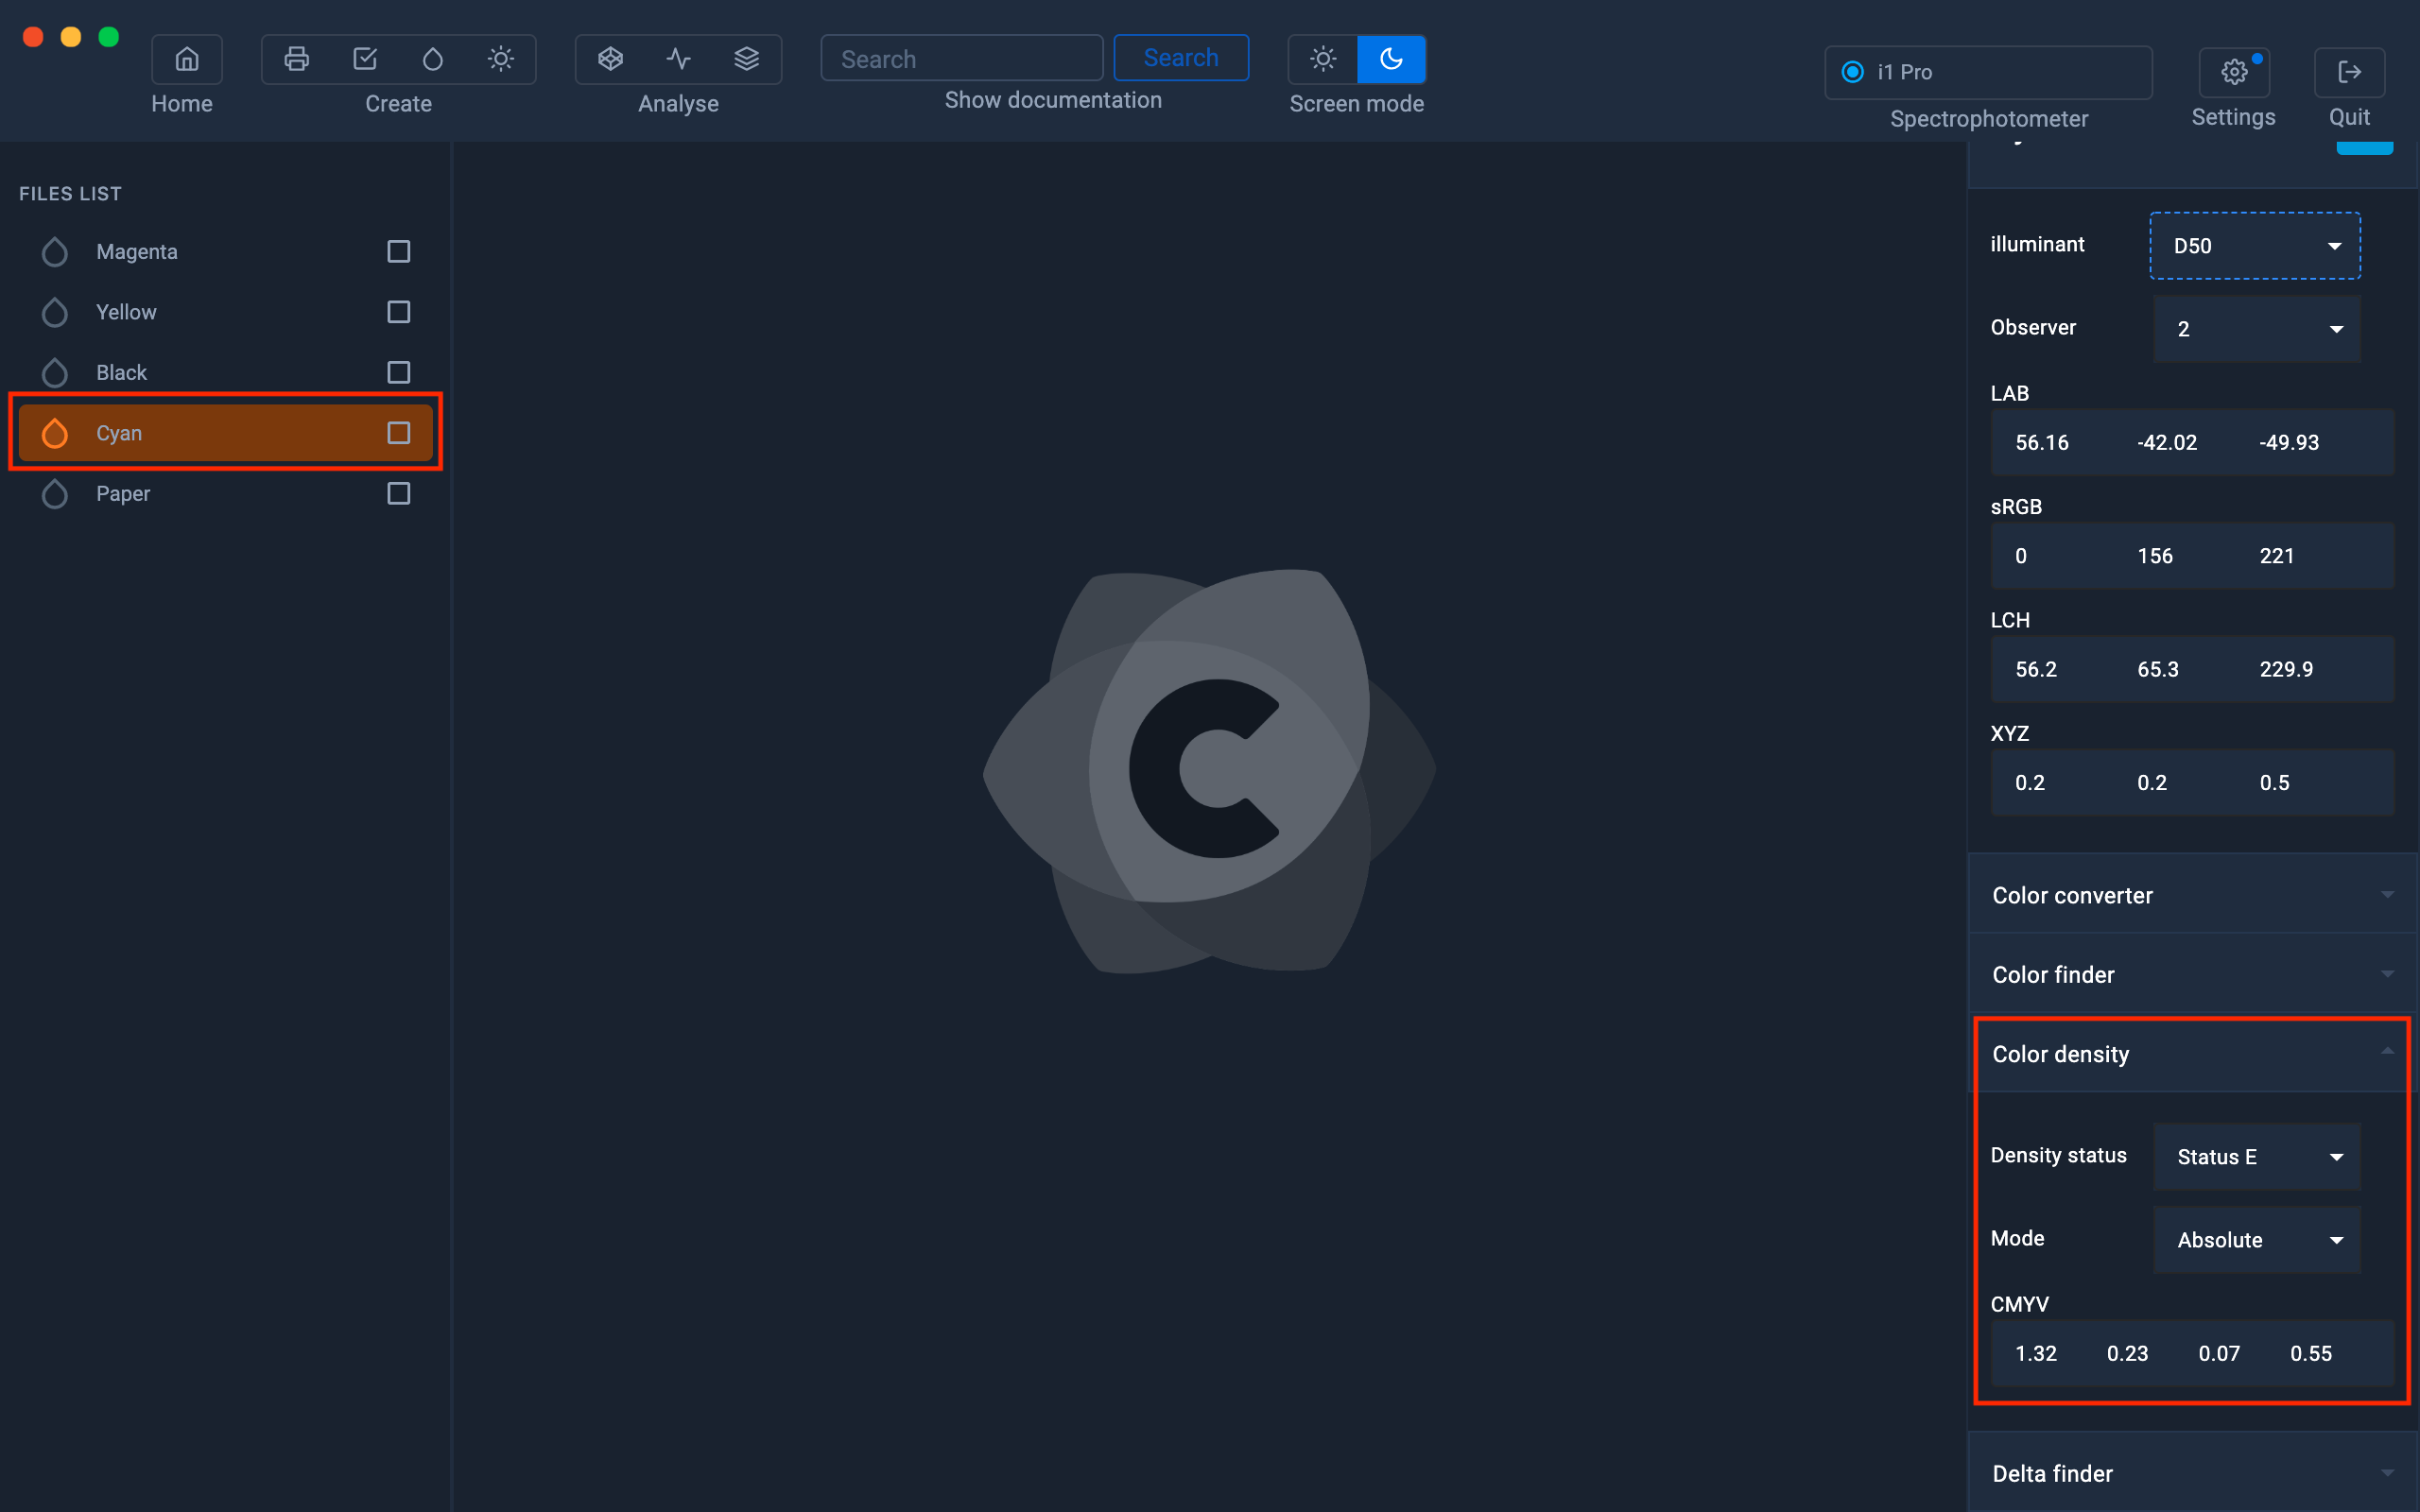
Why CMYV and not CMYK?
When you measure density, you use a densitometer that uses Red, Green, and Blue filters to filter out Cyan, Magenta, and Yellow density values.
But the densitometer cannot distinguish the difference between a single black and a composite black. it will then provide us with a density value relative to a "visual black".
The trends
The different modes supported by Corayes
- Status E: response of the densitometer which is the standard accepted in Europe for color reflection densitometers.
- Status T: Wideband Color Reflection Densitometer Response, which is the accepted standard in the United States for color reflection densitometers.
- Status A: ANSI PH2.18, densitometer response. This is the accepted standard for reflection densitometers intended for the measurement of photographic color prints.
- Status M: Negative color photographic print density (ie negative color, internegative, intermediate, original inversion, intermediate inversion).

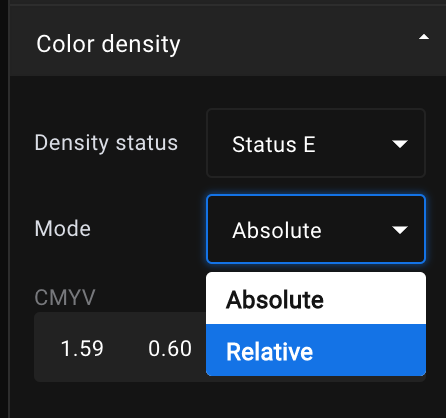
Absolute density vs relative density
Select Density Status Mode
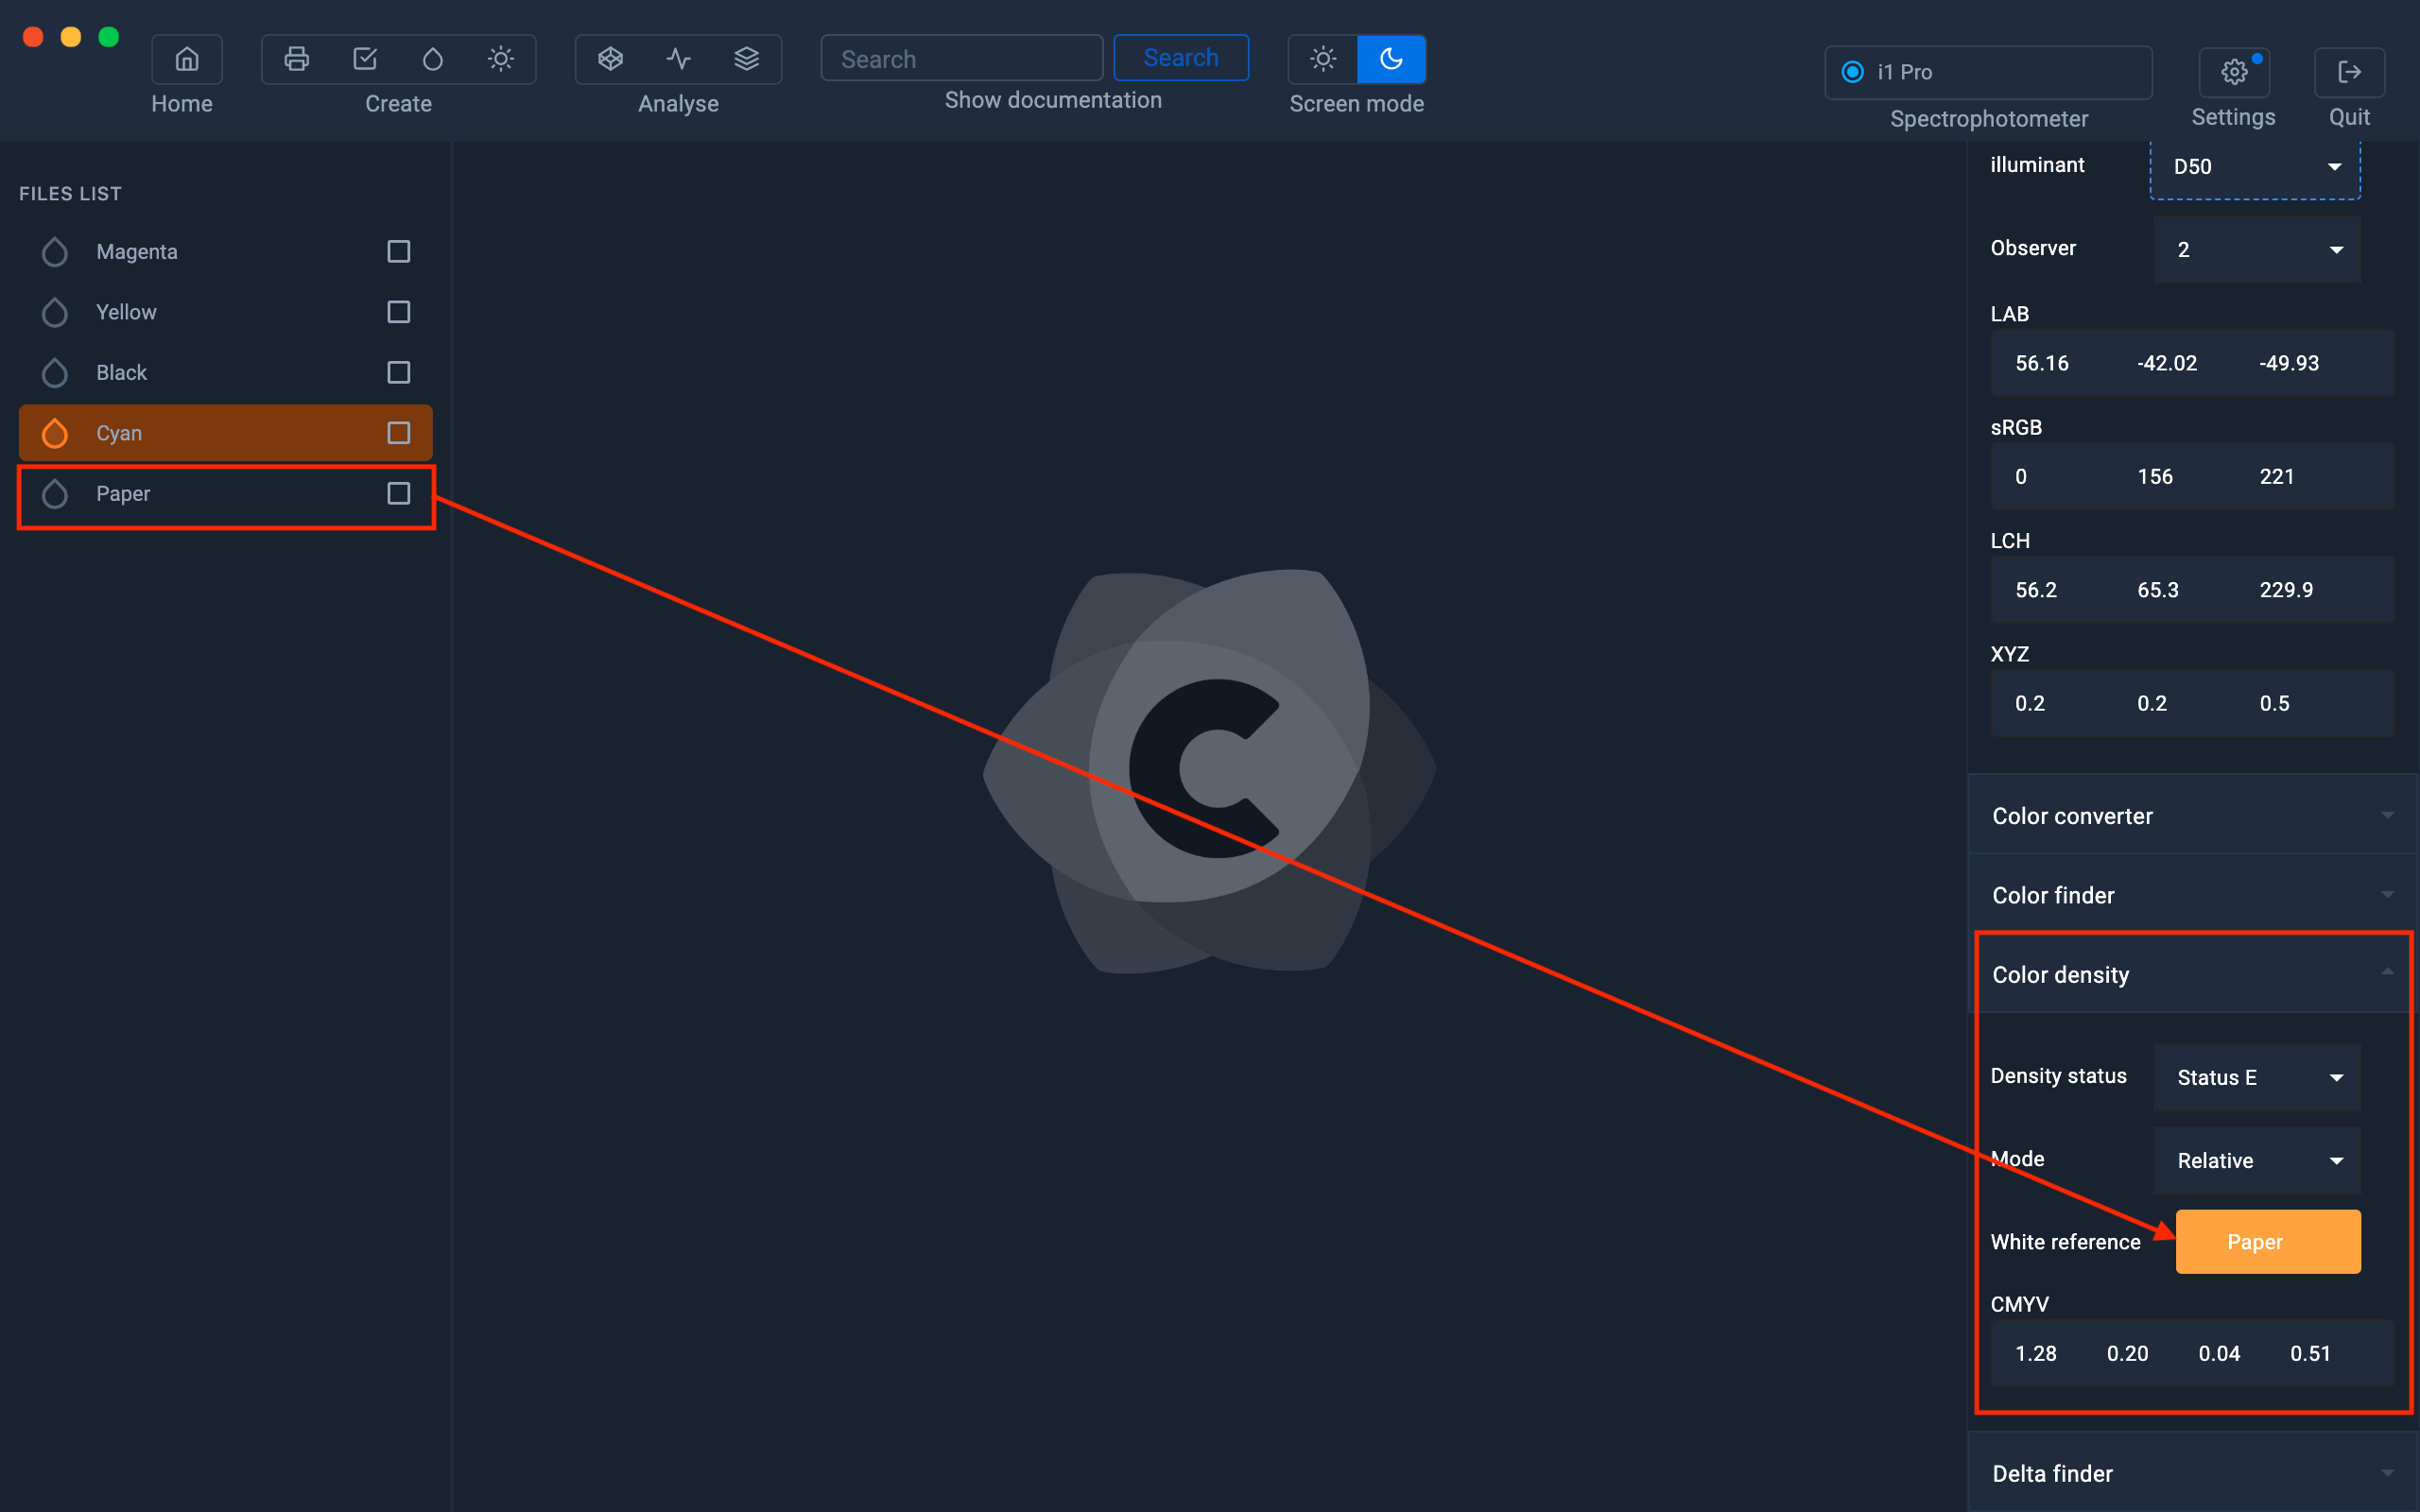
- Absolute Density: Density measured with the included paper density. - Relative density: Density measured without paper included (- Paper)
If you want to know more about this topic: Absolute density vs relative density
To get the relative density values, you need to select "Relative" in the "Mode" area, then drag and drop the paper reading into the "White Reference" area.
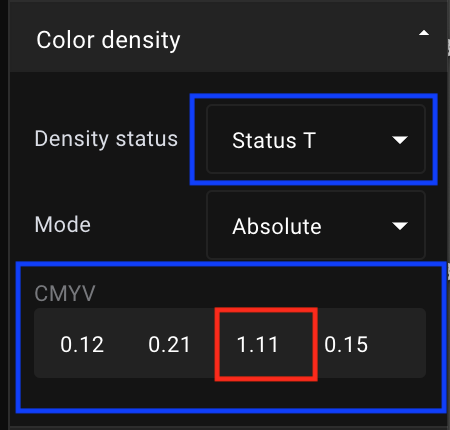
Status E vs. Status T
In the field of printing, the difference between the European standard (status E) and the American standard (status T) is the solid yellow color which is not the same.
In Europe they use "lemon" yellow ink instead of the United States which uses "egg yolk" ink.
As a result, the density measurement is not carried out on the same frequency zone.
In our example, the yellow measured in Status T gives a density of 1.11 while in Status E it is 1.26
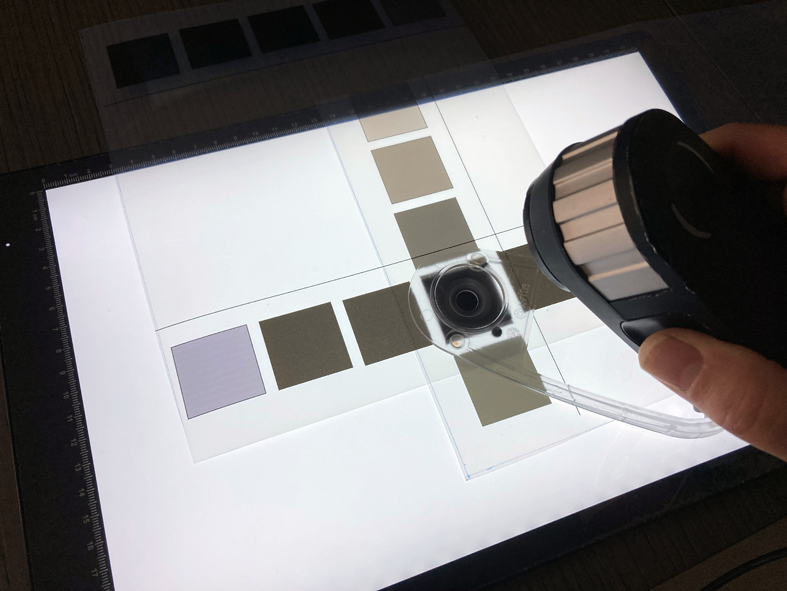
Measure your densities in Transmission mode
You are a screen printer or a photo lab and you need to measure the density of your films in transparency ?
For this you will need:
- Color Capture module by Coraye
- An XRite I1 Pro 1, 2, 3 or 3 PLUS spectrophotometer
- A flat light table
To start, connect the XRite I1 Pro spectrophotometer, click on the "Add Color" icon
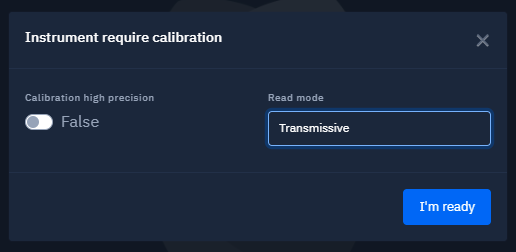
Select the "Transmissive" reading mode
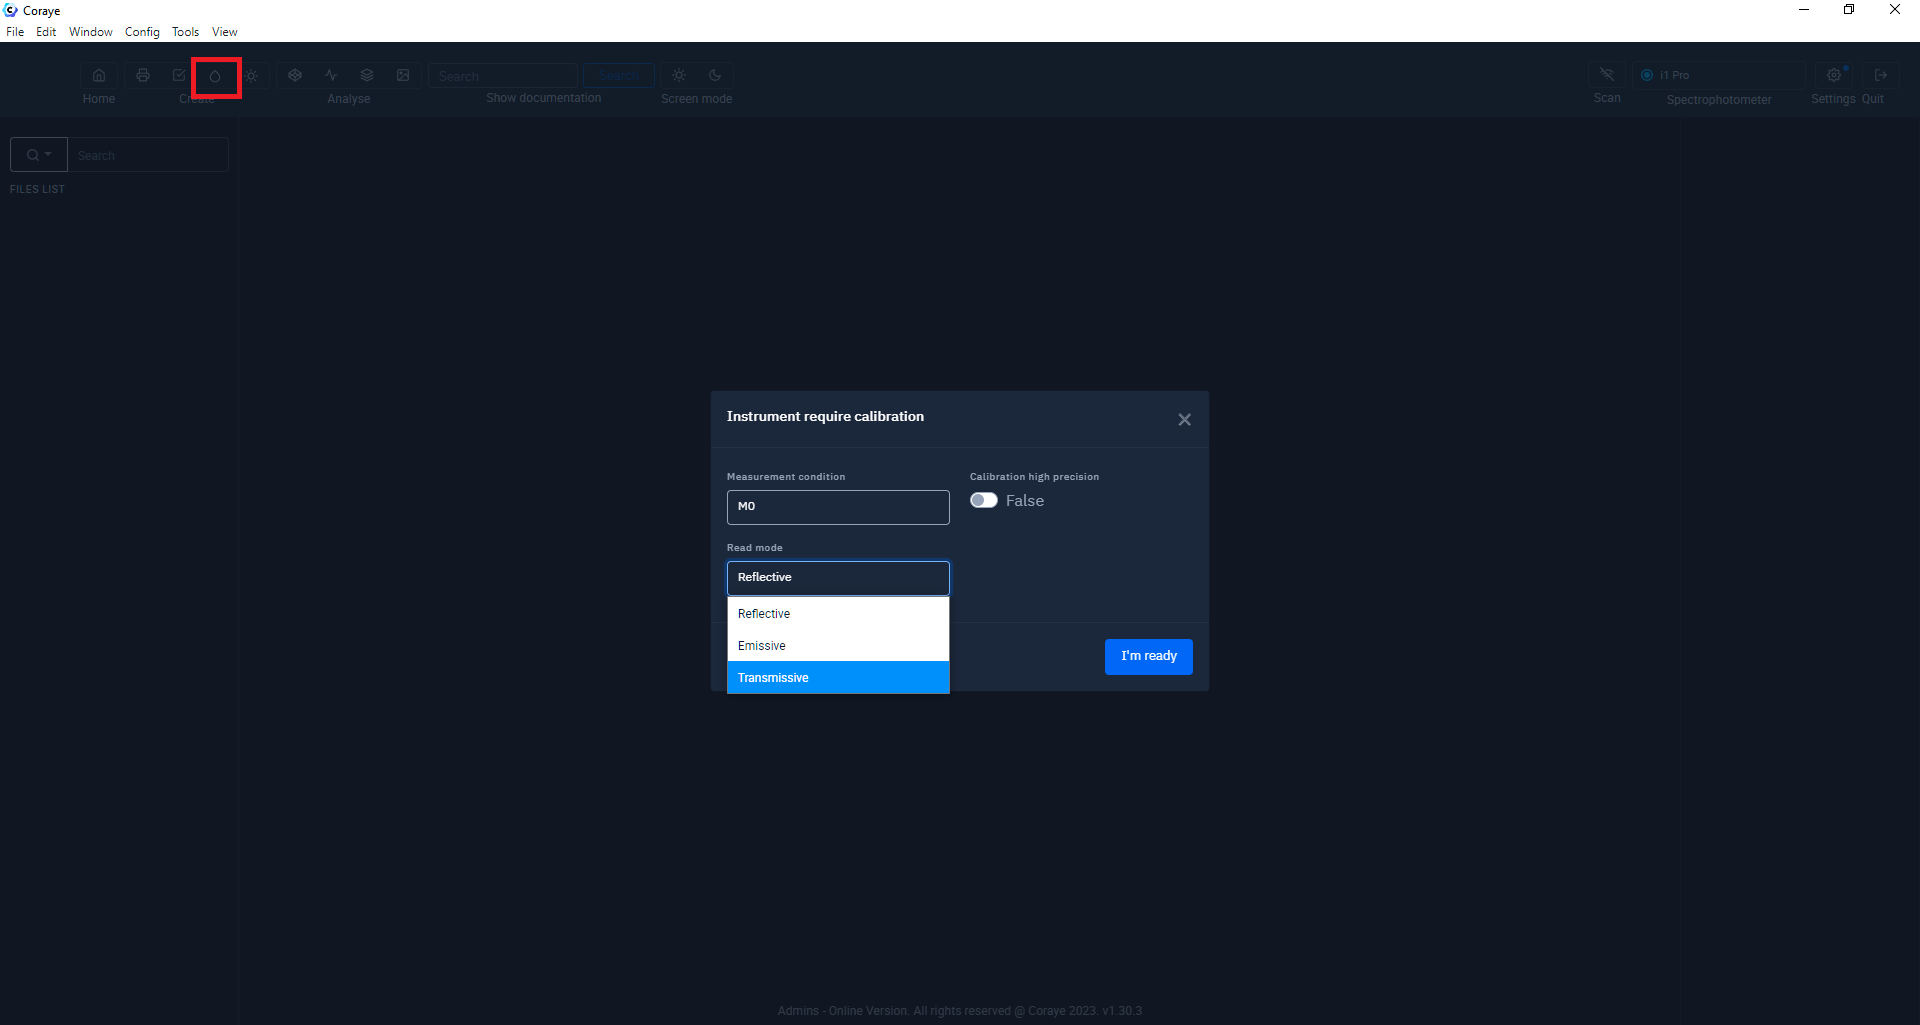
Then click on the "I'm ready" button
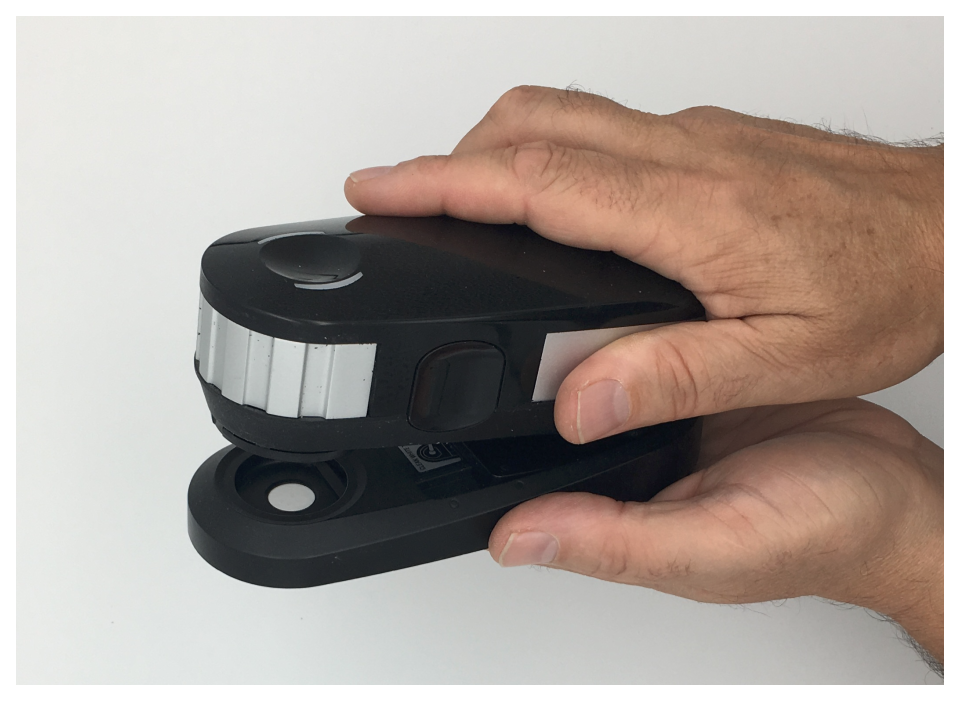
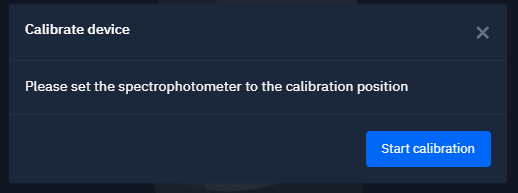
Position the spectrophotometer on its calibration base
Then click on the "Start calibration" button
Once your spectrophotometer calibration is complete, turn on and measure the light tablet.
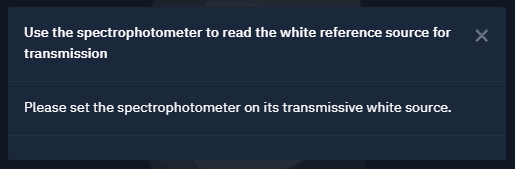
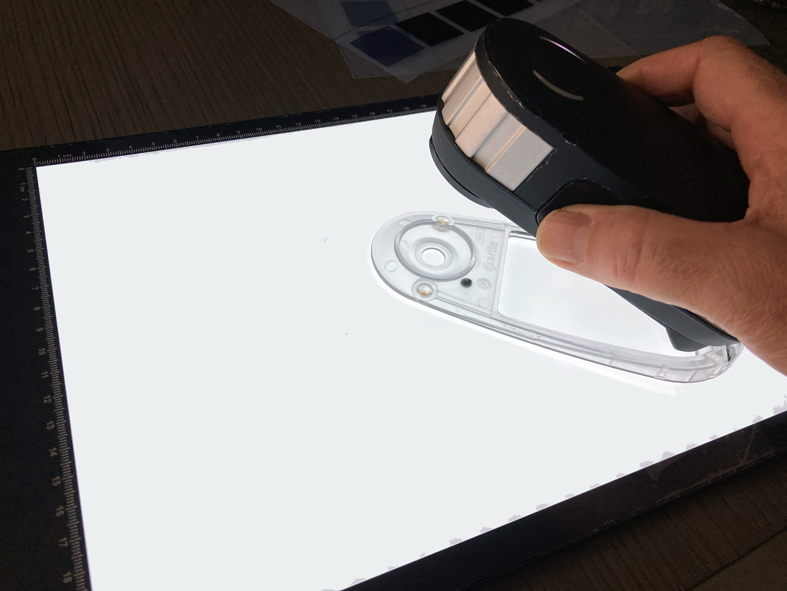
Measure your films on the light table
After renaming your measurements, you can click on the "Save and quit" button to save them.
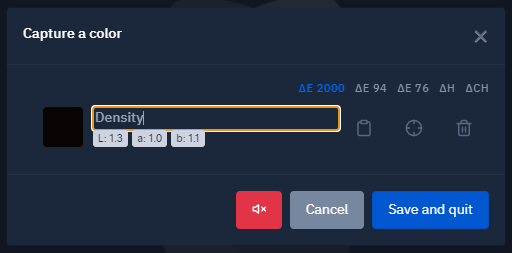
Select the measured sample, then pull down the "Color density" menu to view the density values.
If you want to know the black density value, only the fourth value corresponding to the V (visual) will be taken into consideration.
In our example we have a black density value (V) equal to 2.82
