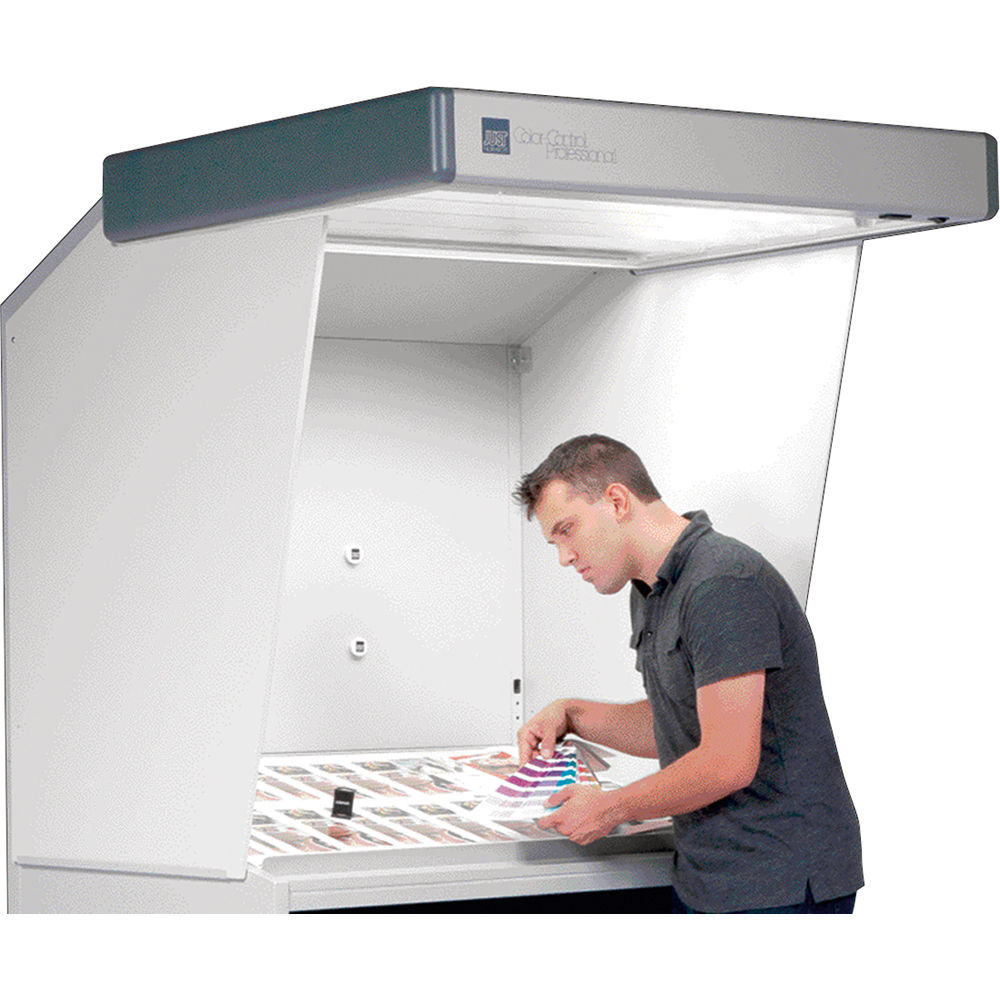
Light cabin control according to ISO3664:2009 standard
Light Control is a module for controlling light booths according to the ISO3664: 2009 P1 and P2 standard. Its purpose is to produce a control report on the quality of your light in light booths, viewers or booths located at the desks at printers.
Prerequisites
This feature can only work with the following spectrophotometers:
- XRite Eye One Pro
- XRite Eye One Pro ( EFI ES 1000)
- XRite Eye One Pro 2 ( EFI ES 2000)
- XRite Eye One Pro 3 ( EFI ES 3000) and XRite Eye One Pro3 PLUS
The "LIGHT CONTROL" module must be enabled
Important: Make sure your spectrophotometer is connected to a USB port directly on your computer and not to a USB hub
The XRite I1 Pro are powered via the USB port,.
If the power supply from the USB port is not sufficient, the spectro will be recognized, but at the time of calibration the software will go into error.
Please note that some OEM XRite I1 Pros cannot measure illuminants.
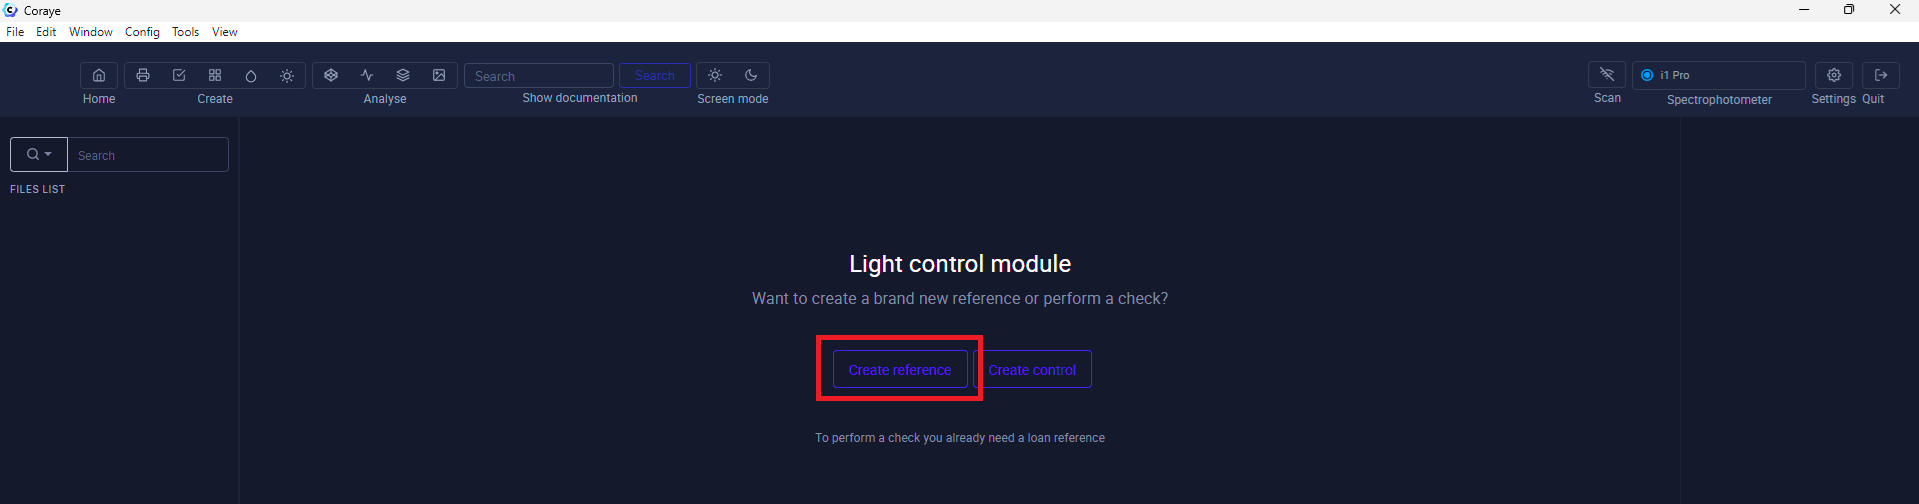
1) Creating the LCTRL file
First of all, the first step is to create the Light Control file (.lctrl) containing the information associated with the cabin you want to control and the choice of the cabin type P1 or P2.
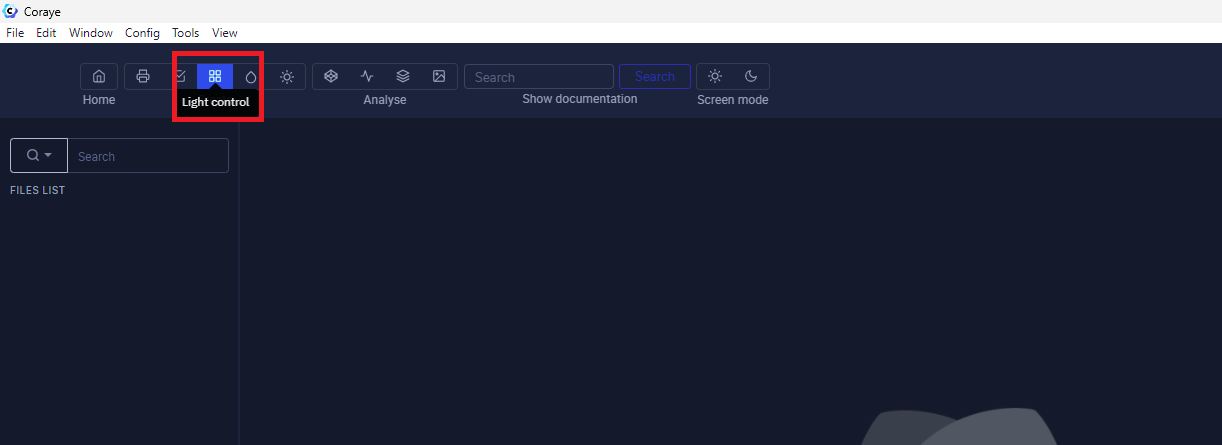
Click on the "Light Control" icon
Click on the "Create reference" button
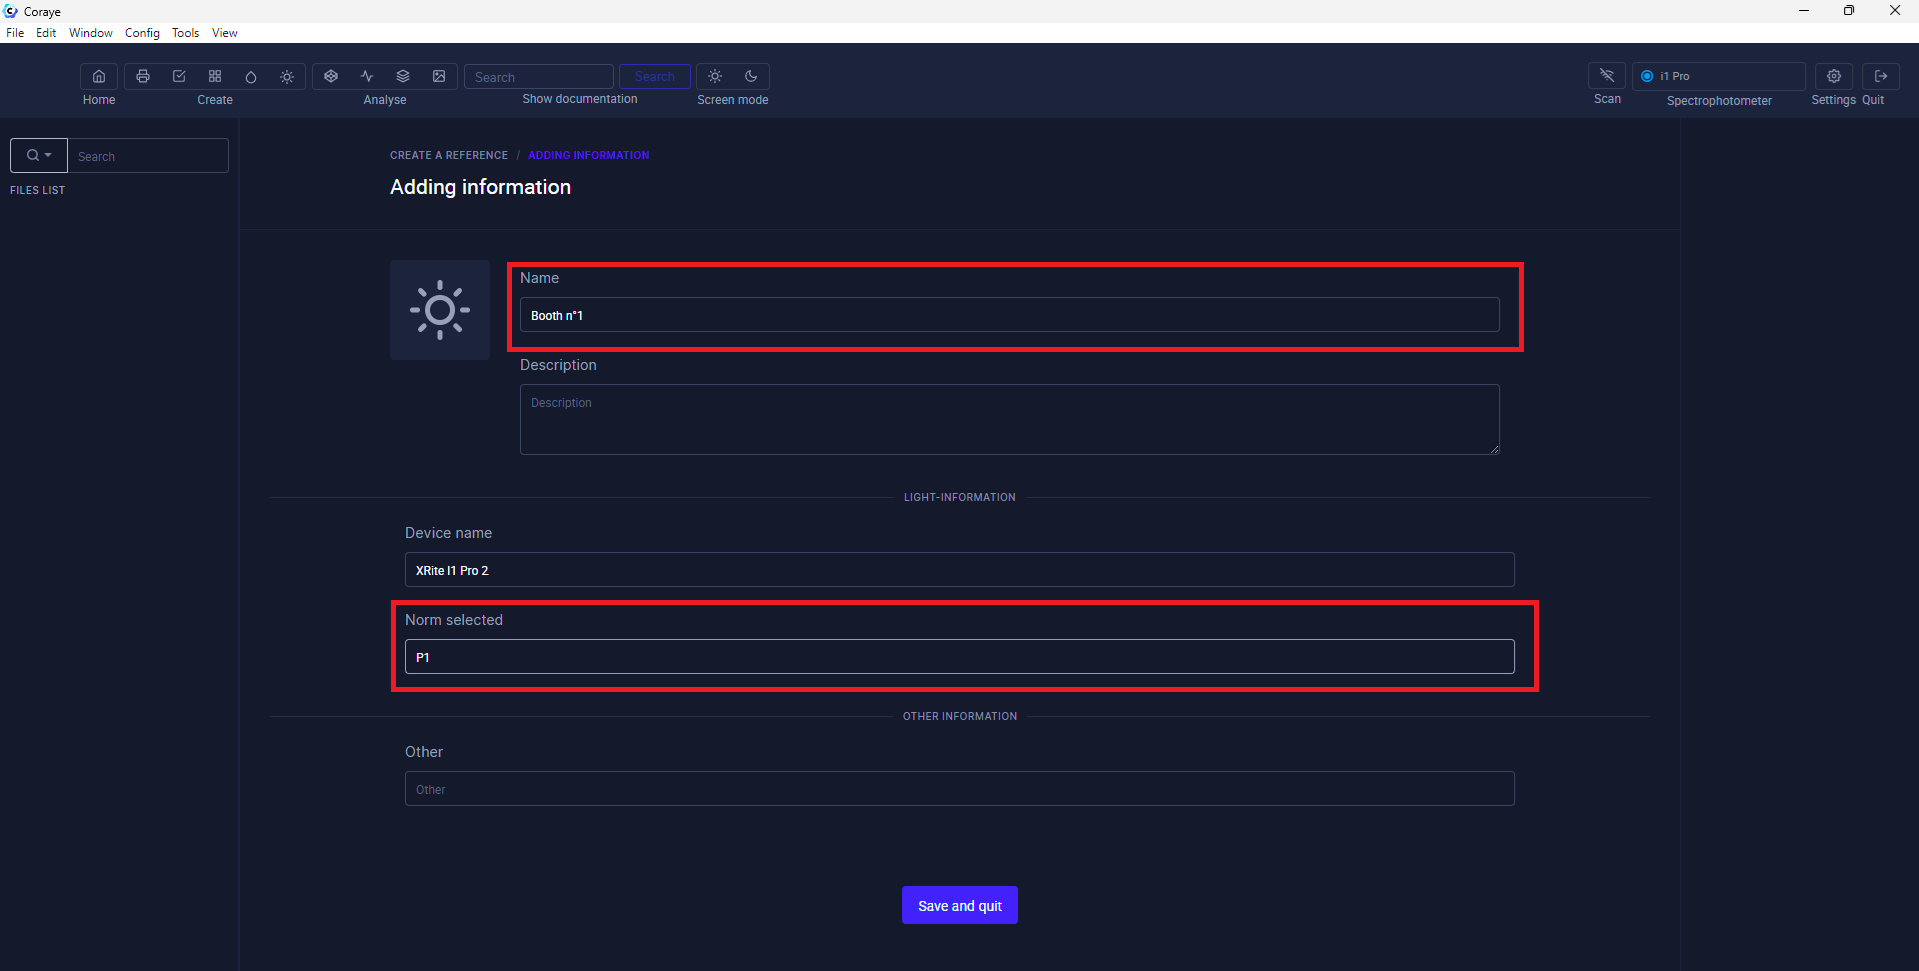
Fill in the fields
In this new window, fill in the "Name" field, then click on the "Save and quit" button
The other fields are optional, they are only used to add information when you create the measurement reports.
Define the P1 or P2 standard depending on the type of cabin you want to control.
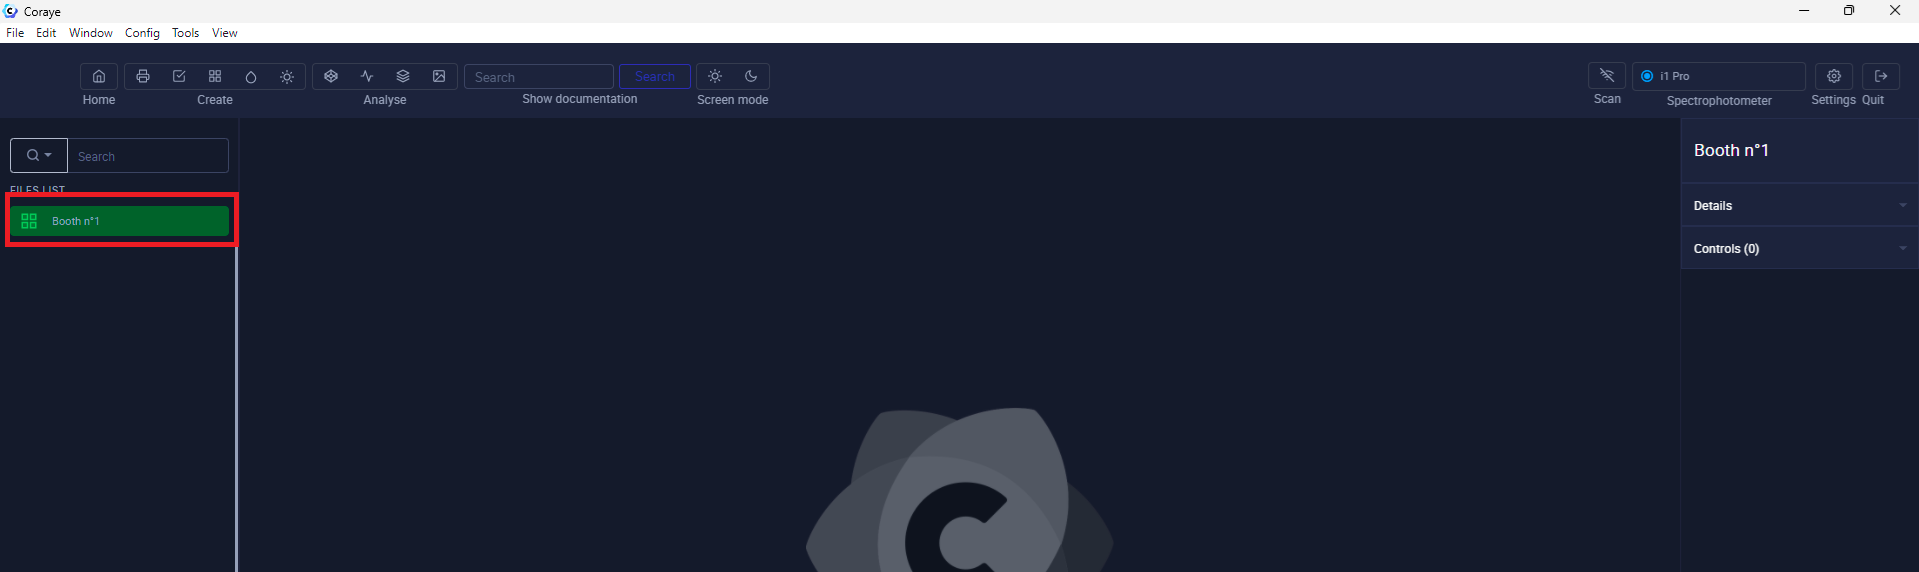
The "Light Control" file will appear in the left column.
2) Cabin Control
Connect your spectrophotometer
Your spectrophotometer name should appear in the top right corner

Important: Make sure your spectrophotometer is connected to a USB port directly on your computer and not to a USB hub
The XRite I1 Pro and Konica Minolta Myiro are powered via the USB port,.
If the power supply from the USB port is not sufficient, the spectro will be recognized, but at the time of calibration the software will go into error.
Let's start controlling your cabin
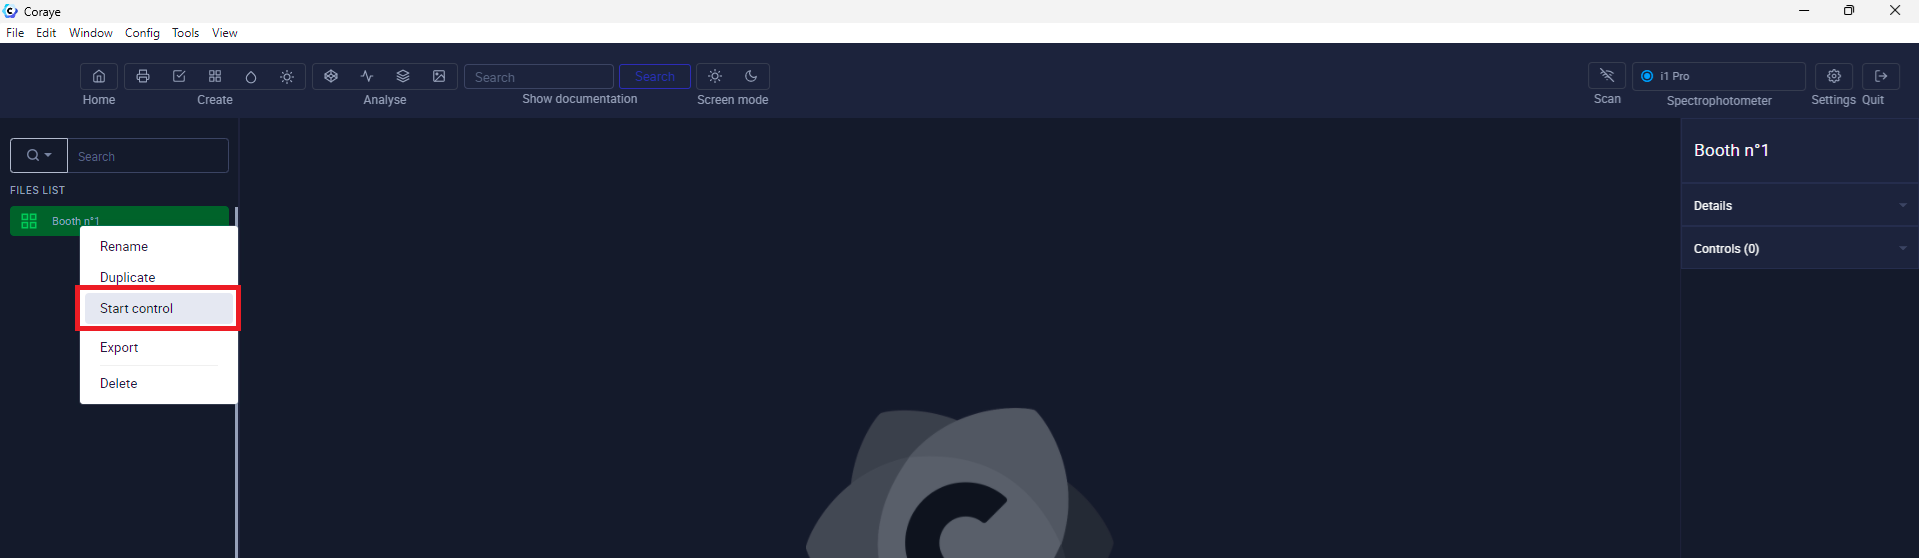
Select the previously created "Light Control" file in the left column, then right-click to select "Start control"
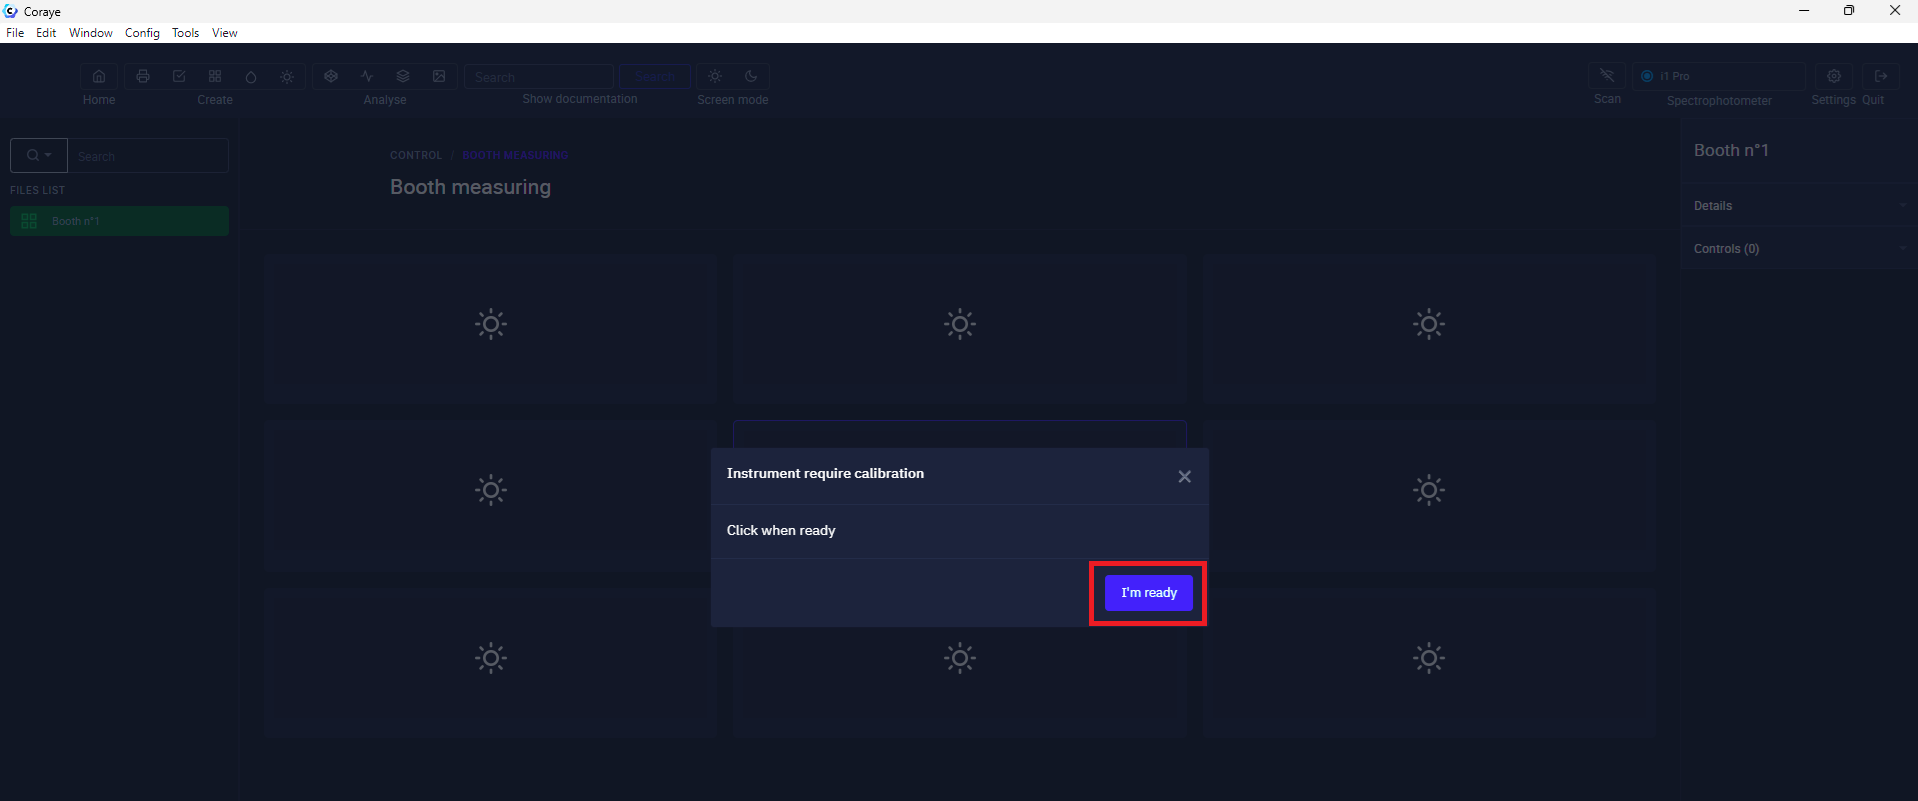
Click on the "I'm ready" button
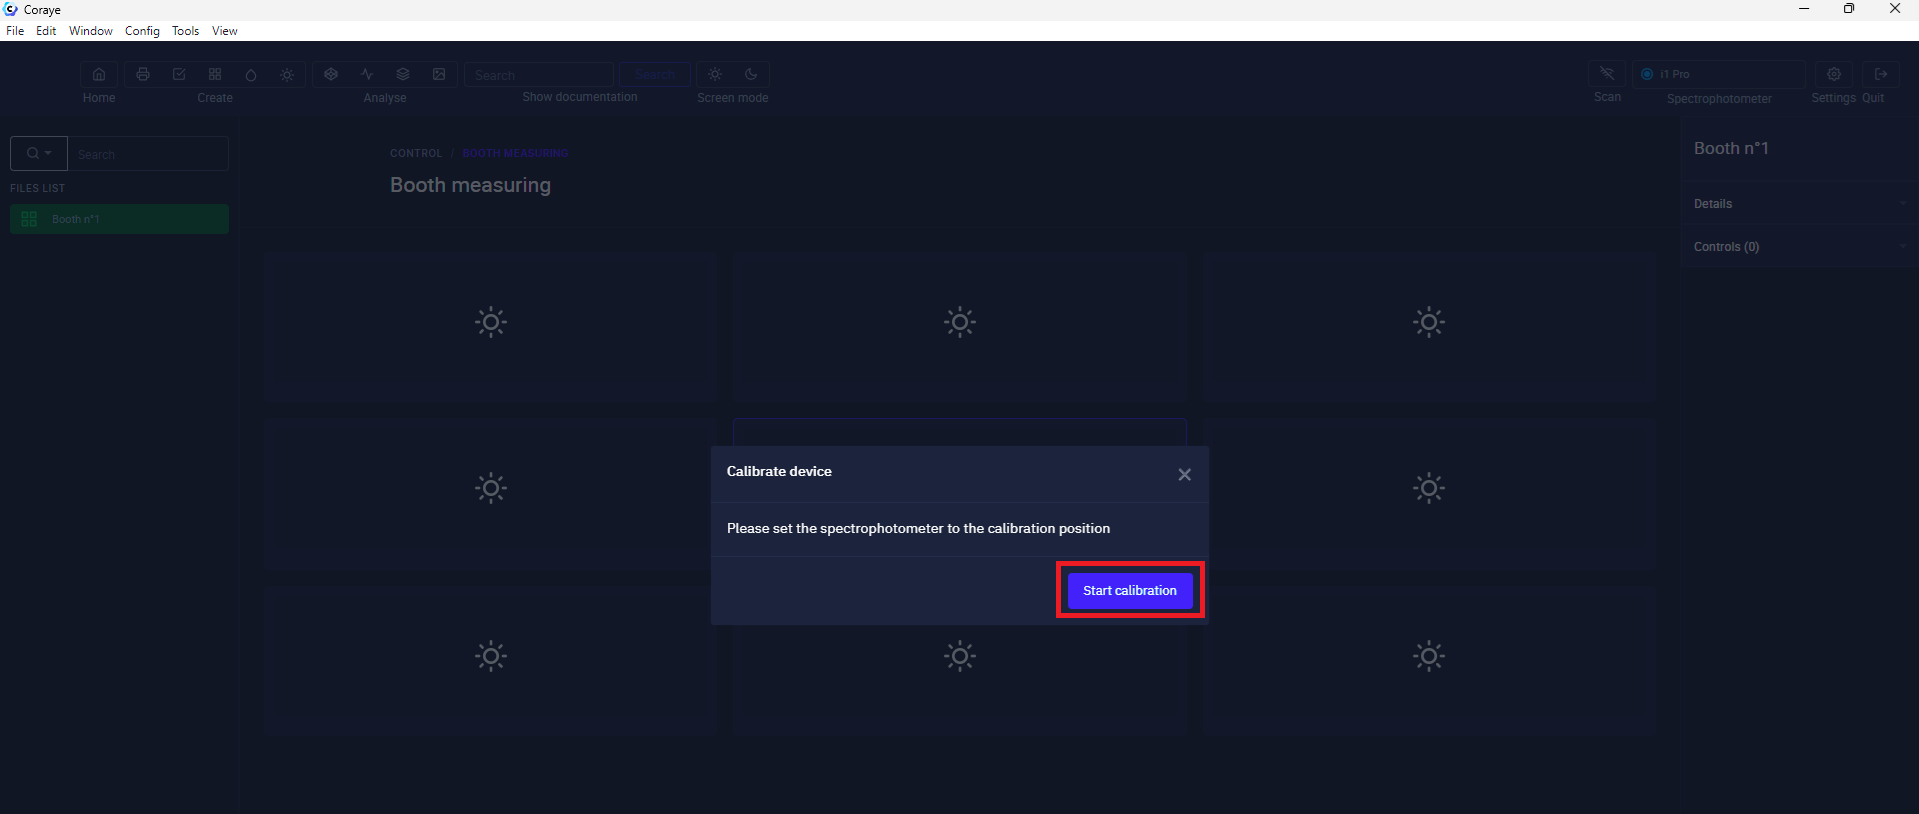
Make sure your spectrophotometer is set to its reference white, then click on "Start calibration"
Once calibration is complete, install the light diffusion cap on your spectrophotometer.
Please note, you must use the cap to read the light with
Konica Minolta MYIRO, XRite Eye One Pro 1, 2, 3 and 3 PLUS.
|
Konica Minolta MYIRO |
|
|
XRite Eye One Pro 3 & 3 PLUS |
 |
| XRite Eye One Pro 2 |
|
| XRite Eye One Pro |  |
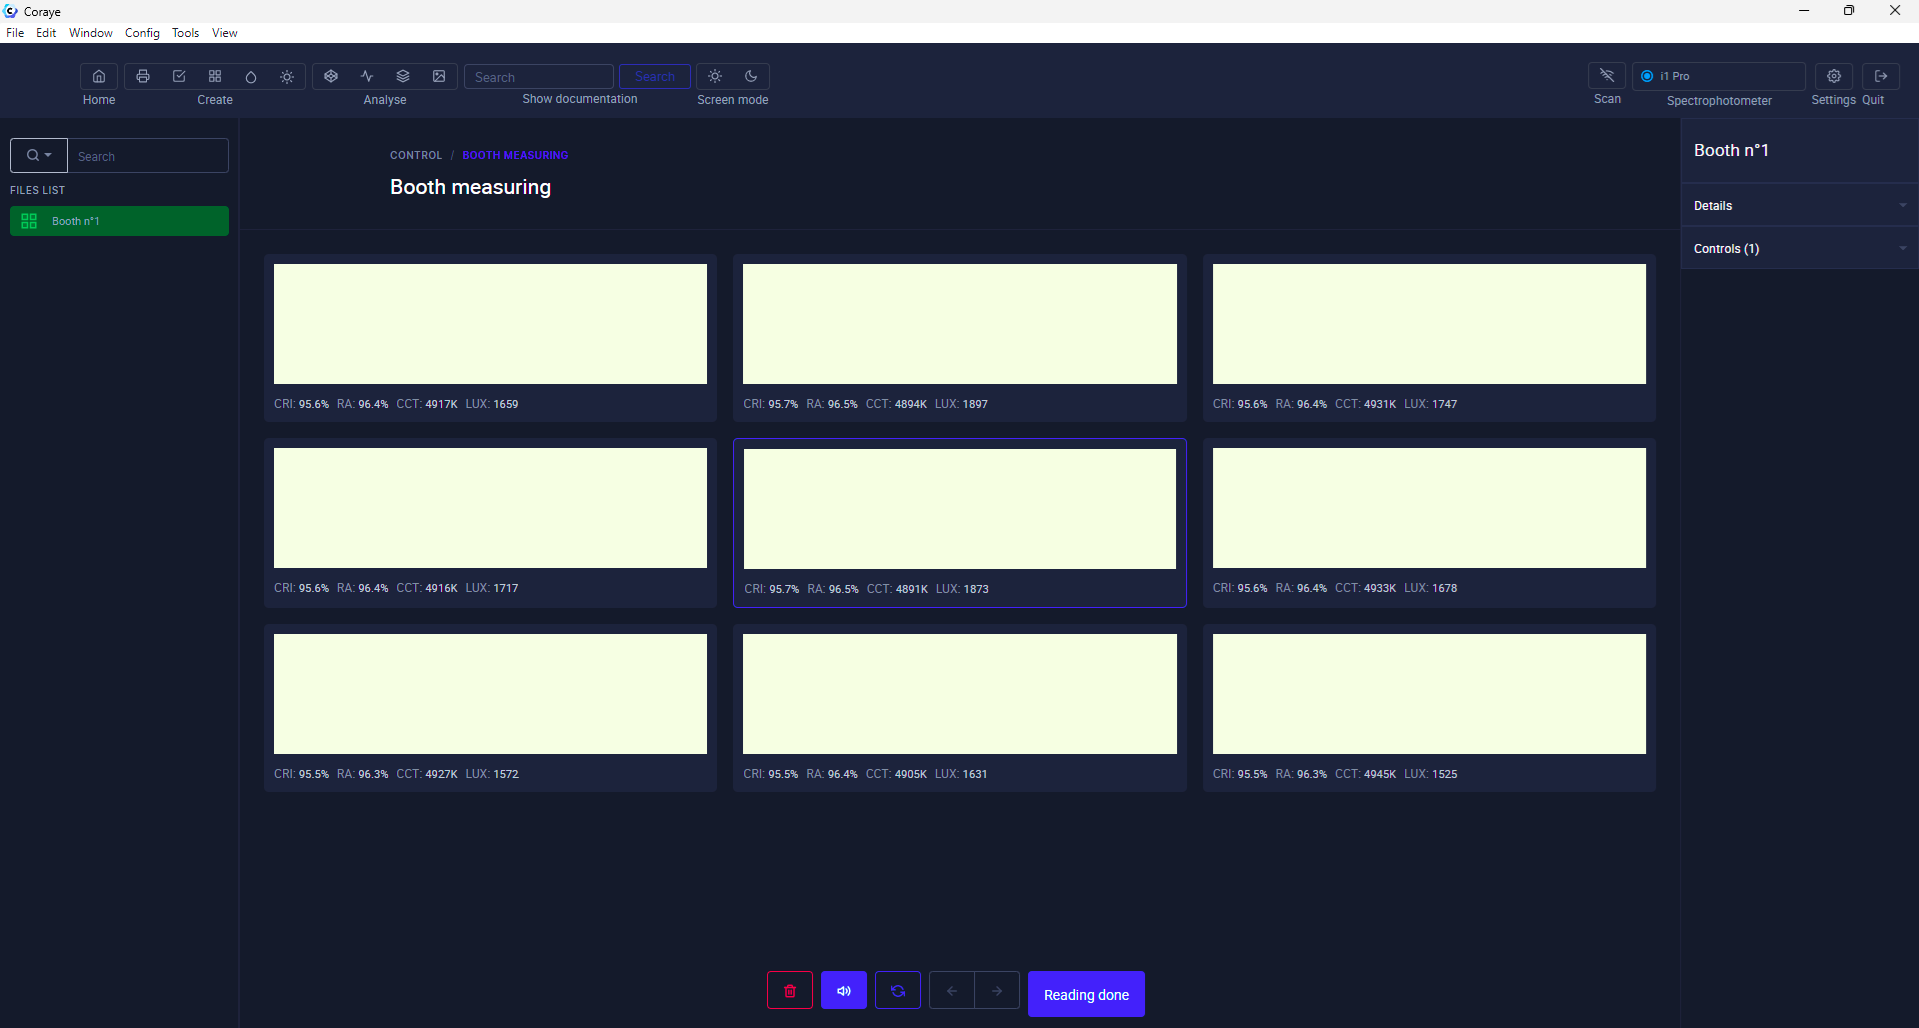
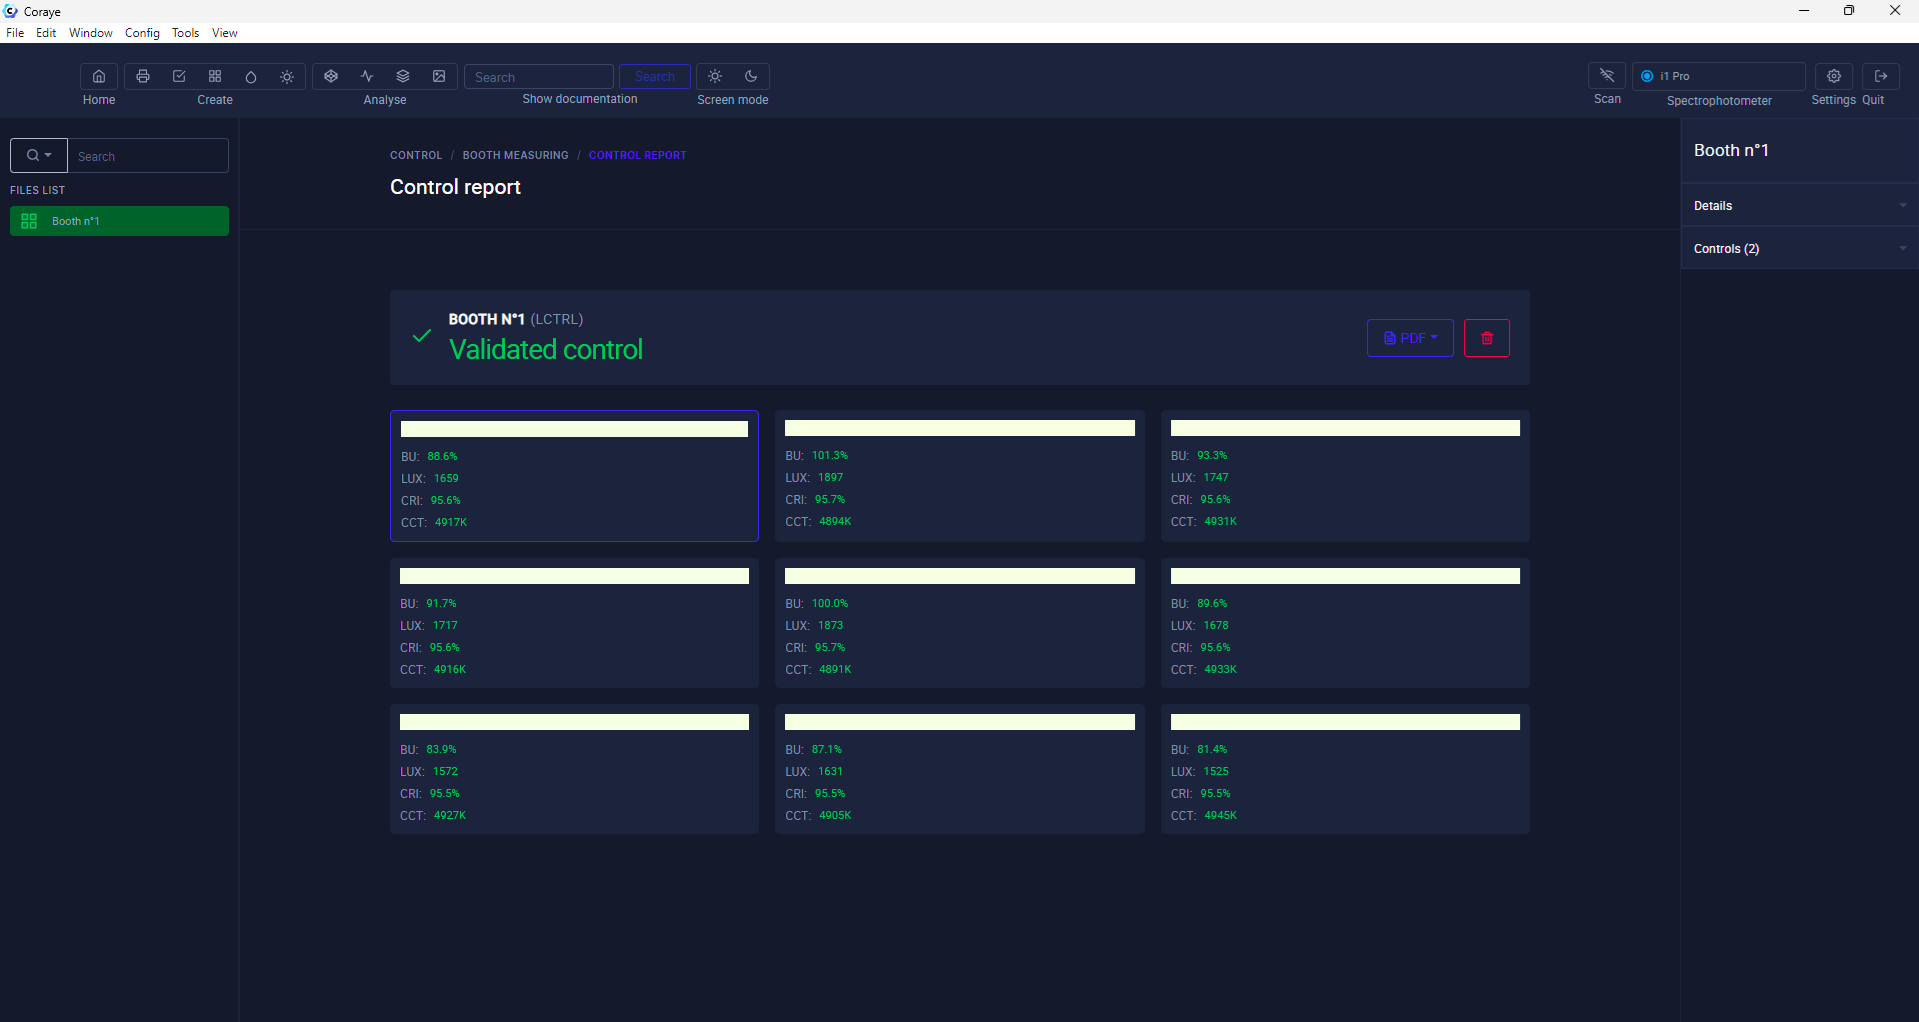
Measure the light starting from the center of the cabin.
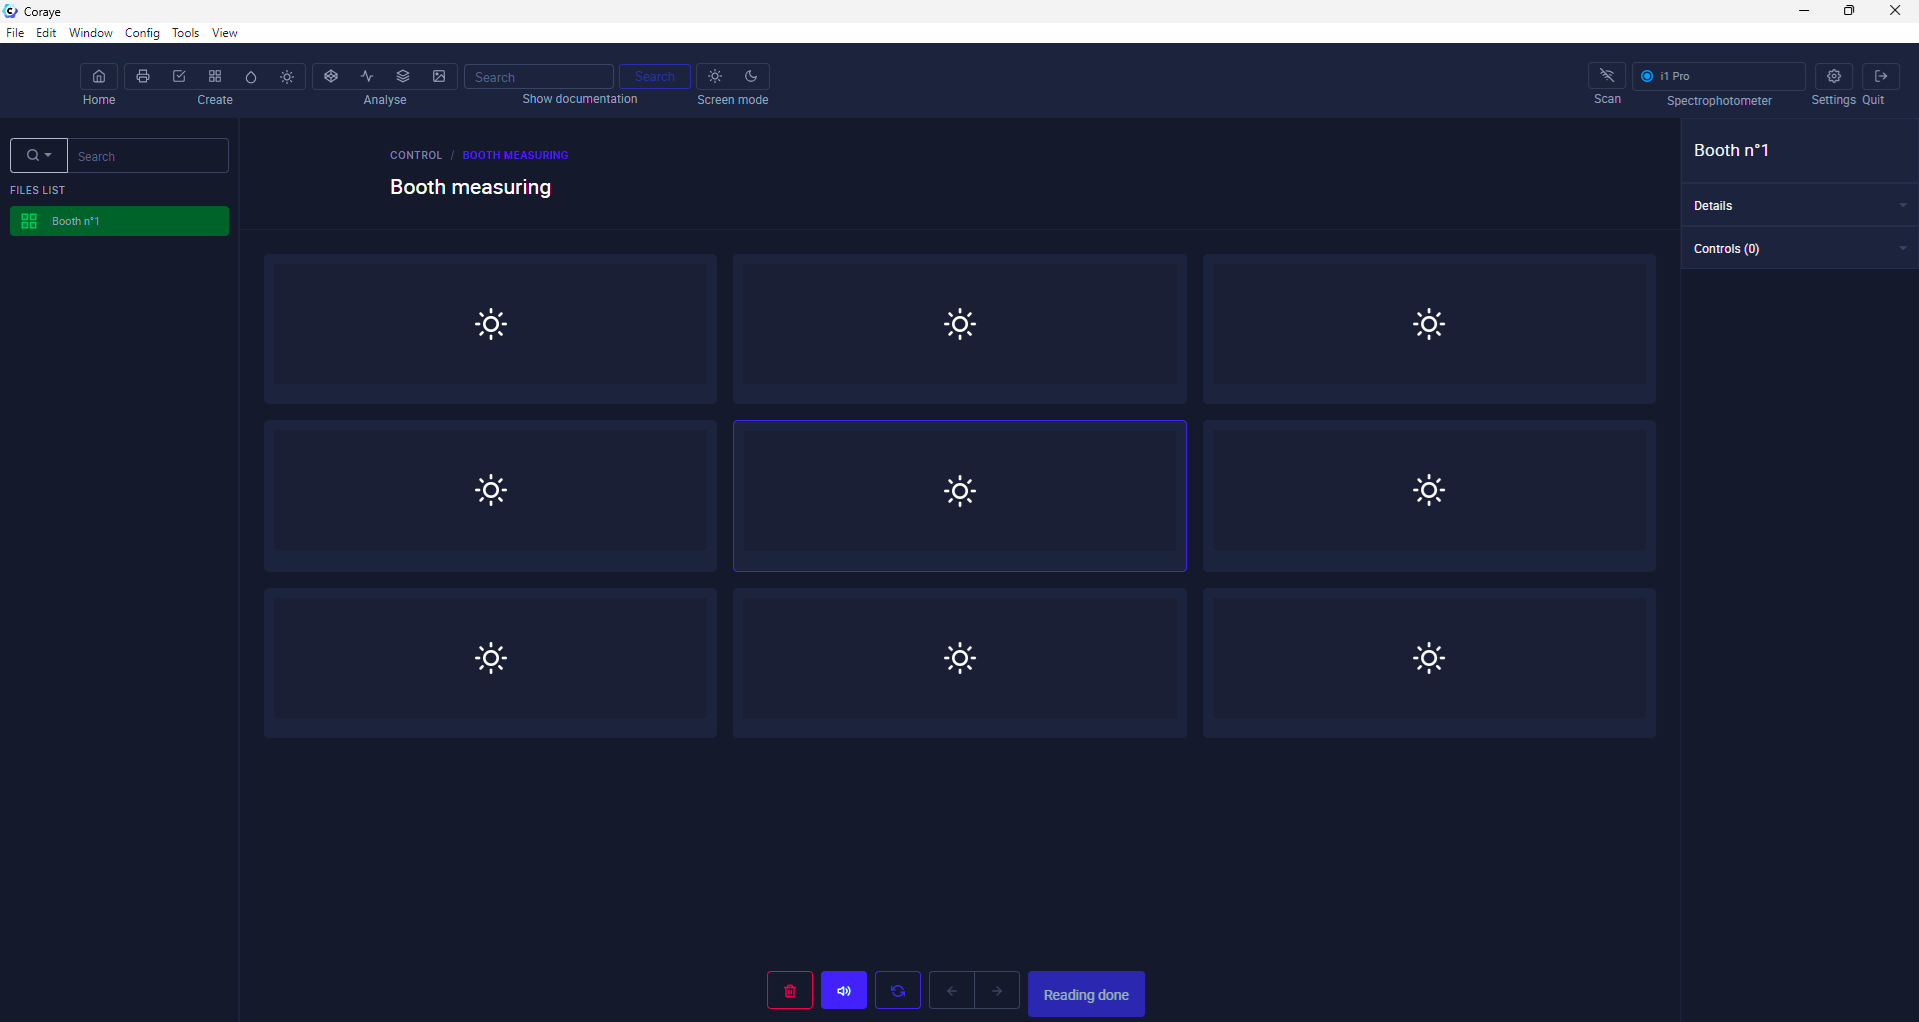
The order of the measurement zones is indicated in the interface
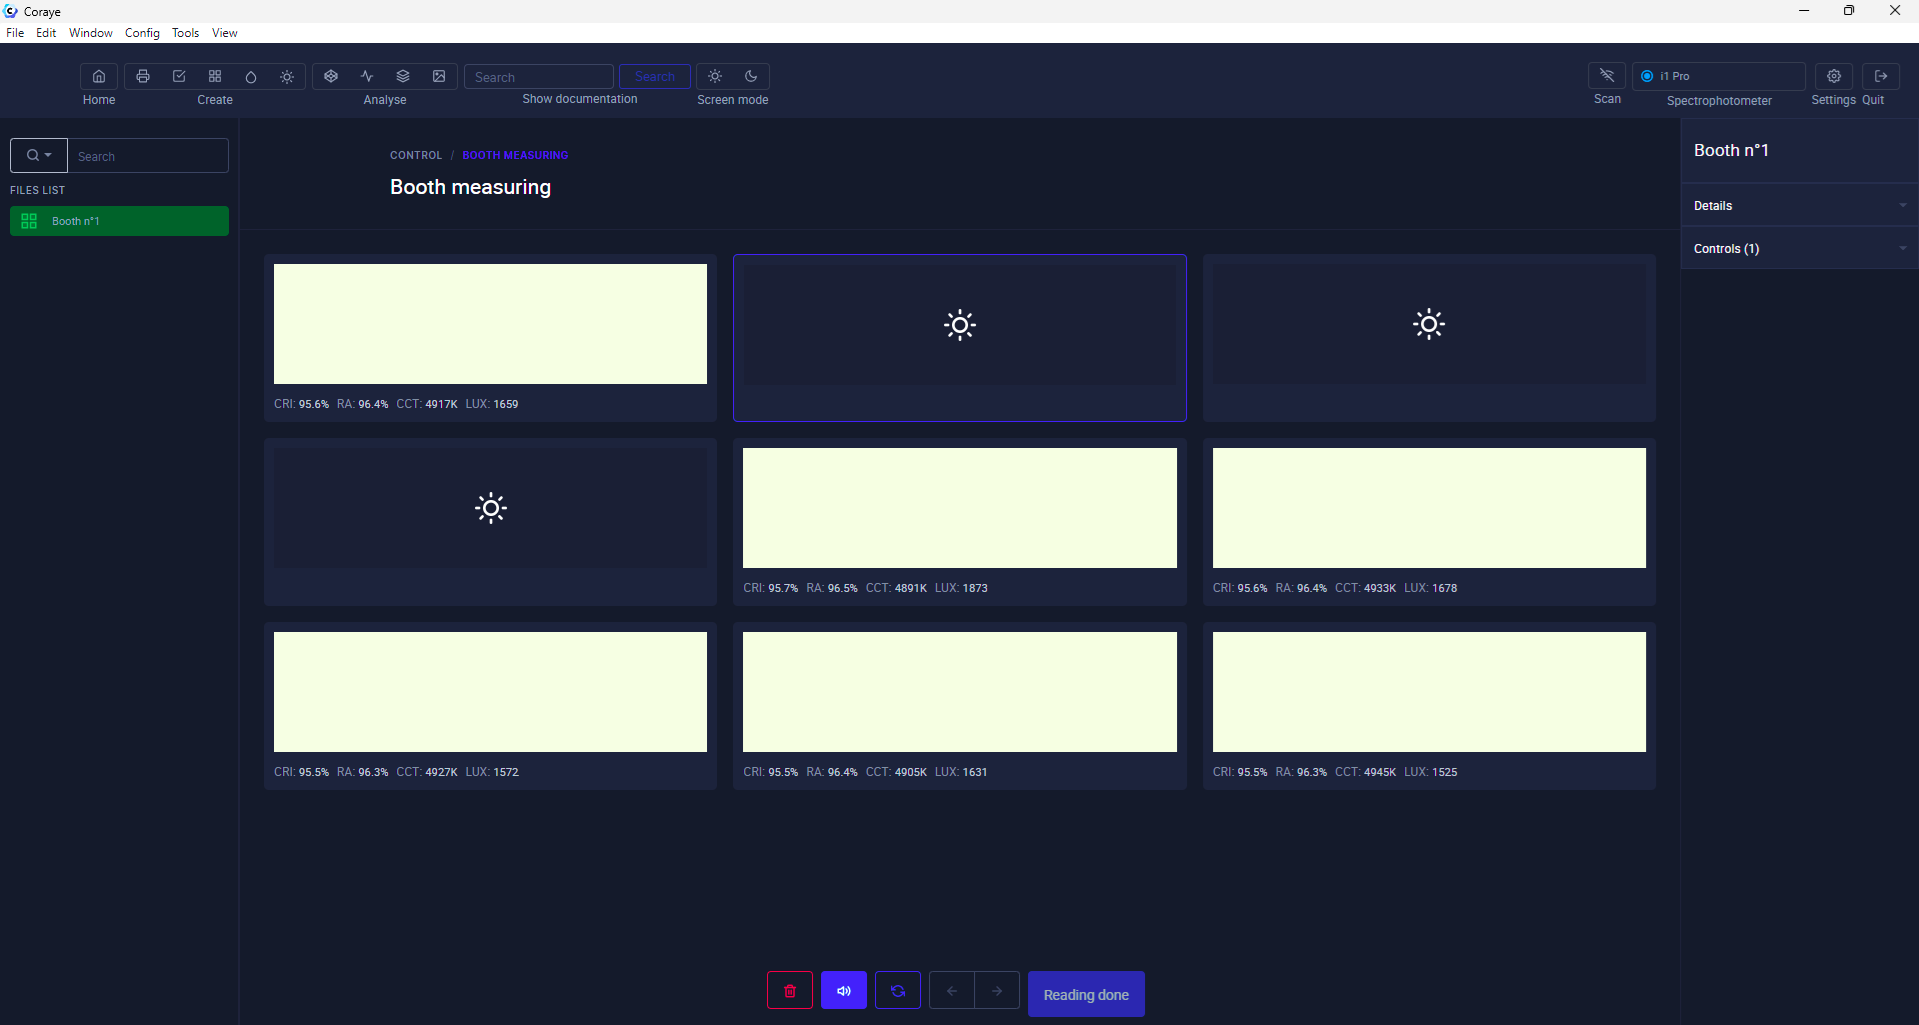
You have the option to re-measure by selecting the desired area
The measurement values are displayed under each measurement area.
Once the 9 zones have been measured, click on the "Reading done" button. Note that this remains grayed out until the 9 zones have been measured.
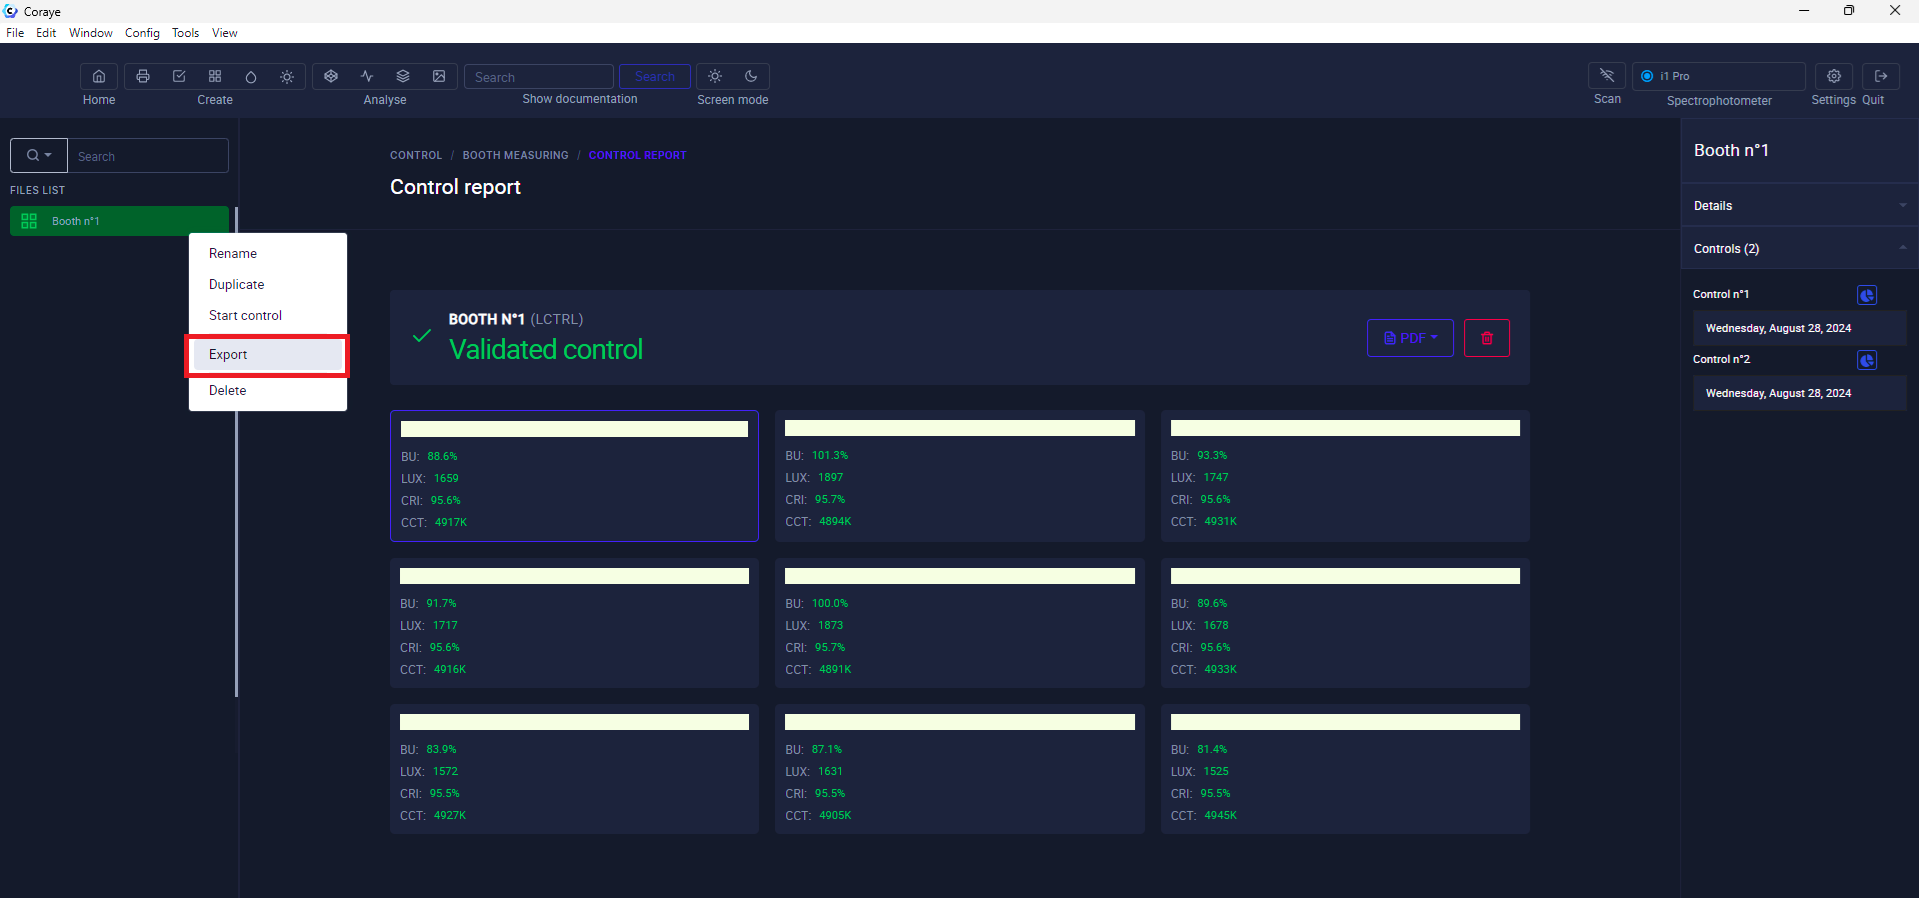
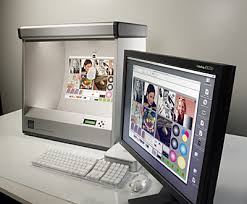
Control report
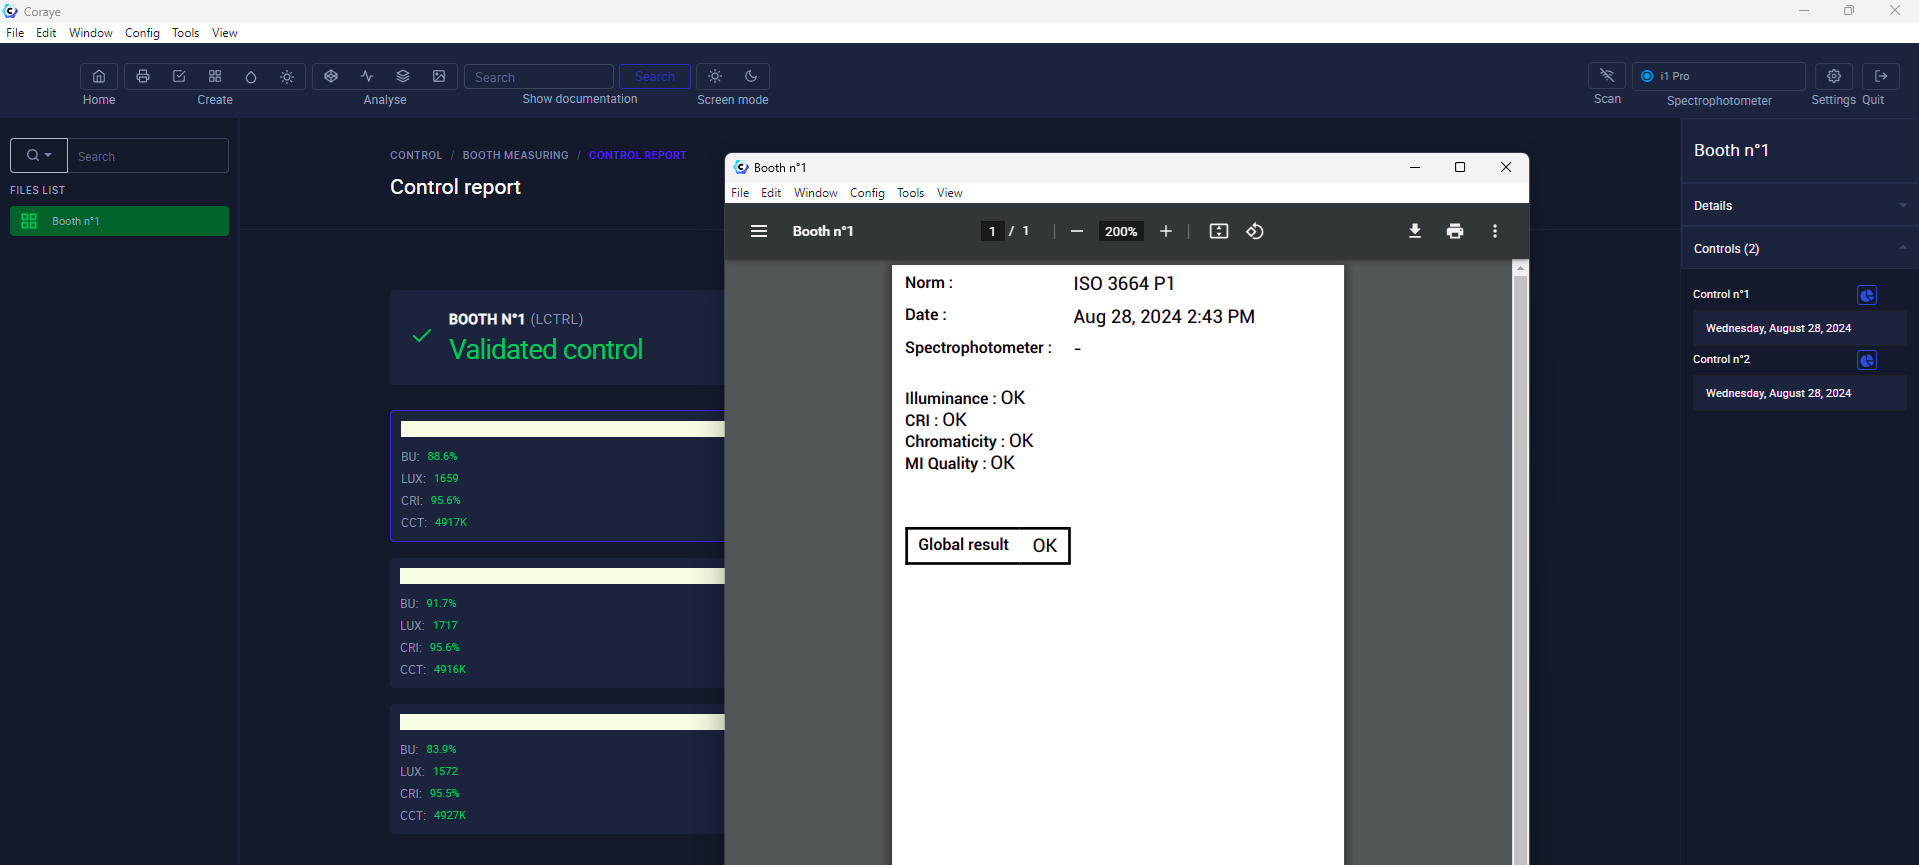
Once the measurements are completed, the reading report is displayed
At the top right, the control history is displayed and allows you to view previous controls.

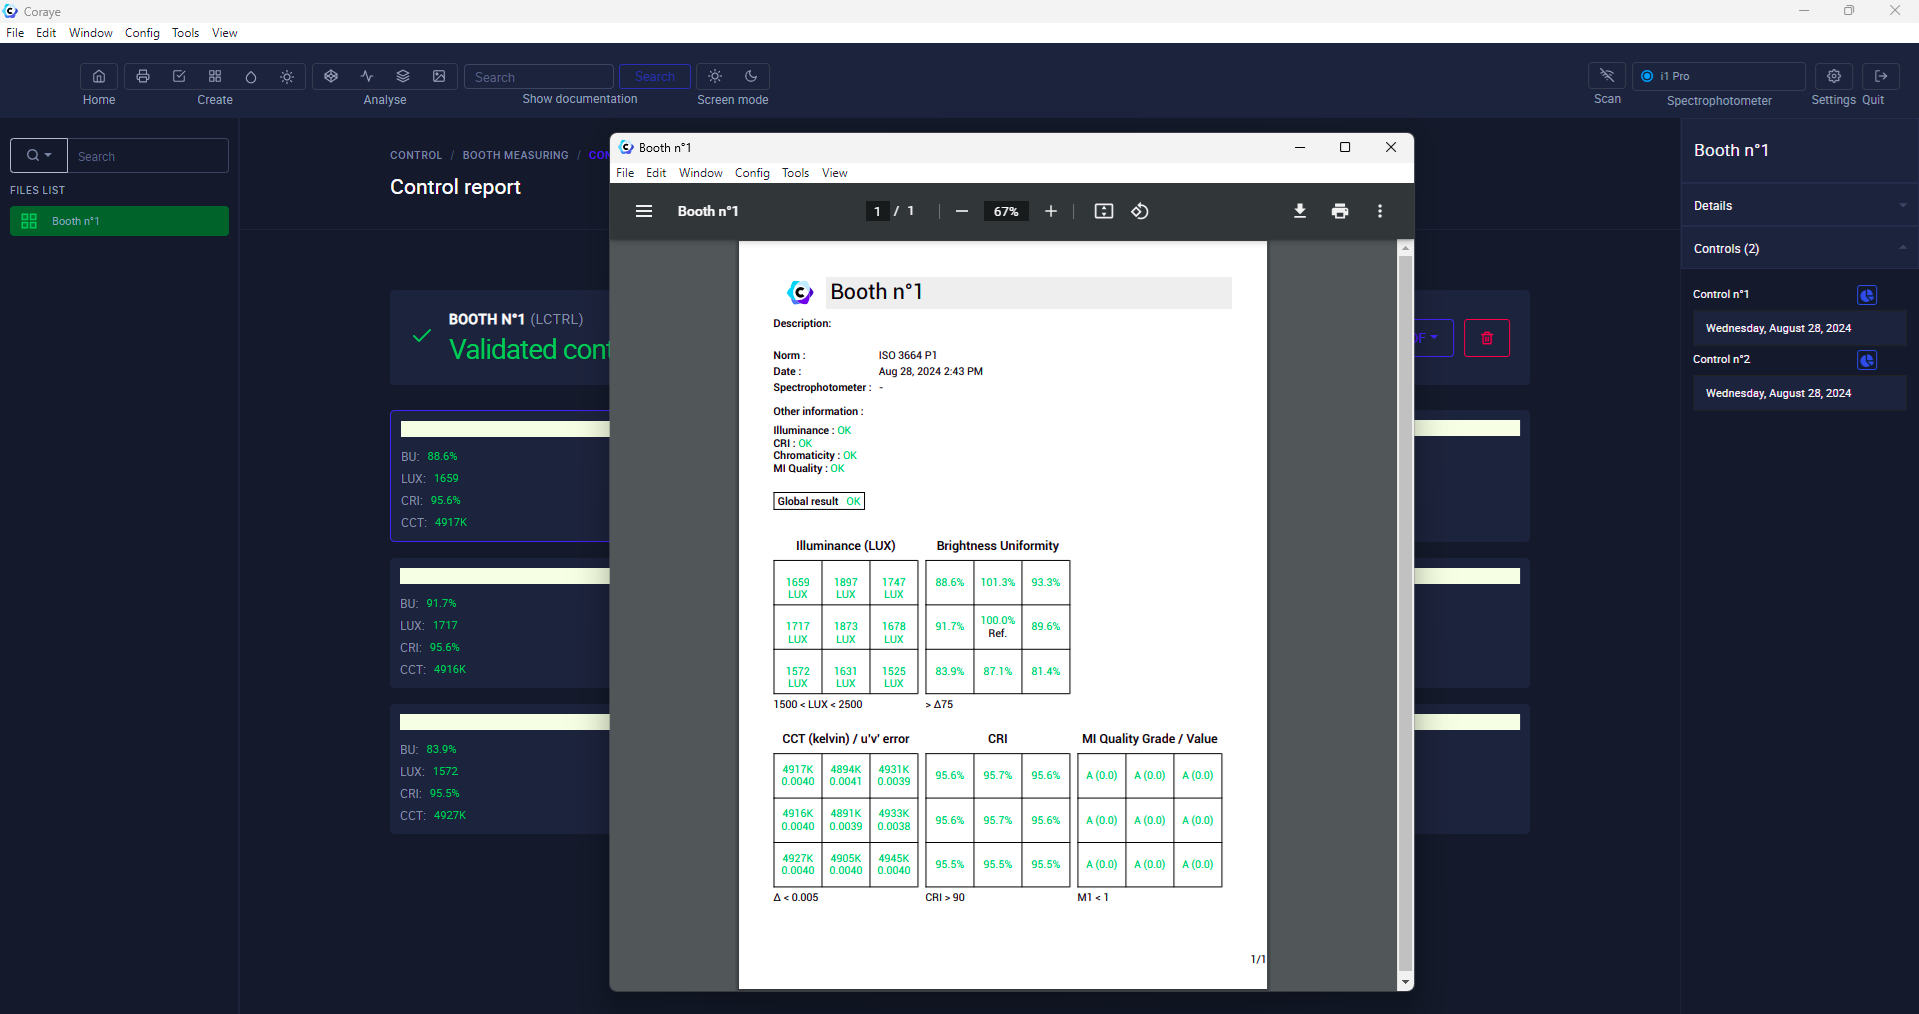
By clicking on the "PDF" button, you can obtain a report
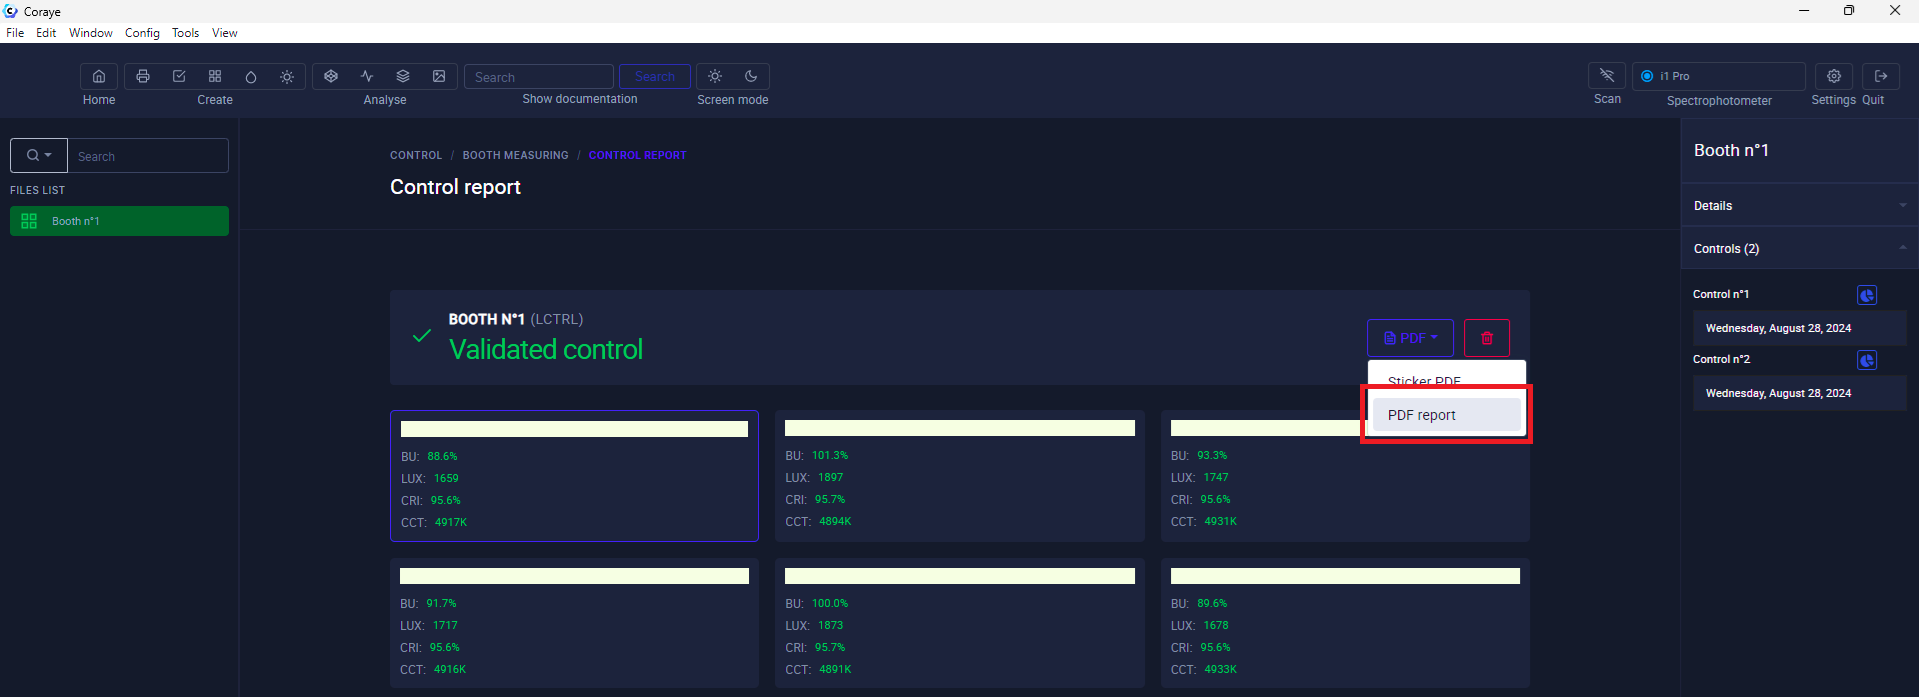
Displaying the report:
By clicking on the "PDF" button, you can obtain a label

Displaying the label
Printing the label on a Dymo label printer
To print a label, install a label printer and its driver, then click on the printer icon when you display the label.
Saving the ".lctrl" file
It is strongly recommended to save your control file to avoid losing it or to share it.
3) What You Need to Know About Controlling Your Cabins
The CIE Color Rendering Index (CRI) is a method of determining how well the illumination of a light source on eight samples compares to that provided by a reference source. Together, the CRI and CCT provide a numerical estimate of which reference (ideal) light source most closely matches a given artificial light and how much the difference is.
The CRI is a quality index for evaluating an illuminant. It is expressed as a percentage. The higher the value, the better the quality of the illuminant.
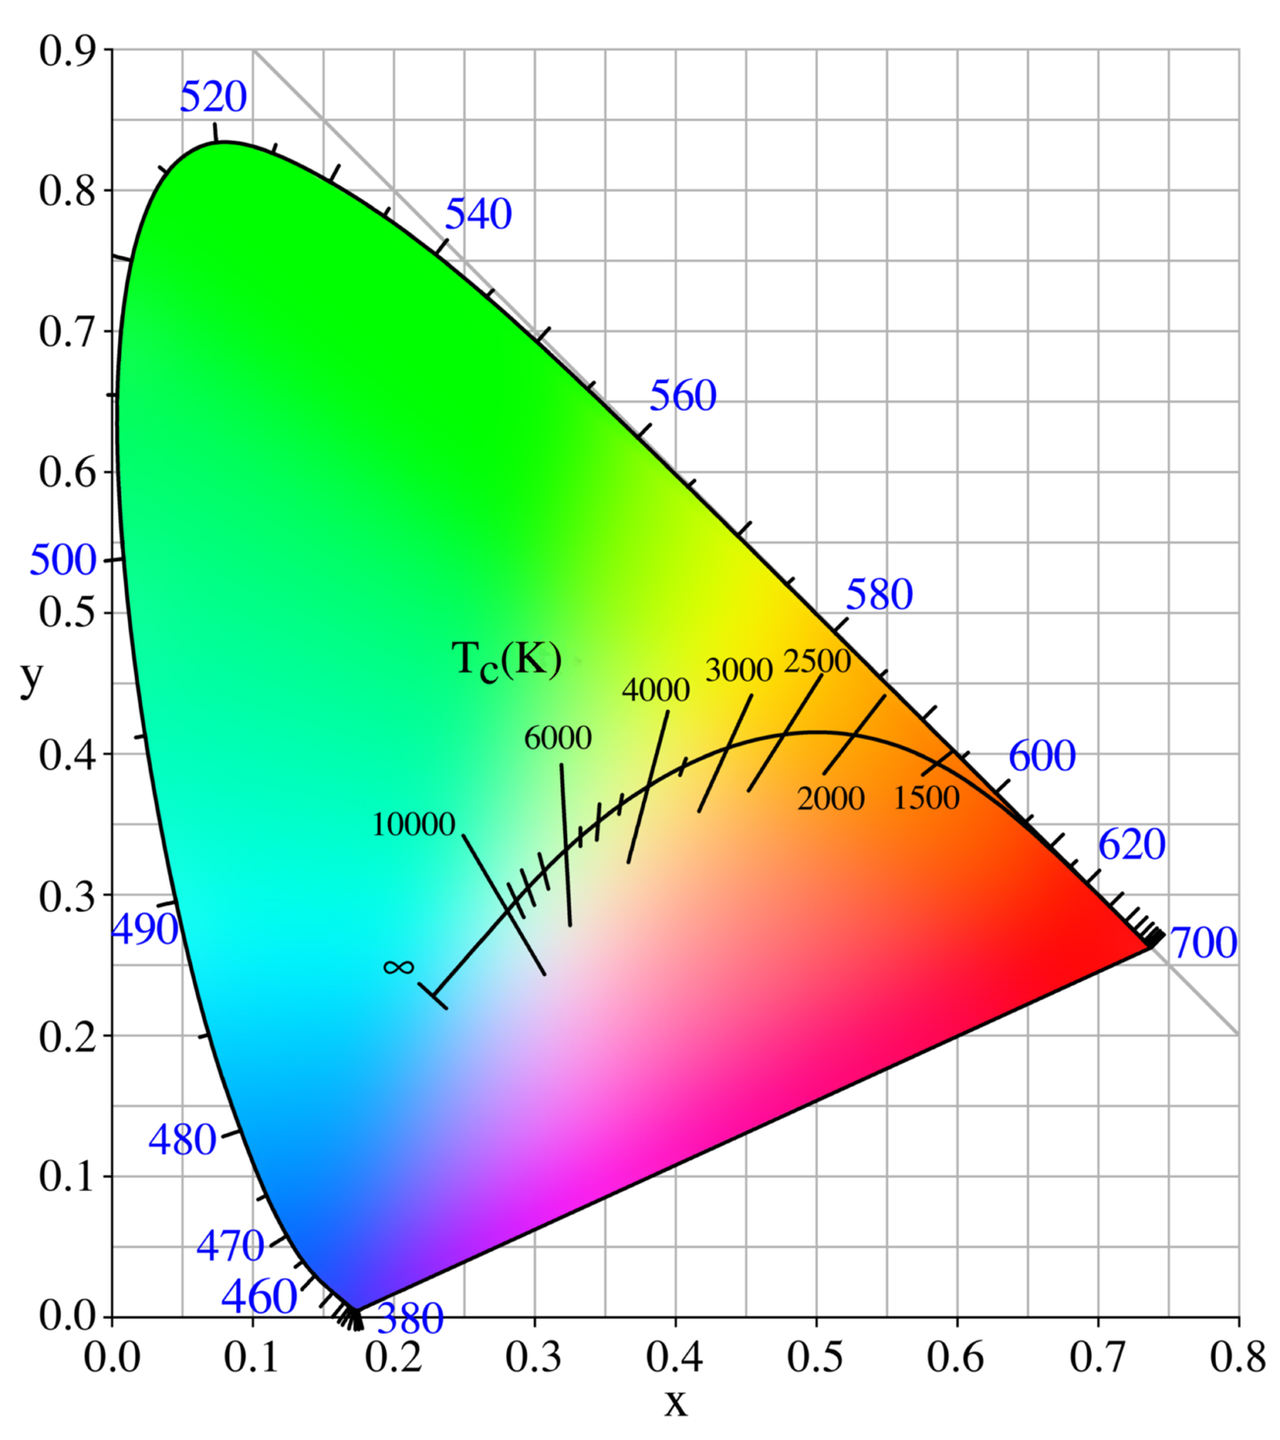
The color temperature of a light source is the temperature of an ideal blackbody radiator that emits light of a color comparable to that of the light source.
Color temperature is a characteristic of visible light that has important applications in lighting, photography, videography, publishing, manufacturing, astrophysics, horticulture, and other fields.
In practice, color temperature is meaningful only for light sources that actually correspond fairly closely to the radiation of some black bodies, that is, light ranging from red to orange to yellow to white to bluish-white; it makes no sense to speak of the color temperature of, for example, green or violet light.
Color temperature is usually expressed in kelvins, using the symbol K, a unit of absolute temperature.
Color temperatures above 5000 K are called "cool" (bluish) colors, while lower color temperatures (2700–3000 K) are called "warm" (yellowish) colors.
"Warm" in this context is an analogy to the radiated heat flux of traditional incandescent lighting rather than the temperature.
The spectral peak of warm-colored light is closer to the infrared, and most warm-colored natural light sources emit significant infrared radiation.
The fact that "warm" lighting in this sense actually has a "cooler" color temperature is often a source of confusion.
Source: Wikipédia
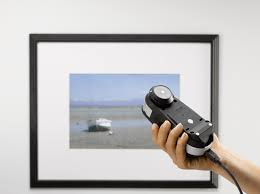
Control your booth or viewing conditions
IllumReader can be useful to check uniformity, color temperature, light intensity in a booth and to check the viewing conditions of proofs, objects and prints.
In the field of graphic arts, ISO standards have been defined to standardize the viewing conditions of prints.
Knowing how to control your light is in a way knowing how to control color.
| Viewing condition | P1 Critical Comparison | P2 Practical Appraisal |
 |
 |
 |
ISO 3664:2009 - VIEWING CONDITIONS
Light source
• The relative spectral power distribution should correspond to that of CIE illuminant D50.
• The UV energy should comply with CIE illuminant D50 (correlated with M1 in ISO 13655).
Two levels of light intensity
• Critical comparison P1: for example two prints: illuminance 2000 ± 500 Lux
• Practical assessment of P2: illuminance 500 ± 125 Lux or exact illuminance setting of the lighting booth to be monitored
Additional definitions
• Homogeneity (check over 9 zones in your booth)
• Surroundings: neutral grey diffuse surface
• Viewing angle to avoid reflections