Epson Quality Control
For the lucky owners of an Epson S series (Eco-solvent), R series (Resin) or F series (Sublimation or DTG) compatible with the Epson Edge Print RIP, here is a solution for performing Quality Control using the "Test Pattern" file included in the Epson RIP.
Quality control
Have you ever had customer feedback due to print quality issues?
How much did it cost you in terms of production cost, labor time, transport costs, commercial cost and other costs that are difficult to quantify, being due to the dissatisfaction of your customers?
What can the implementation of Quality Control bring you?
- Checking the stability of your prints.
- Verification of the color stability of your prints over time
- Verification of the colorimetry between two emulsions of supports
- Error detection, such as using a print setting that does not match the media.
- Control before the start of production to avoid waste
- The guarantee of a result in accordance with your wishes.
The sooner you detect print quality issues, the sooner you fix them and the less it will cost you.
The certainty of being able to count on the control of your production will allow you, for example, to produce quality reprints and connections.
Looking for a marketing idea for your business? ... Set up quality control and promote it!
Creating a benchmark for print control based on the Epson Edge Print RIP test pattern
The first step in the Print Control process is to generate reference data from a range printed on a recently calibrated printer.
From the Epson Edge Print RIP, you can print a test page containing a Mediawedge CMYK type range.
It is the measurement of this range, in the Coraye software, which will serve as a reference for checking the stability of your printer.
1) Adding a test pattern to the Epson Edge Print RIP print queue
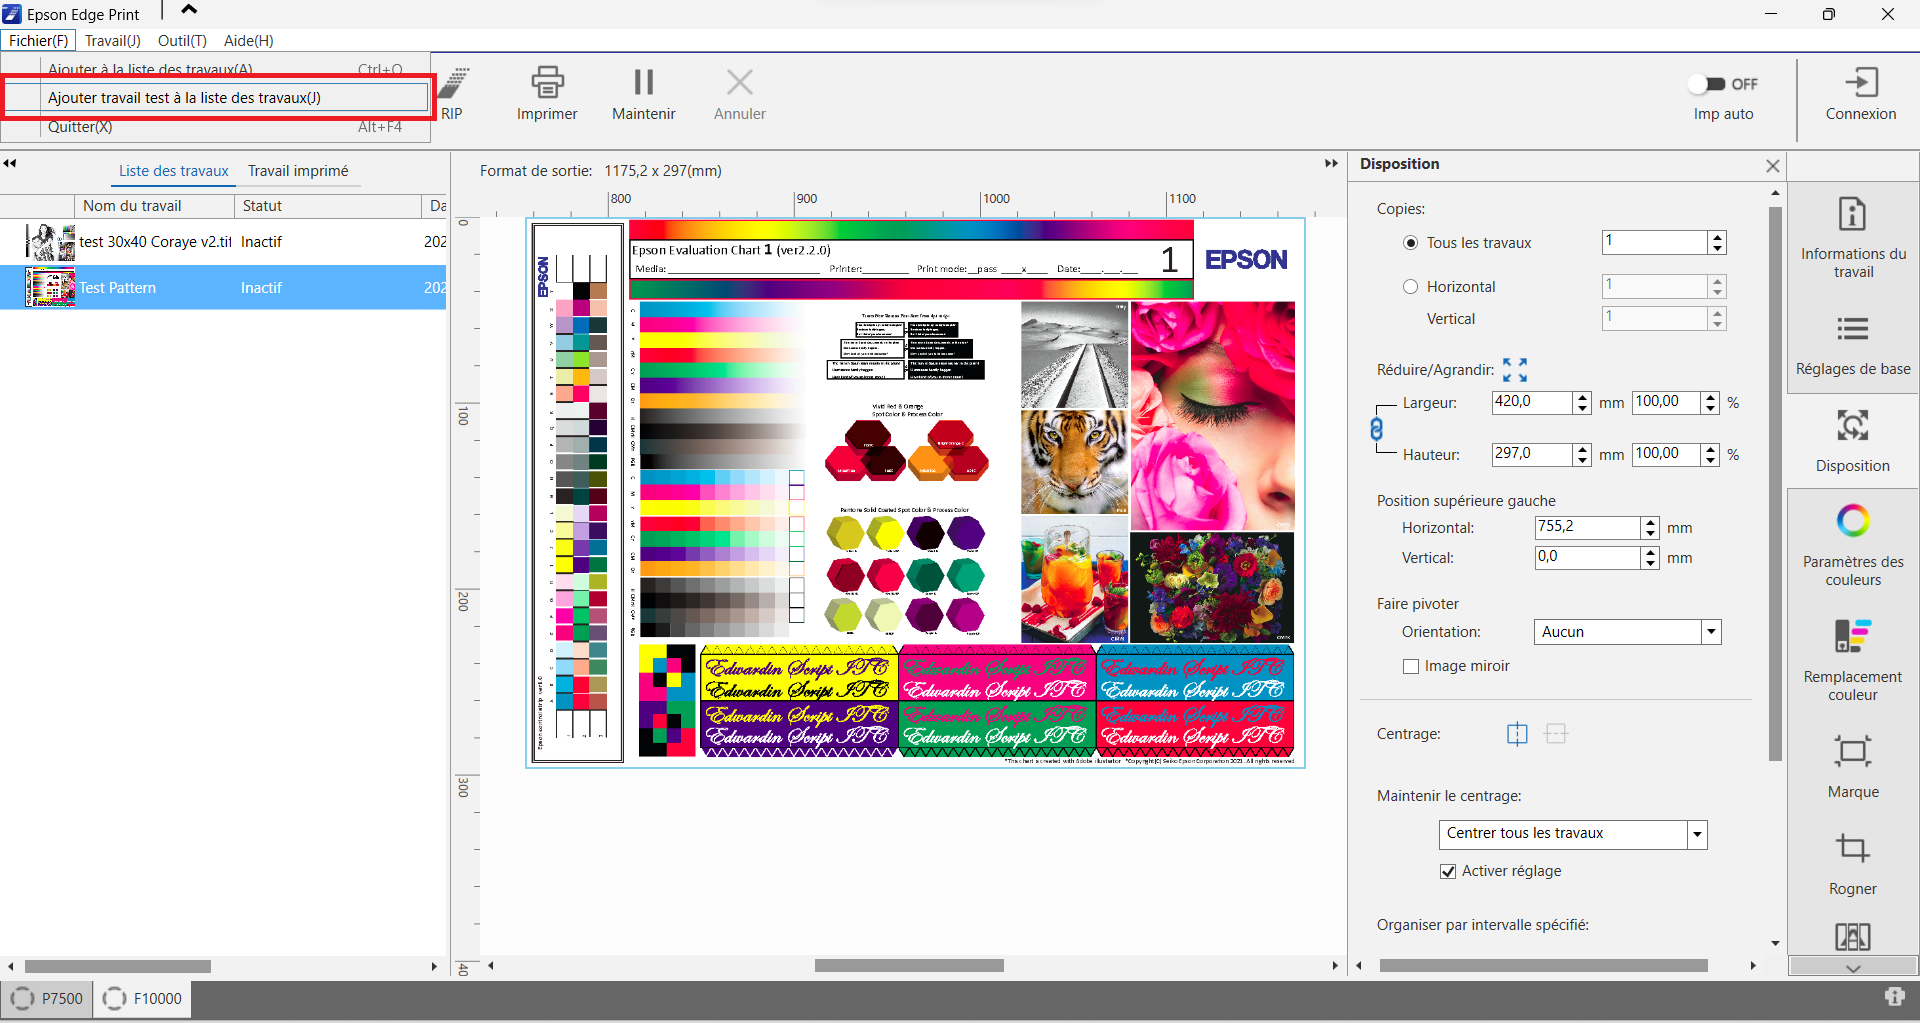
2) Printing the Epson test pattern
Print the test pattern under normal printing conditions.
Creation of the repository with the Coraye Print Control module
Reference range measurement
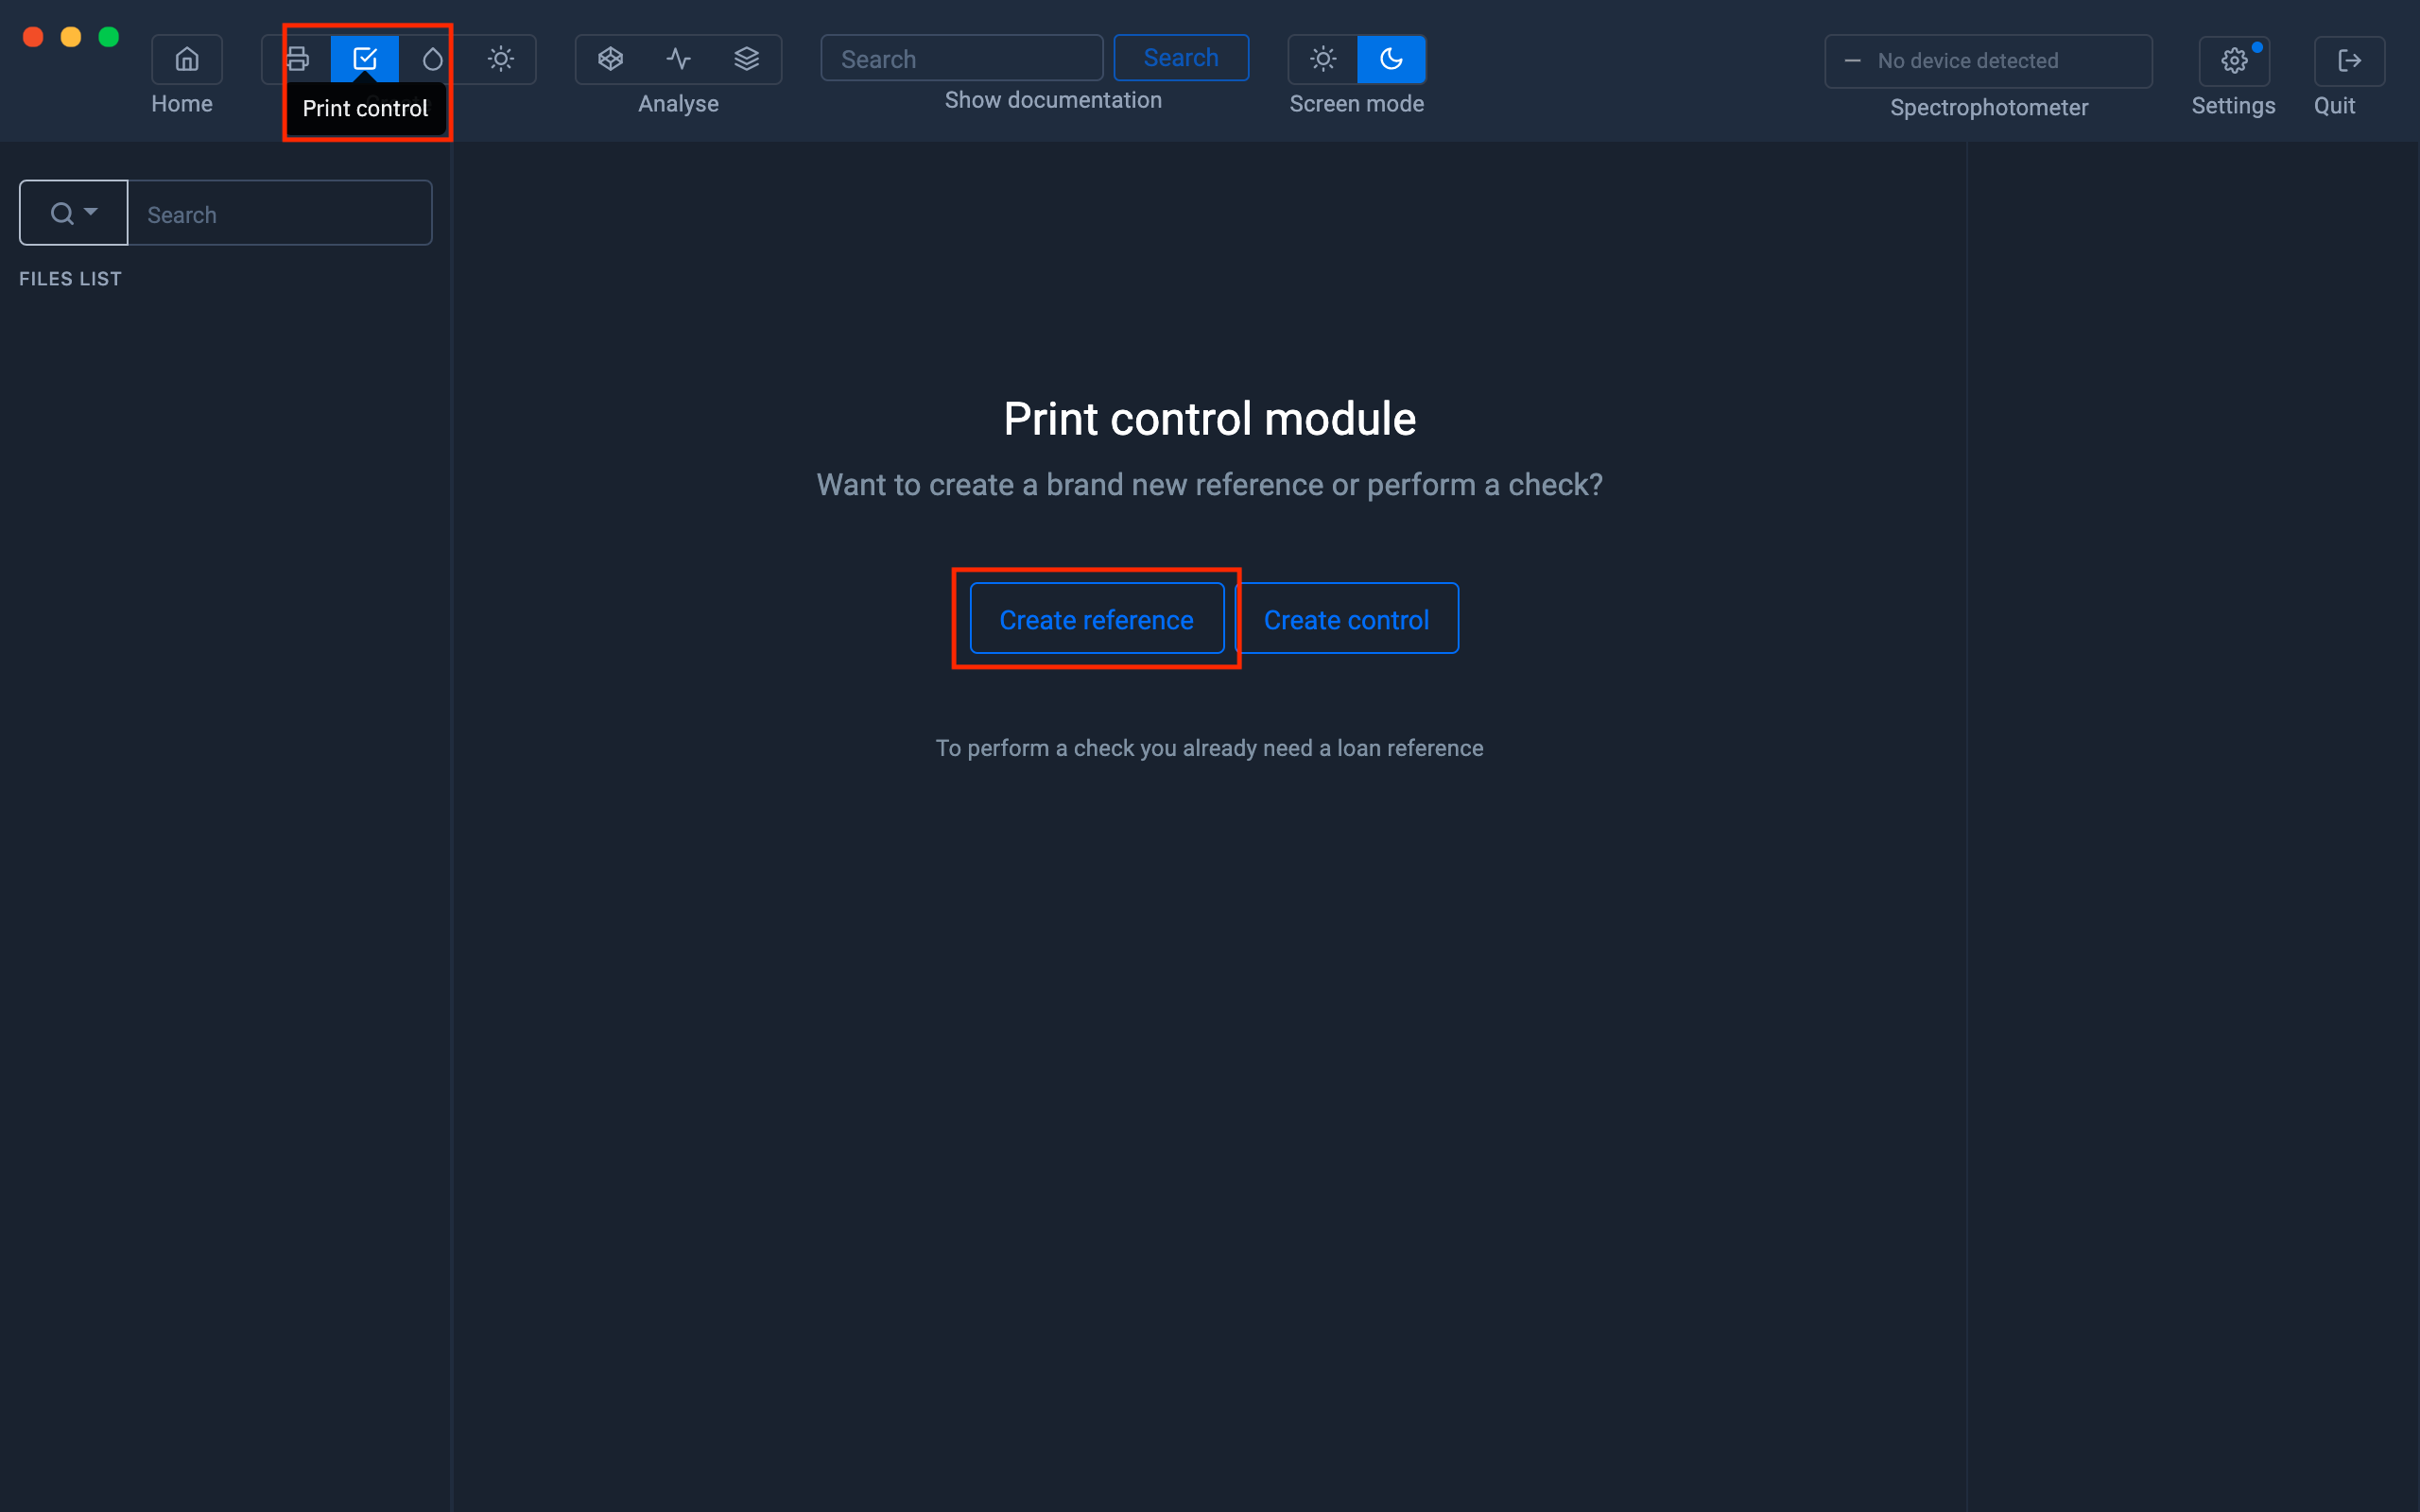
1) Launch the Coraye software, then select the "Print Control" icon and click on the "Create a reference" button.
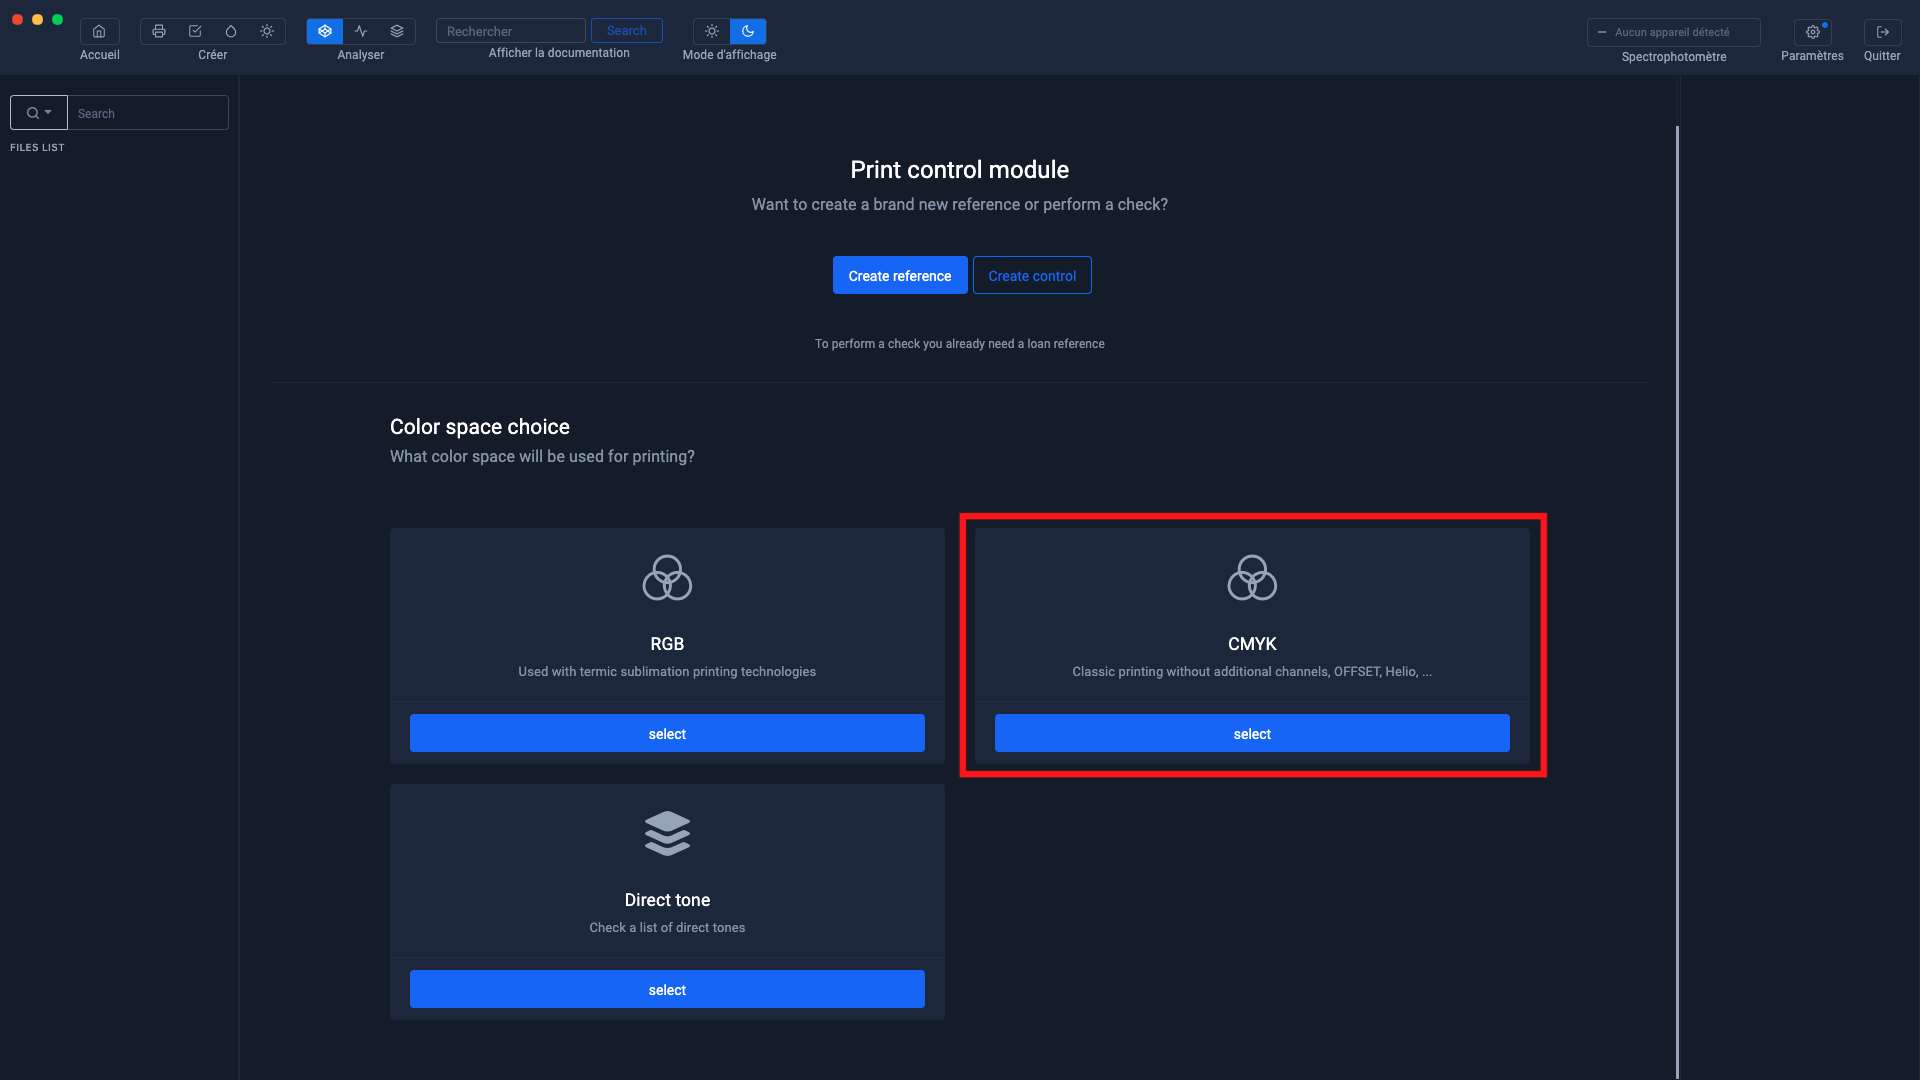
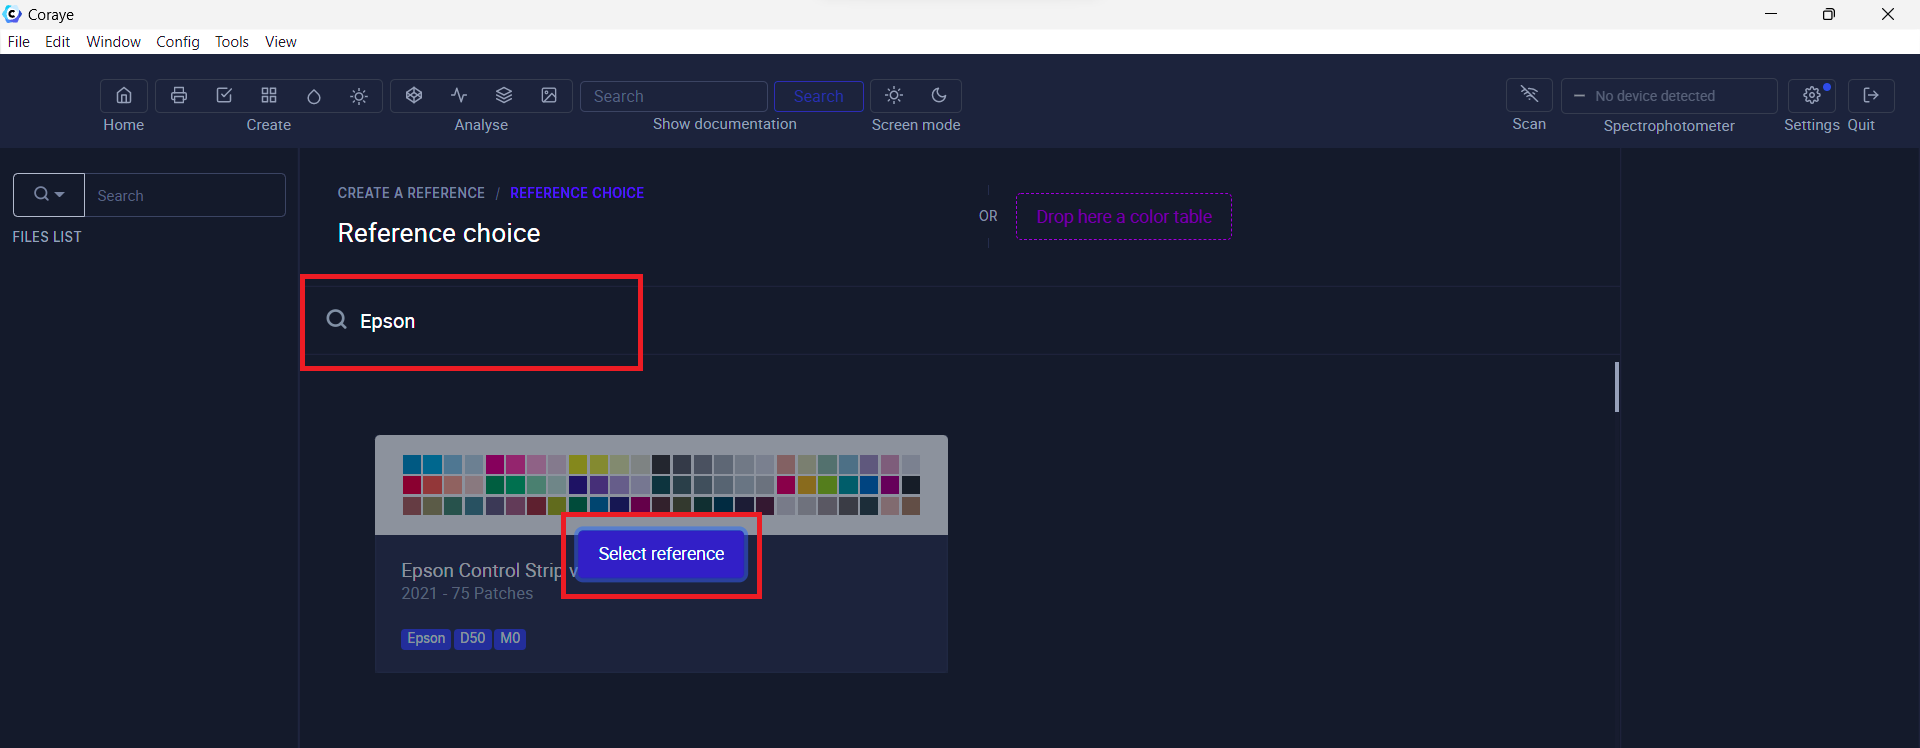
2) The Epson "Test pattern" test page being in CMYK, select the CMYK mode.
3) To easily find the Epson Mediawedge, type "Epson" in the search field, then select the range.
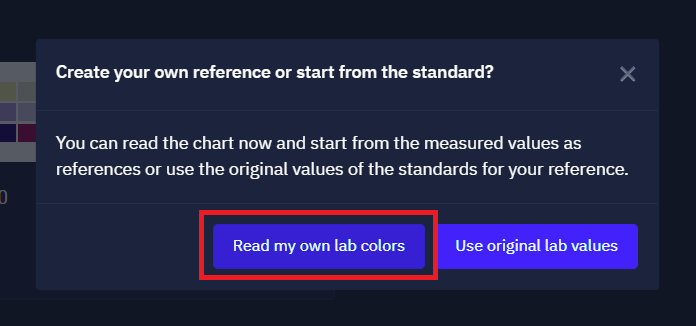
4) Since we want to create a reference from a print (for example the first print after a calibration), click on "Read my own Lab colors".
5) To start the measurement procedure, click on the "Start reading" button.
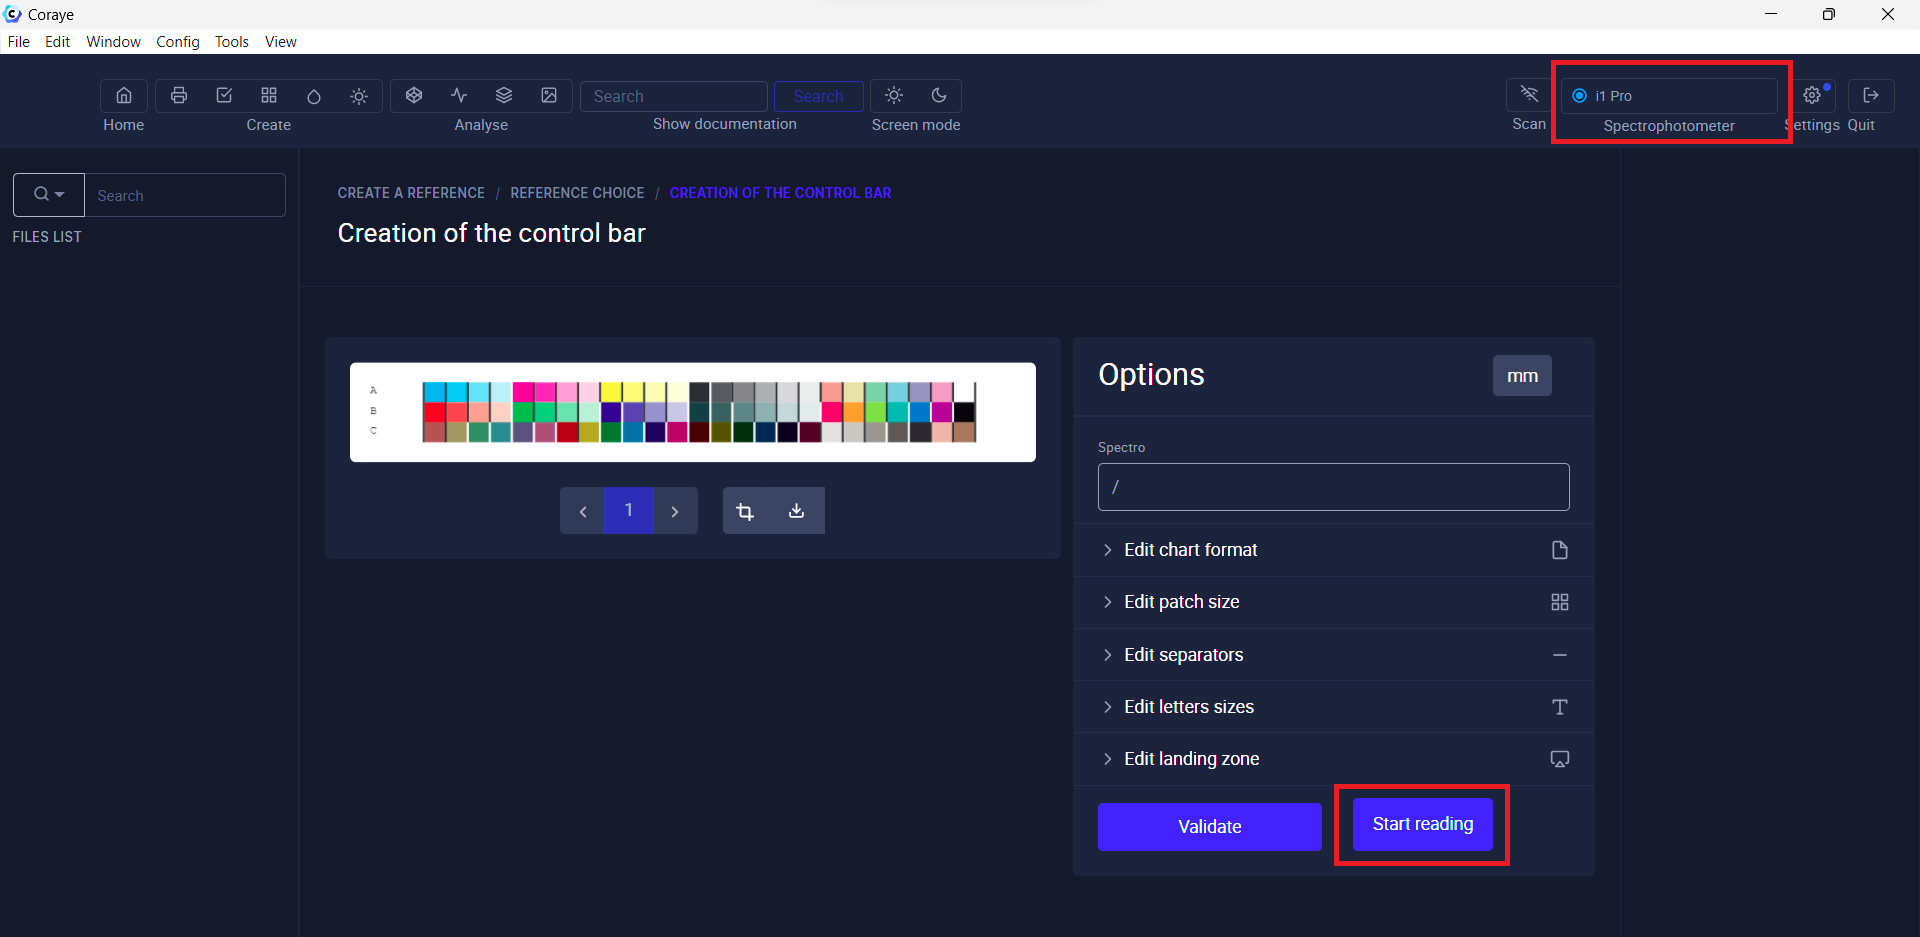
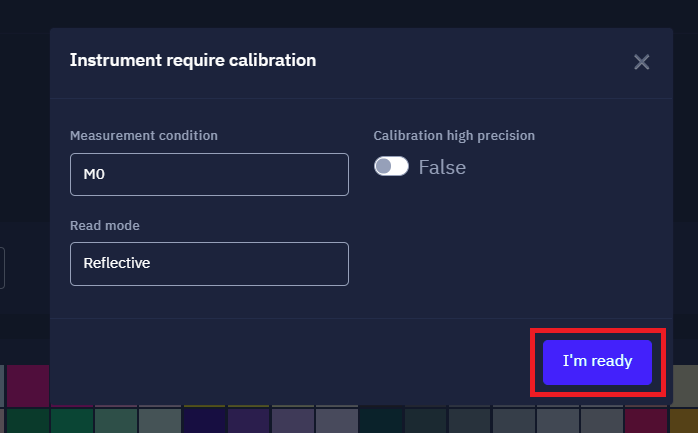
6) Select the measurement mode, then click "I'm ready".
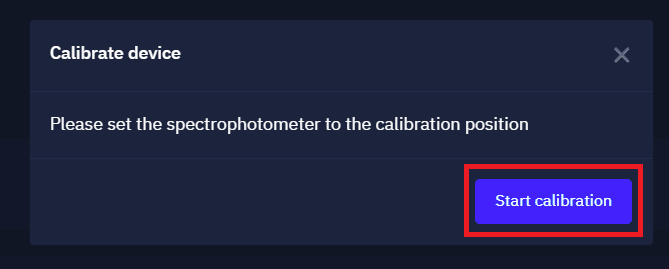
Important: Make sure your spectrophotometer is connected to a USB port directly on your computer and not to a USB hub
The XRite I1 Pro and Konica Minolta Myiro are powered via the USB port.
If the power supply to the USB port is not sufficient, the spectro will be recognized, but during calibration the software will error.
7) Position the spectrophotometer on its reference blank, then click on the "Start calibration" button
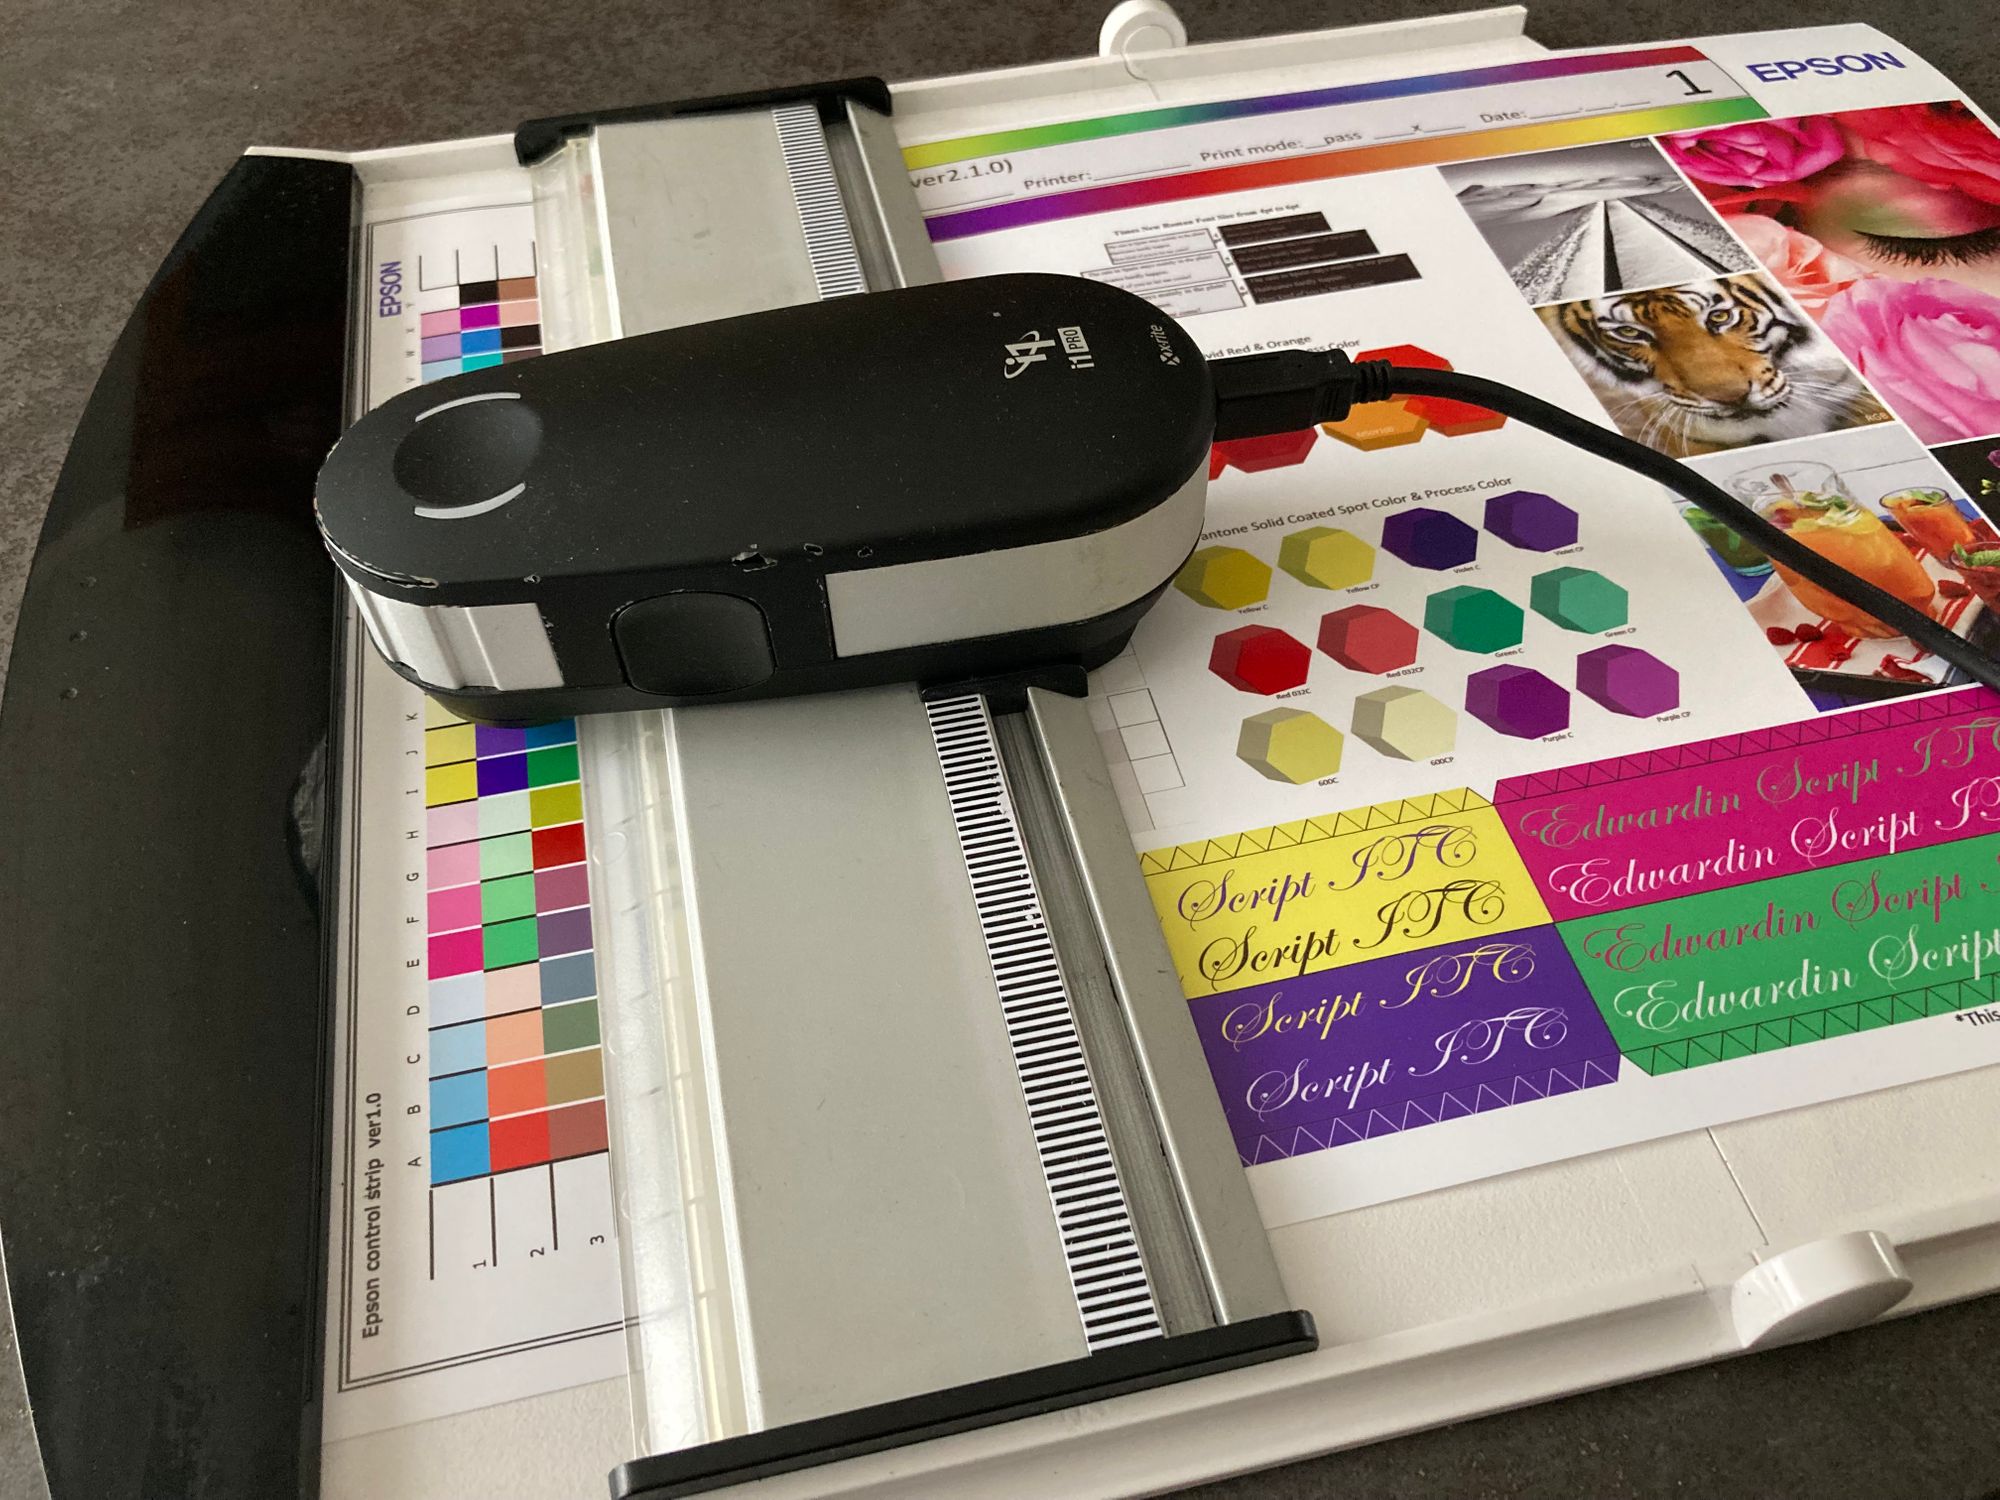
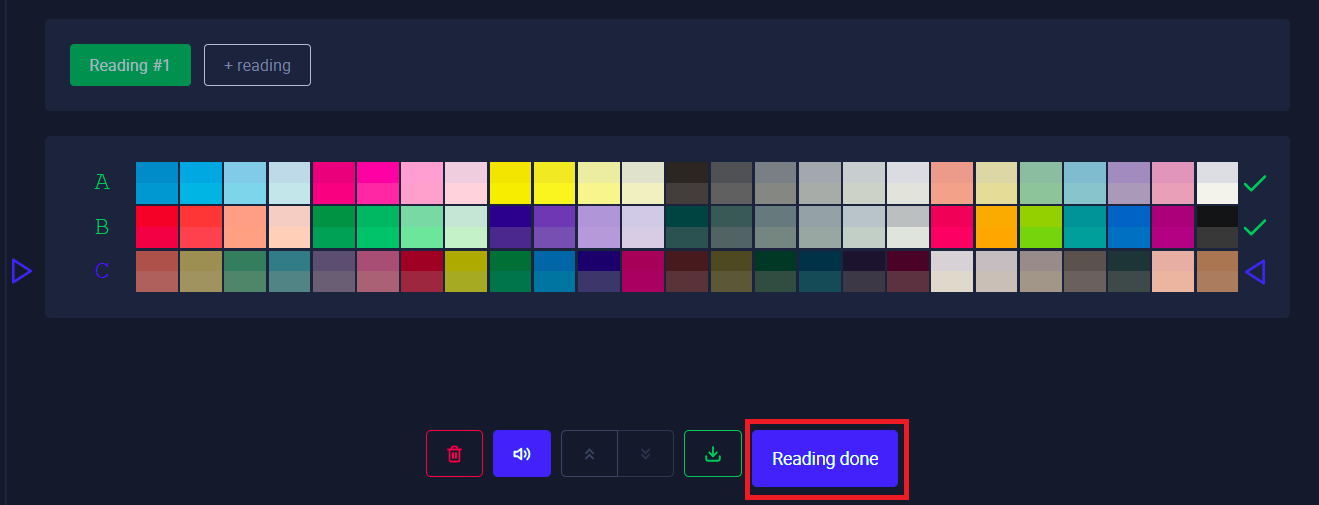
8) Measure the 3 lines with the spectrophotometer and its ruler.
When the measurement is complete, click "Reading done"
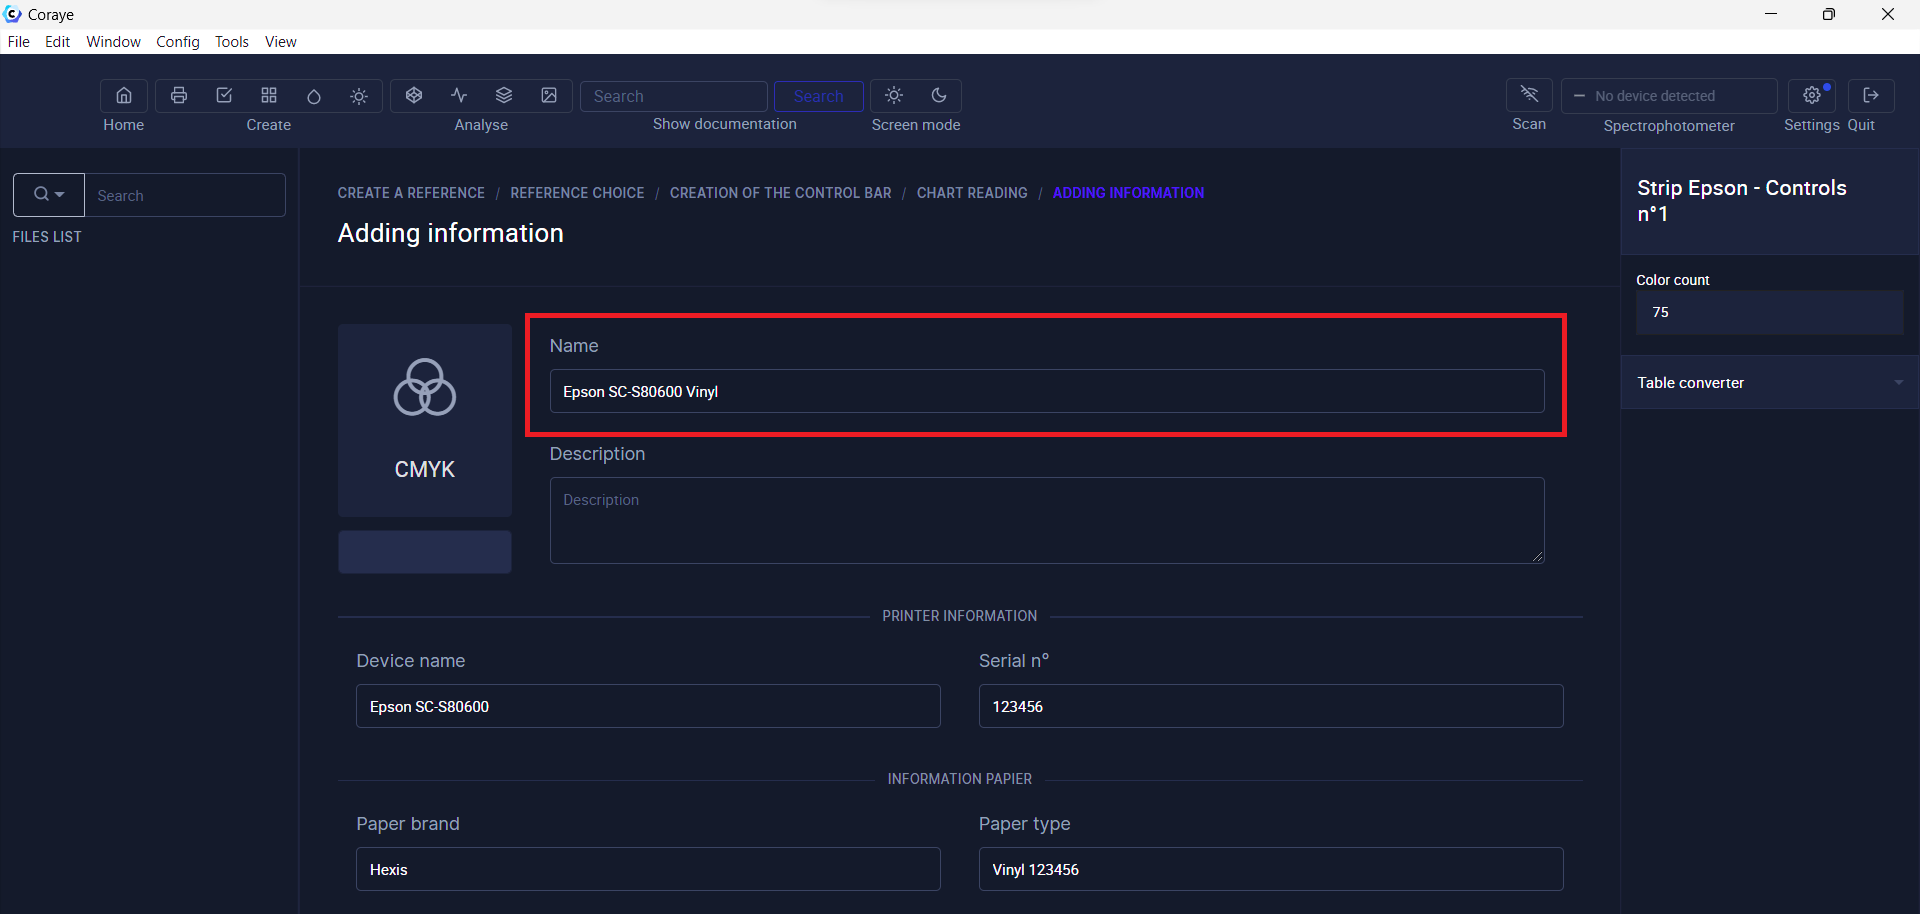
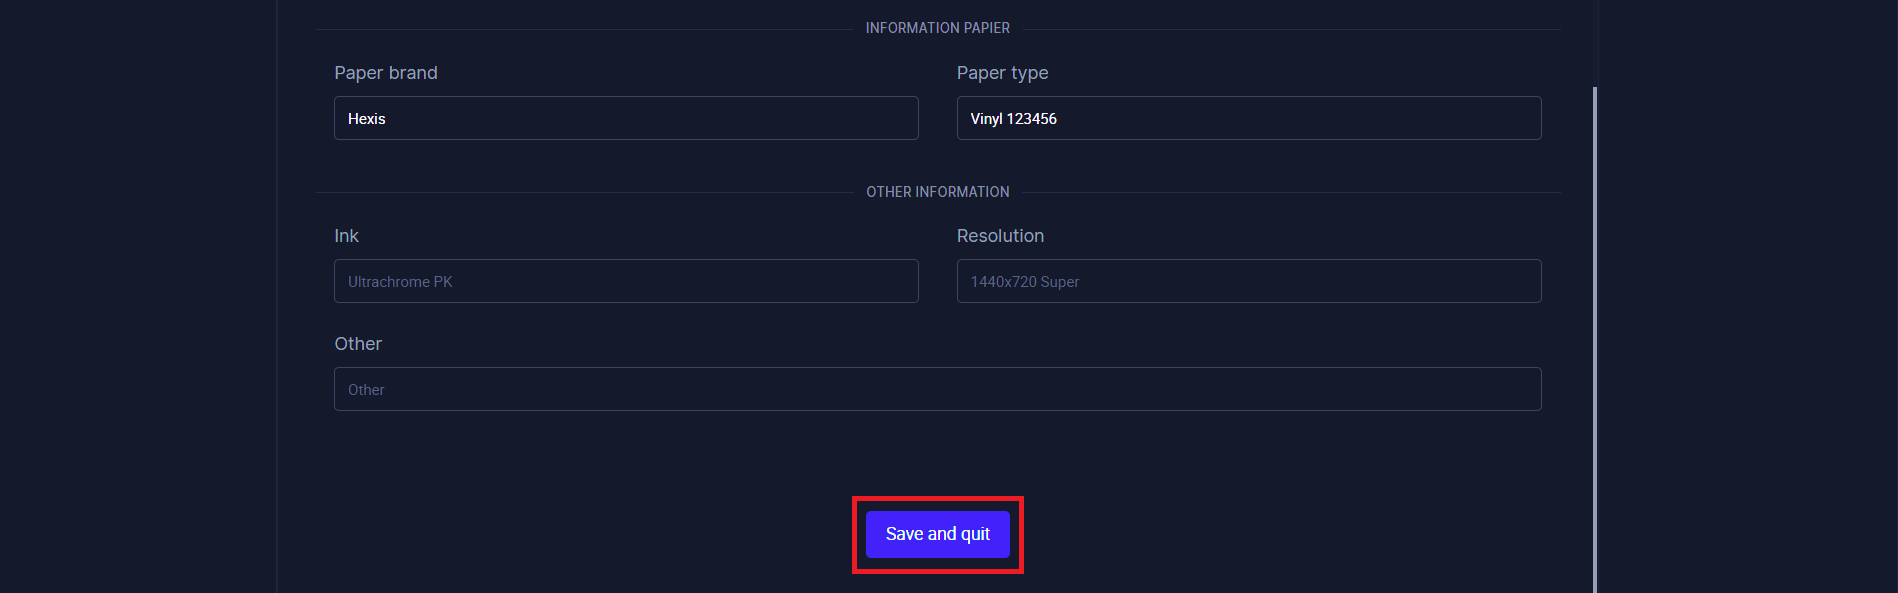
9) Give a name to the "Print Control" file
Optional: fill in the fields that will appear on the pdf report.
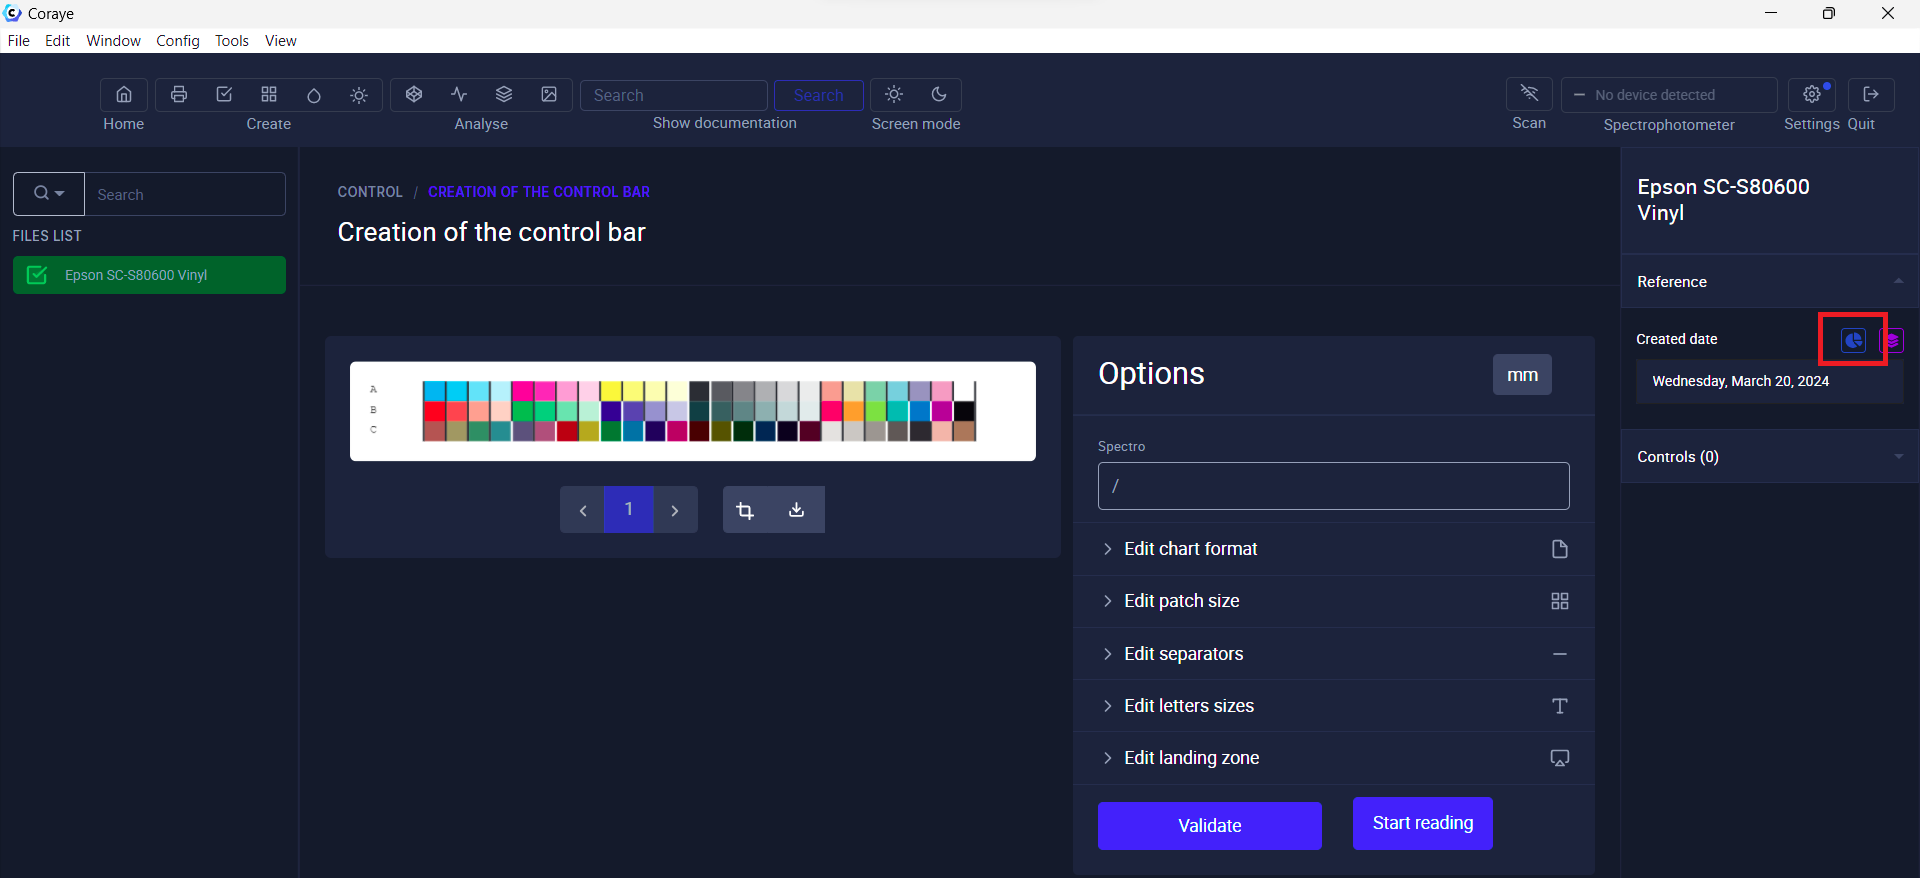
10) The "Print Control" file is displayed in the left column.

You must now define the control criteria and tolerances
- Select the newly created "Print control" file, then click on the "blue pie chart" located in the right column, in the "Reference" tab.
11) Edit each of the control criteria to customize the tolerances.
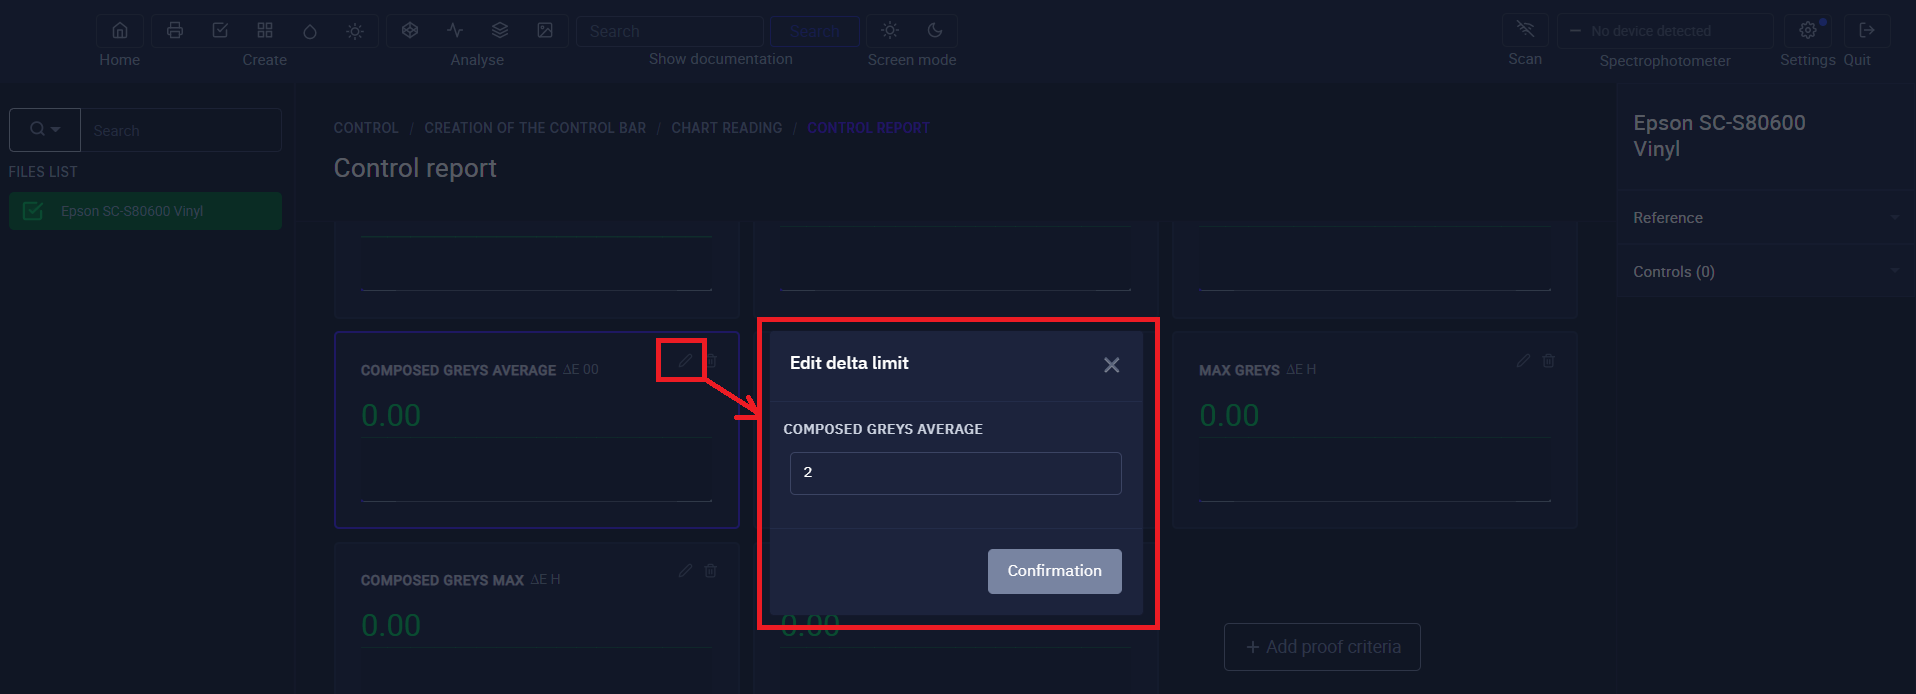
- Click on the "Add proof criteria" button to add verification criteria.
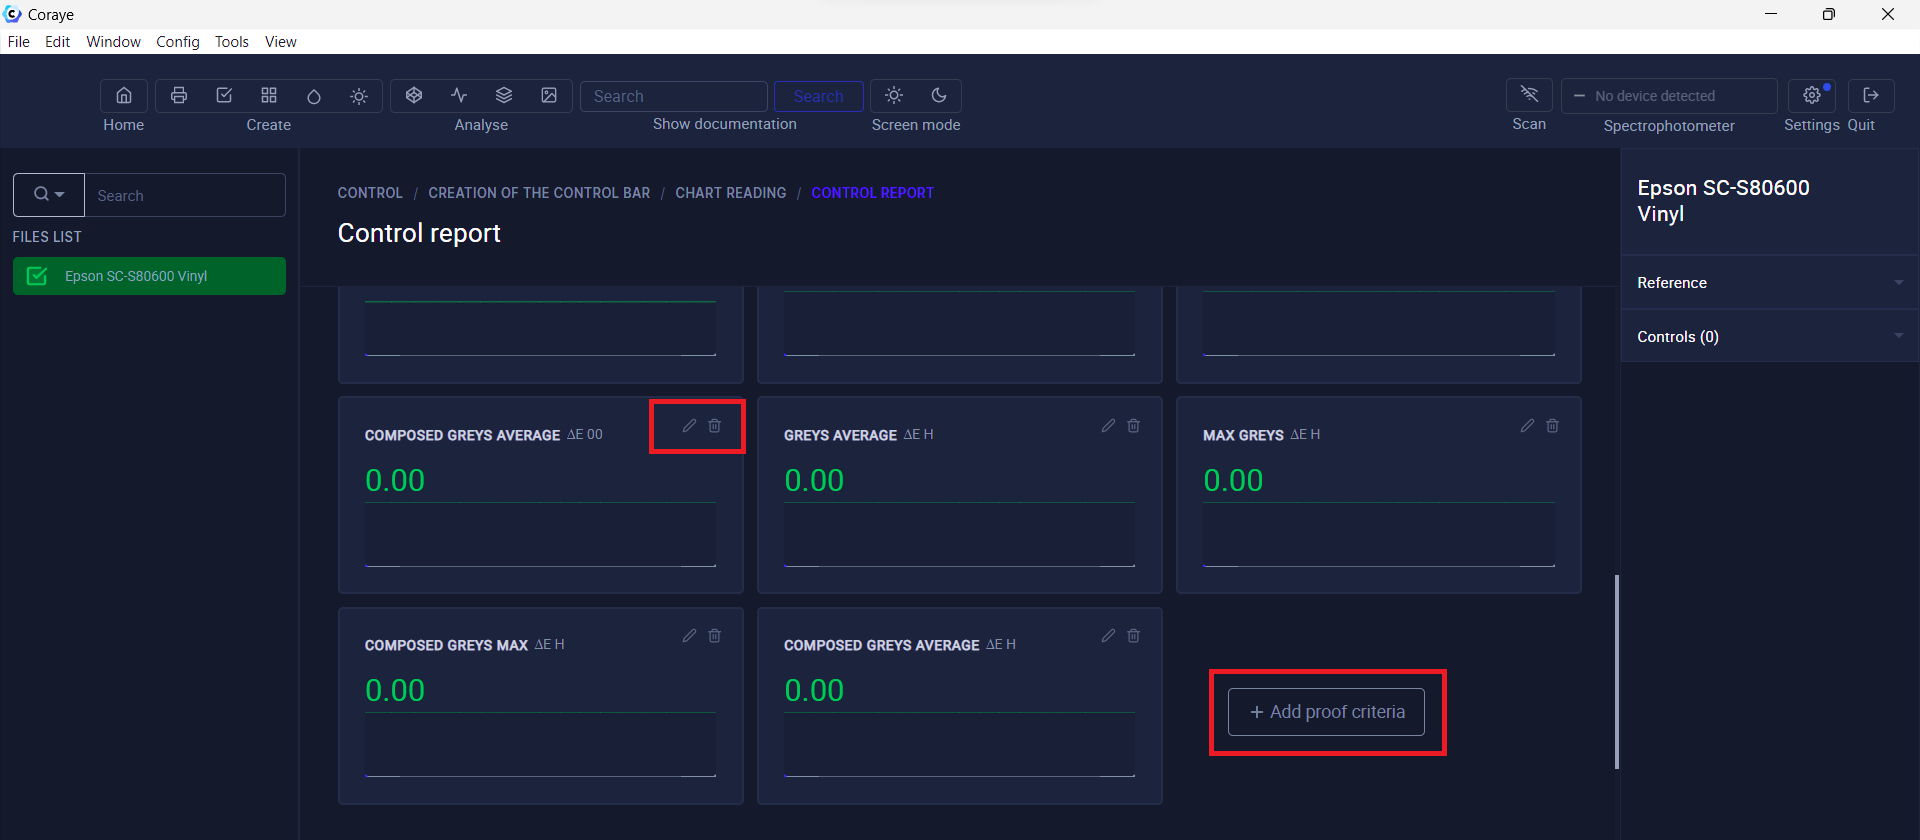
12) Click the "Save" button to save the settings.
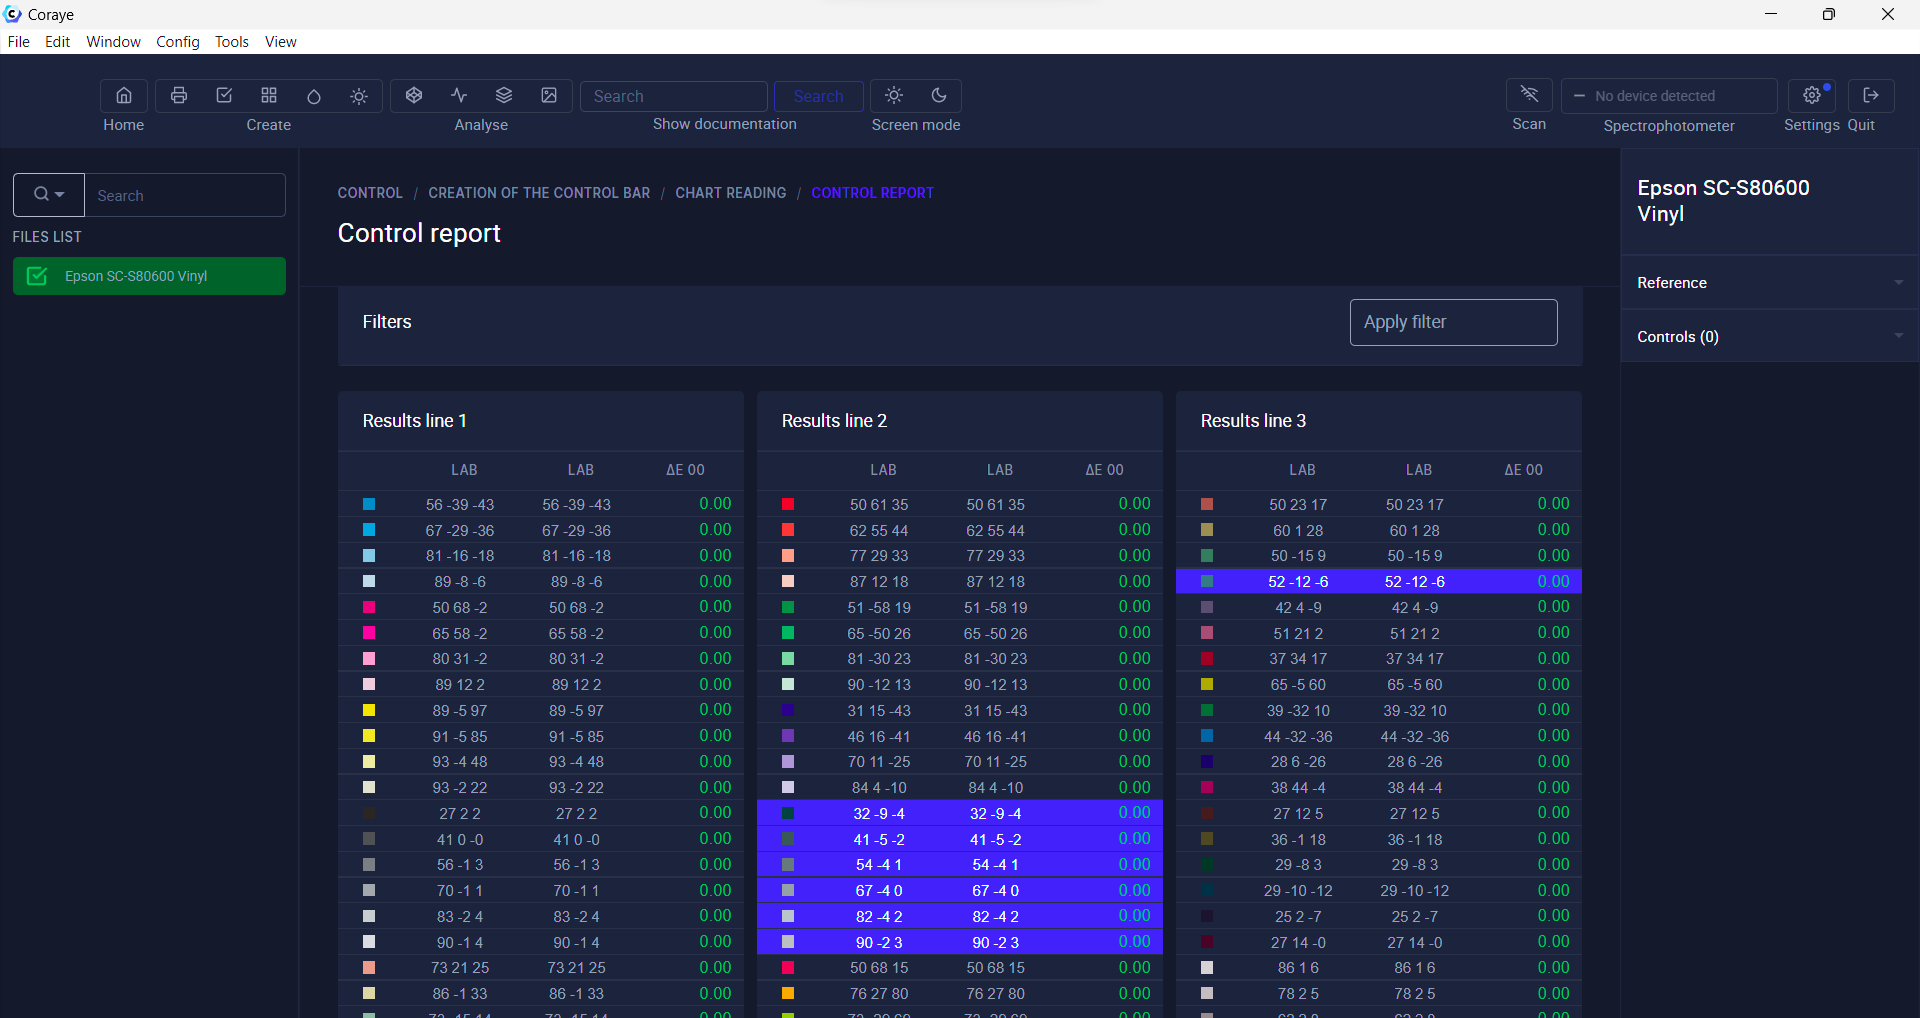
By scrolling in the lower area of the window, you can view the values of each of the patches in the range.
By selecting the different criteria, the patches concerned in the calculation will be highlighted in blue.
13) When the "Print Control" file is configured, it is possible to export it and import it later
Control measures
To ensure Quality Control, print and then measure the "Epson Test pattern" at regular intervals.
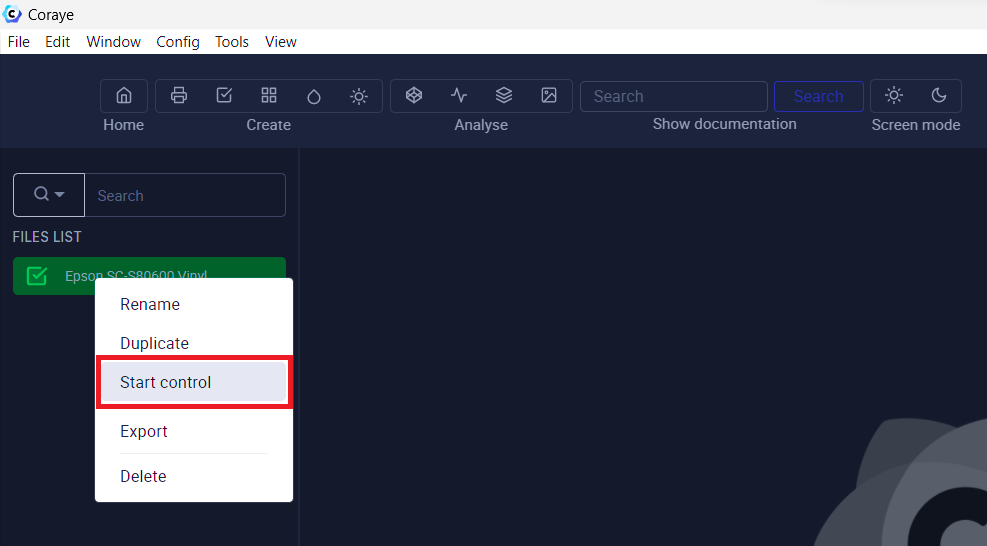
To do this, select the "Print Control" file then right-click and choose the "Start control" option to start the reference range measurement procedure.
If the file is not present in the left column, import the Pctrl file containing the Epson control strip data.
Make sure that the spectrophotometer is connected and recognized then click on the "Start reading" button
Range measurement with an XRite I1 Pro or Konica Minolta Myiro type spectrophotometer.
When the three lines have been measured, click on the "Reading done" button
Coraye's Pctrl file keeps all the history of your measurements, don't forget to export it to save this precious data.
The Coraye Print Control module allows:
- Export an old measurement as a .table file
- To display the report of an old measurement
- The display of evolution curves
- Recording of successive measurements
the report in PDF format
The "PDF Report" option makes it possible to extract a very complete report of the measurement in the form of a pdf file.
The "Sticker PDF" option allows you to generate a short report in the form of a label in pdf format.
The procedure for exporting the quality control report is identical to that explained in the tutorial "Controlling a standardized CMYK Mediawedge gamut"
Personalization
Other RGB or CMYK control ranges are available and it is also possible to customize your own range with spot colors for example. For example, if you need an XRite I1 Pro 3 PLUS, to verify the textile printing, you will have larger patches. The Print Control range can be fully customized.