Export of a measurement file made with Coraye to the XRite I1 Profiler software
Just as it is possible to import measurement files from XRite I1 Profiler to Coraye to calculate icc profiles, the converse is also possible.
This means that you can create and measure a chart in Coraye and then calculate the icc profile in I1 Profiler.
1) Export of the measurement file in .table format
This procedure begins at the end of the measurement of the range containing the color patches serving as a reference for the creation of the ICC profile.
To know the previous steps, refer to the chapter "Creating a profile from a standard pattern"
To save the measurement file at the end of the reading of the chart, click on "Export reading"
The file is saved in the left column.
You can rename it to better identify it, for example: P7500 Photo Paper 260gr

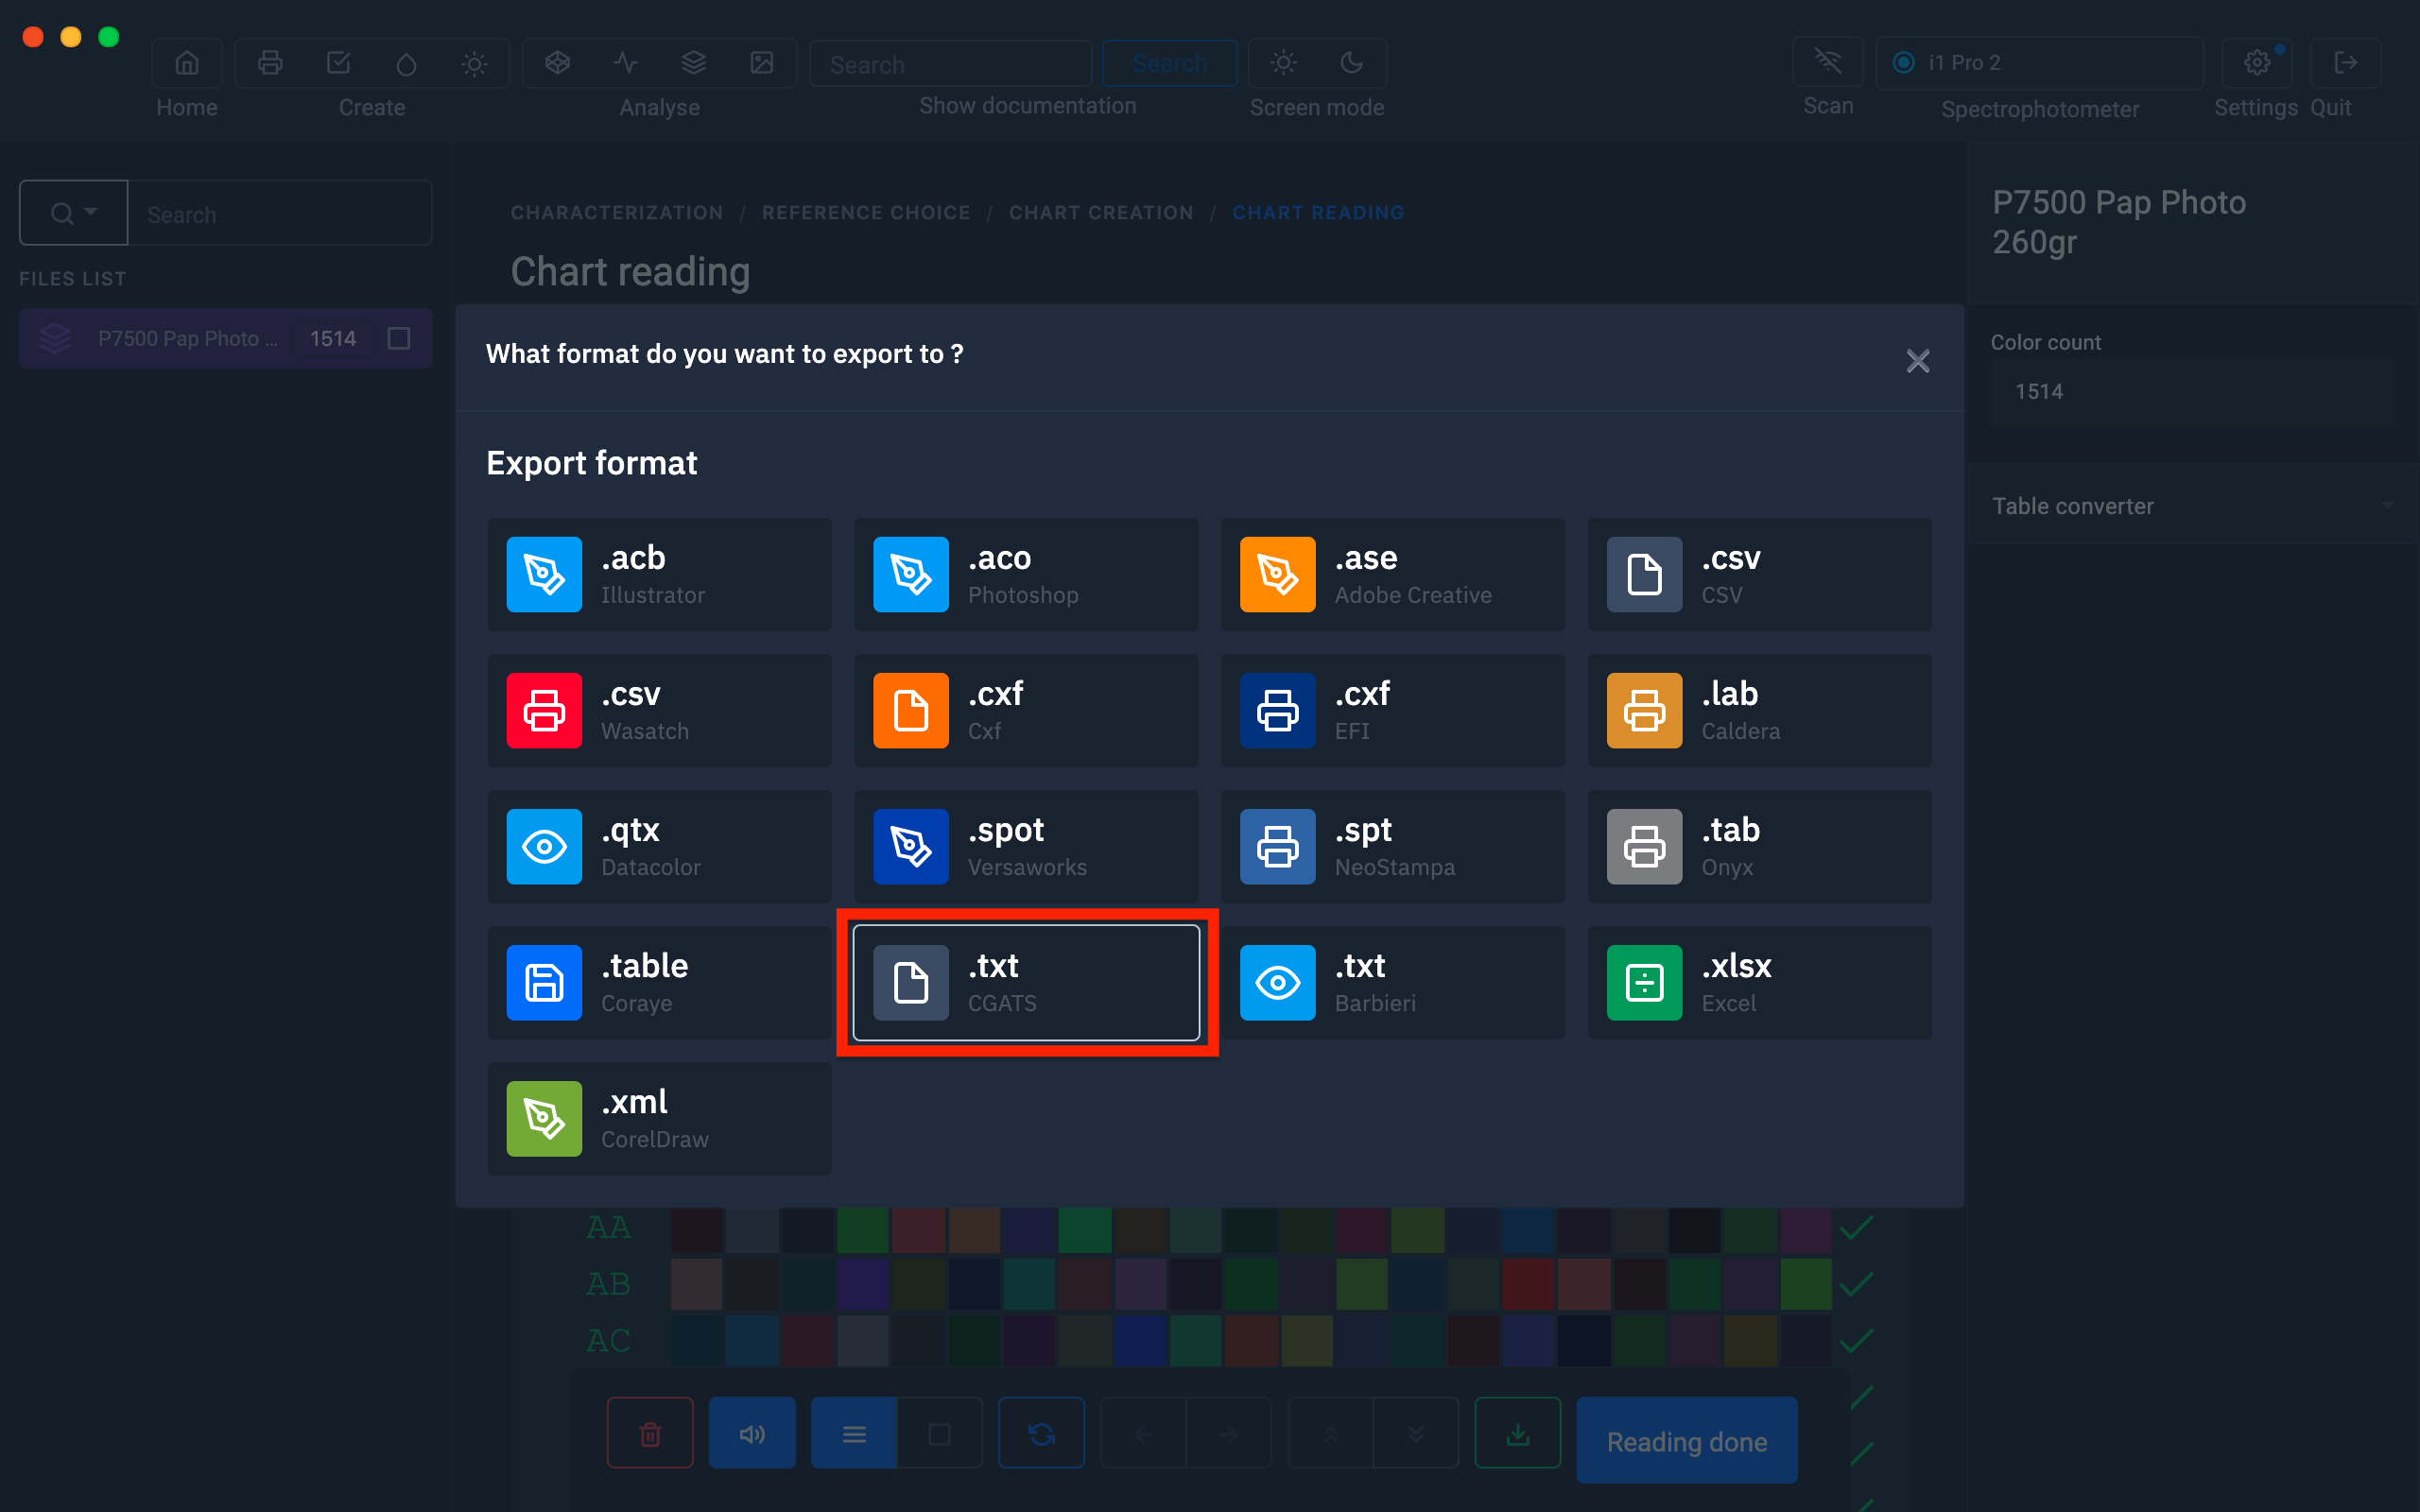
2) Select the .table file in the left column then right click and "Export".

3) Choose .txt format (CGATS)
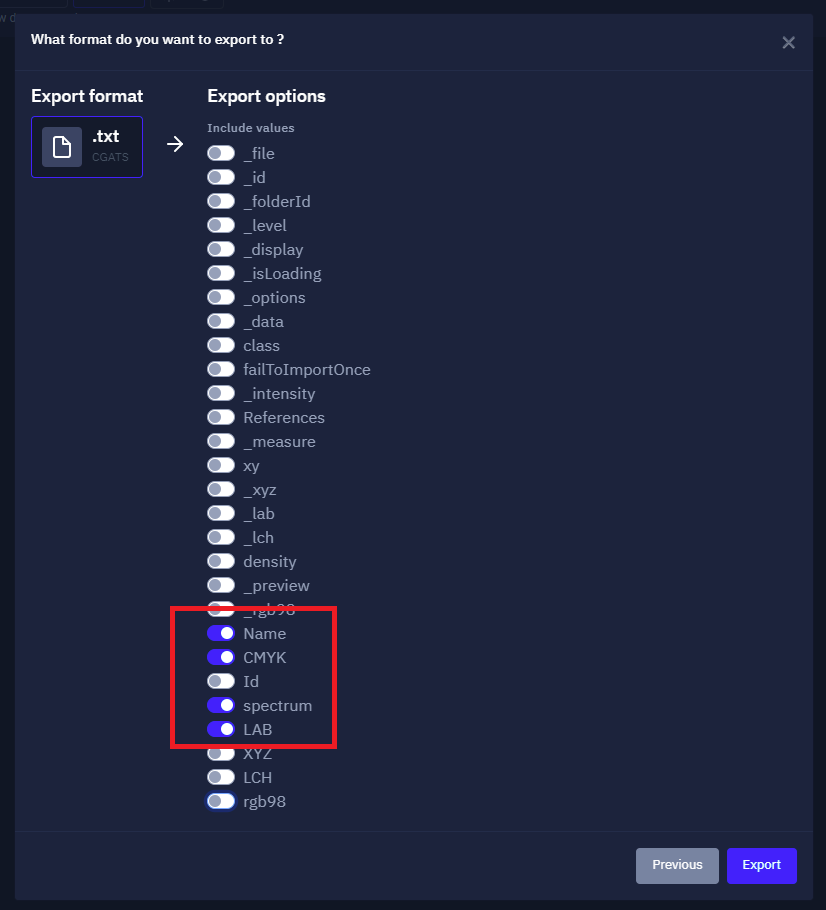
4) Select export options:
-Spectrum
- LAB
- RGB or CMYK depending on the mode
- Name (optional)
I1 Profiler does not support other options
Then click on the "Export" button
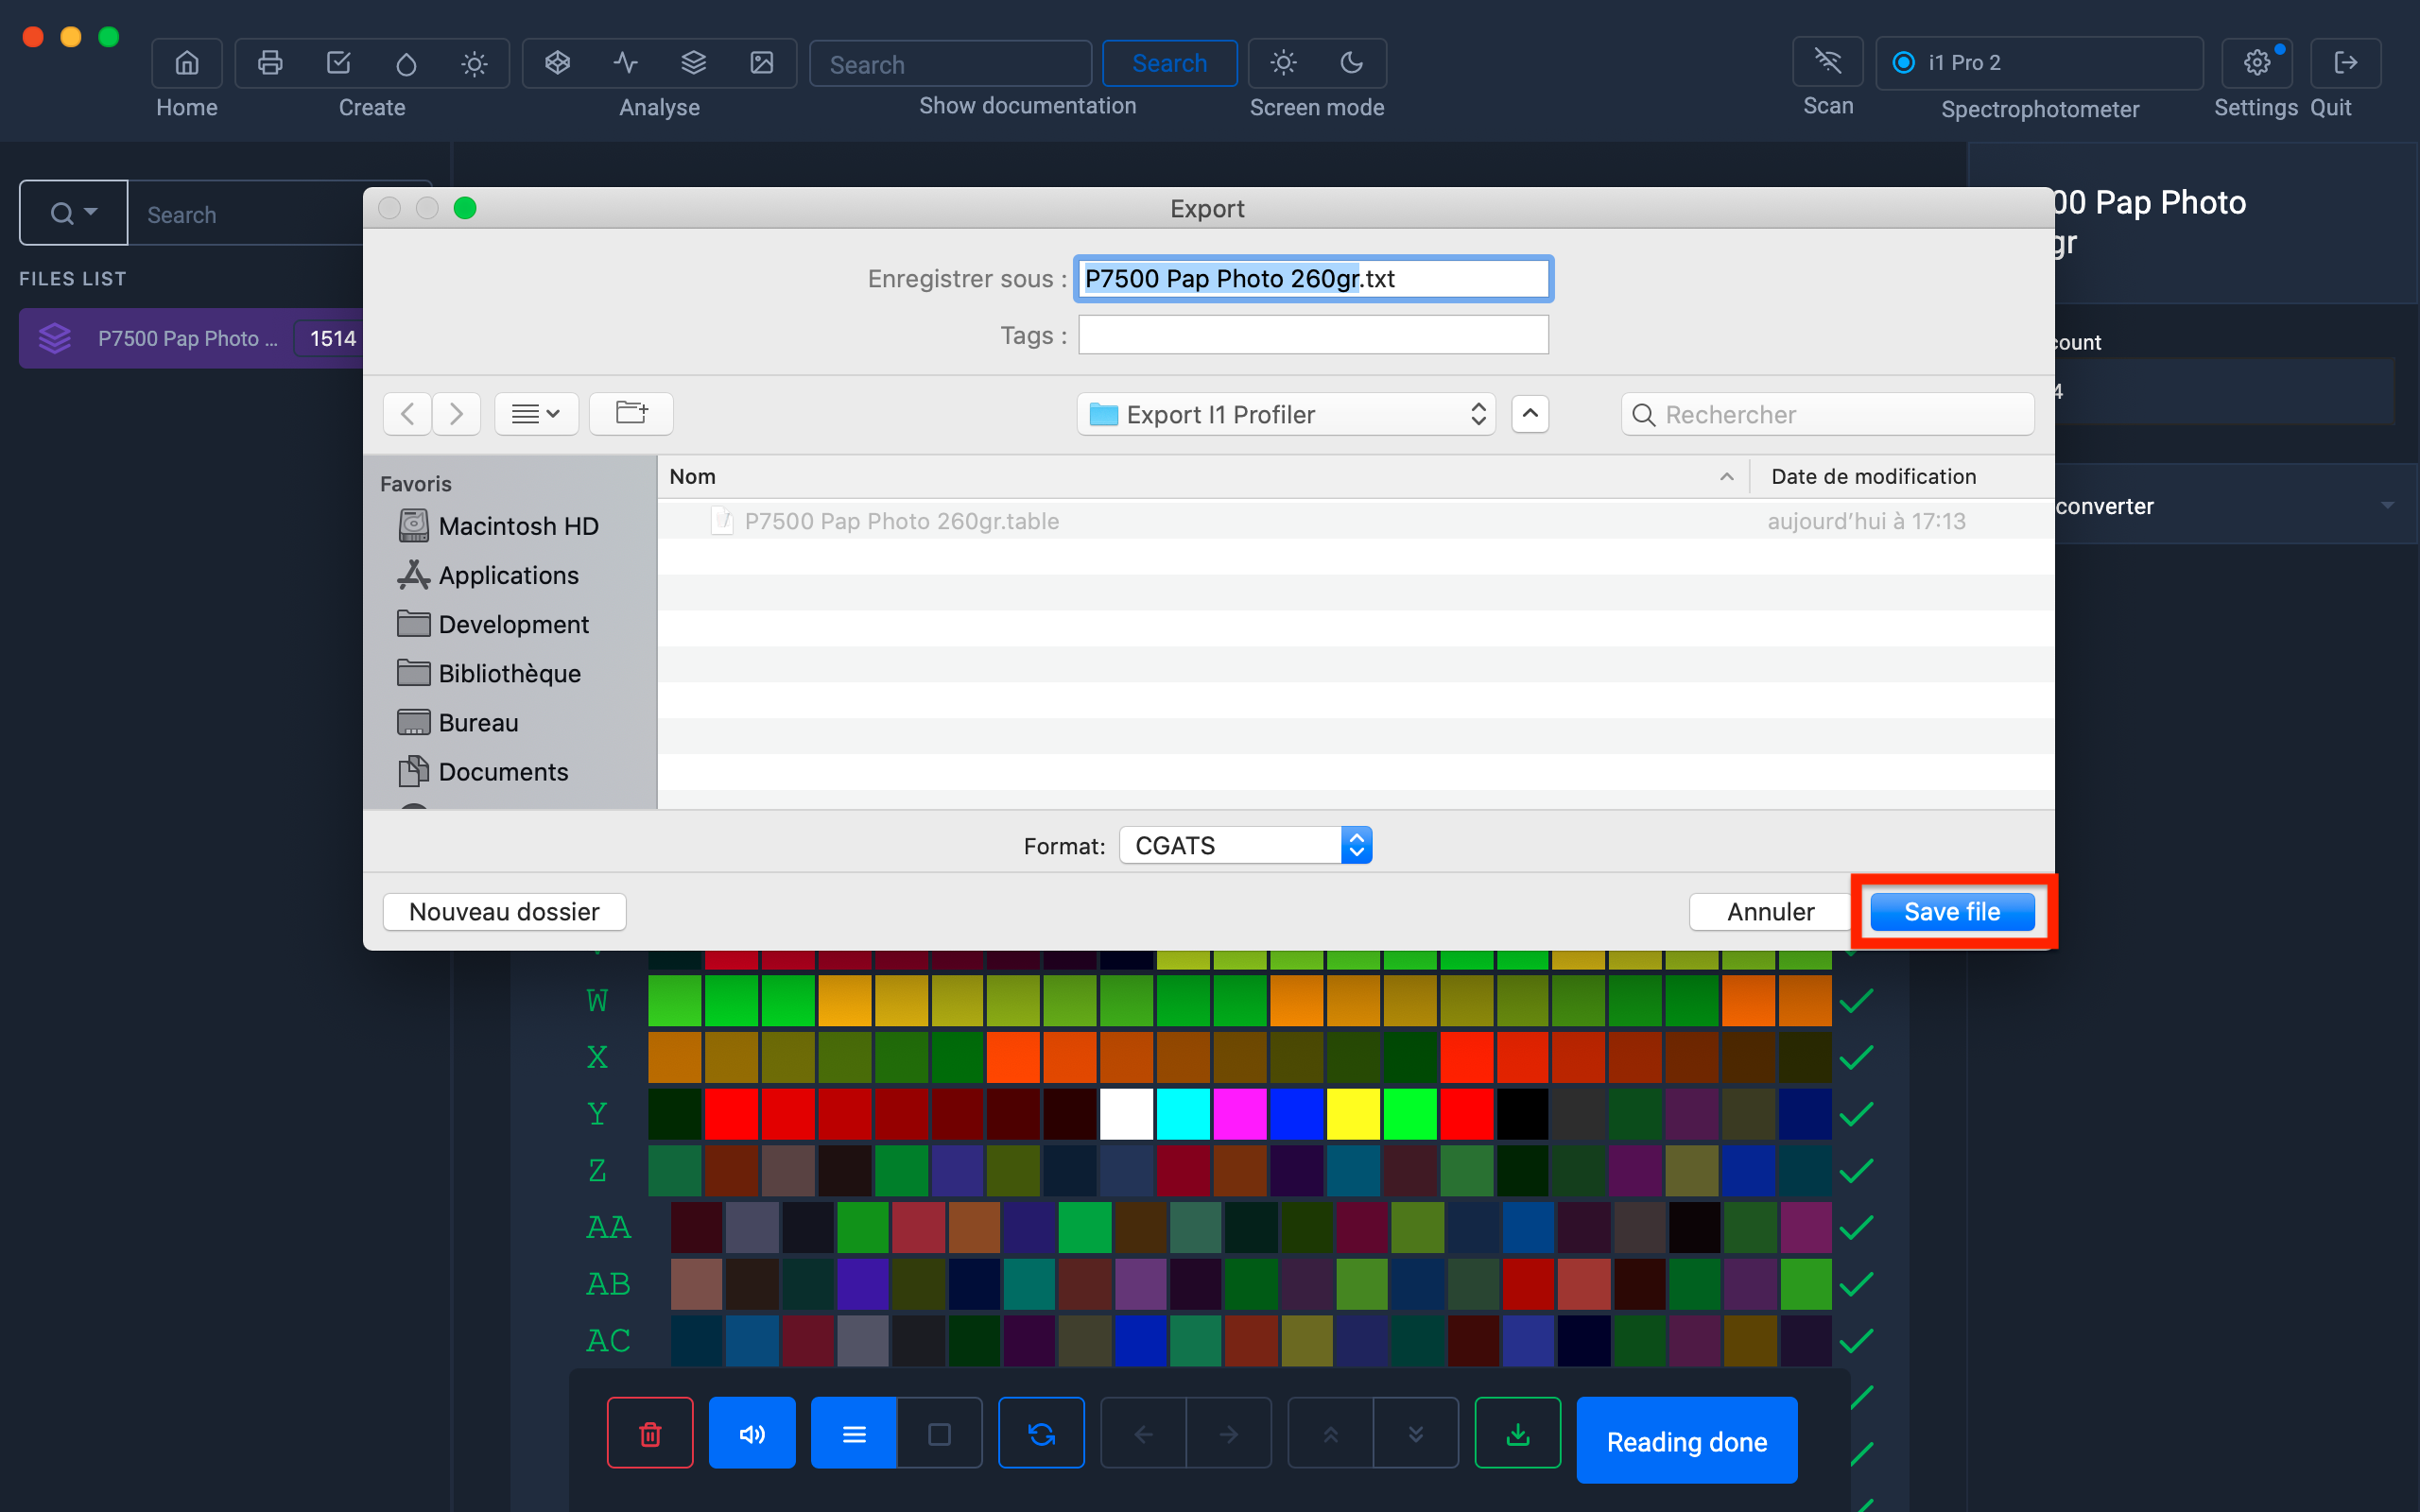
5) Save the .txt file (CGATS) so that it is accessible when importing into the I1 Profiler software.
6) Launch the I1 Profiler software
In the "Printer" zone, select "RGB printer" or "CMYK printer" depending on the mode of the ICC profile to be created.
Click on "Characterization"
Make sure that you have the license allowing you to perform the calculation of ICC profiles.

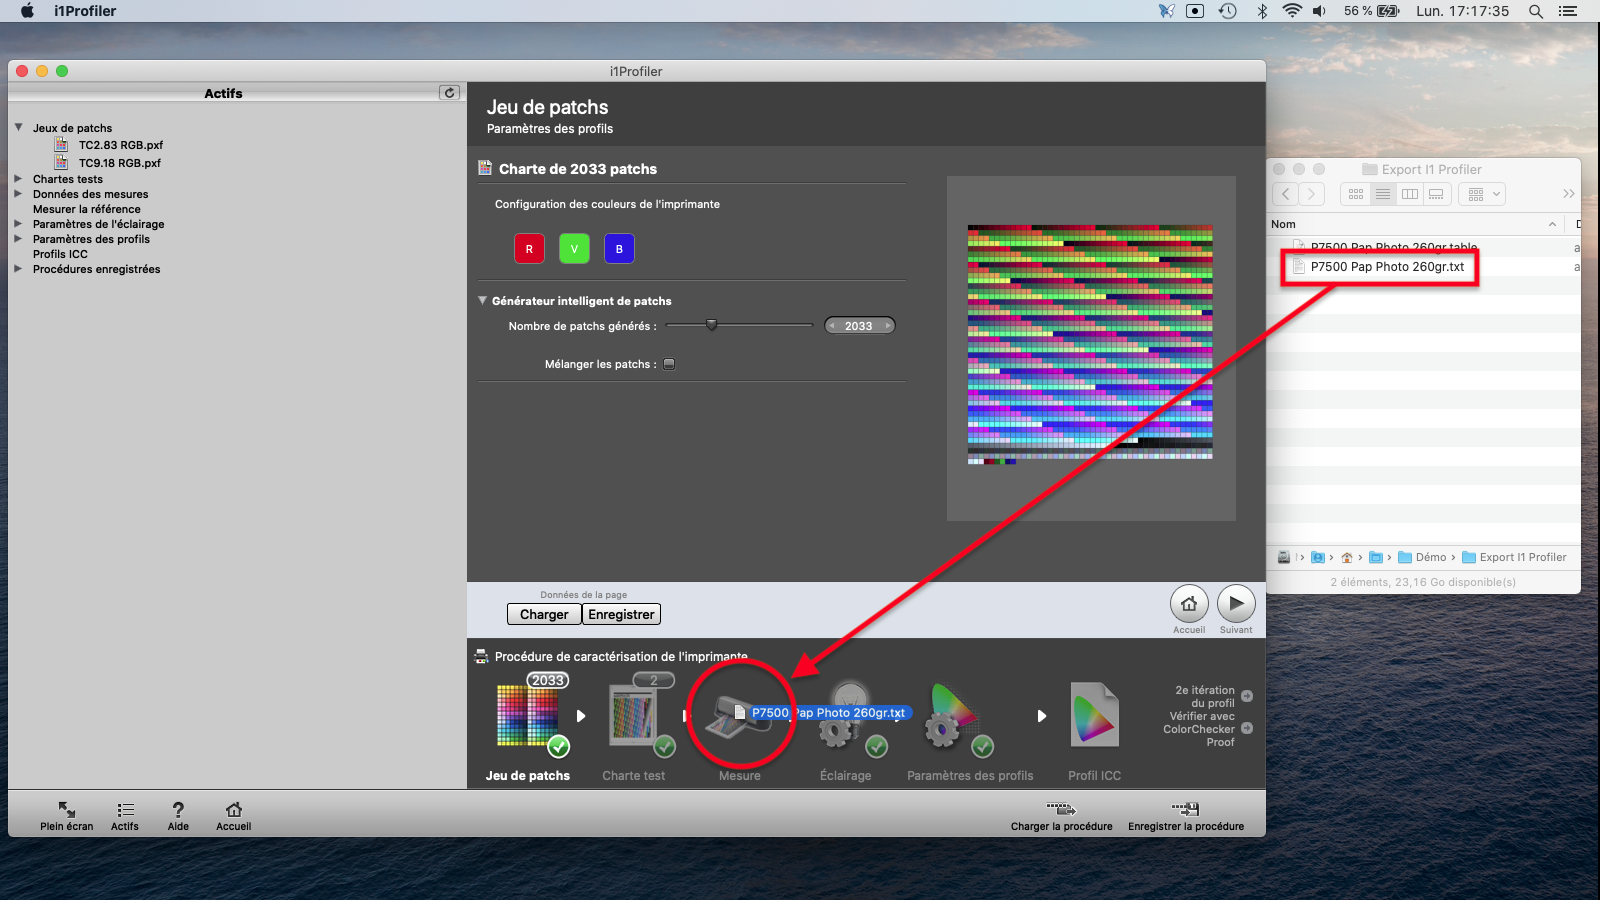
7) Importing the CGATS file into I1 Profiler
Drag and drop the CGATS .txt file onto the "Measurement" icon.
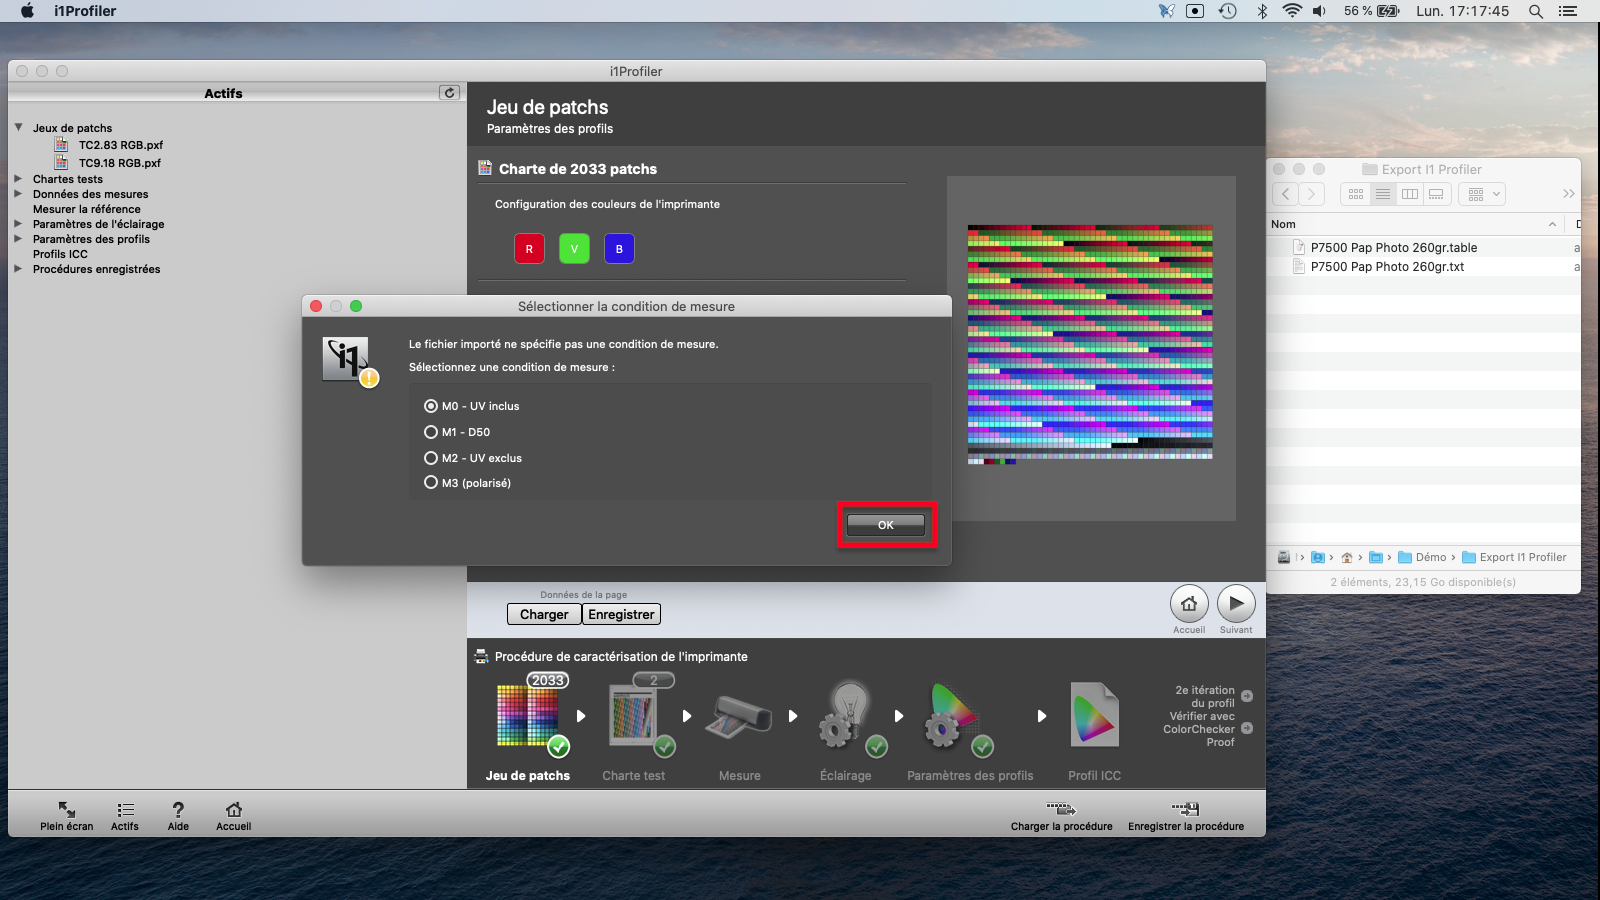
8) Select the reading mode used when measuring the range (Coraye).
Click "Ok" to start importing the measurement data.
9) Change the ICC profile version in "Profiles Settings"
Choose: Version 2

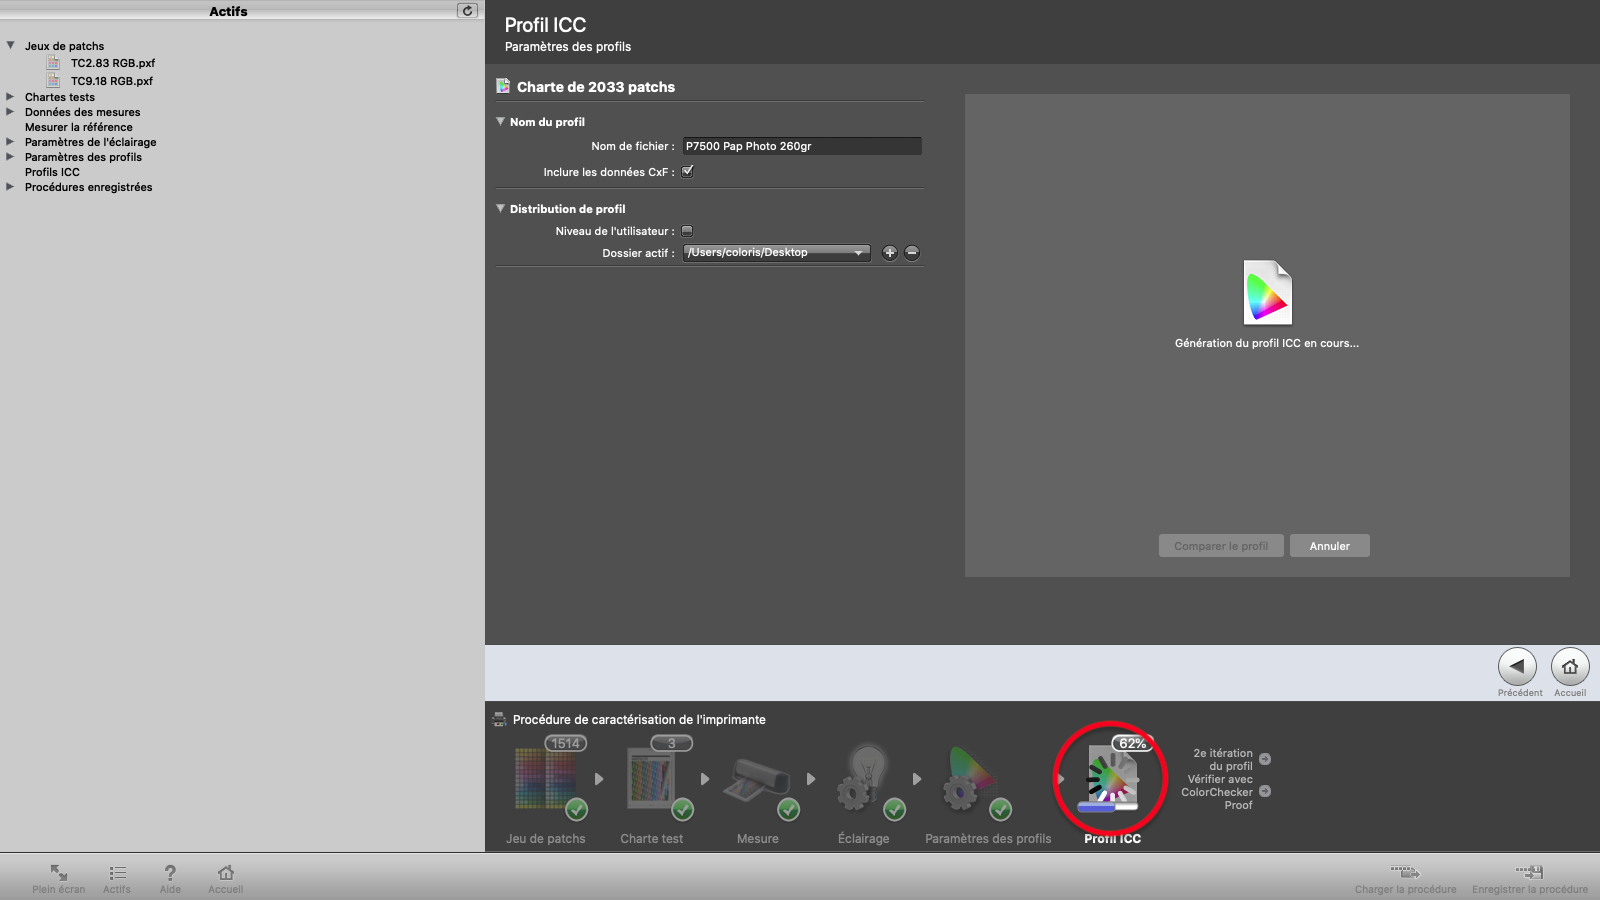
10) Name the ICC profile in the "File name" field
Specify a path if you want to save the profile to a specific location.
Then click on the "Save profile" button

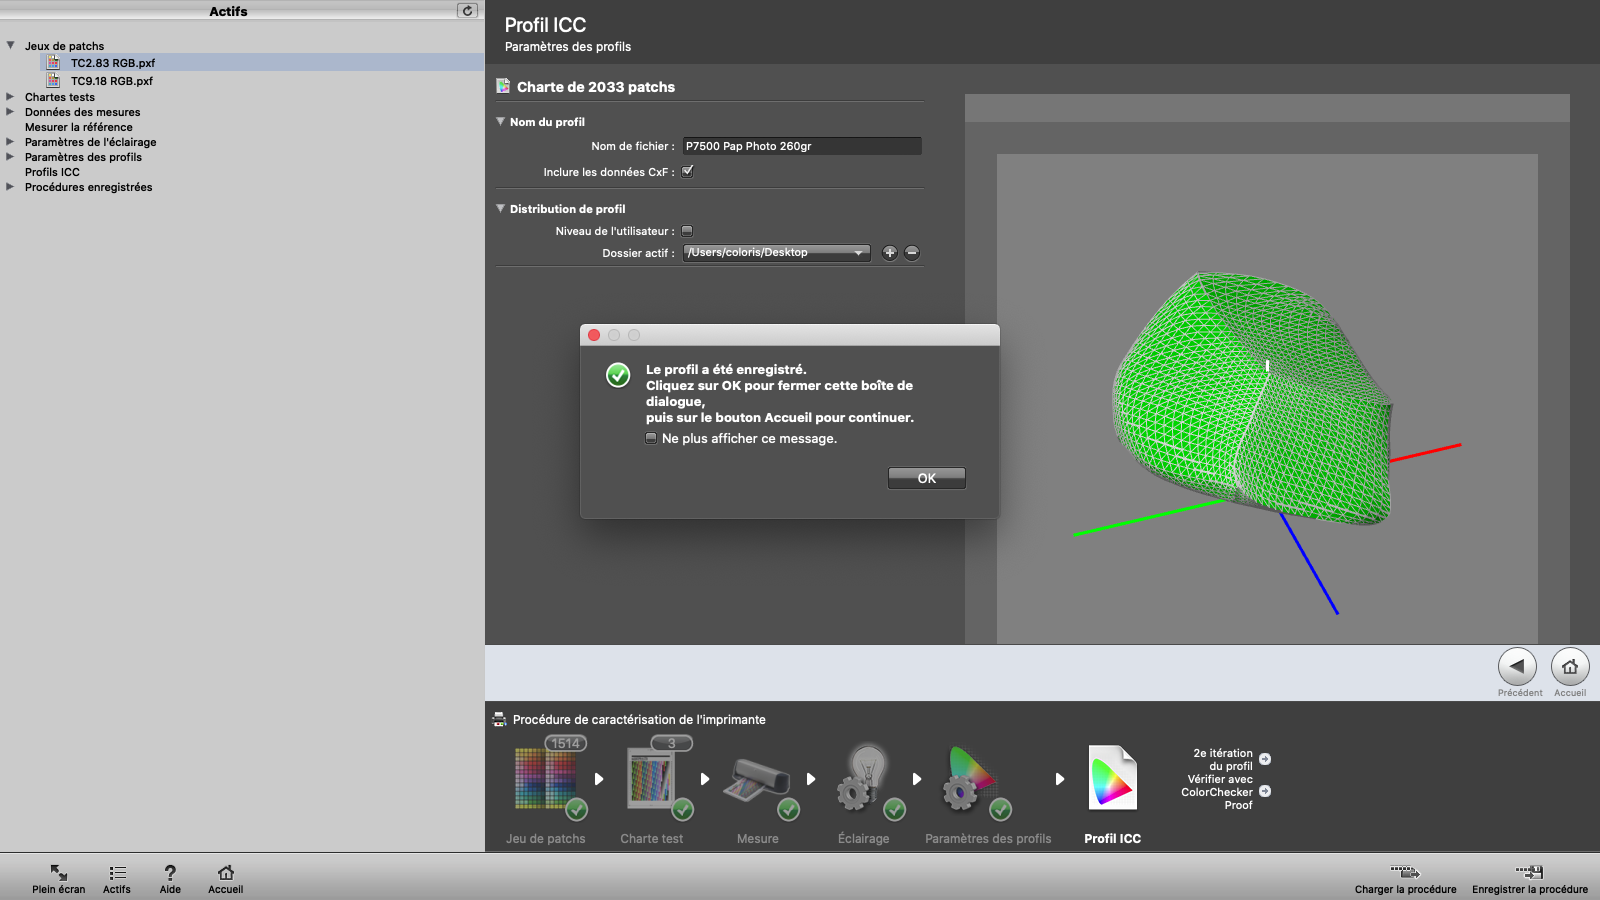
11) Calculation of the profile
The profile creation progress status appears on the "ICC profile" icon.
12) End of the procedure
When the calculation is finished, the profile is saved on the computer, a representation of the gamut appears as well as an alert message to signal the end of the operation.