Installation and maintenance
This chapter deals with the installation of Coraye on your Mac or your PC, but also with the installation of the drivers for your spectrophotometers and the plugins. An overview of Coraye's graphical interface is also presented to you to facilitate the handling of the software.
- Getting started with Coraye
- Installation on Mac OS
- Installation on Windows
- Installing the Windows driver for your spectrophotometer
- Interface presentation
- Installation and management of plugins
- Remote assistance
- Mac OS X remote support
- Windows remote assistance
- Spectrophotometers
Getting started with Coraye
After creating your account and activating your license, we will discuss the chapters on installing Coraye, installing plugins and presenting the software interface to you.
Installation on Mac OS
64 bits compatible, minimum version Mac OS 10.10 (Yosemite).
For more information, see chapter: Installation in Mac OS
Windows installation
x64 compatible (x32 version on request), minimum version Windows 7.
For more information, see the chapter: Installation on Windows
Installing the Windows driver for your spectrophotometer
The drivers for Windows are supplied with the plugings. Regarding the Mac OS version, there is no driver to install.
For more information, see chapter: Installing the Windows driver for your spectrophotometer
Installation and management of plugins
Don't forget to install the plug-in corresponding to your spectrophotometer. The management of plugins is done directly via the Coraye software.
To find out more, see the chapter: Installing and managing plugins
Interface presentation
For more information, see chapter: Interface presentation
Installation on Mac OS
In this chapter we will discuss the installation of Coraye on Mac OS
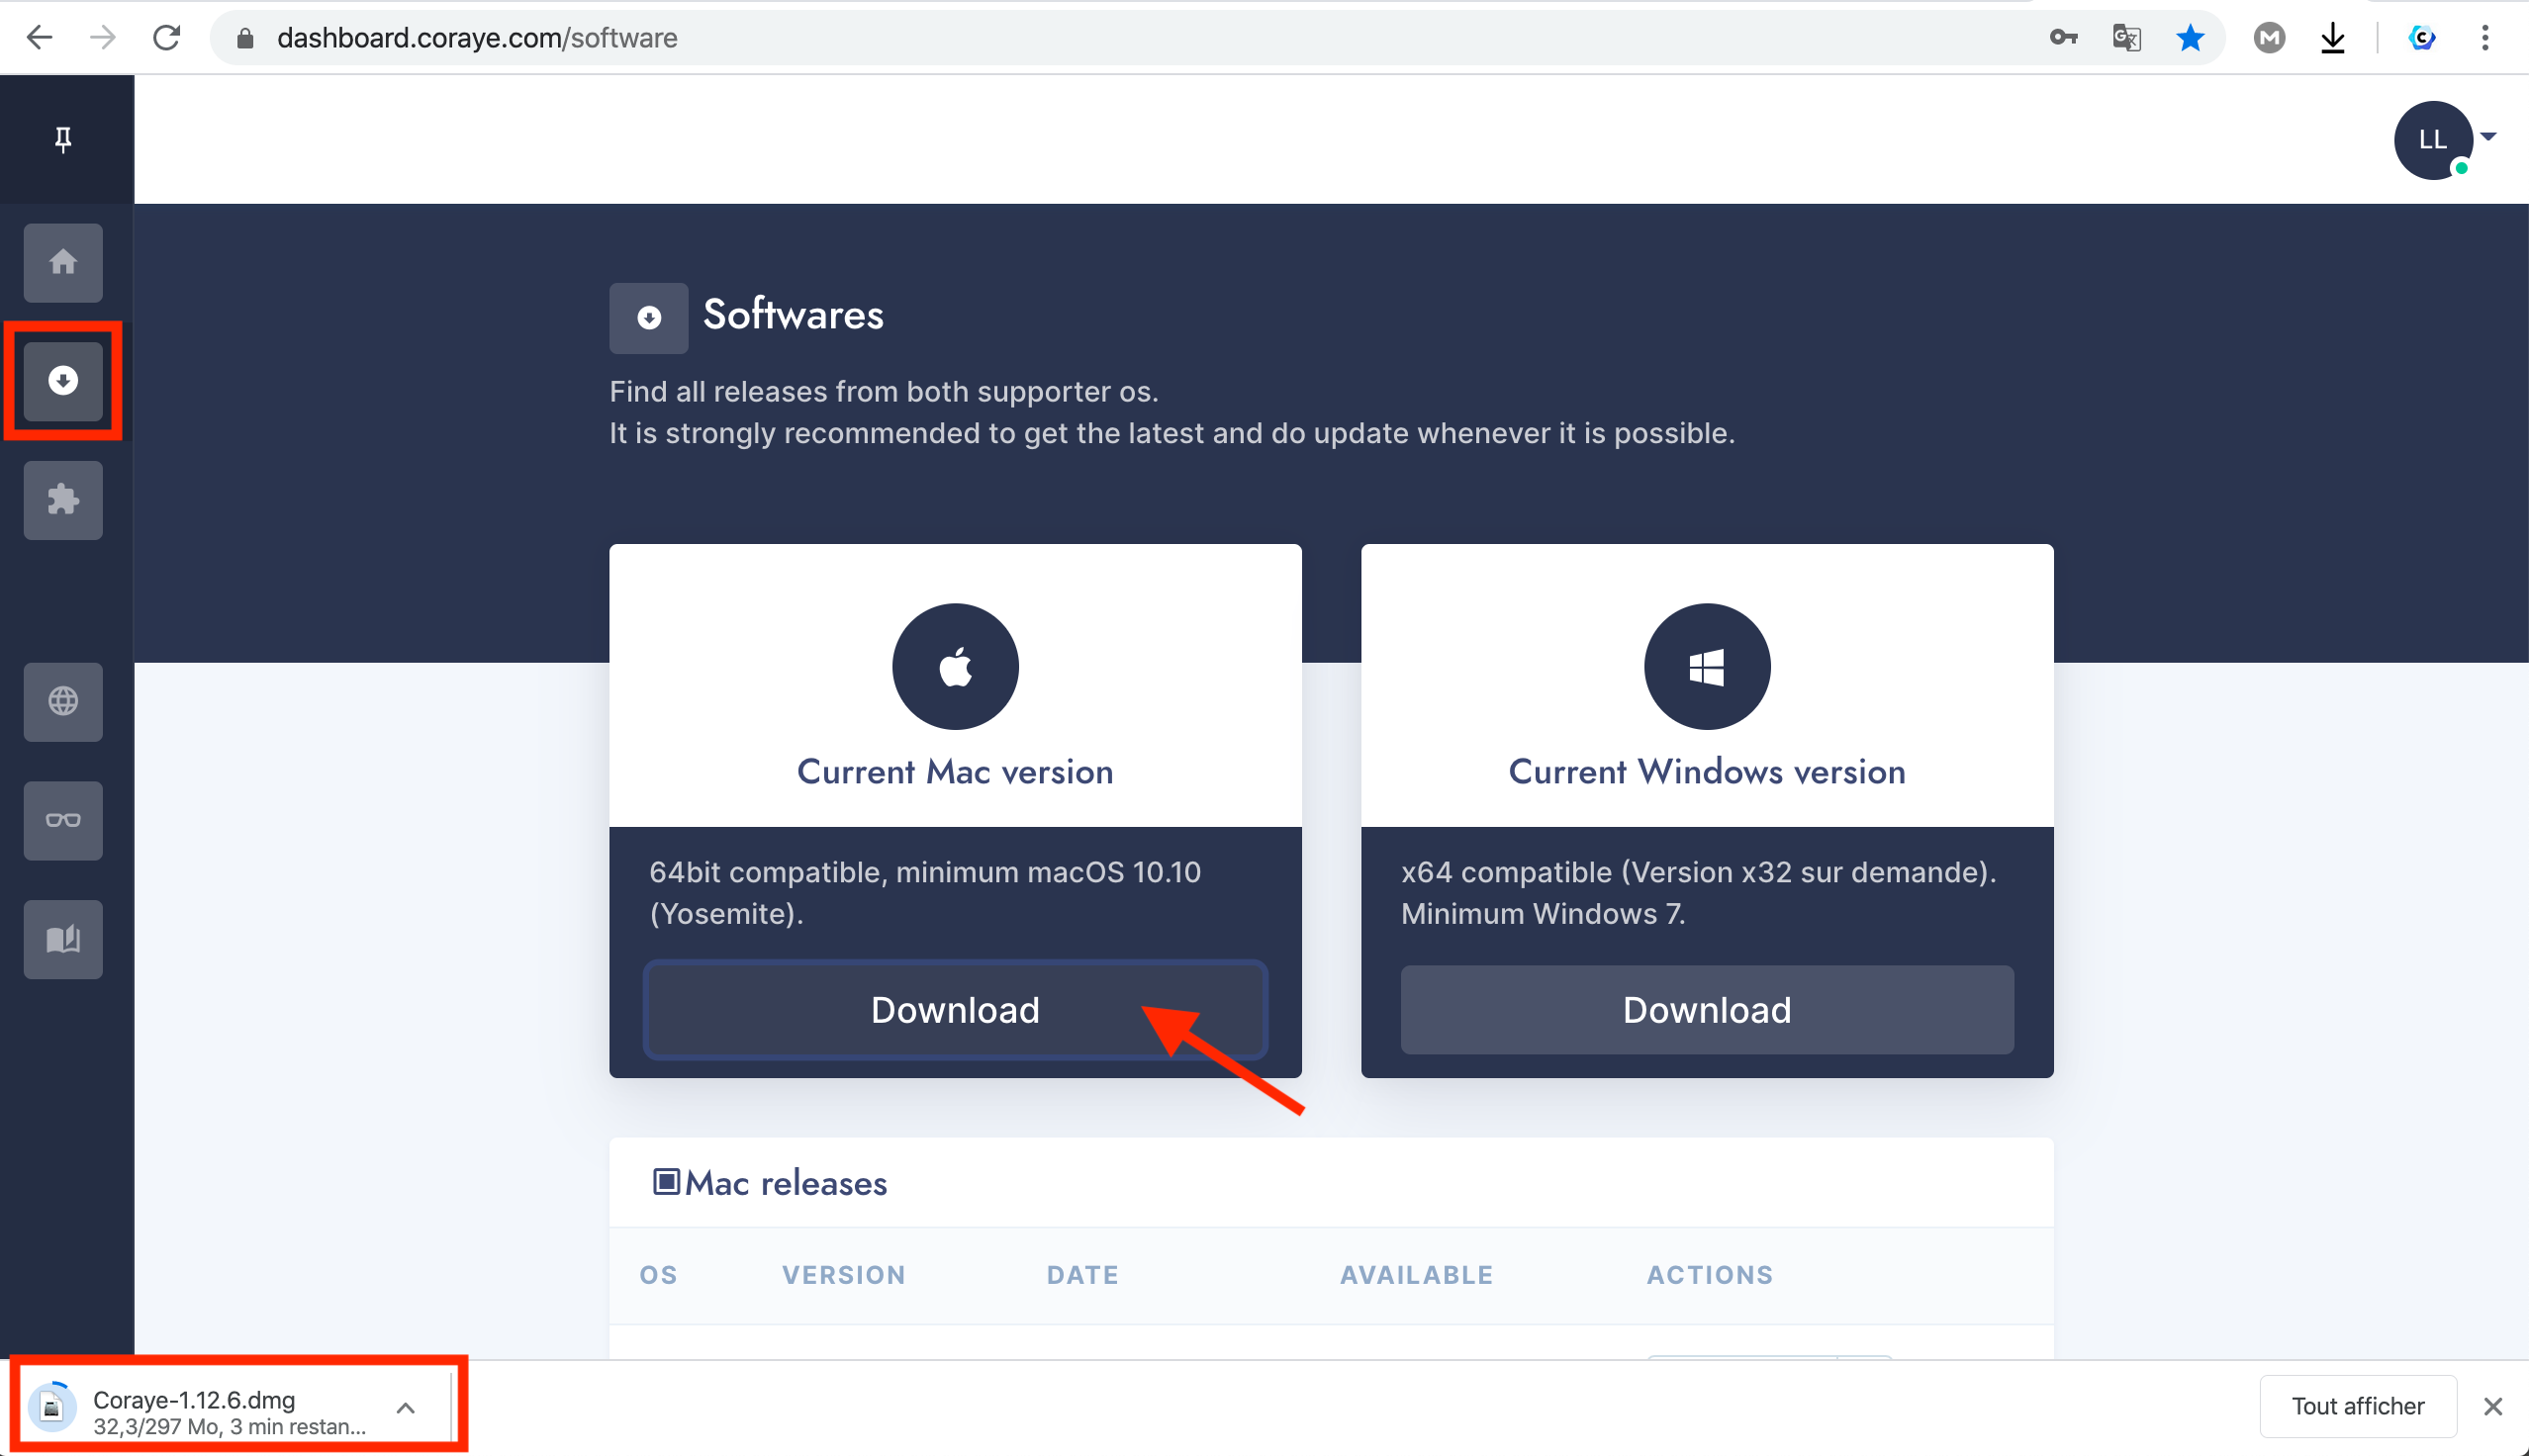
Download the CORAYE software from the Dashboard
For more information, see the chapter: Support Download

Click on the "Download" button to download the CORAYE software.
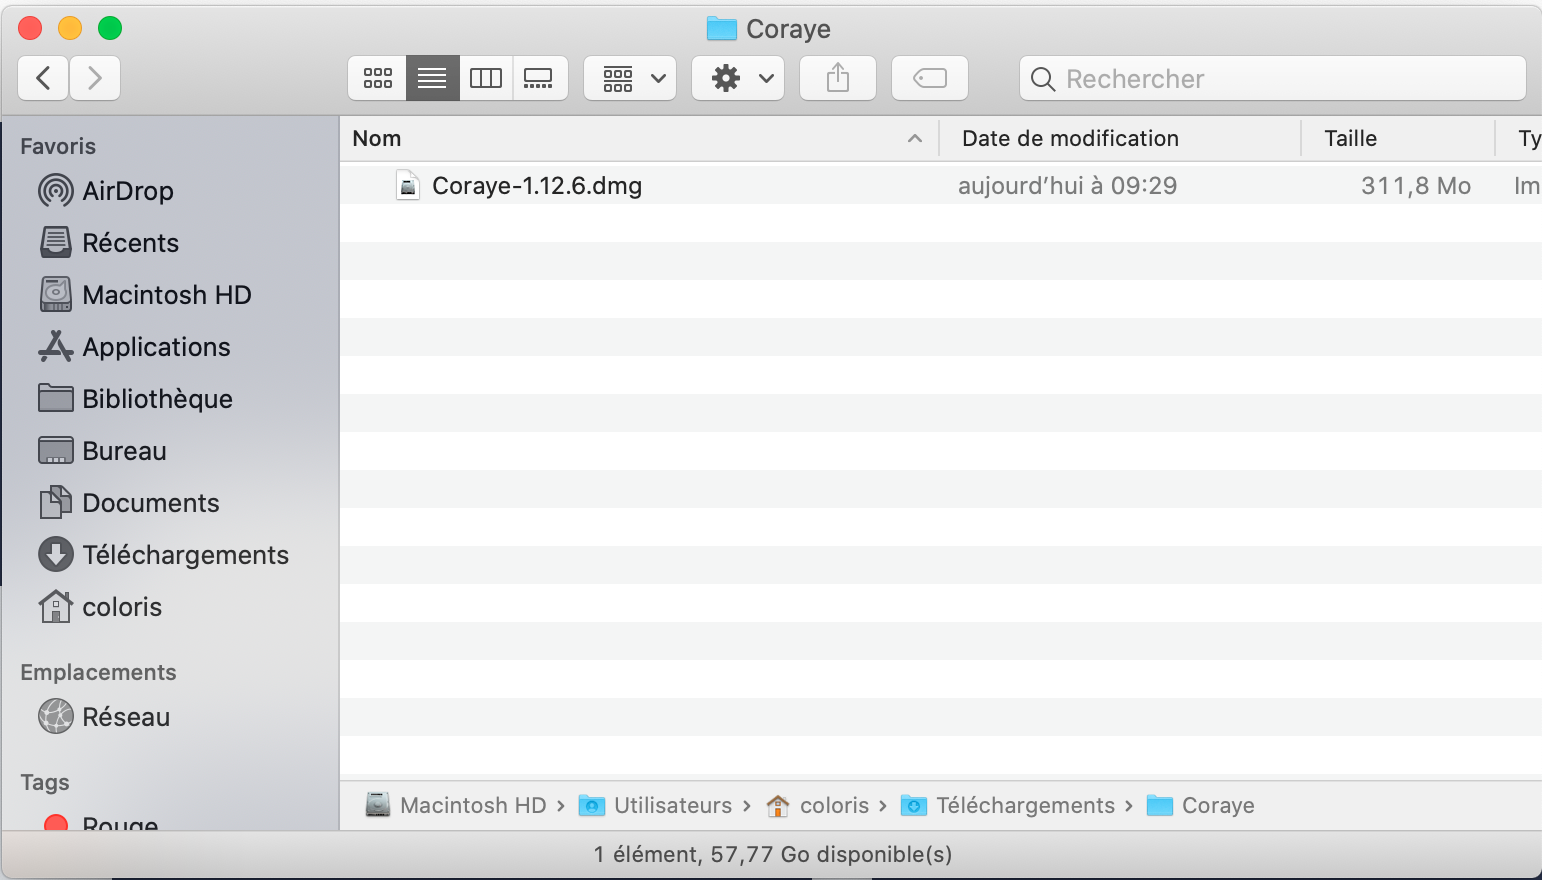
Double click on the CORAYE Disk Image file to start the installation.
Installation
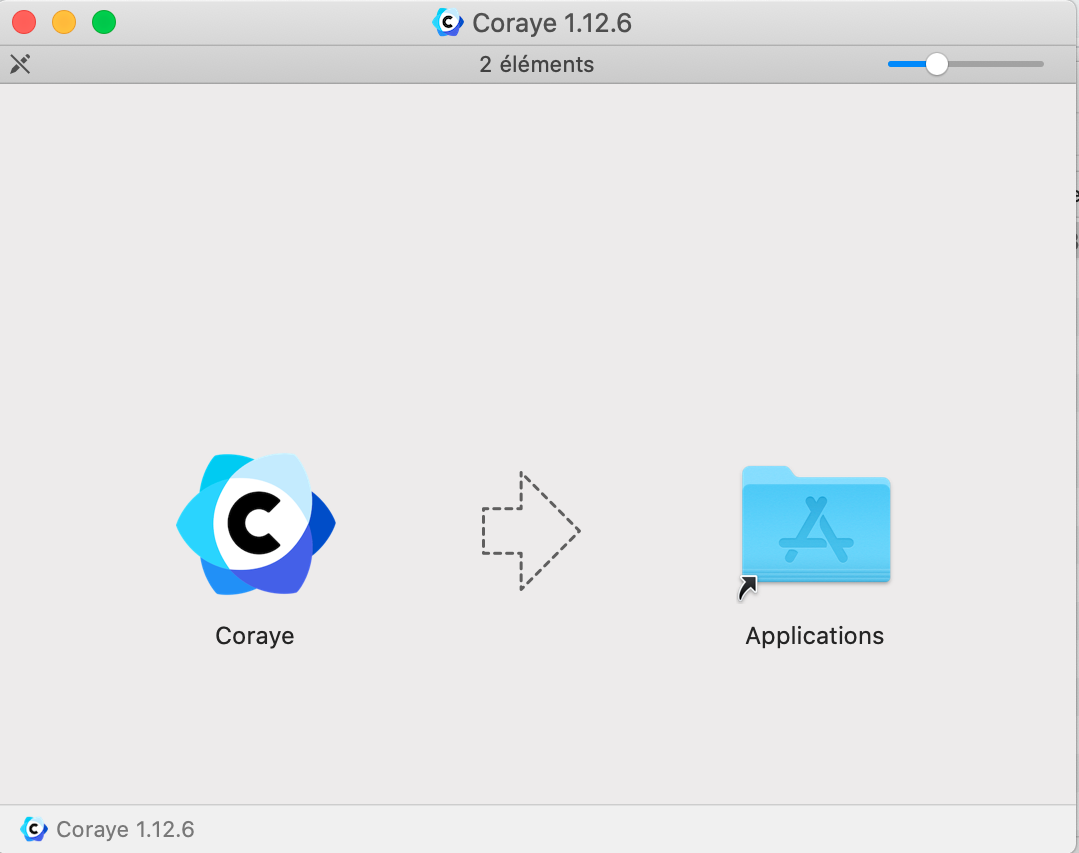
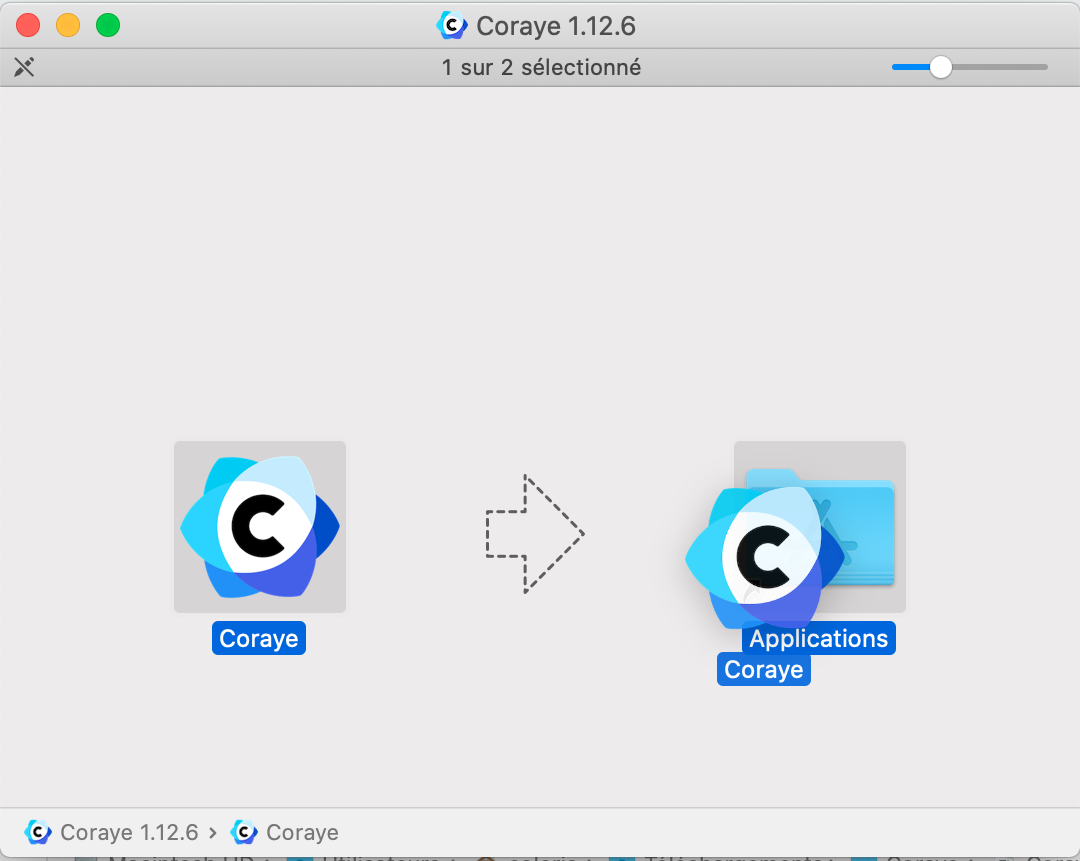
Drag the CORAYE icon into the " Applications " folder
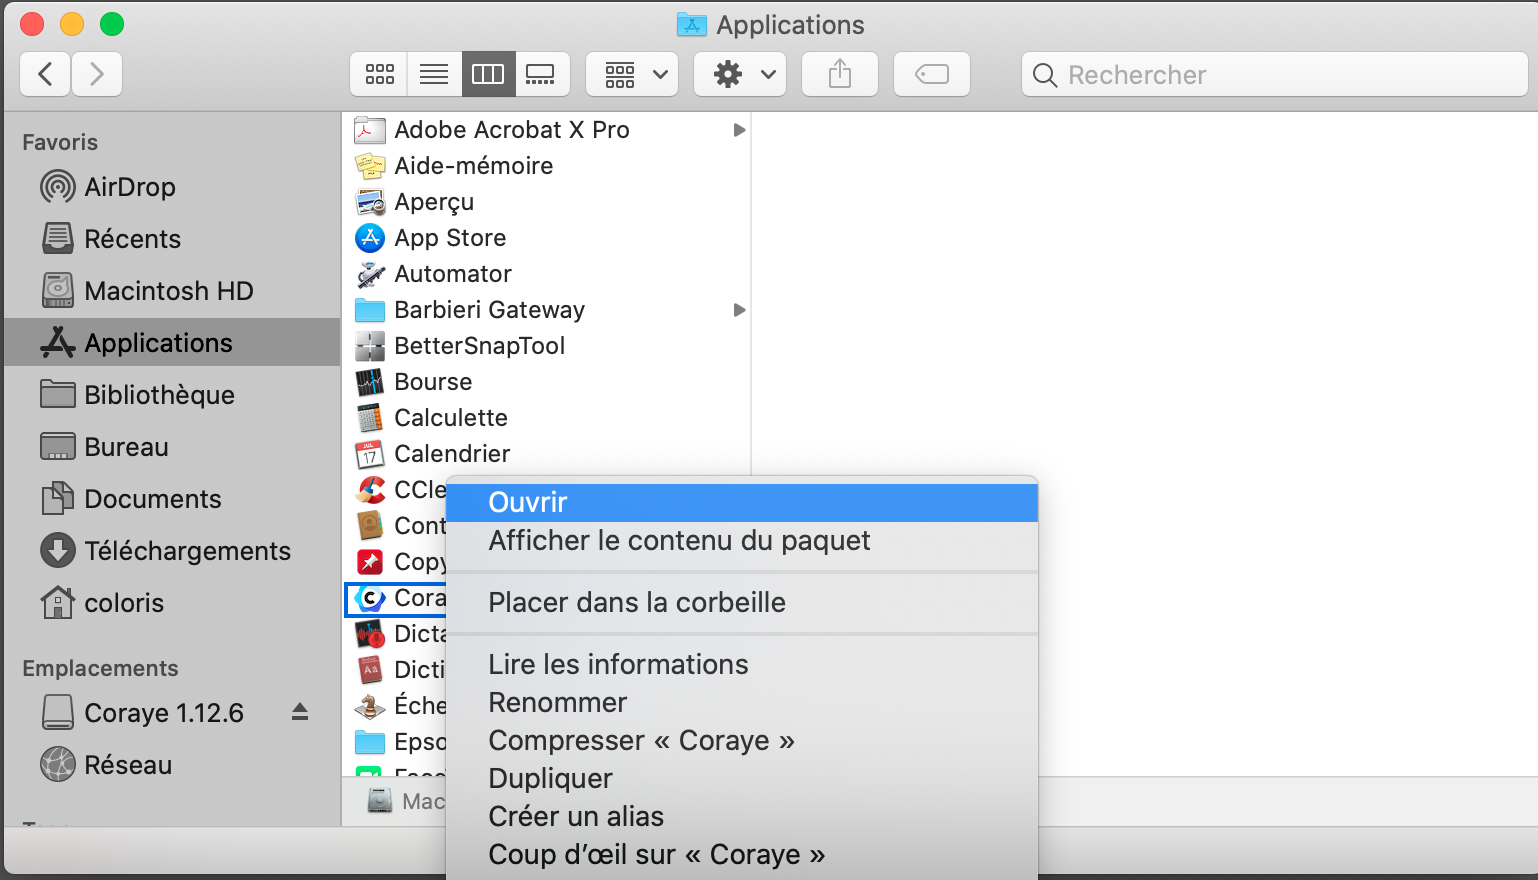
In the " Applications " folder, right click on " Coraye " then select " Open "
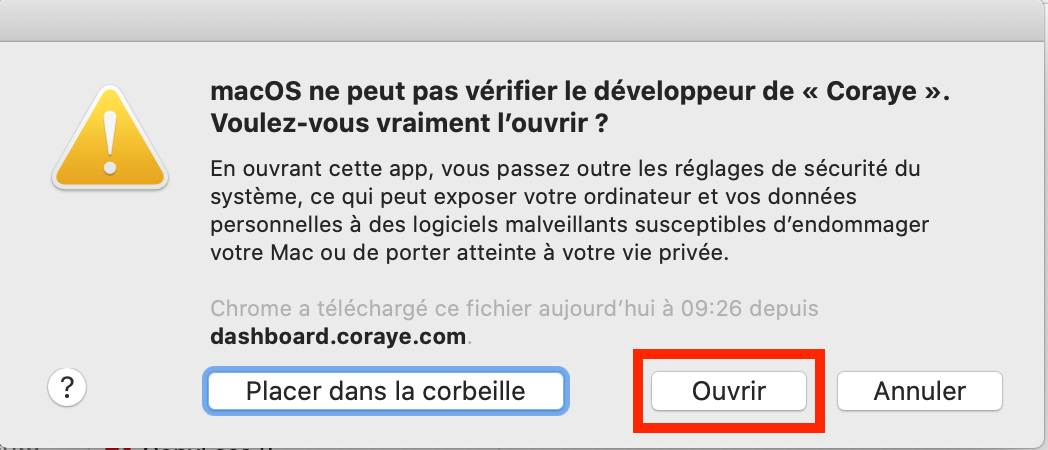
A warning window appears, ignore it and click " Open "
Start the CORAYE software
The CORAYE software starts and you must connect with the Email and the password associated with your CORAYE account (which is the same as the one used to access your personal space on the dashboard).
Important note for the installation of Coraye on an Apple Silicon Mac equipped with ARM - M1 processor
The Rosetta software must be installed on Macs equipped with an M1 chip
To do this, launch the terminal then type the command to install Rosetta:
/usr/sbin/softwareupdate --install-rosetta --agree-to-licenseLicense activation
For more information, see the chapter: Activate a license
Installation on Windows
In this chapter we will discuss the installation of Coraye on Mac OS
Download the CORAYE software from the Dashboard
For more information, see the chapter: Support Download

Click on the "Download" button to download the CORAYE software.

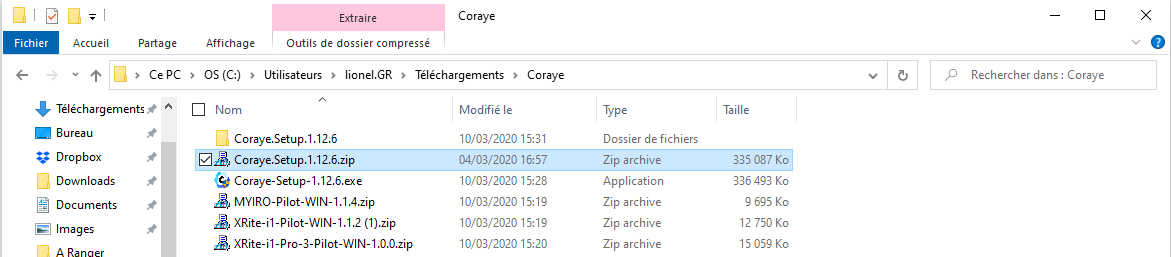
The "Coraye.Setup.XXXzip" file is downloaded

Unzip the file "Coraye.Setup.XXXzip"
Double click to launch the installation of Coraye

Start the CORAYE software
The CORAYE software starts and you must connect with the Email and the password associated with your CORAYE account (which is the same as the one used to access your personal space on the dashboard).
License activation
For more information, see the chapter: Activate a license
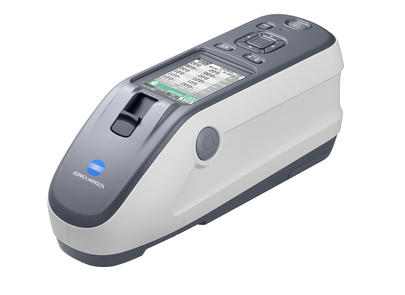
Installing the Windows driver for your spectrophotometer
If Coraye does not recognize your spectrophotometer when it is connected, it is likely that your spectrophotometer driver is not installed or installed incorrectly.
Download the driver
The drivers are included in the Coraye spectrophotometers plugins, which can be downloaded from the dashboard: https://dashboard.coraye.com/plugins
In our example, we will install the one for the Konica Minolta MYIRO.
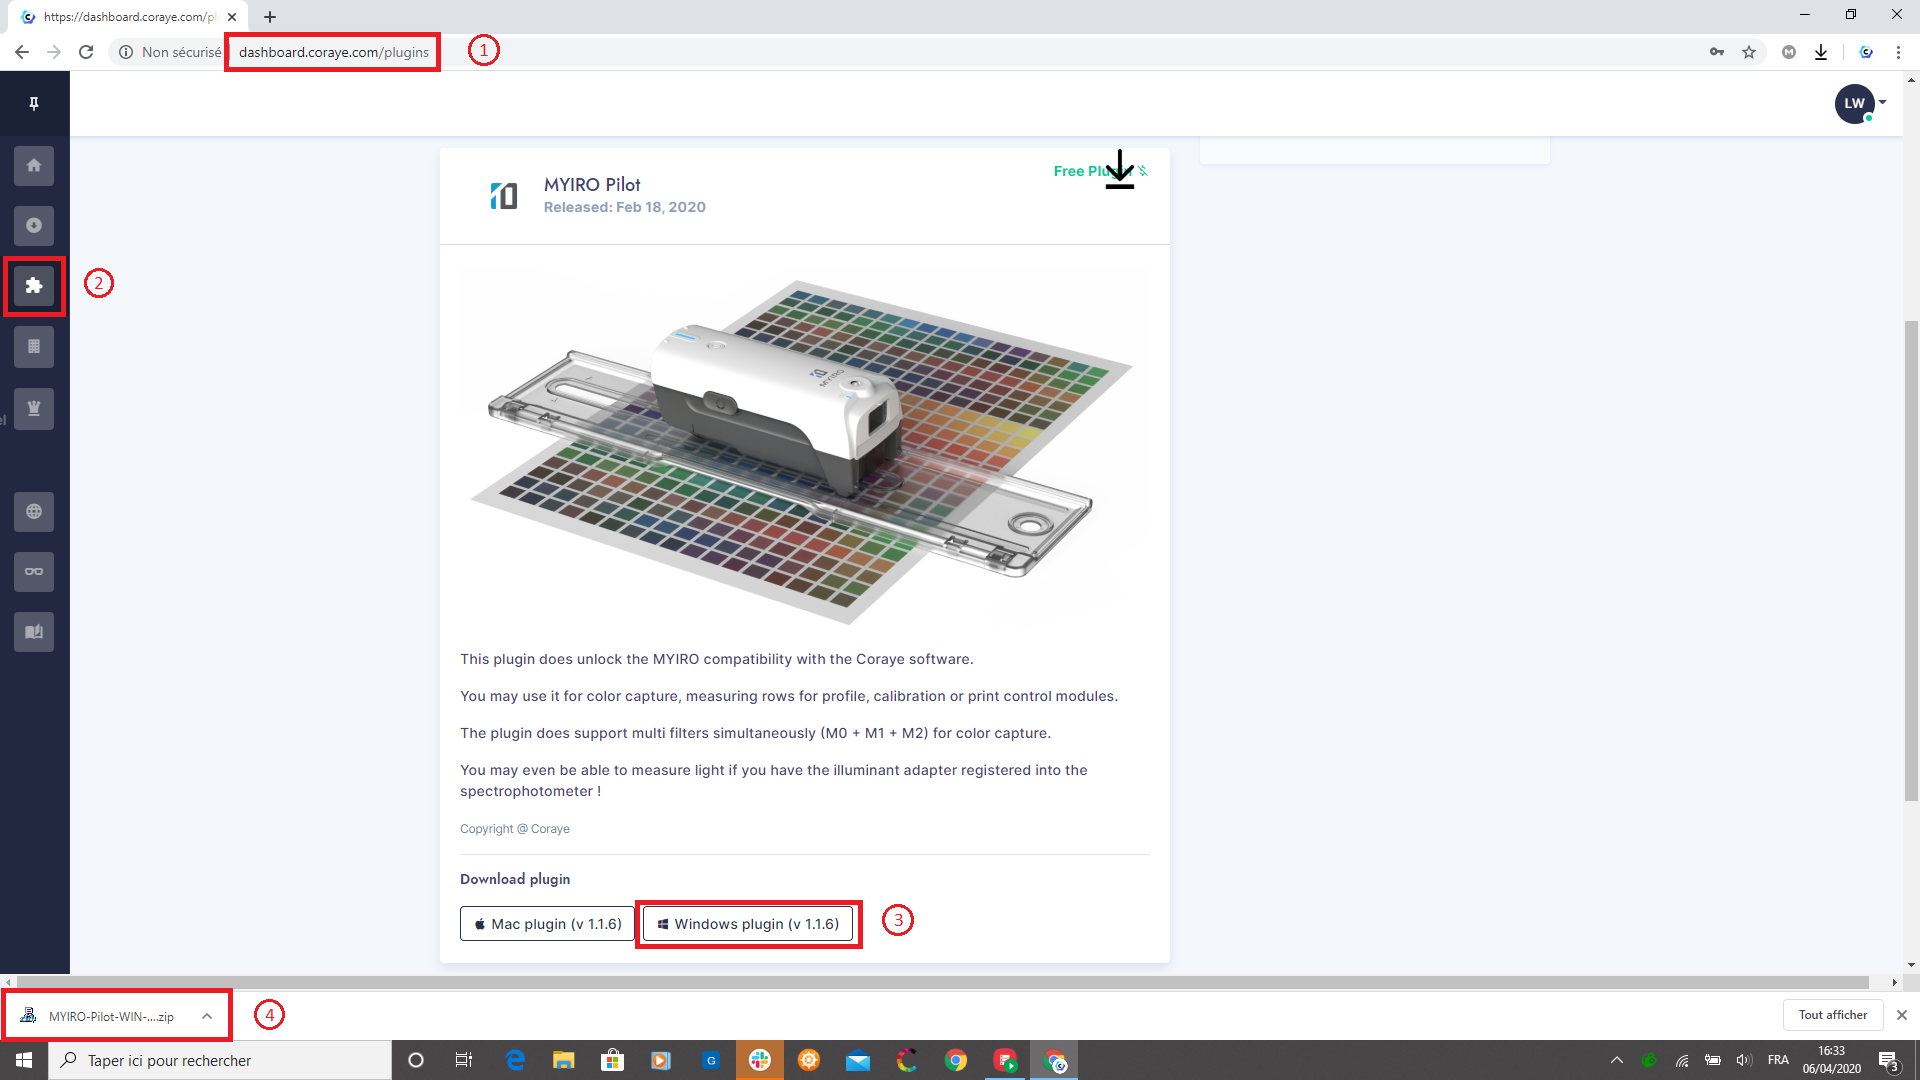
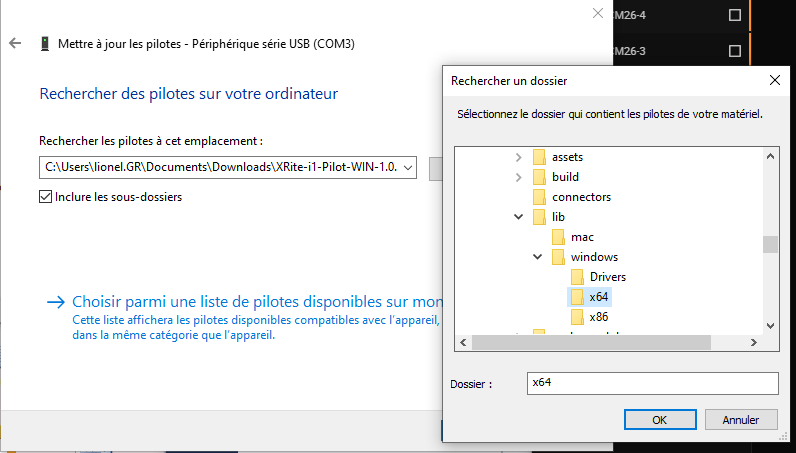
Unzip the file
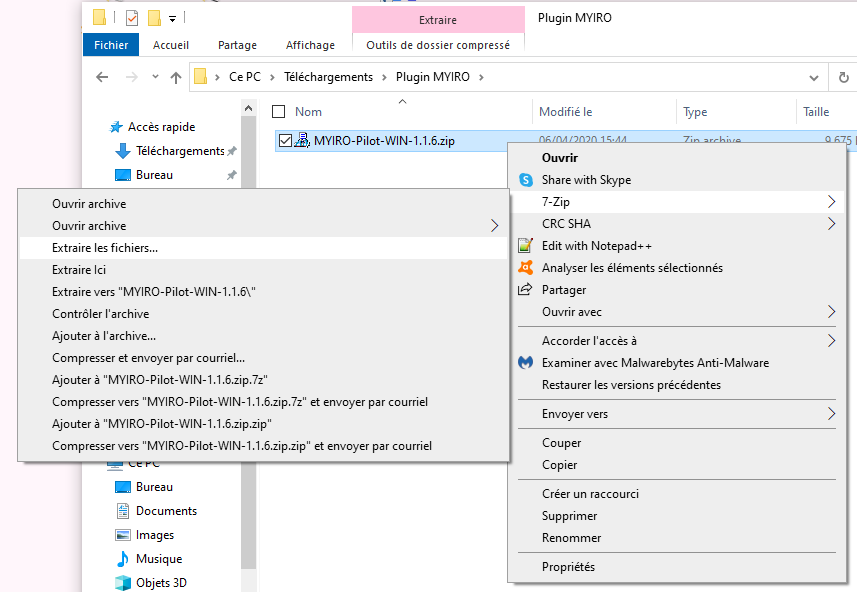
Once the file is decompressed, the driver for Windows 10 64 bits is available in the folder: C: \ .... \ Plugin MYIRO \ MYIRO-Pilot-WIN-1.1.6 \ lib \ windows \ x64
Driver installation
When you connect the spectrophotometer for the first time, it will appear as " USB Serial Device " in Windows Device Manager.
This means that the driver has never been installed.
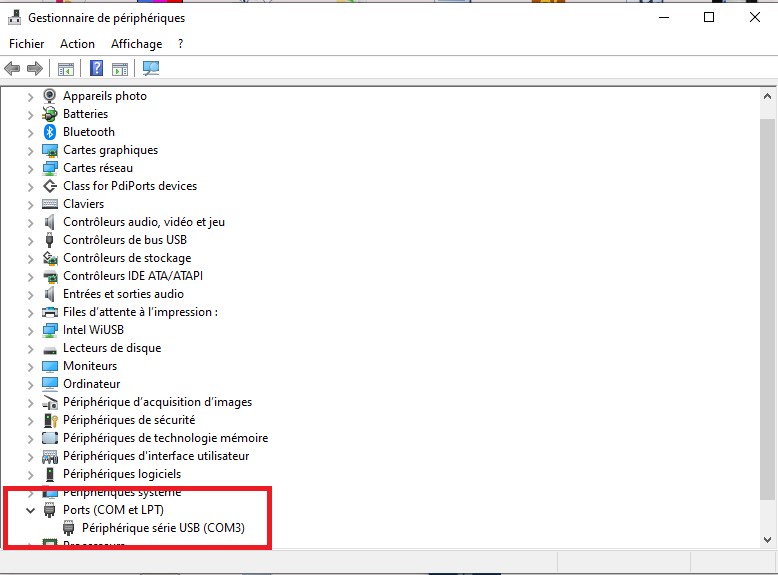
To install the driver, right click on " USB serial device " then select " Update driver "

Select " Browse my computer ... " to indicate the path of the folder in which the driver is: C: \ .... \ Plugin MYIRO \ MYIRO-Pilot-WIN-1.1.6 \ lib \ windows \ x64
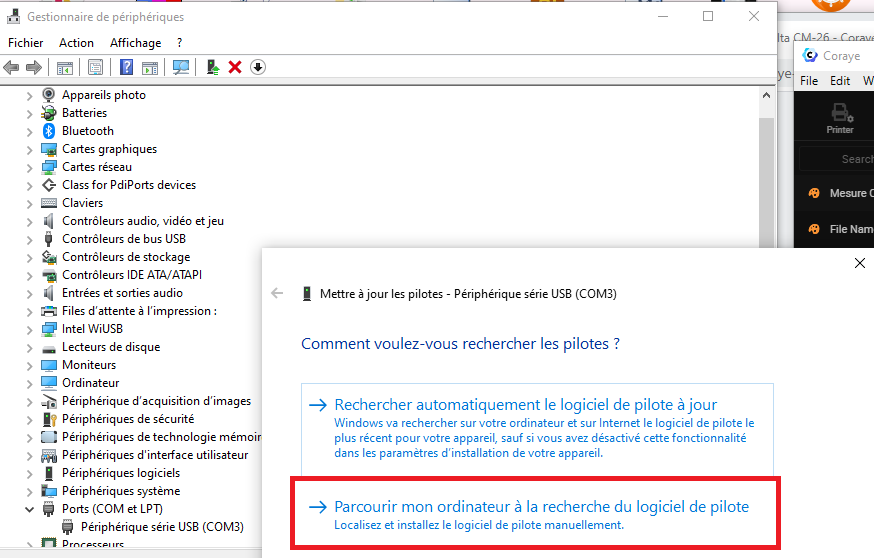
When you have indicated the path, click on " Next "
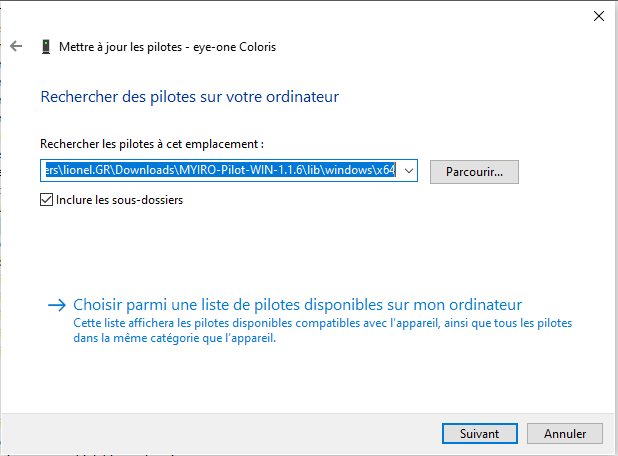
The driver will install, and " USB Serial Device " will become " Measuring Instruments ". This means that the driver is correctly installed. Then click on the " Close " button

Now your spectrophotometer should be recognized by Coraye.
Interface presentation
Before starting to use your Coraye software, we invite you to a presentation of its graphical interface.
Display areas
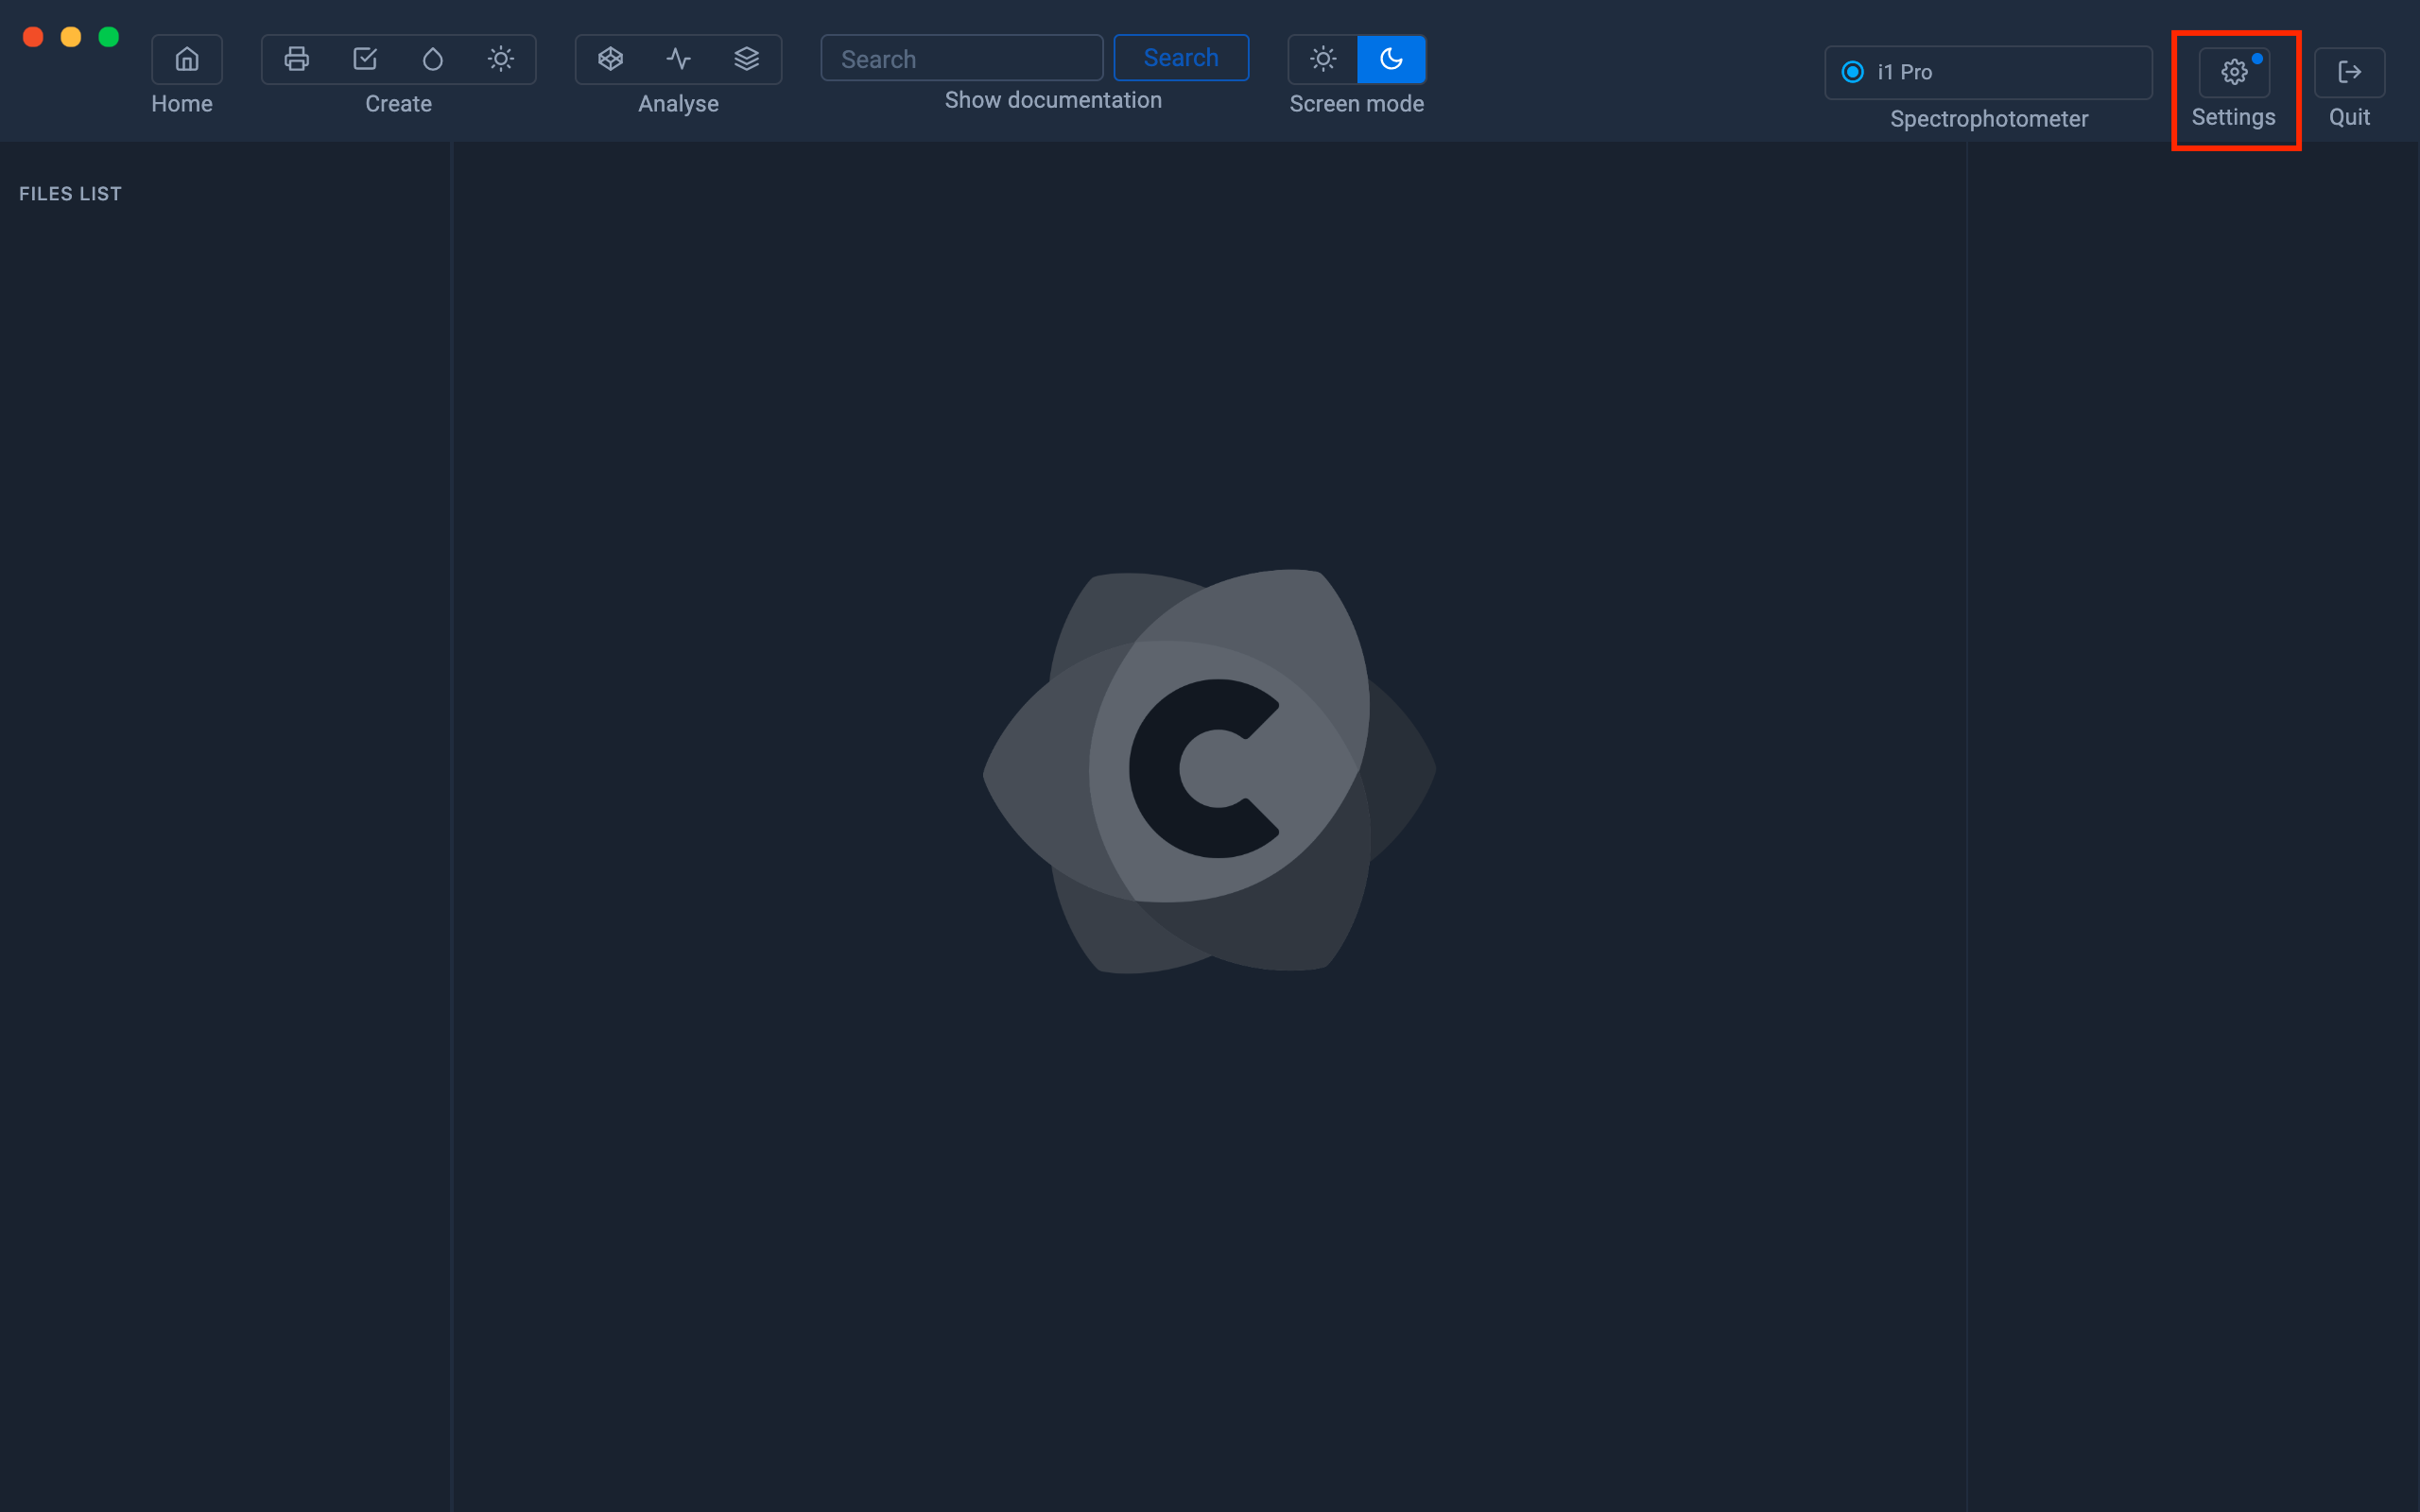
Coraye's graphical interface is structured in 6 areas, plus a menu bar.
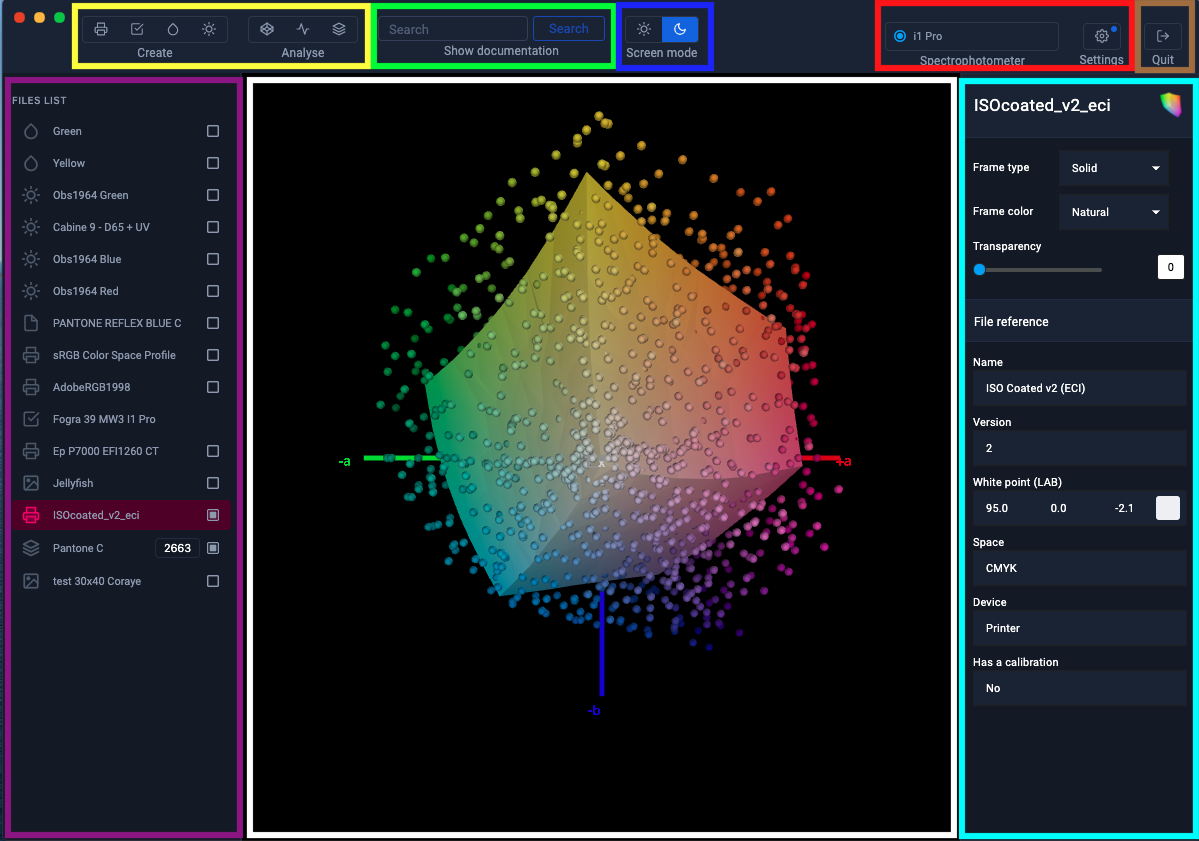
The Yellow zone (Creation and analysis tools)
This area is made up of seven pictograms associated with Coraye modules

From left to right we have:
Calibration & Characterization: 

This module is used to calibrate and characterize RGB or CMYK printing systems
For more information, see chapter: Calibration & Characterization
Print Control: 

- Control of CMYK Fogra & IDEAlliance proofs
- Creation of custom RGB & CMYK control ranges
- Control of printer stability
- Comparison between two test charts (for example IT8 or ECI)
- Tone control direct
For more information, see the chapter: Quality Control
Capture Color: 

For more information, see chapter: Capture a color
Capturing a light: 

For more information, see the chapter: Controlling an illuminant
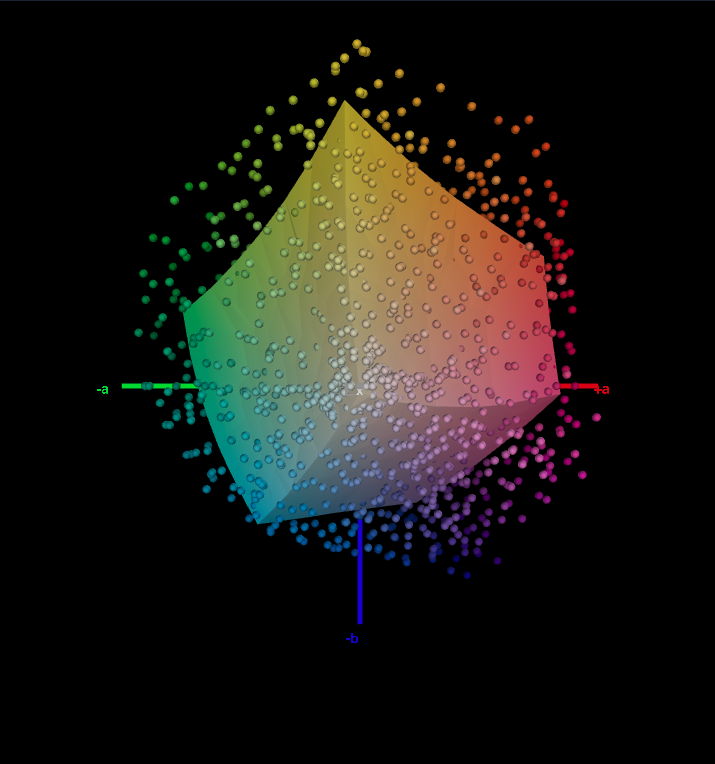
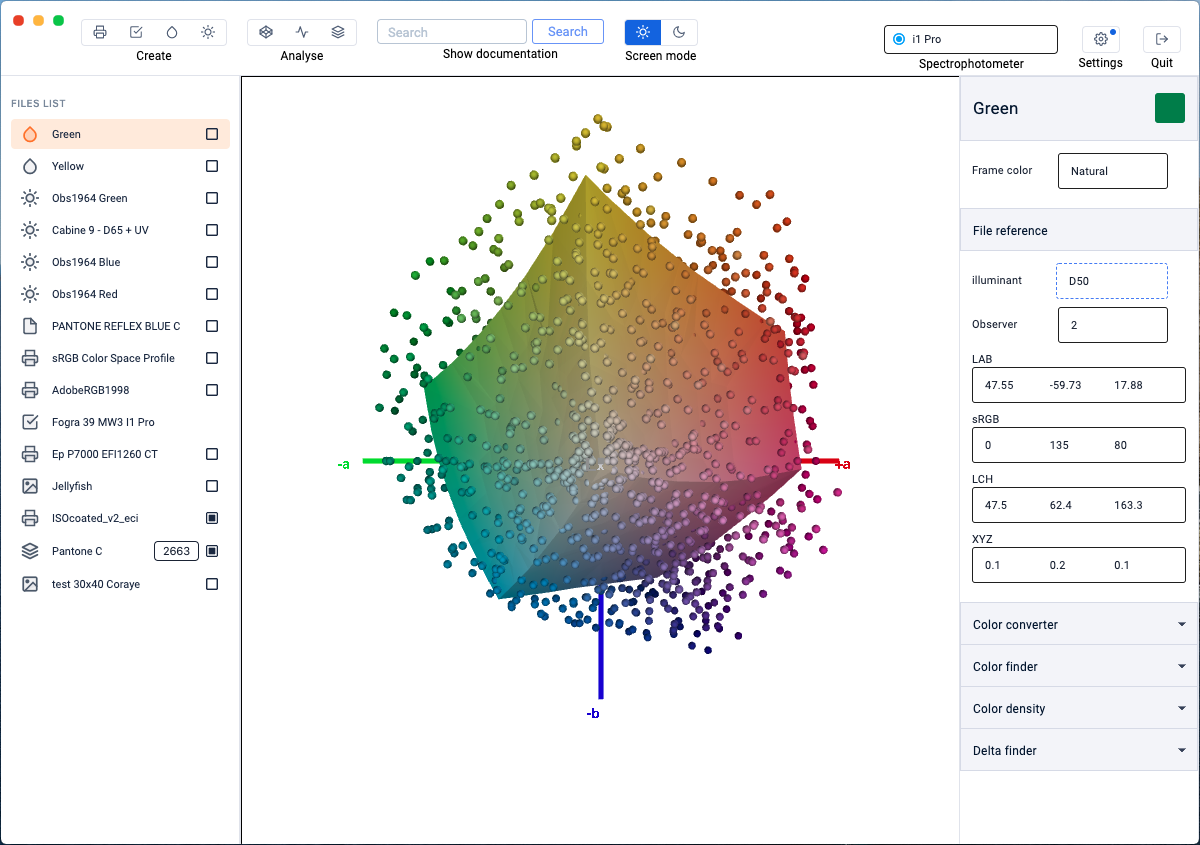
Gamut Viewer: 

- The measured samples
- The colors of a table (for example PANTONE, RAL, etc ...)
- The gamuts of the icc v2 profiles (does not support icc v4)
- The gamuts of the jpeg and Tiff images
- The training.
For more information, see the chapter: Gamut Viewer
Spectral Viewer: 

Another very fun module to display the reflectance curves of the measured colors and the spectral curves of the illuminants. This tool can be useful for:
- Analyzing the white of the papers - Analyzing the quality of light sources
- Analyzing the metamery between 2 measured samples and a light source.
- Training.
For more information, see chapter: Spectral Viewer
Color Table: 

The Color Table module is a major module of the Coraye solution. It allows to create, edit and convert color tables. These tables will then be useful for:
- Standardizing the color table exchanges between the software used by creatives (Adobe Suite or Coreldraw) and the software used by printers (RIP) for example.
- Carry out color research
- Create personalized test charts for printing control.
- Create personalized targets for characterization.
For more information, see chapter: Color tables
The Violet Zone (Files)
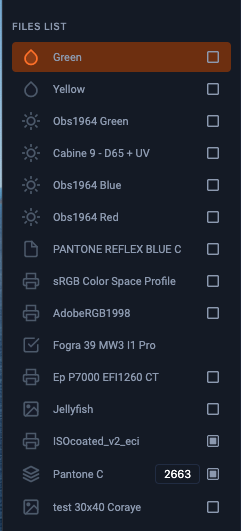
To use the files, just check the box, select or drag & drop the file depending on how it is used.
The Cyan area (Information relating to the selected file)
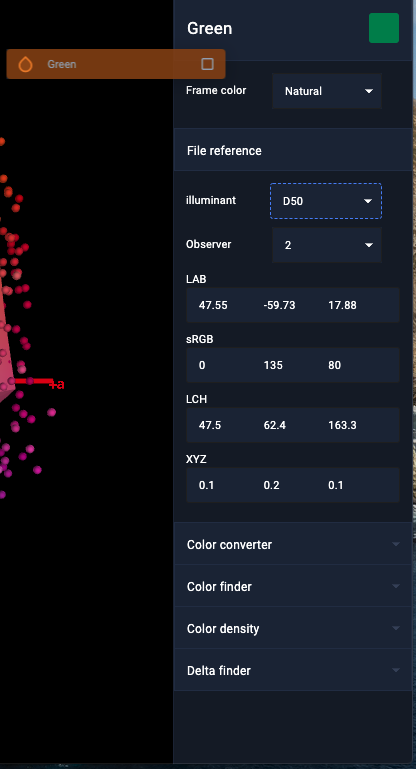
The White area (The central area for display)
This central zone displays the instructions during the procedures (Calibration, quality control, measurement, etc.), the color tables and the graphic representations of the Gamut Viewer and Spectral Viewer modules.
The Green Zone (Online help)
Thanks to the keywords written in this search bar, you can access our online tutorials directly from your Coraye software.

The Red zone (Device and plugins management)
To find out more, see the chapter: Installing and managing plugins
Added to this is :
The Blue area (Display mode)
Personalize your display by choosing between dark mode and light mode.

 Clear mode
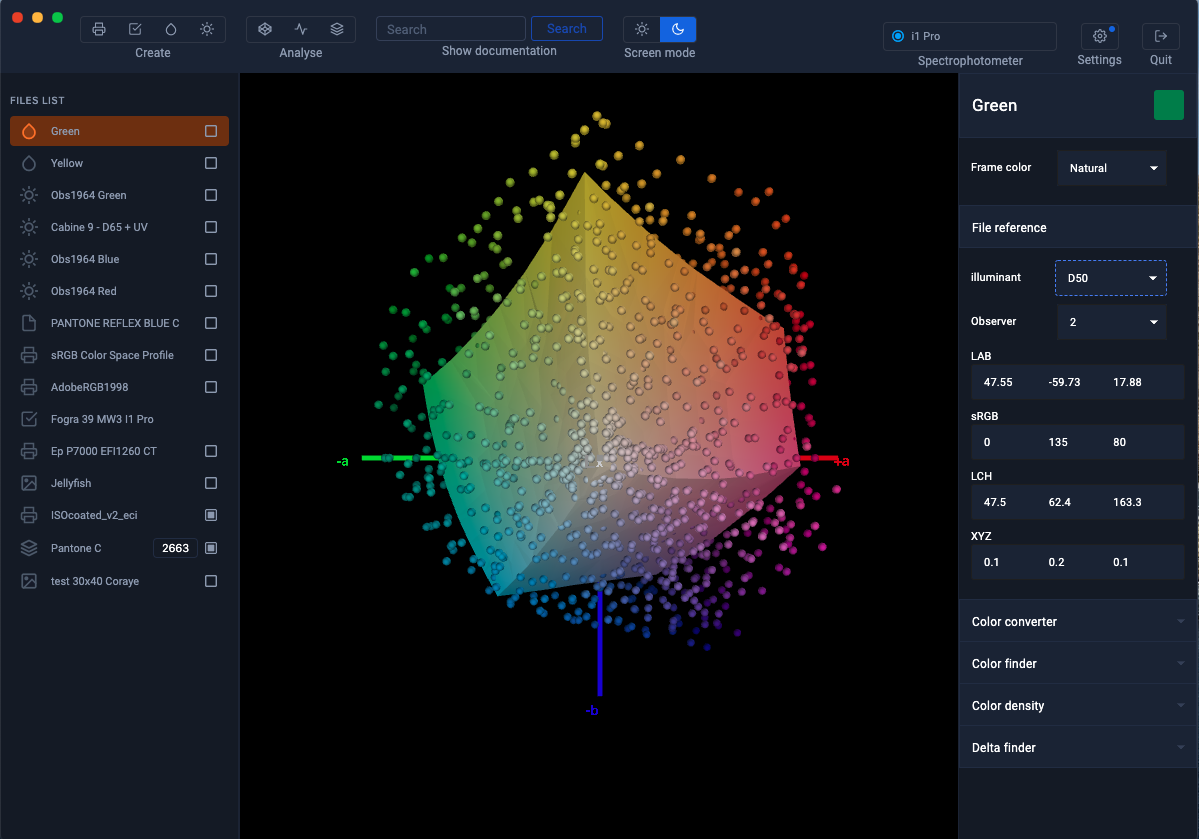 Dark mode
The Brown Zone (Logoff)
By clicking on the " Quit " button you quit the software by disconnecting, to find yourself on the connection page.
To restart the software, you must use the Email address and the password associated with your license and be connected to the Internet.


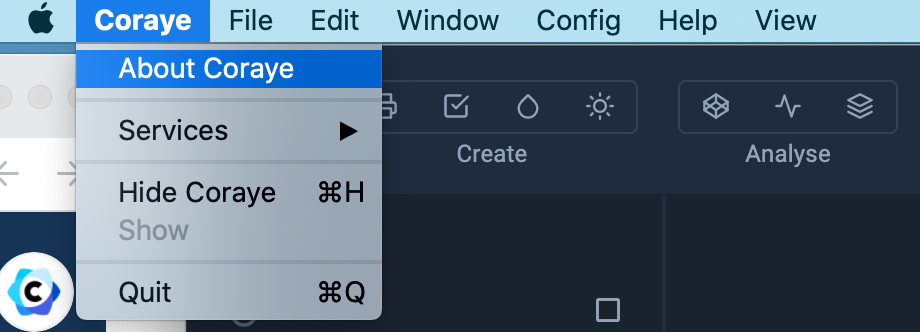
Menu bar
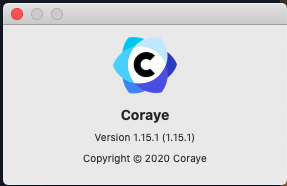
Coraye menu> About Coraye
Version display
File menu
The " Open file " option allows the import of files compatible with the Coraye software.
The " Quit " option closes the Coraye software without logging out.

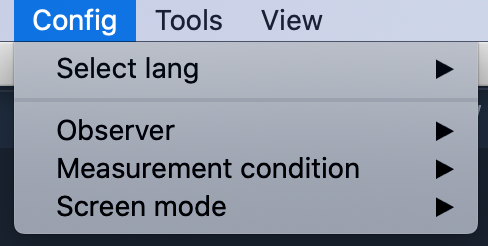
Config menu
Display of submenus
- Languages - Observer
- Illumination
- Screen mode
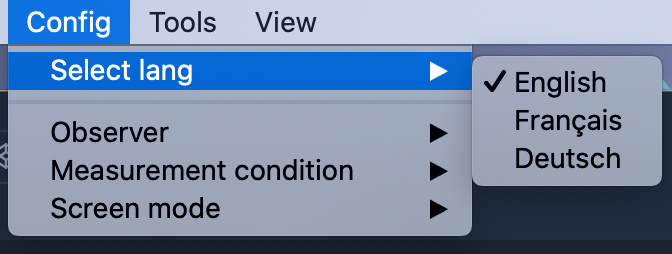
Config menu> Select lang
Coraye is available in 3 languages
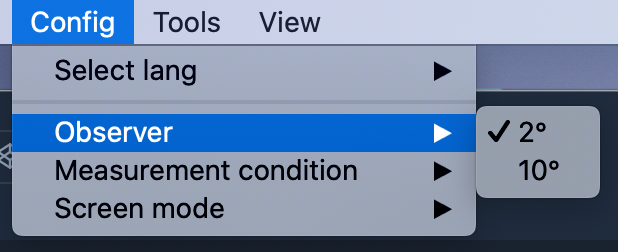
Config menu> Observe
The standard observer depends on another factor which is the angle of observation or the field of view. Two values were retained by the CIE (2 ° and 10 °). Observe 2 ° is used in the field of printing where the color is looked at closely (ex: magazine)
Observe 10 ° is used in the industrial field where the color is looked at from afar (ex: car)
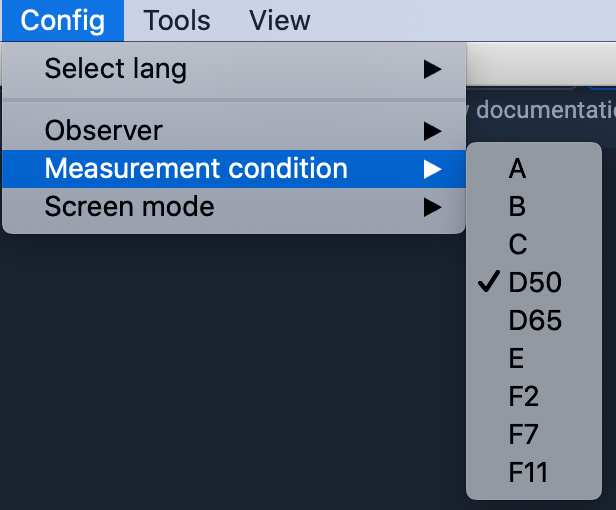
Config menu> Measurement condition
This option allows you to define the default value of the illuminant that will be used when calculating the icc profiles.
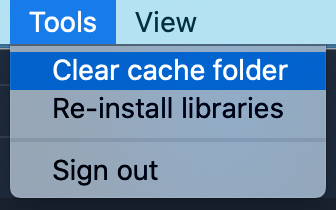
Help menu
Help menu> Clear cache folder
This option allows you to delete all the files located in the left column.
Installation and management of plugins
The Plugins are the interfaces between Coraye and the various compatible spectrophotometers.
If you connect your spectrophotometer and it is not recognized, remember to check if its plugin is installed.
The tutorial below will explain the procedure to you.
Plugins management on the CORAYE software interface
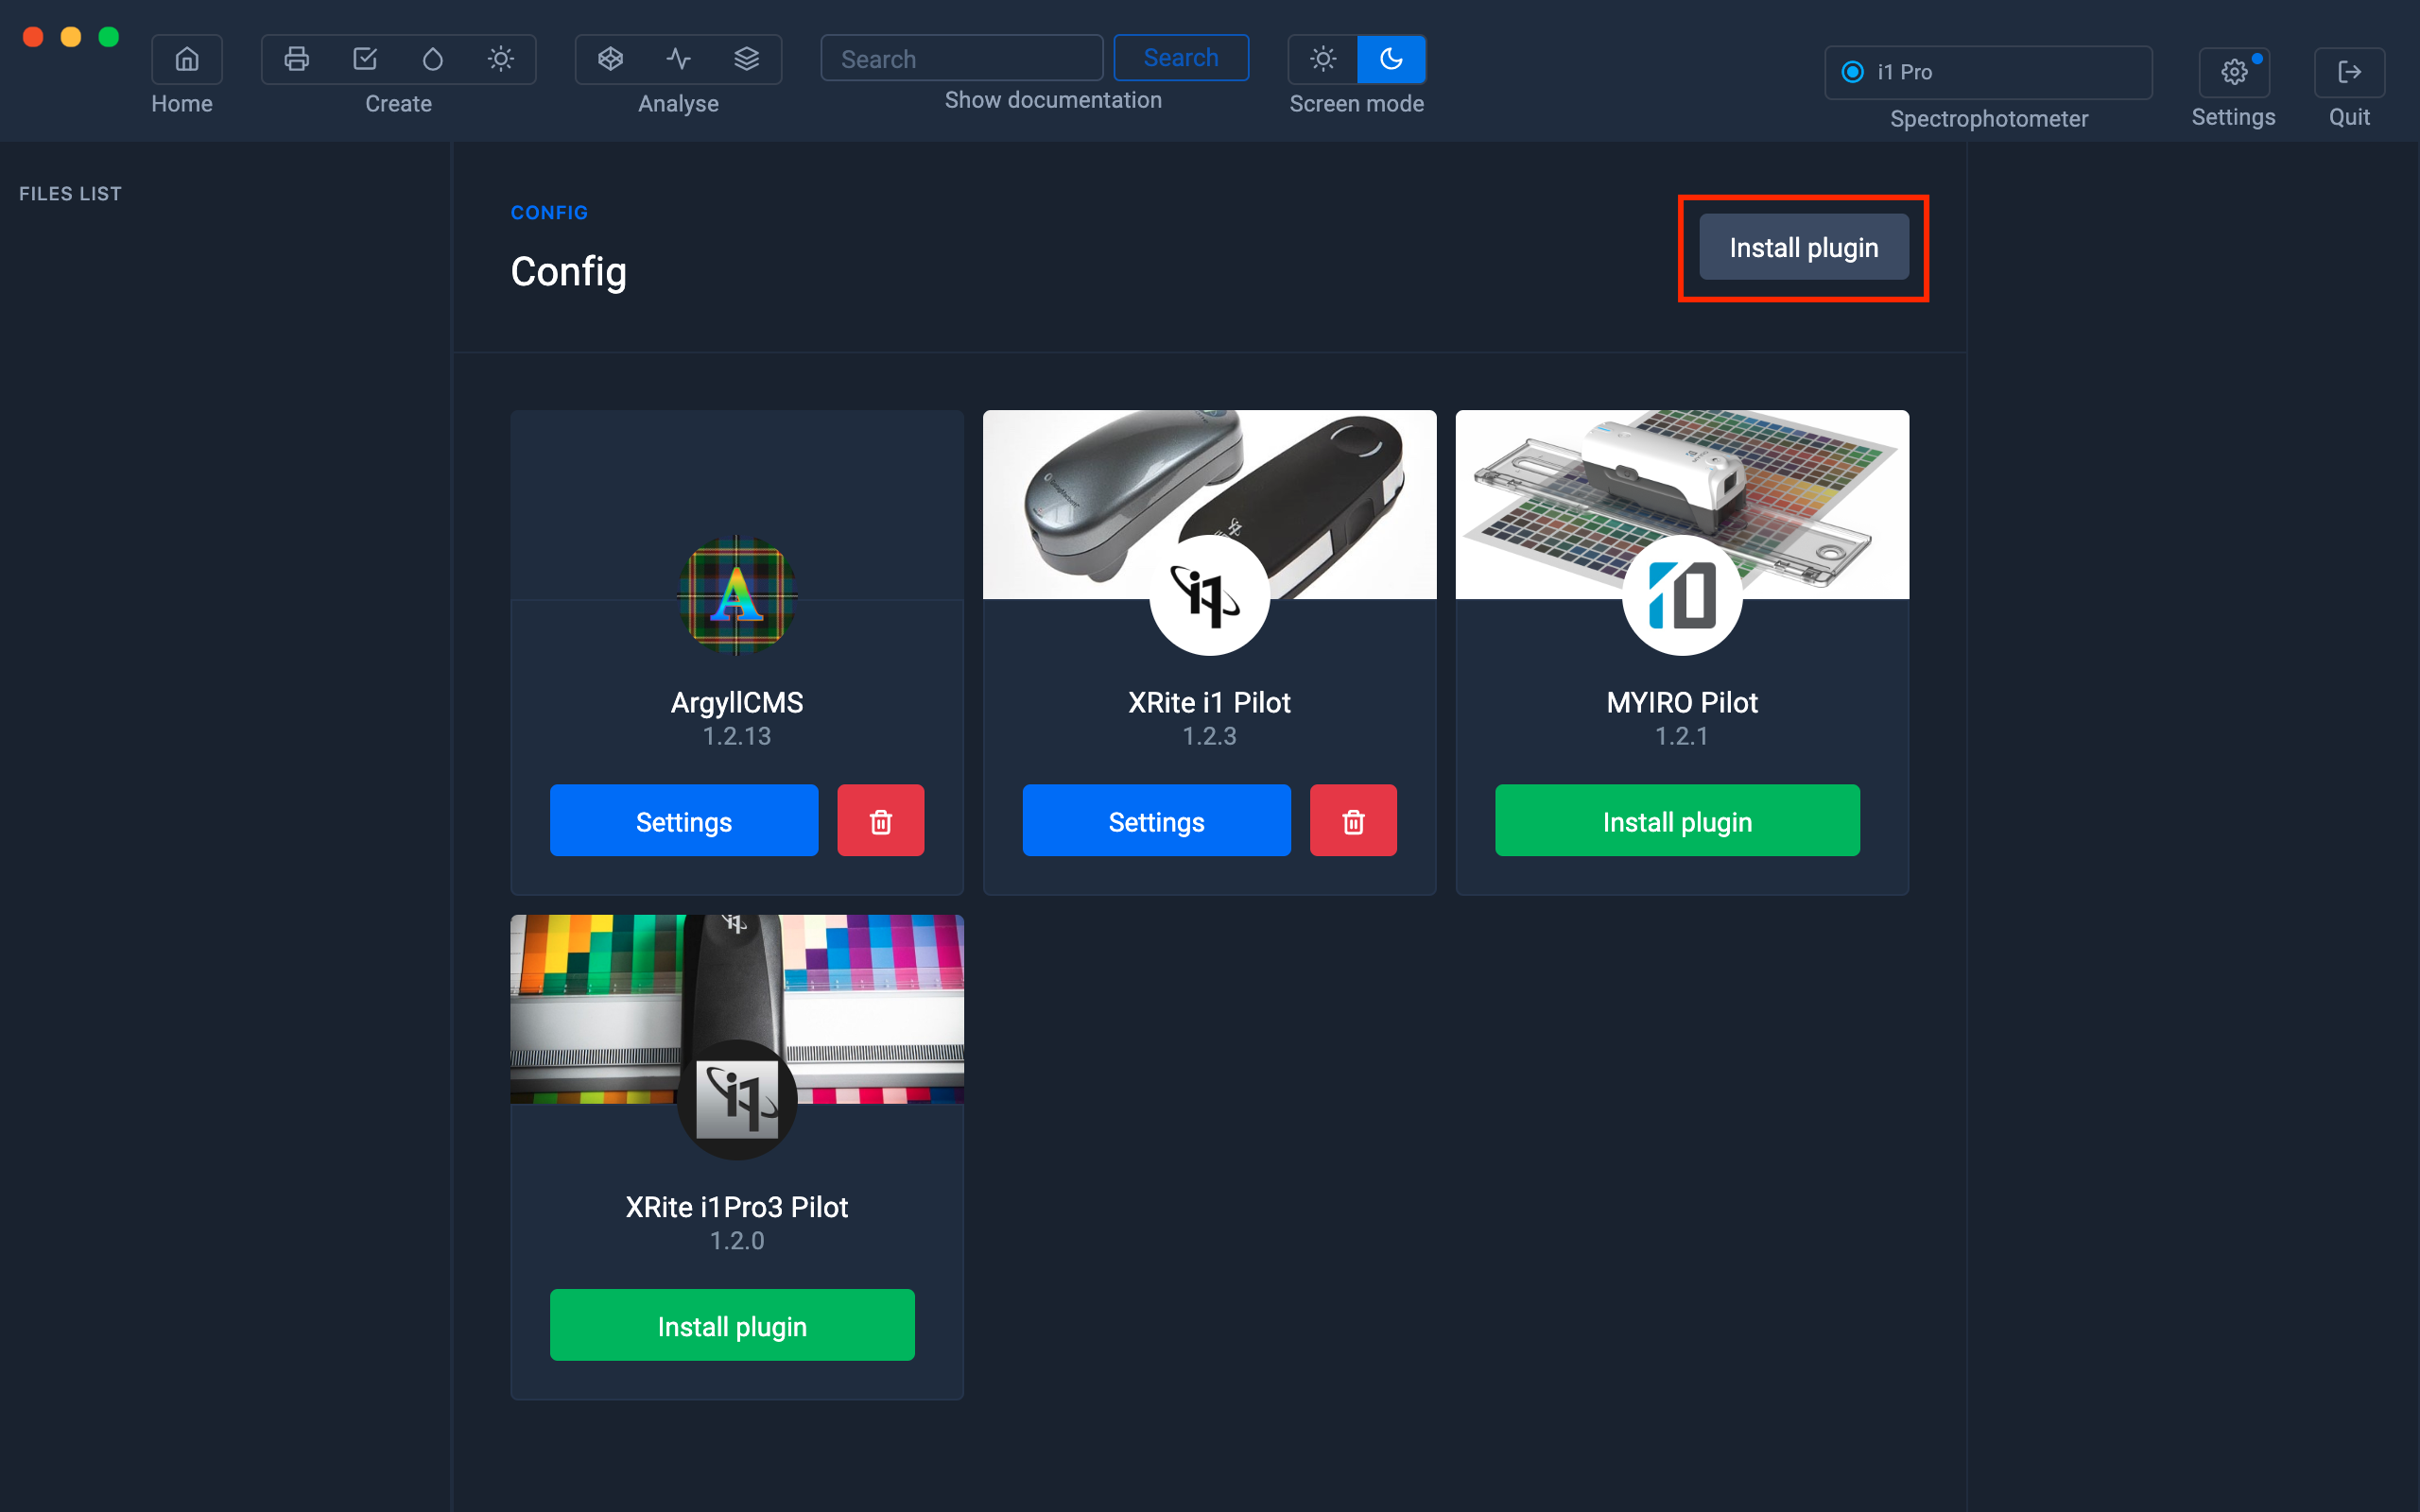
Access to plugins management is made by clicking on the "Config" button located at the top right of the software.
When the installation is new, it is necessary to customize CORAYE by adding plugins corresponding to the spectrophotometers and the color engine you are going to use.
So we are going to install it.
To install a plugin, we have two possibilities
- The first (and the simplest) is to click on the " Install plugin " button located under the icon corresponding to the instrument (for example MYIRO Pilot)
- The second is to download the plugin via the Dashboard and install it with the " Install Plugin " button

Downloading a Plugin via the Dashboard
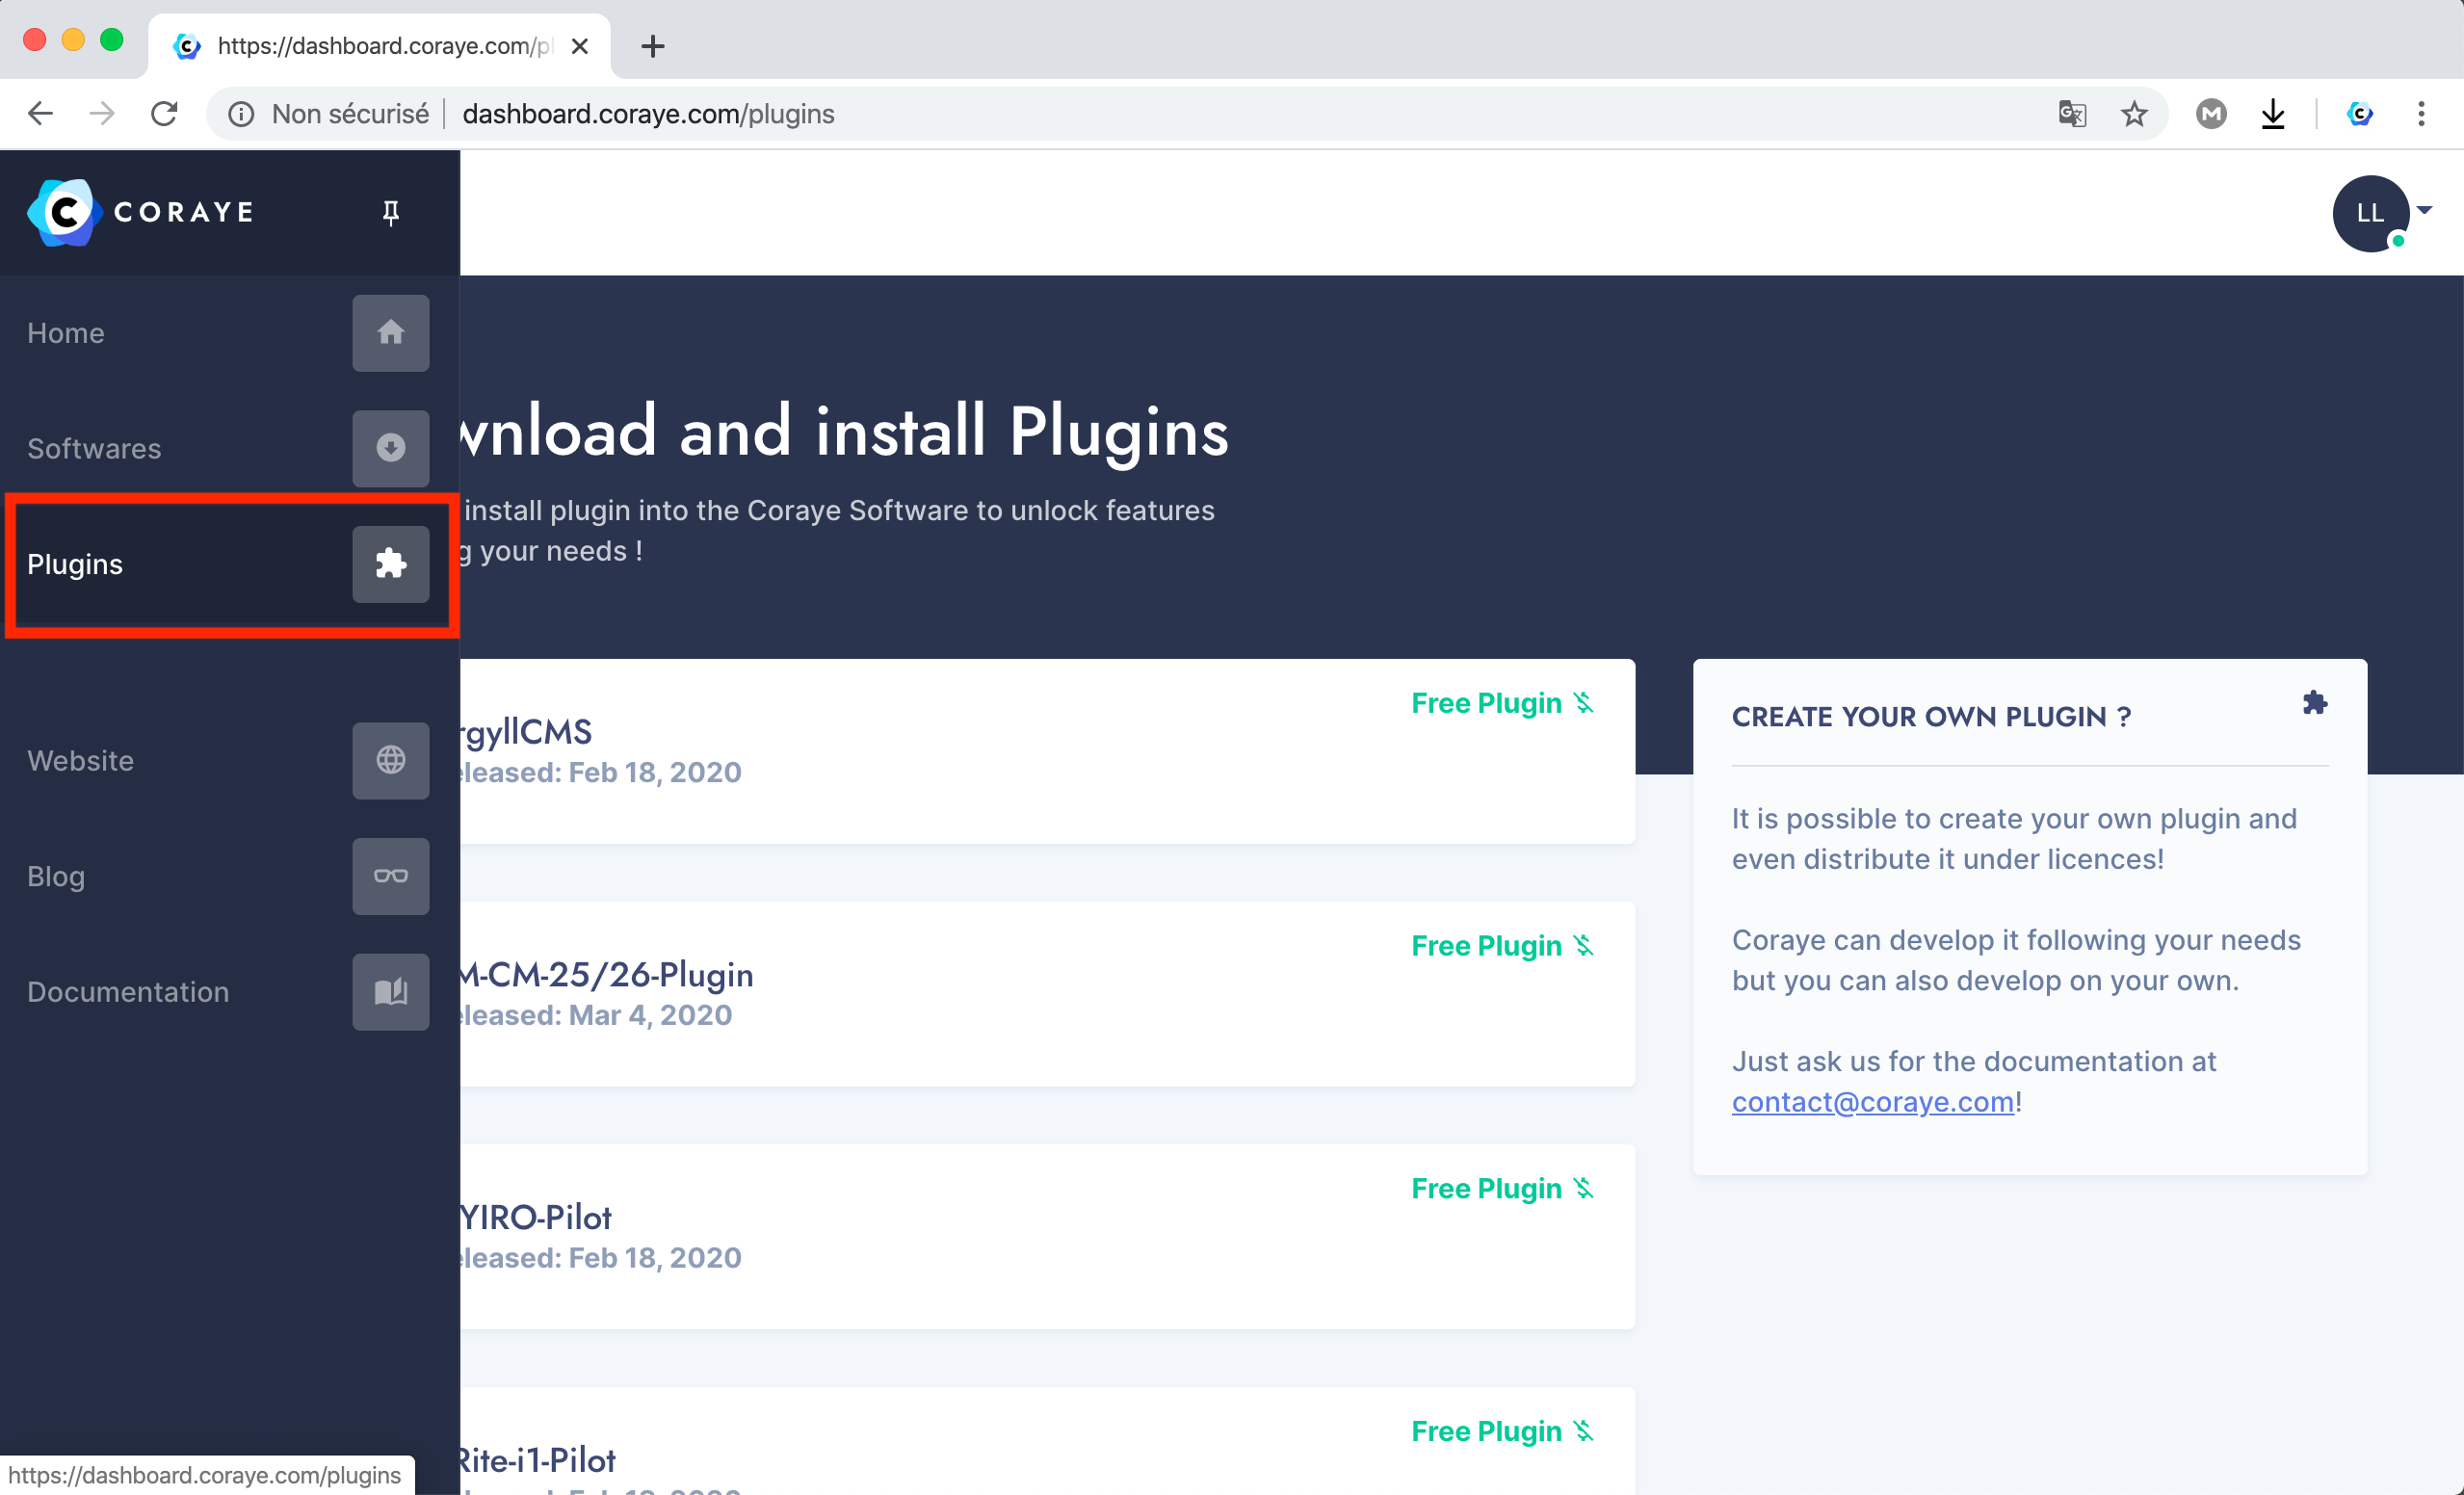
Click on "MYIRO-Pilot"
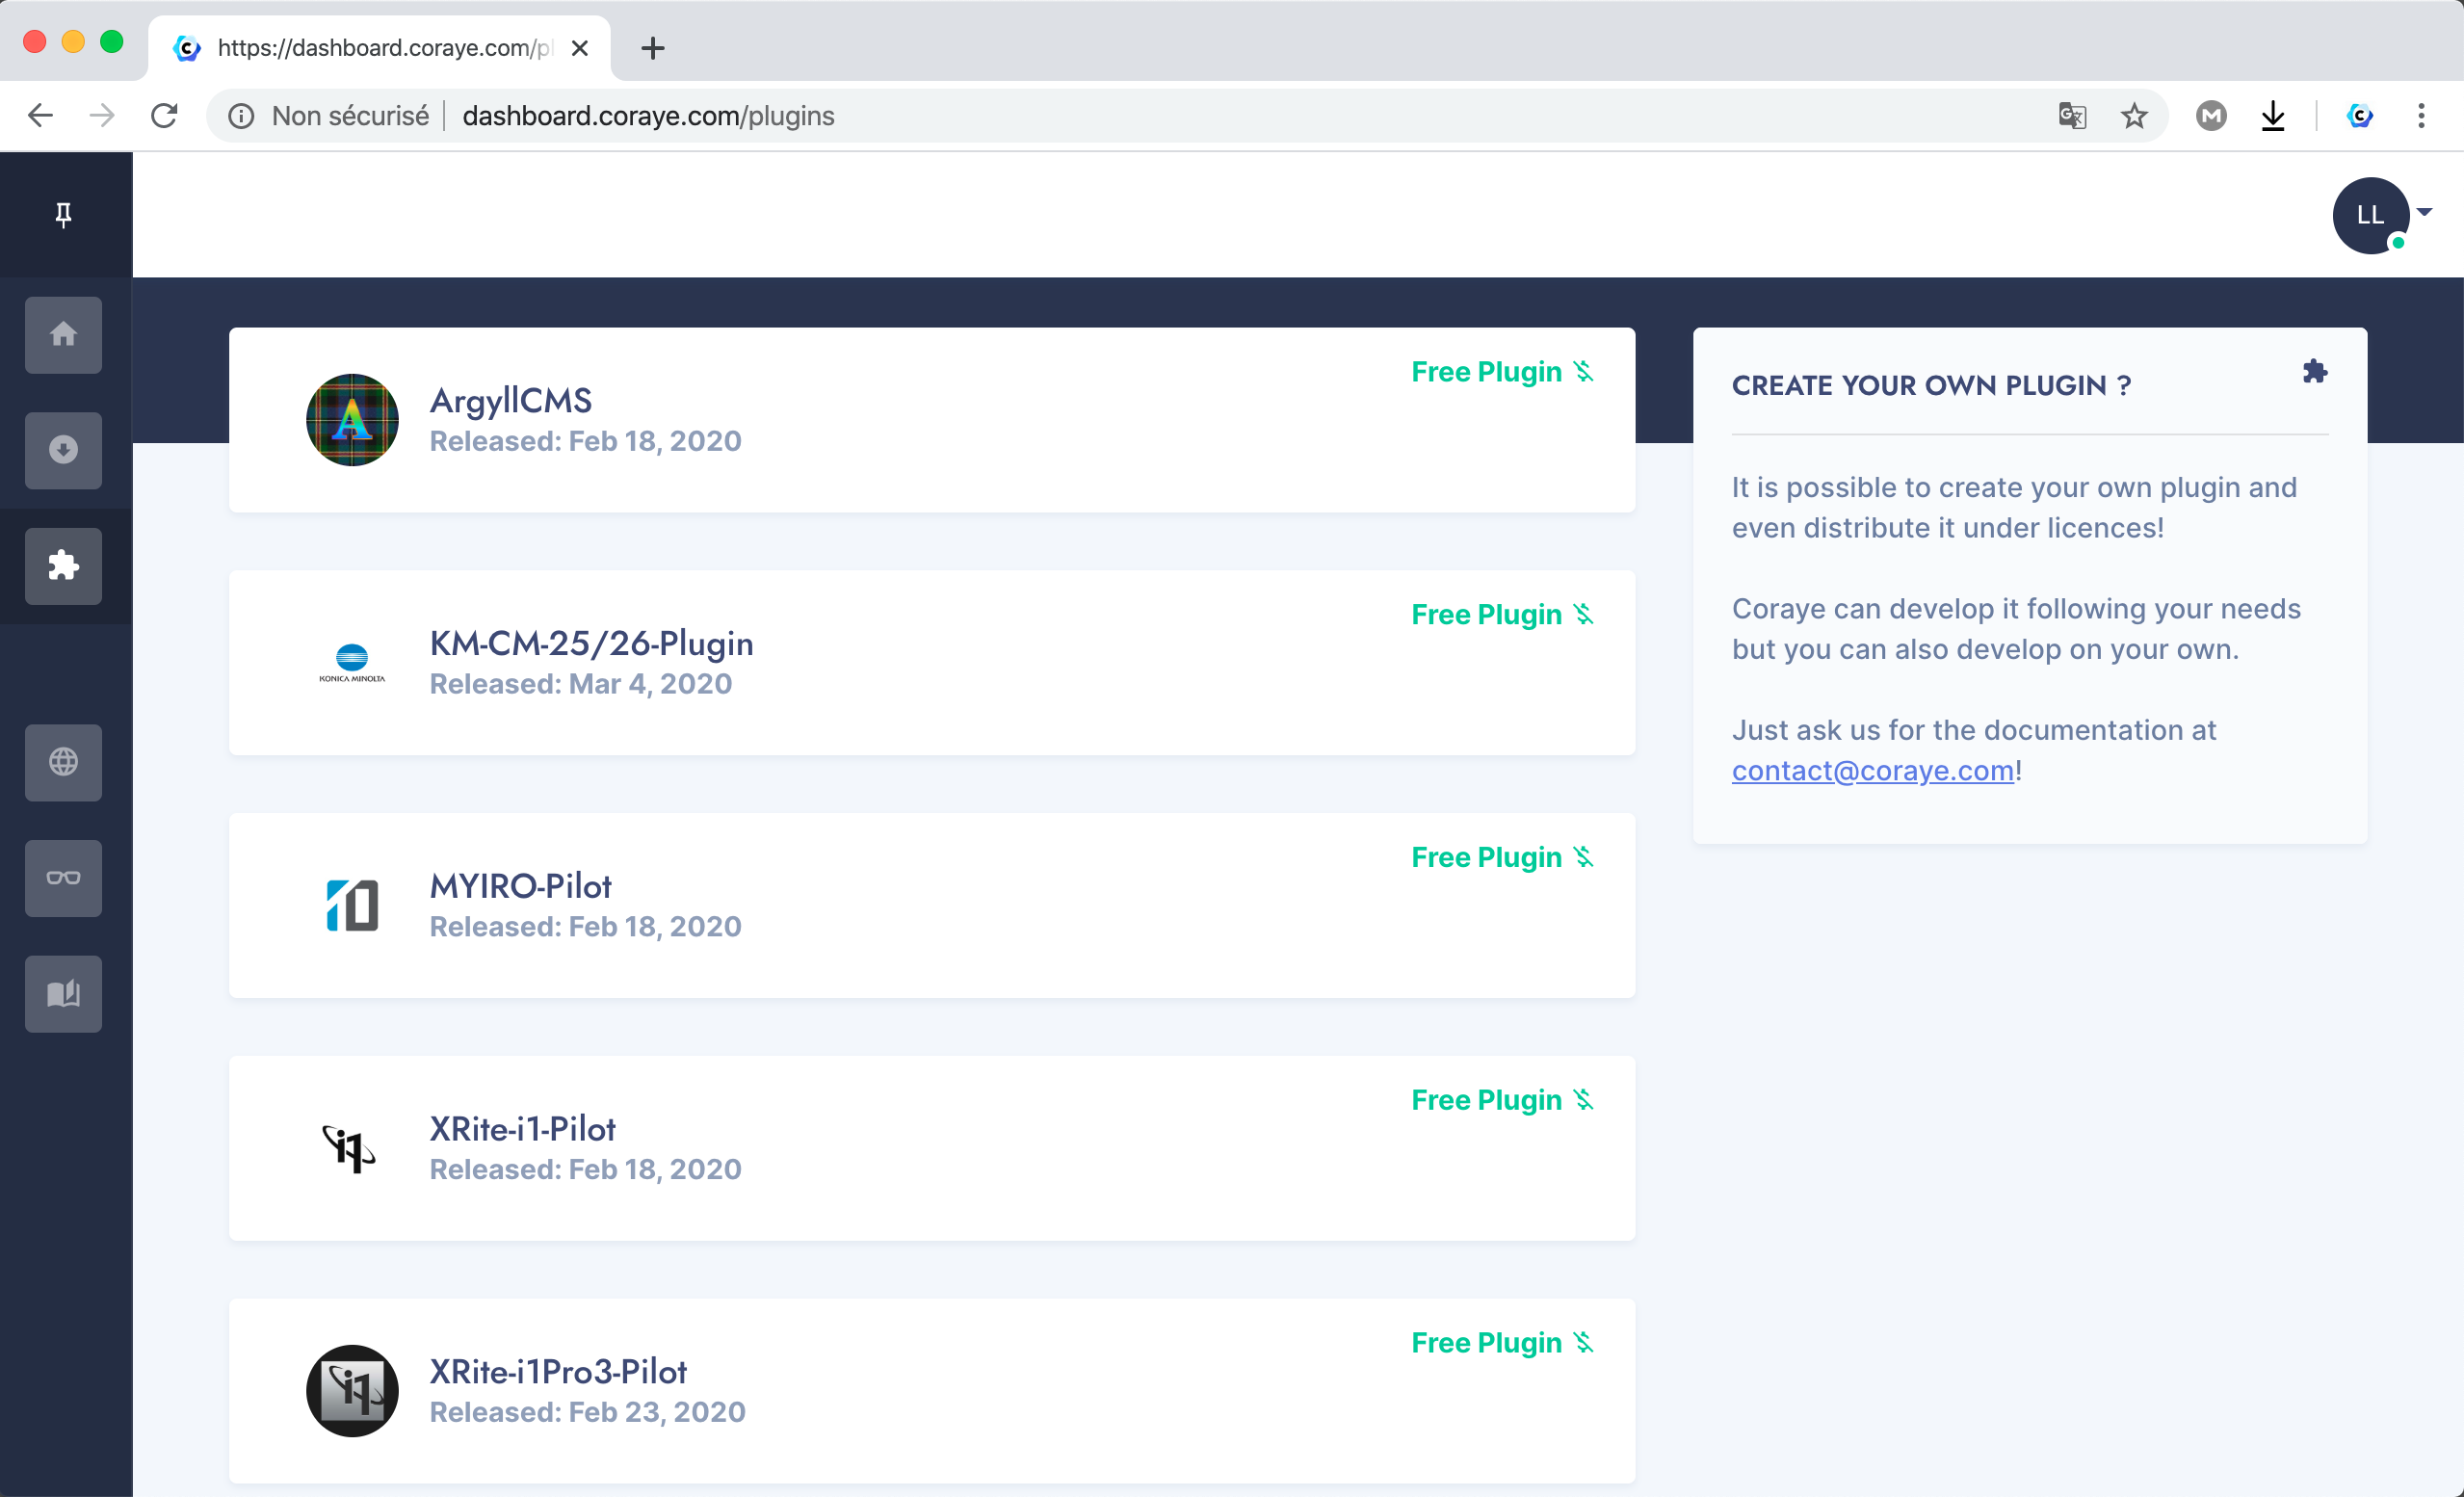
The MYIRO window opens, showing comments on the features of the spectrophotometer. To download the MYIRO plugin, click on the button corresponding to the system on which CORAYE is installed.
The plugin installation procedure is the same on Windows and Mac OS
The same installation procedure for all spectrophotometers

The downloaded file must not be decompressed and must remain in .zip format
Installing the plugin
In the CORAYE "Config" interface, click on the " Install plugin " button
Select the MYIRO plugin (MYIRO-Pilot-MAC-1.2.1.zip)
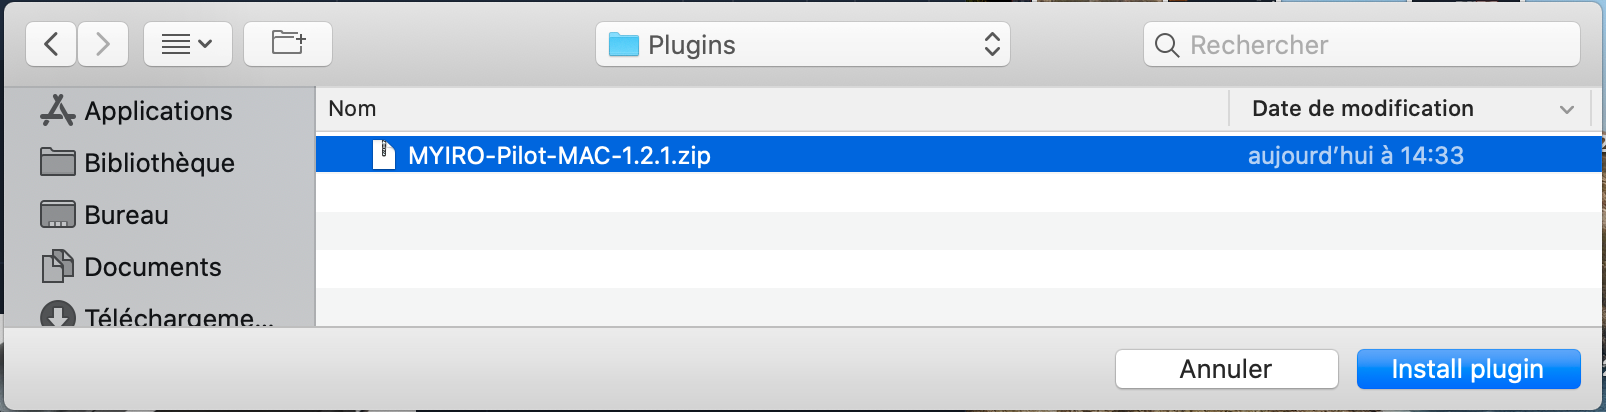
Click on the " Install plugin " button

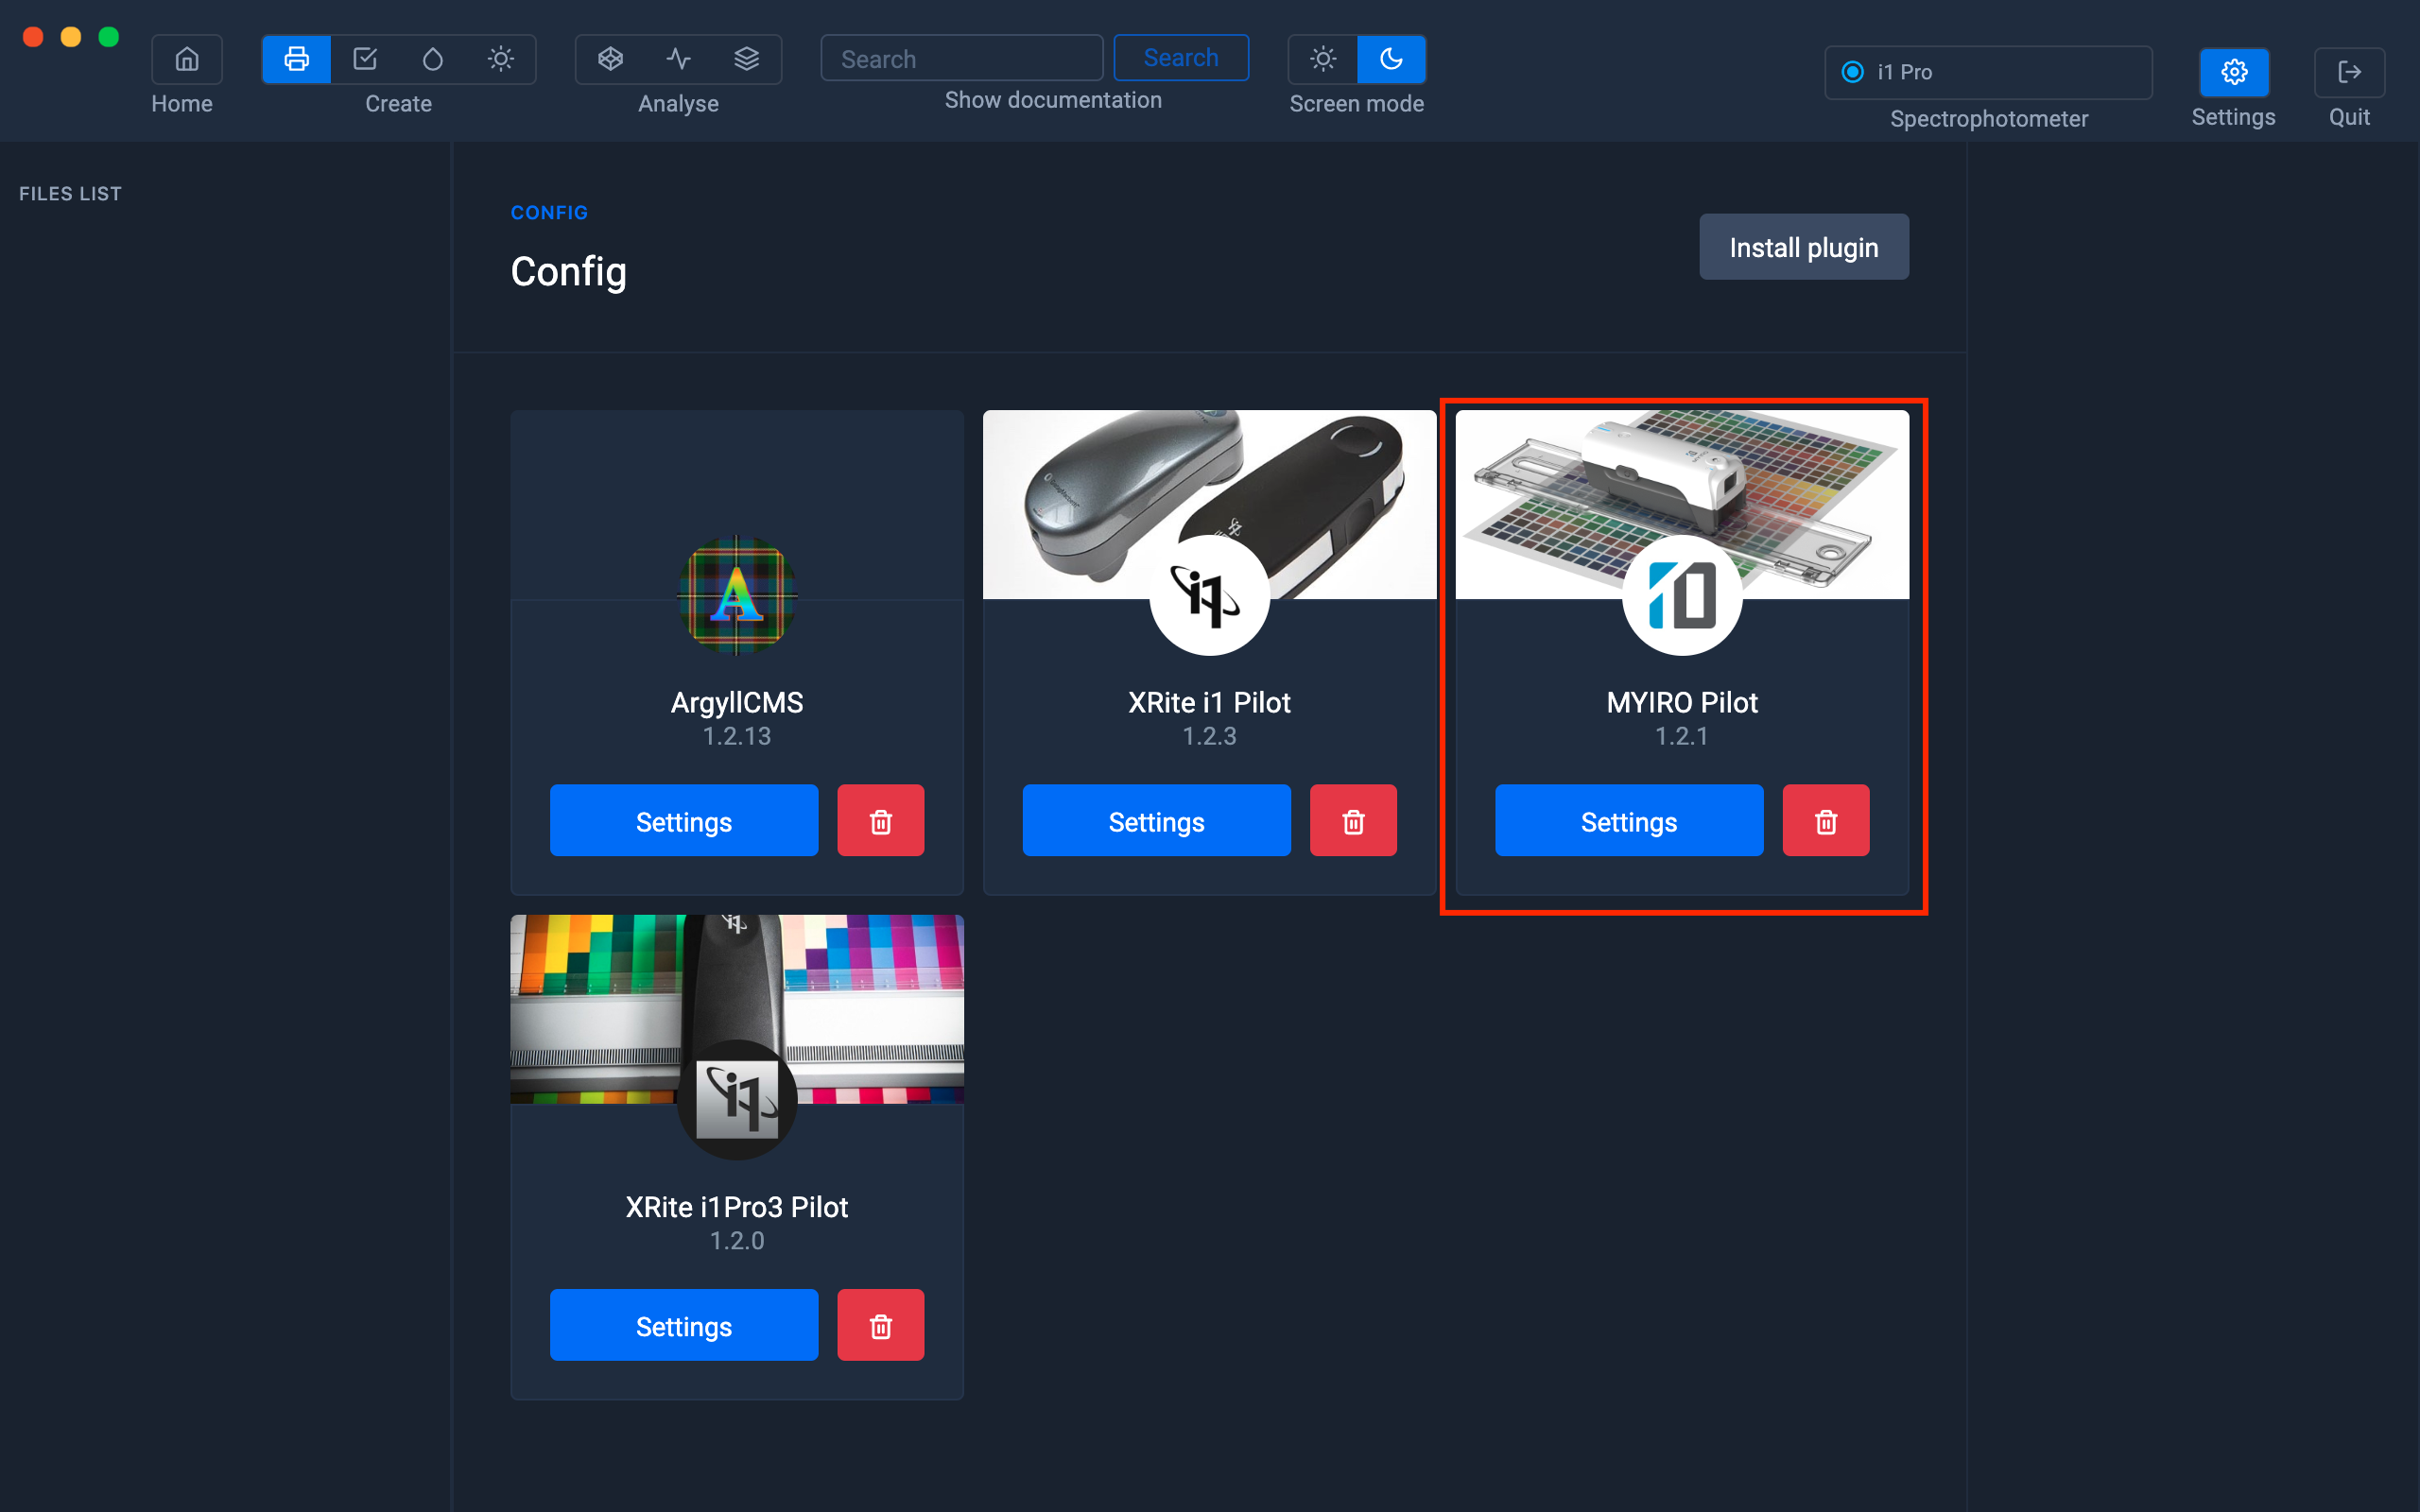
Once the installation is complete, the plugin appears in the interface.
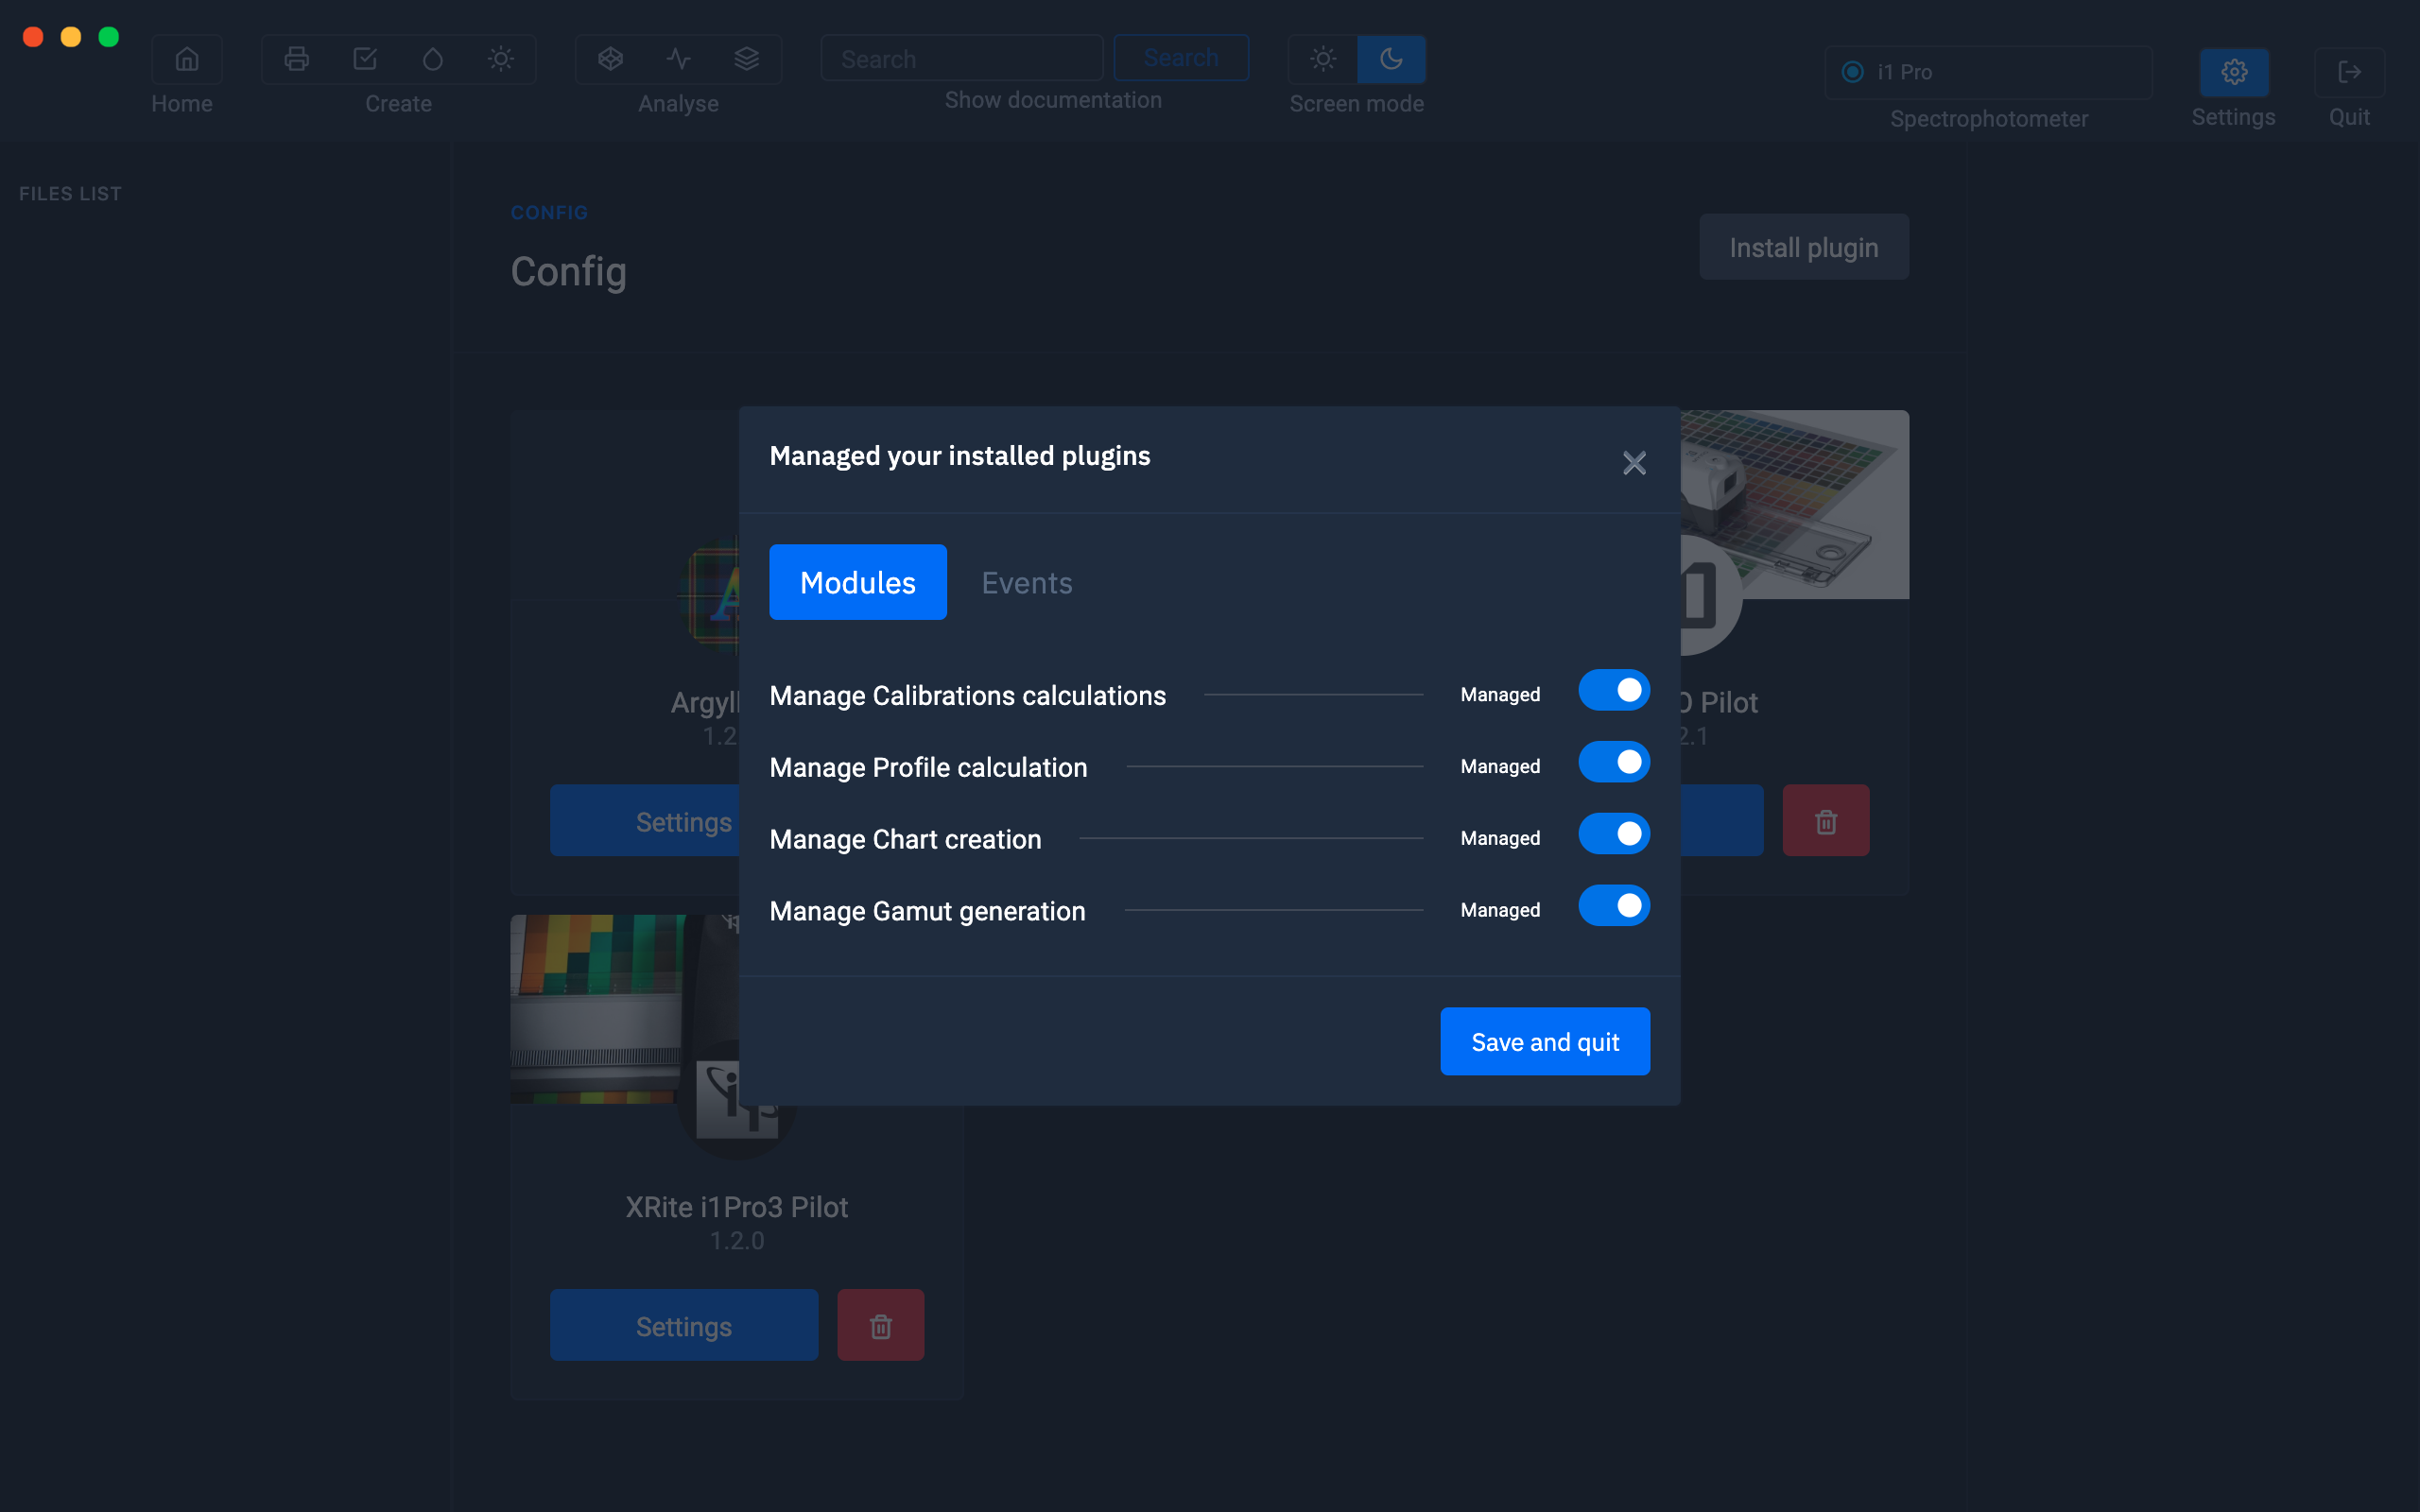
Management of plugins options
To activate or deactivate the spectrophotometer, click on the button to the right of the selected spectrophotometer. In the example below, we have disabled Eye One Pro 2 and left Eye One Pro enabled.

Management of color engine options
In the next versions, it will be possible to install several color engines in order to use the best of each of them.
CORAYE invented the hybrid color engine

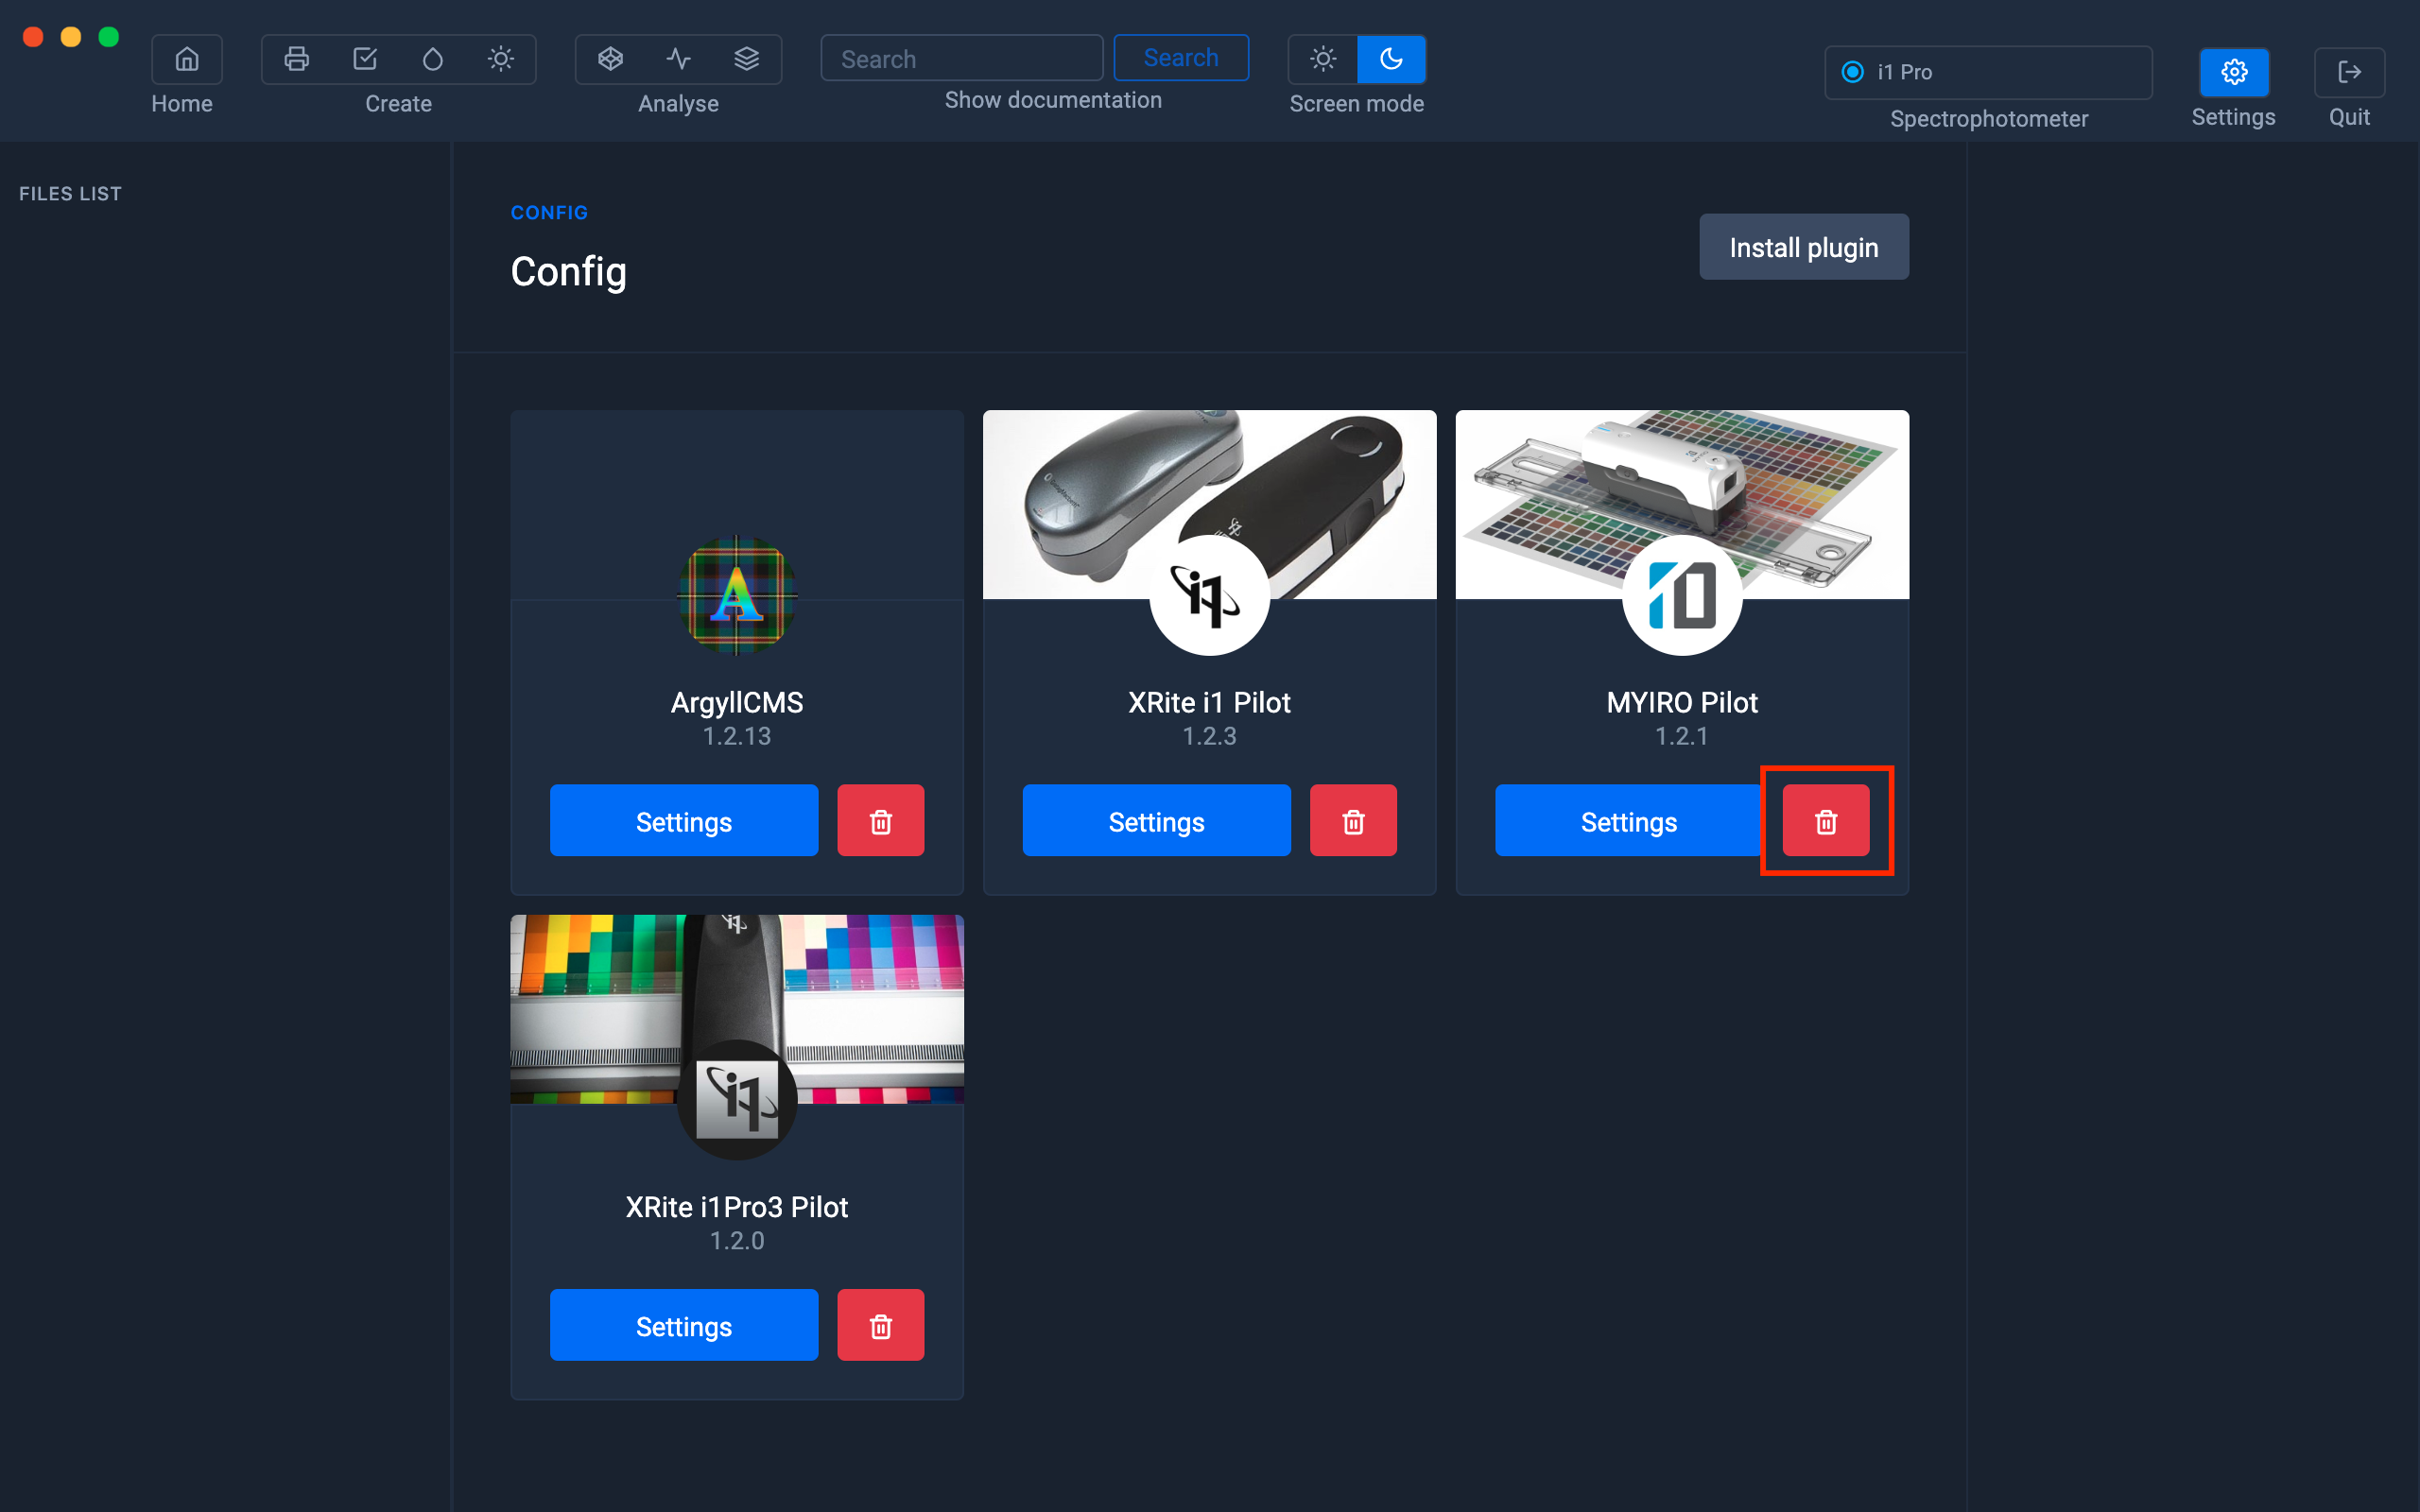
Uninstalling and updating a plugin
To uninstall a plugin, just click on the red trash can button located next to the "Settings" button.
To update a plugin, it is necessary to uninstall the old version, then install the new one.
Always install the latest versions of plugins when you update the software.
Coraye software update
When a new version of the Coraye software is available, an " Update Coraye " button appears next to the " Install plugin " button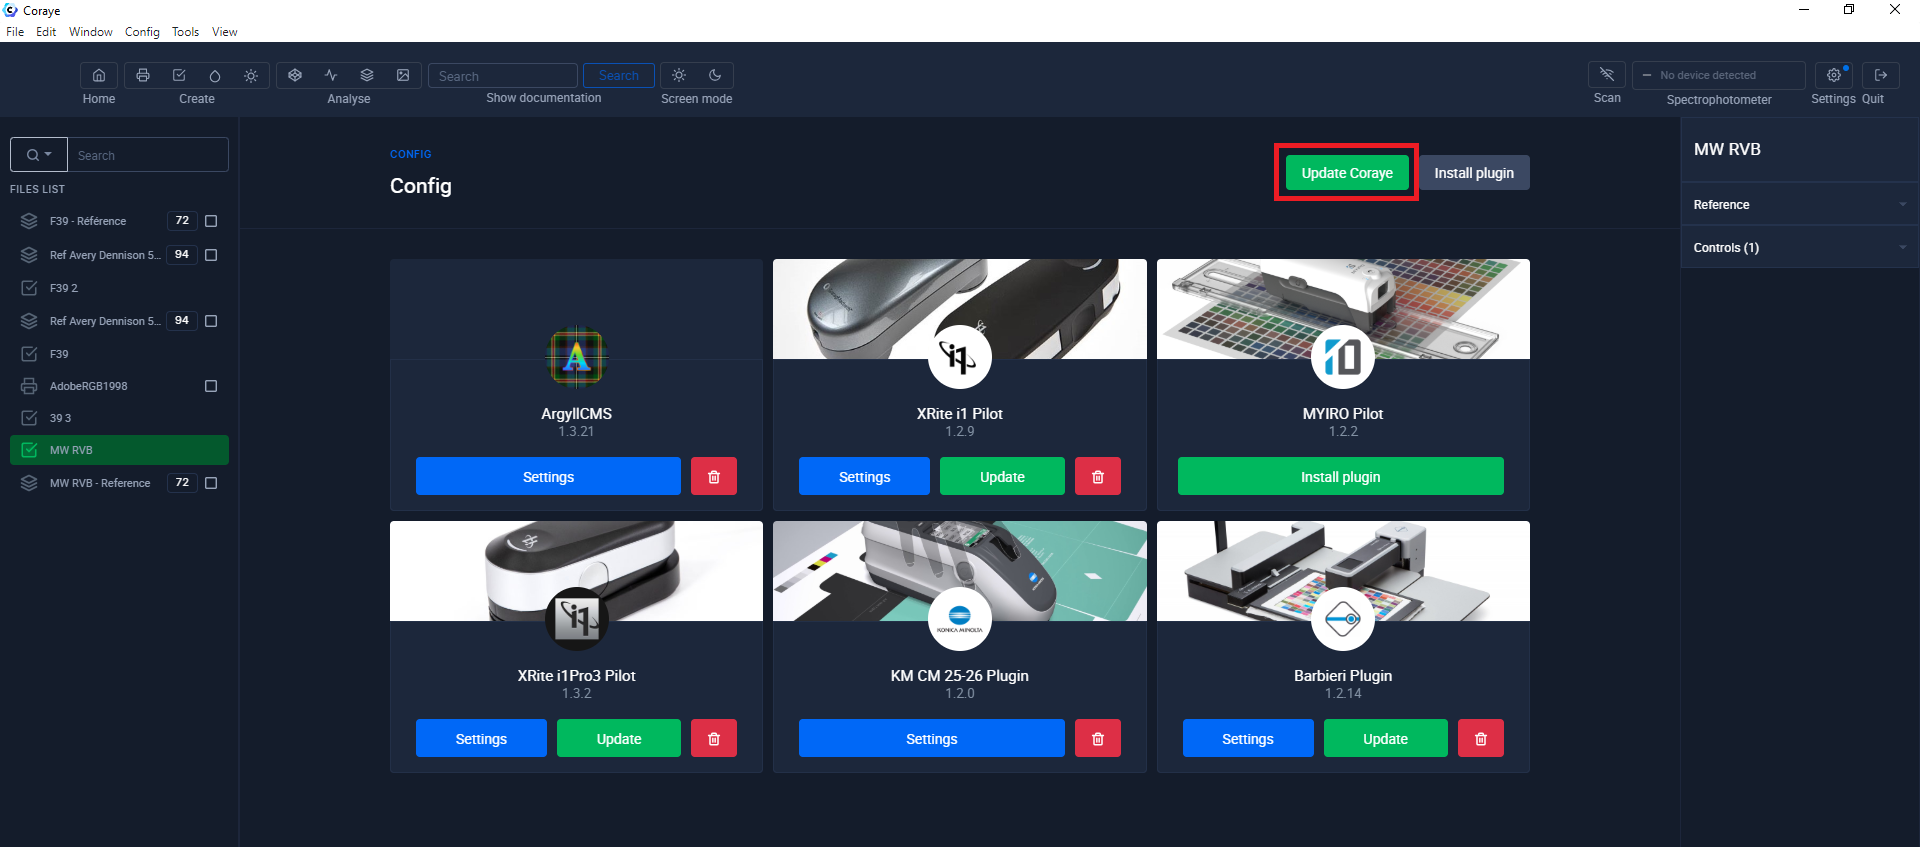
Remote assistance
The Coraye support team uses Google's remotedesktop to provide support.
Chrome Remote Desktop Extension
This is the companion extension for the Chrome Remote Desktop website ( https://remotedesktop.google.com ).
This extension allows you to install, view, and modify the native Chrome Remote Desktop client from the web UI.
Chrome Remote Desktop allows users to remotely access another computer through the Chrome browser or a Chromebook.
Computers can be made available in the short term for scenarios such as ad hoc remote assistance, or in the longer term for remote access to your applications and files.
All connections are fully secure.
Chrome Remote Desktop is fully cross-platform.
Provide remote support to Windows, Mac, and Linux users, or access your Windows and Mac desktops anytime, all from the Chrome browser on virtually any device, including Chromebooks.
For more information on privacy, please see Google's privacy policy and Chrome's privacy notice.
For help or troubleshooting click here: https://support.google.com/chrome/answer/1649523
For more information, see chapter: Mac OS X remote assistance
For more information, see the chapter: Windows Remote Assistance
Mac OS X remote support
This tutorial will help you install Google Remote Desktop on your Mac.
Before any remote assistance request, please install this module before contacting us.
Installing RemoteDesktop on Mac OS X Operating System
Prerequisite: Installation of the Google Chrome browser:
The first step is to open a browser (Google Chrome for example), then type the address below in the address bar.
https://remotedesktop.google.com/support
Click the " Download the Chrome Remote Desktop "
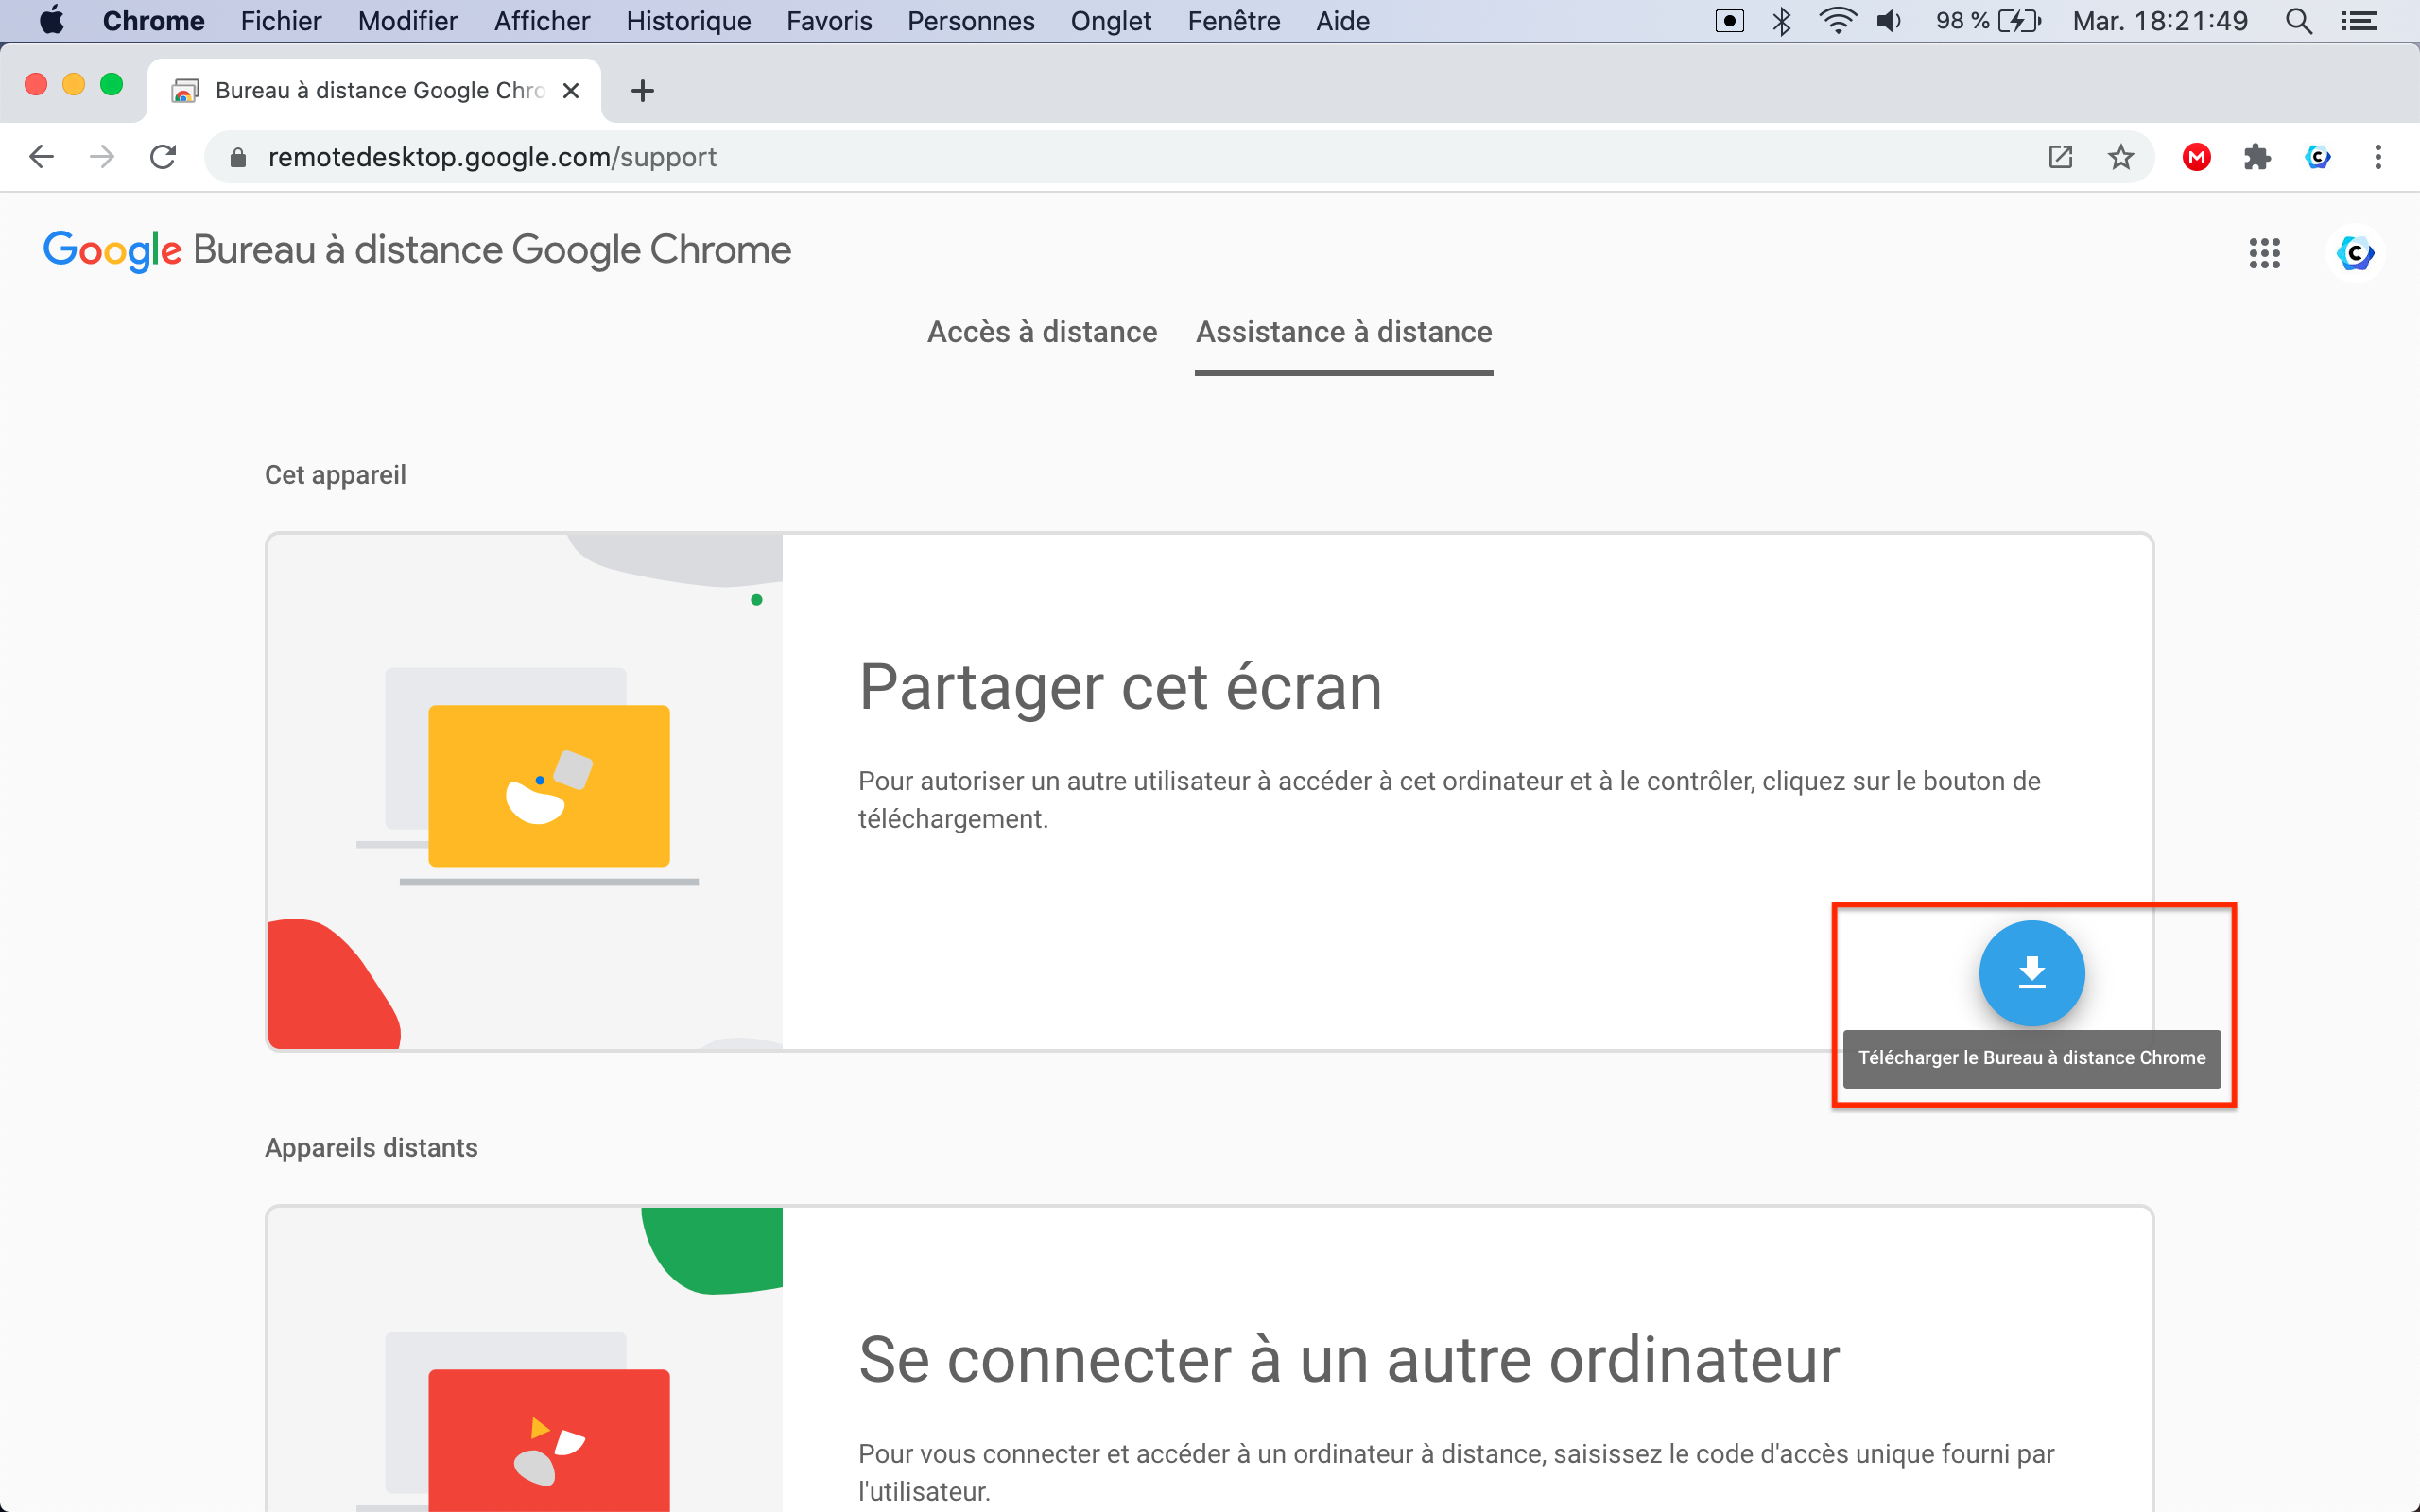
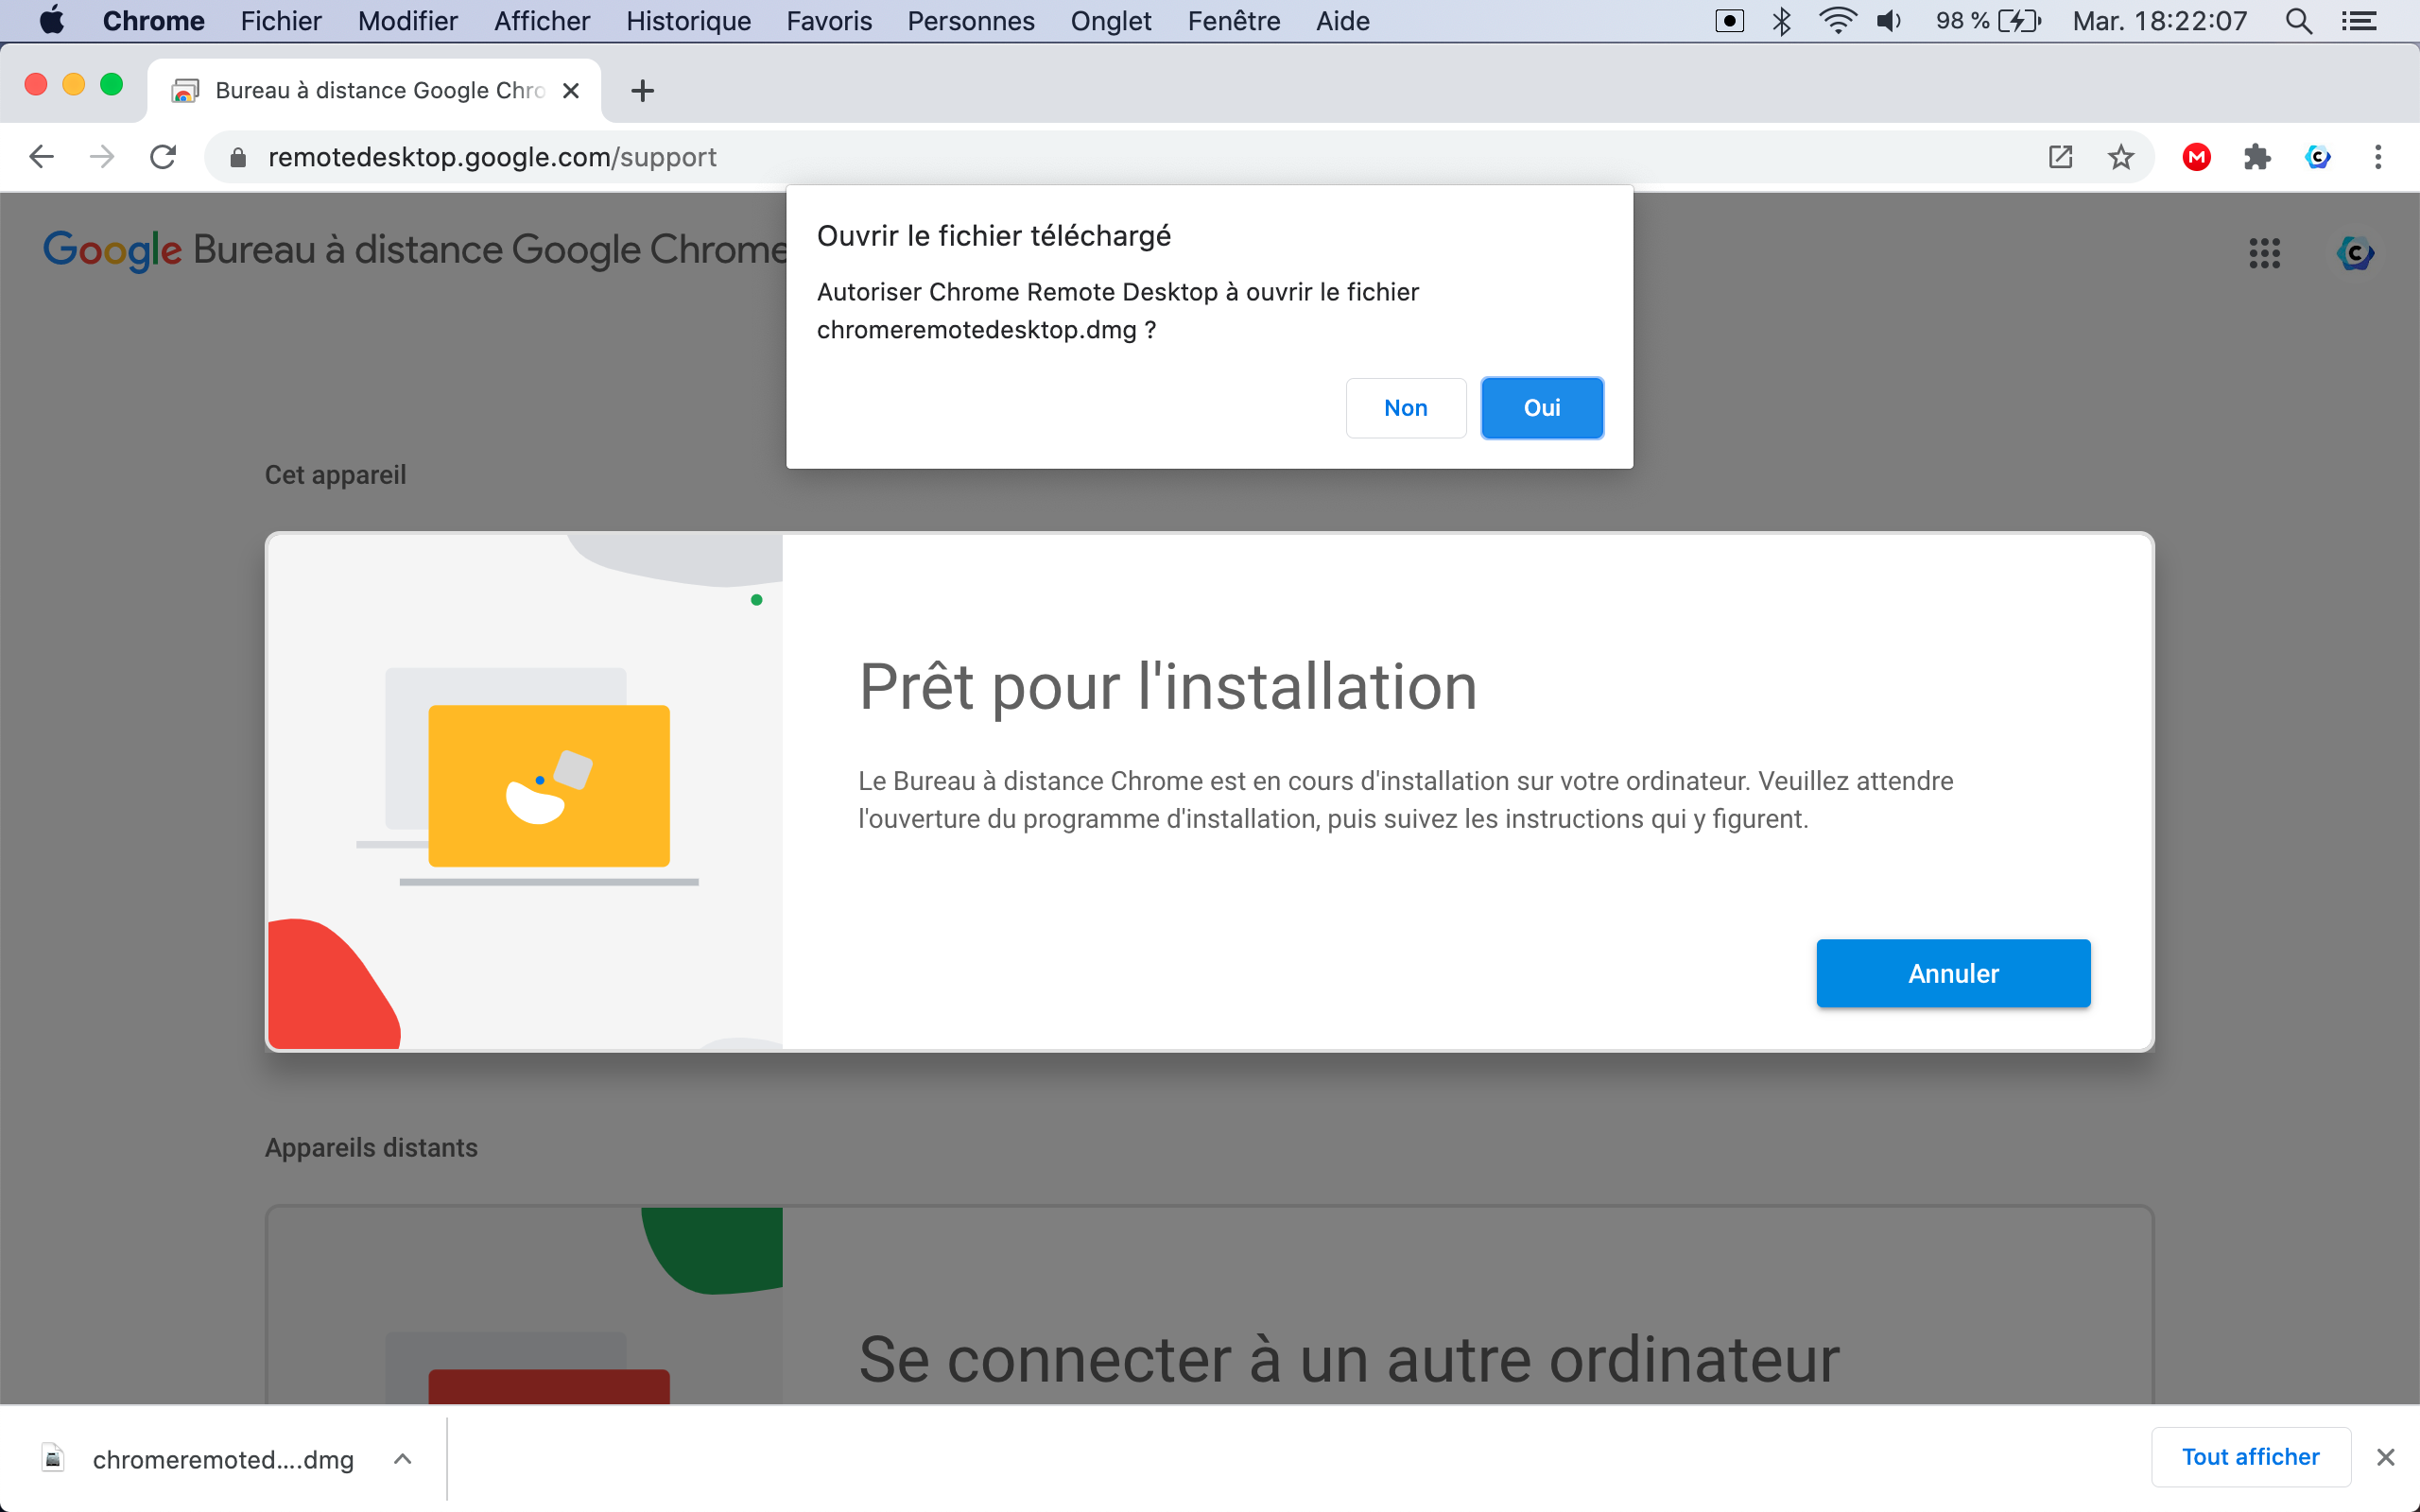
The file "chromeremotedesktop.dmg" will be downloaded
Then click on the button " Accept and Install "
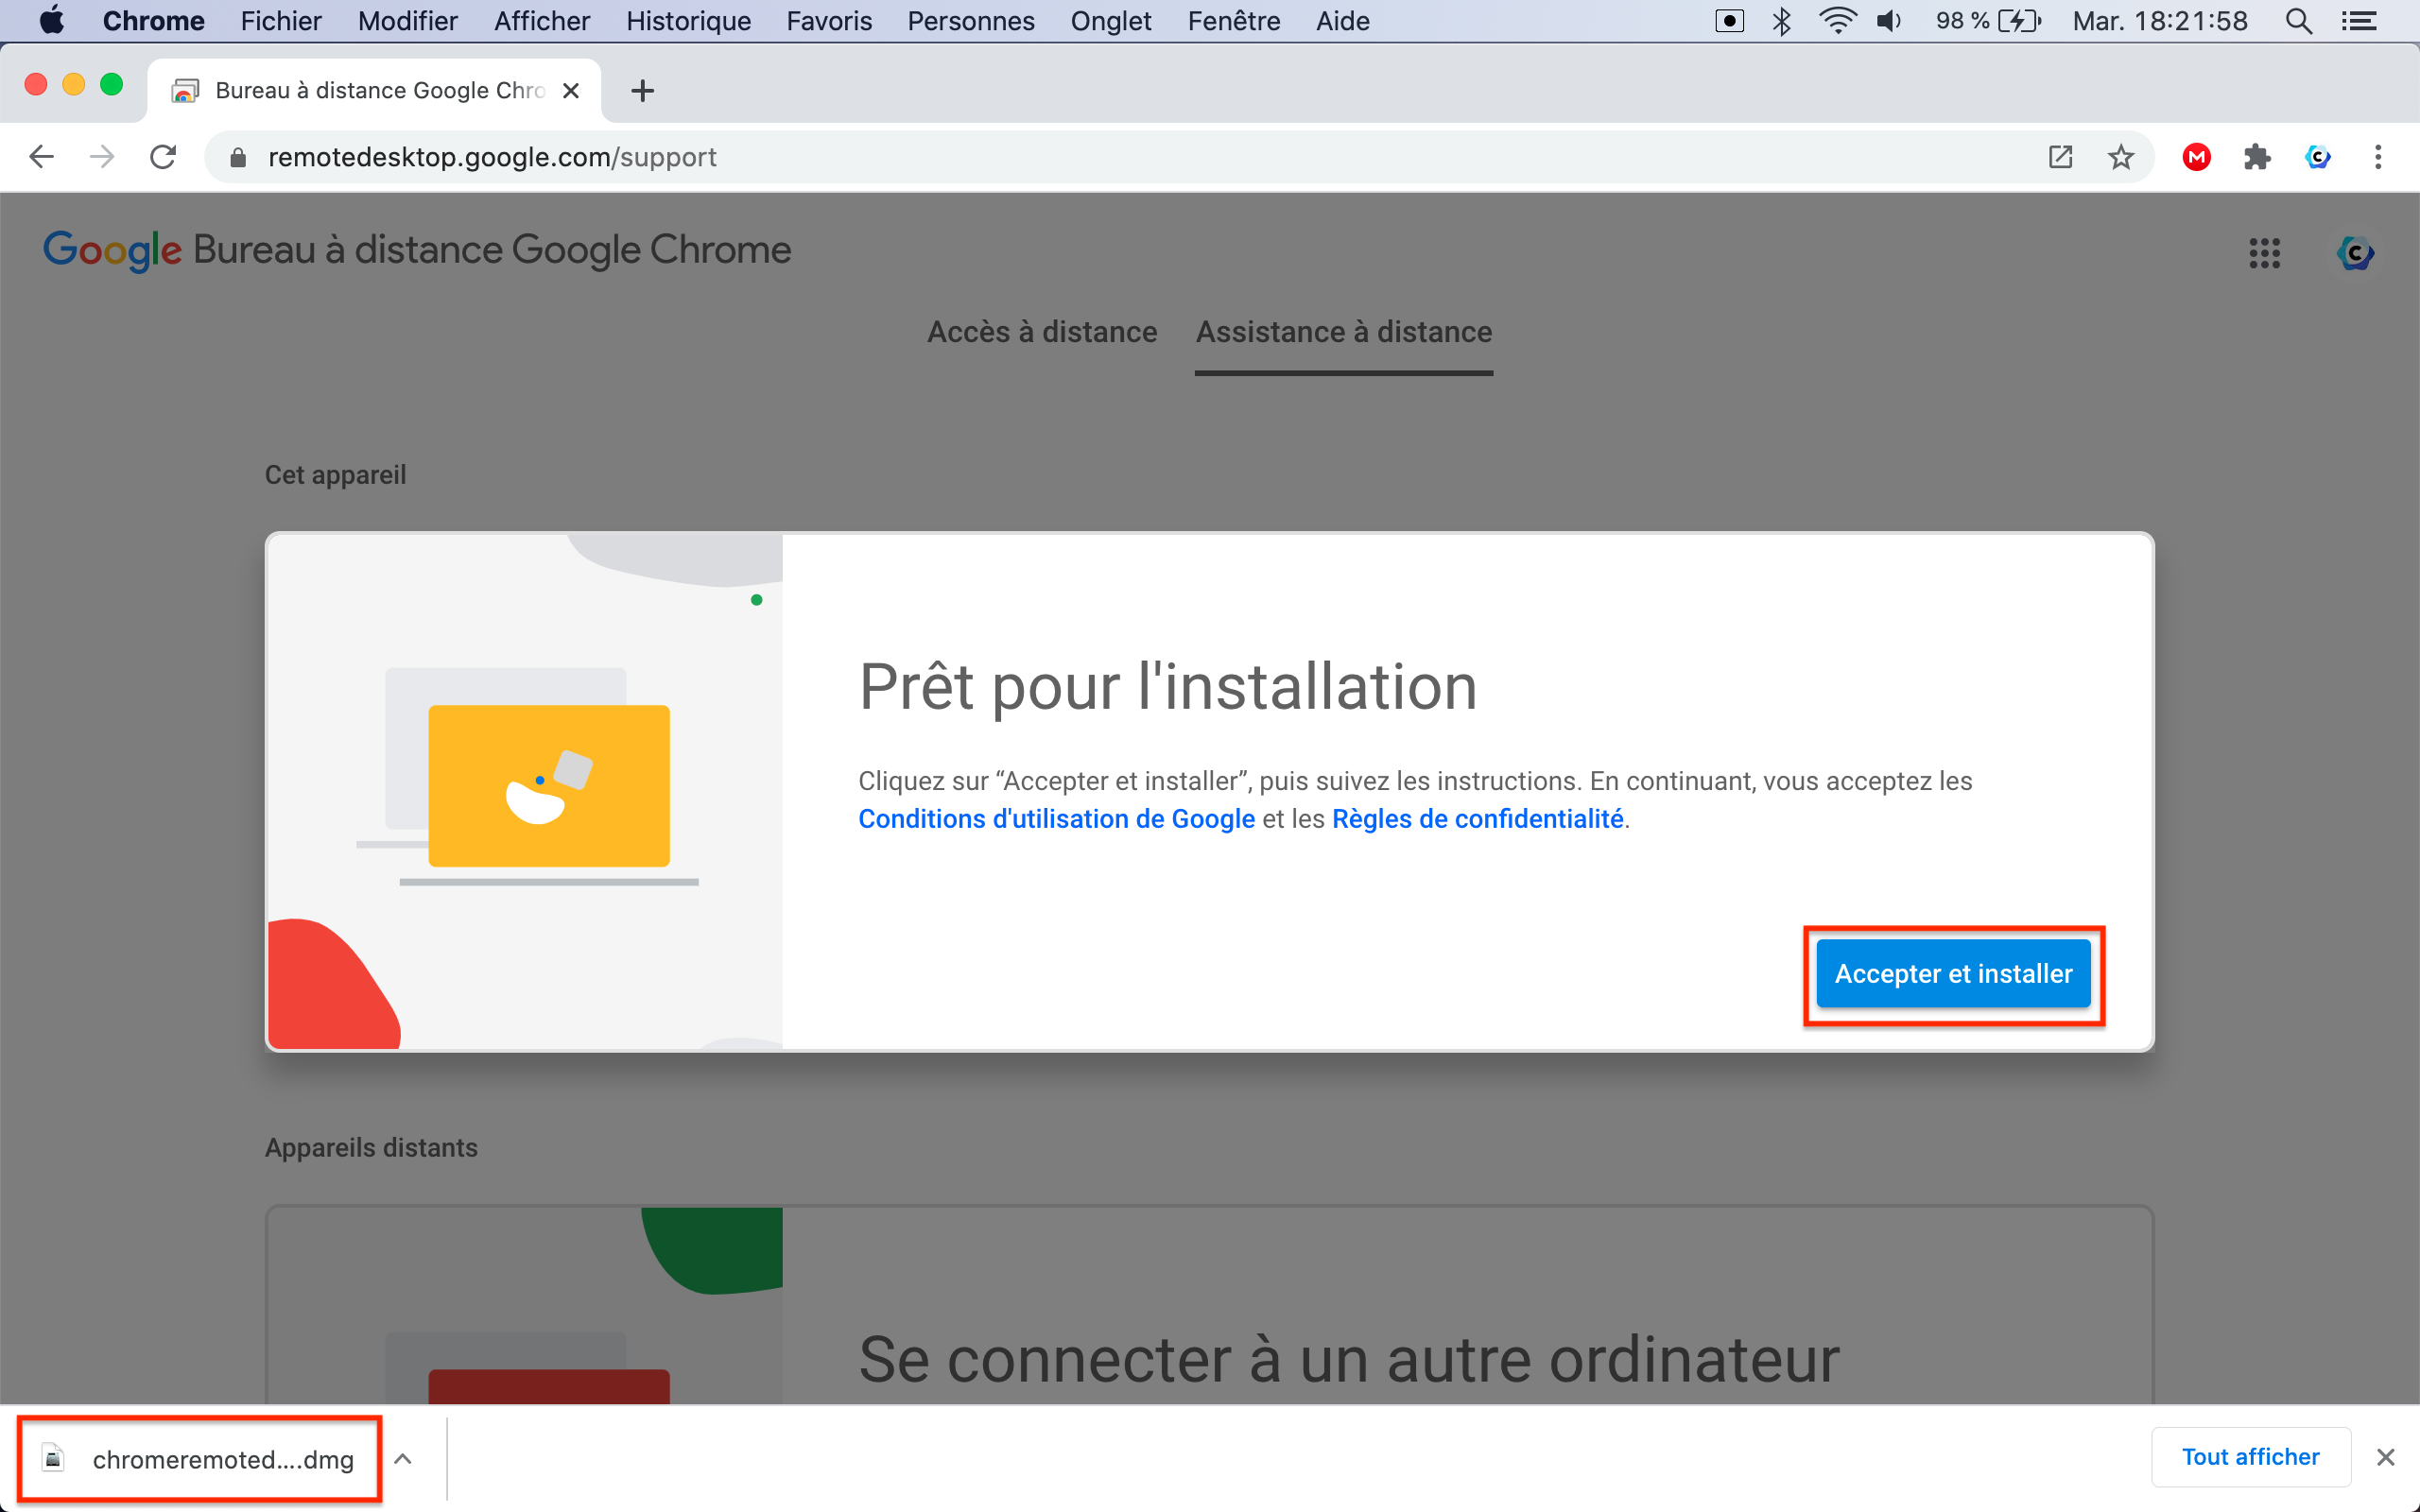
Click on "Yes" in the validation window.
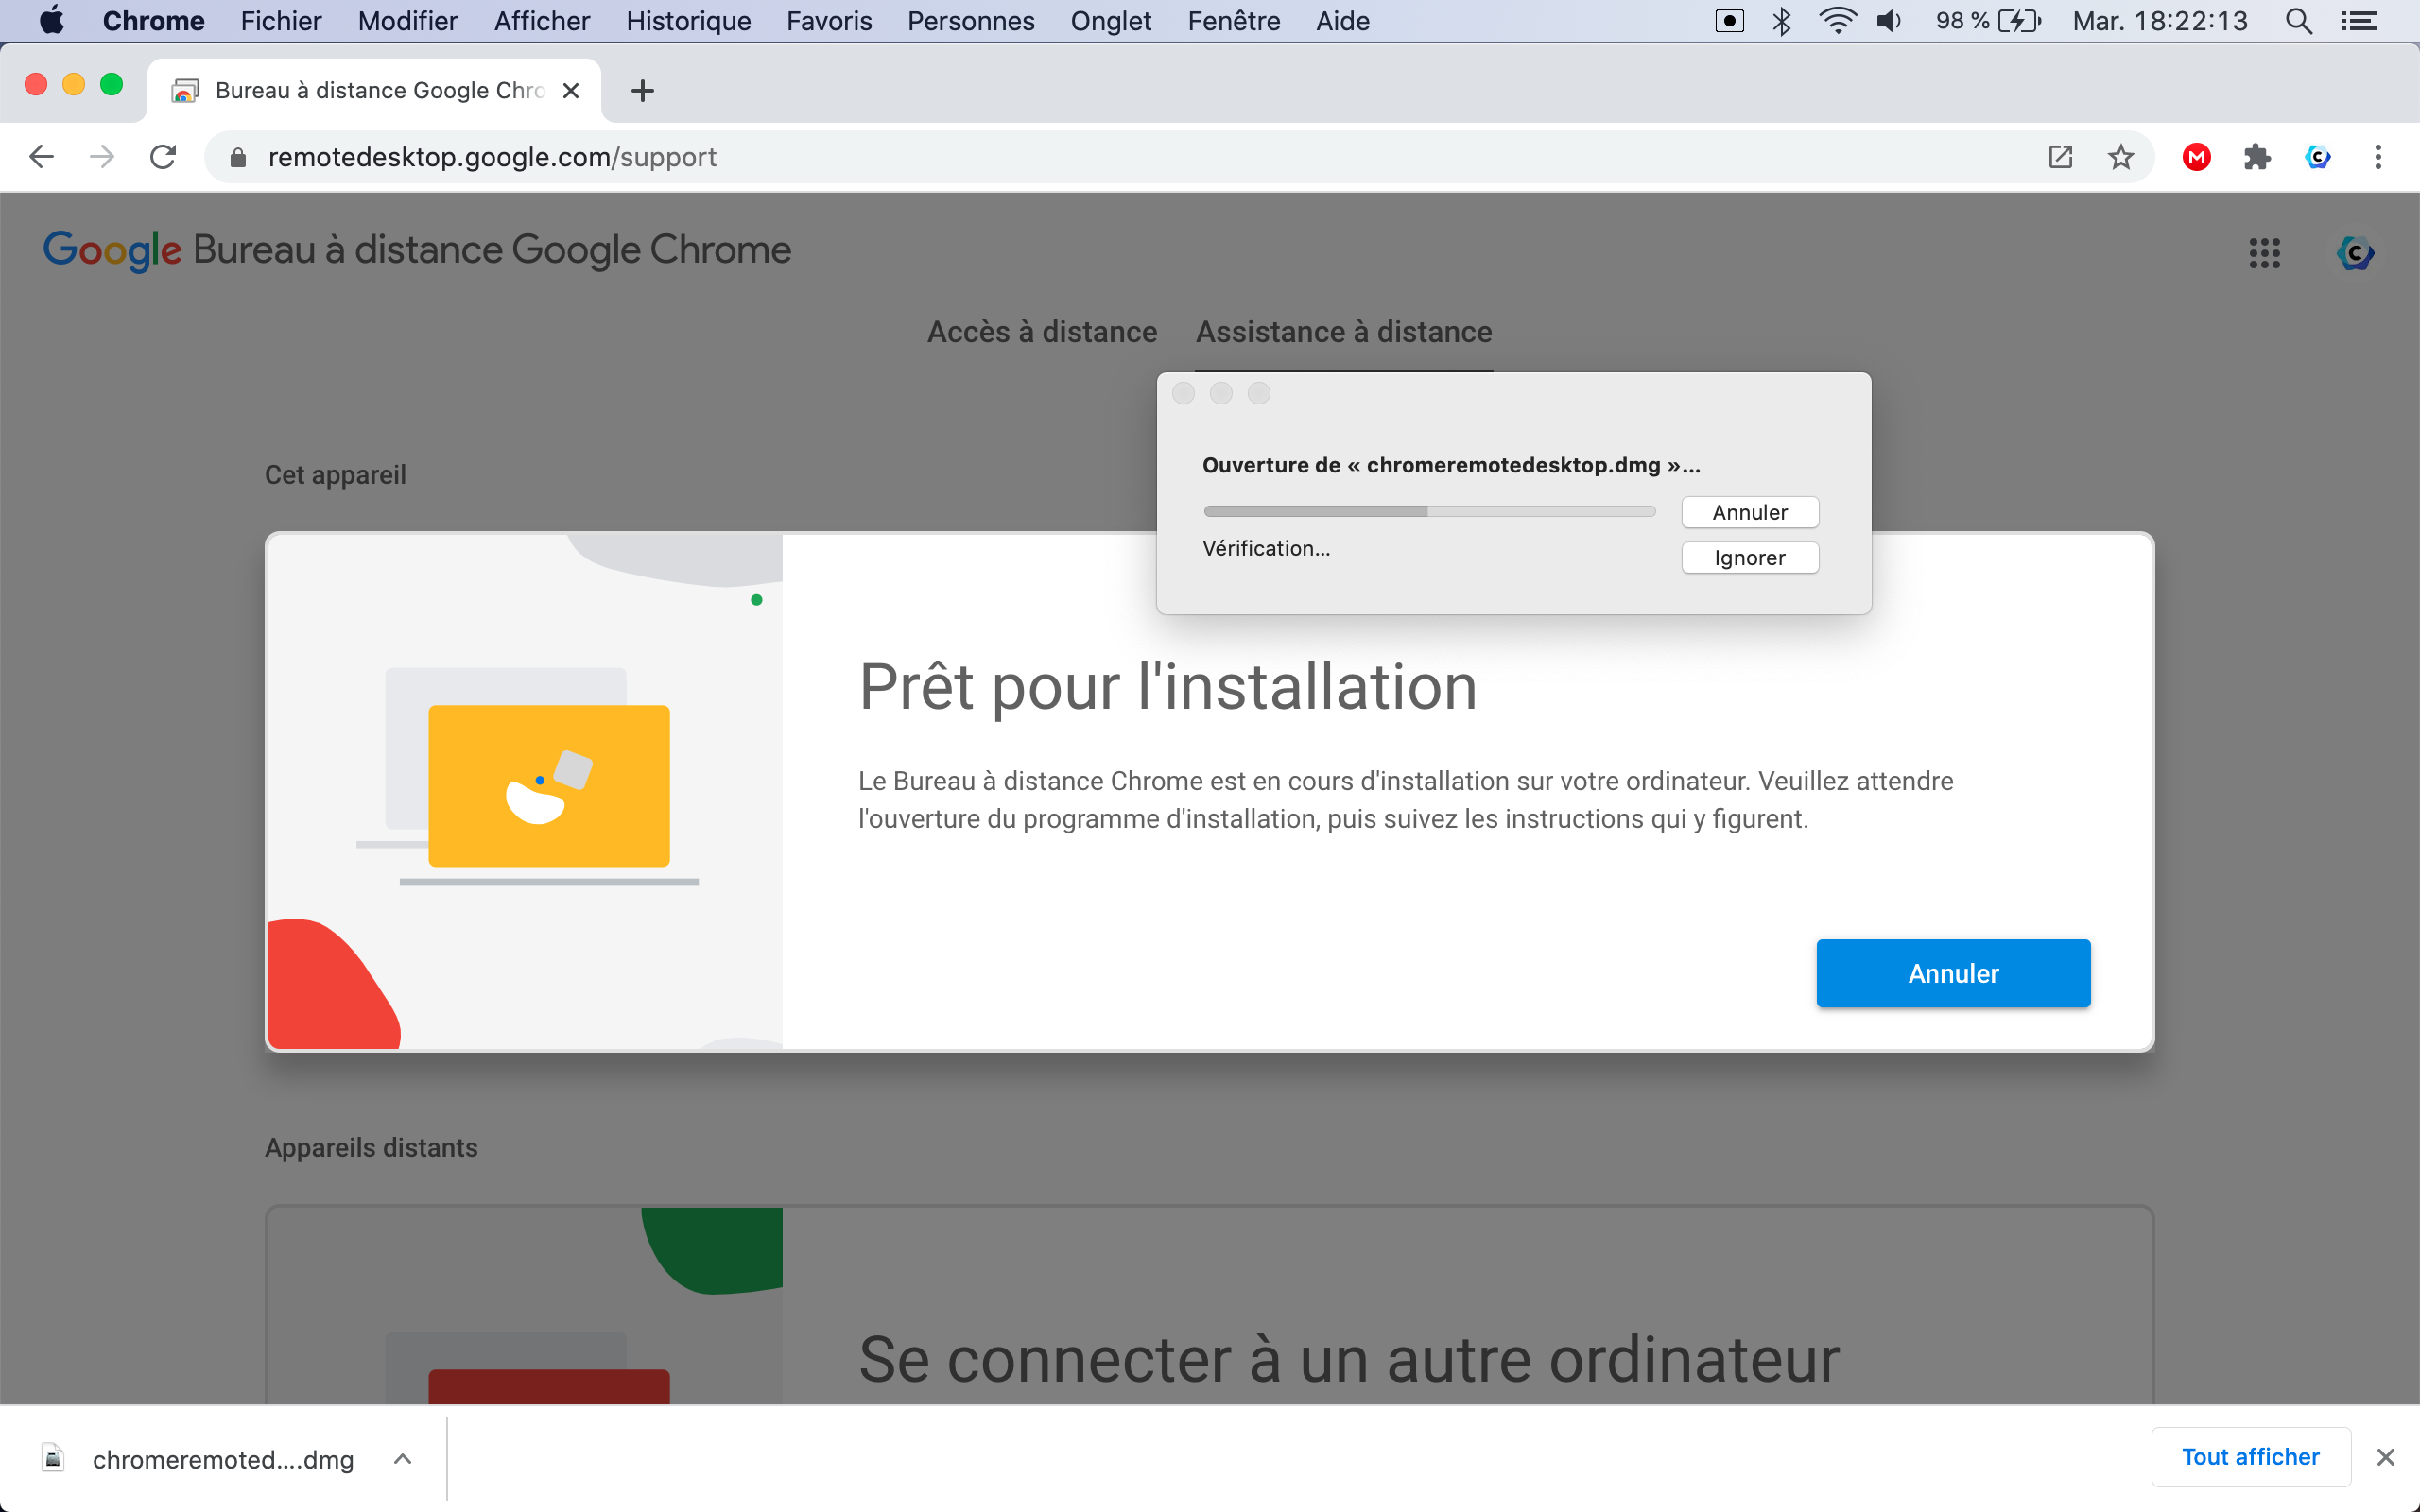
The decompression of the "chromeremotedesktop.dmg" file is started.
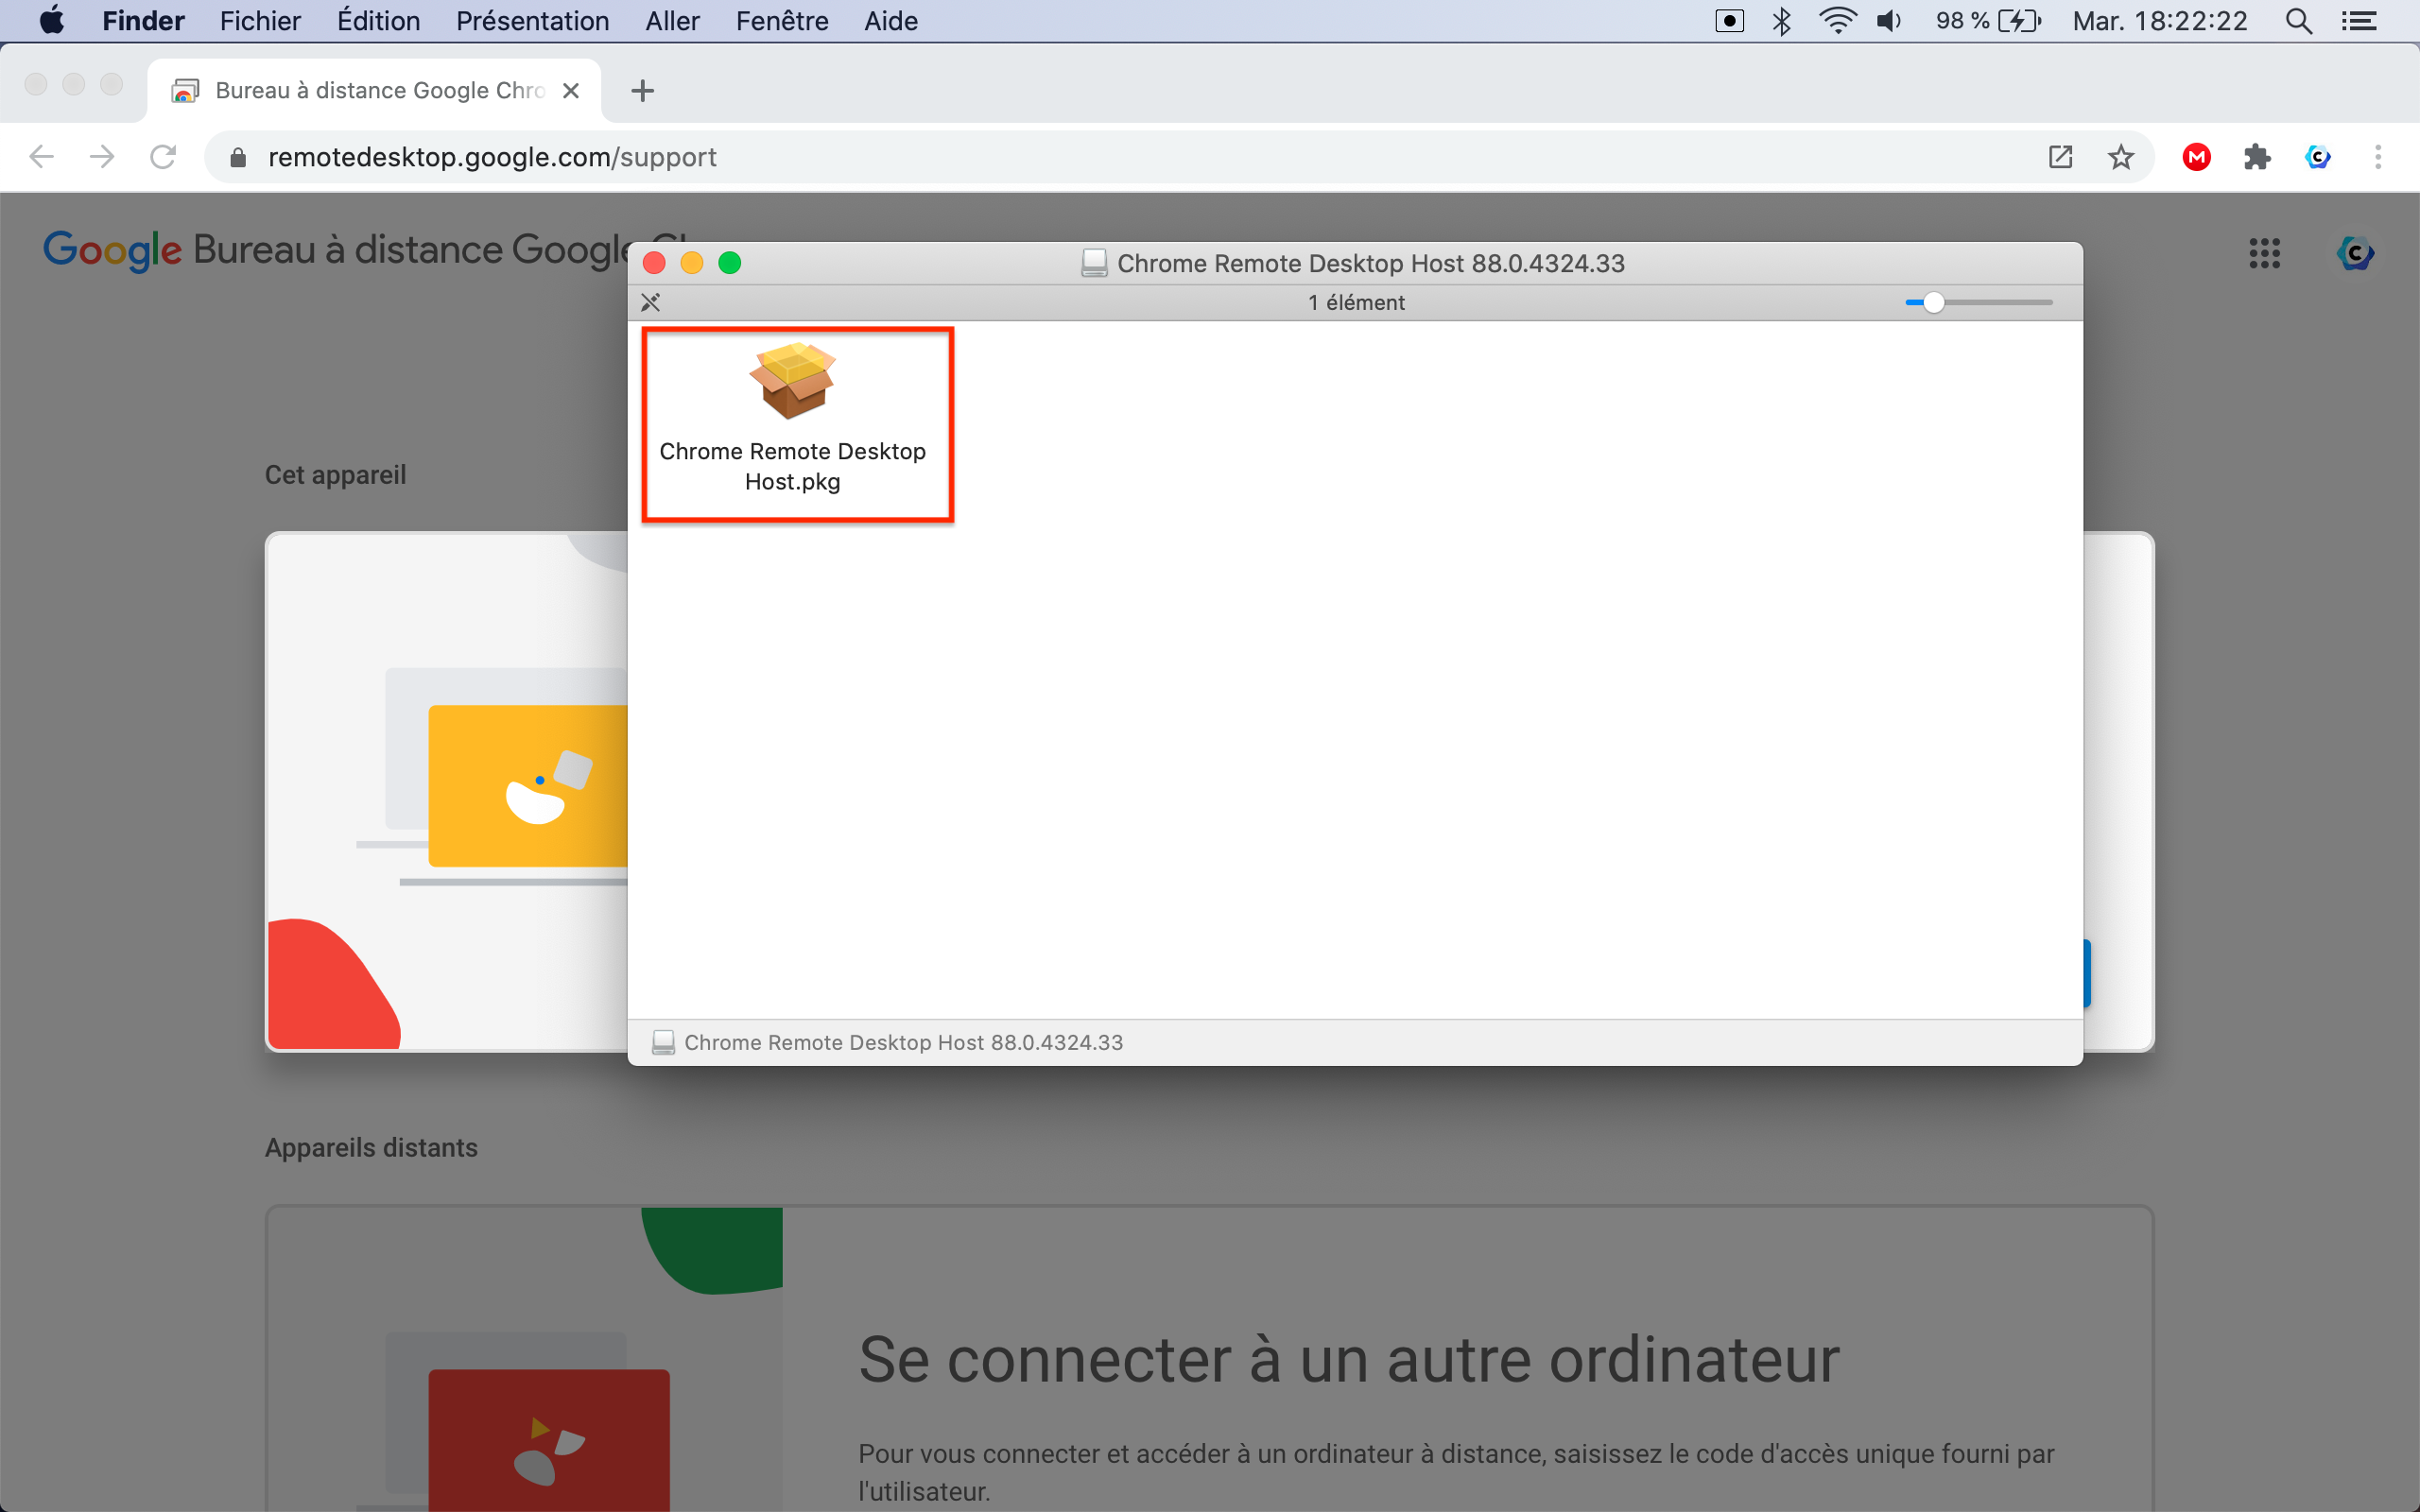
Double click on the "Chrome Remote Desktop Host" file to start the installation.
Click on " Continue "

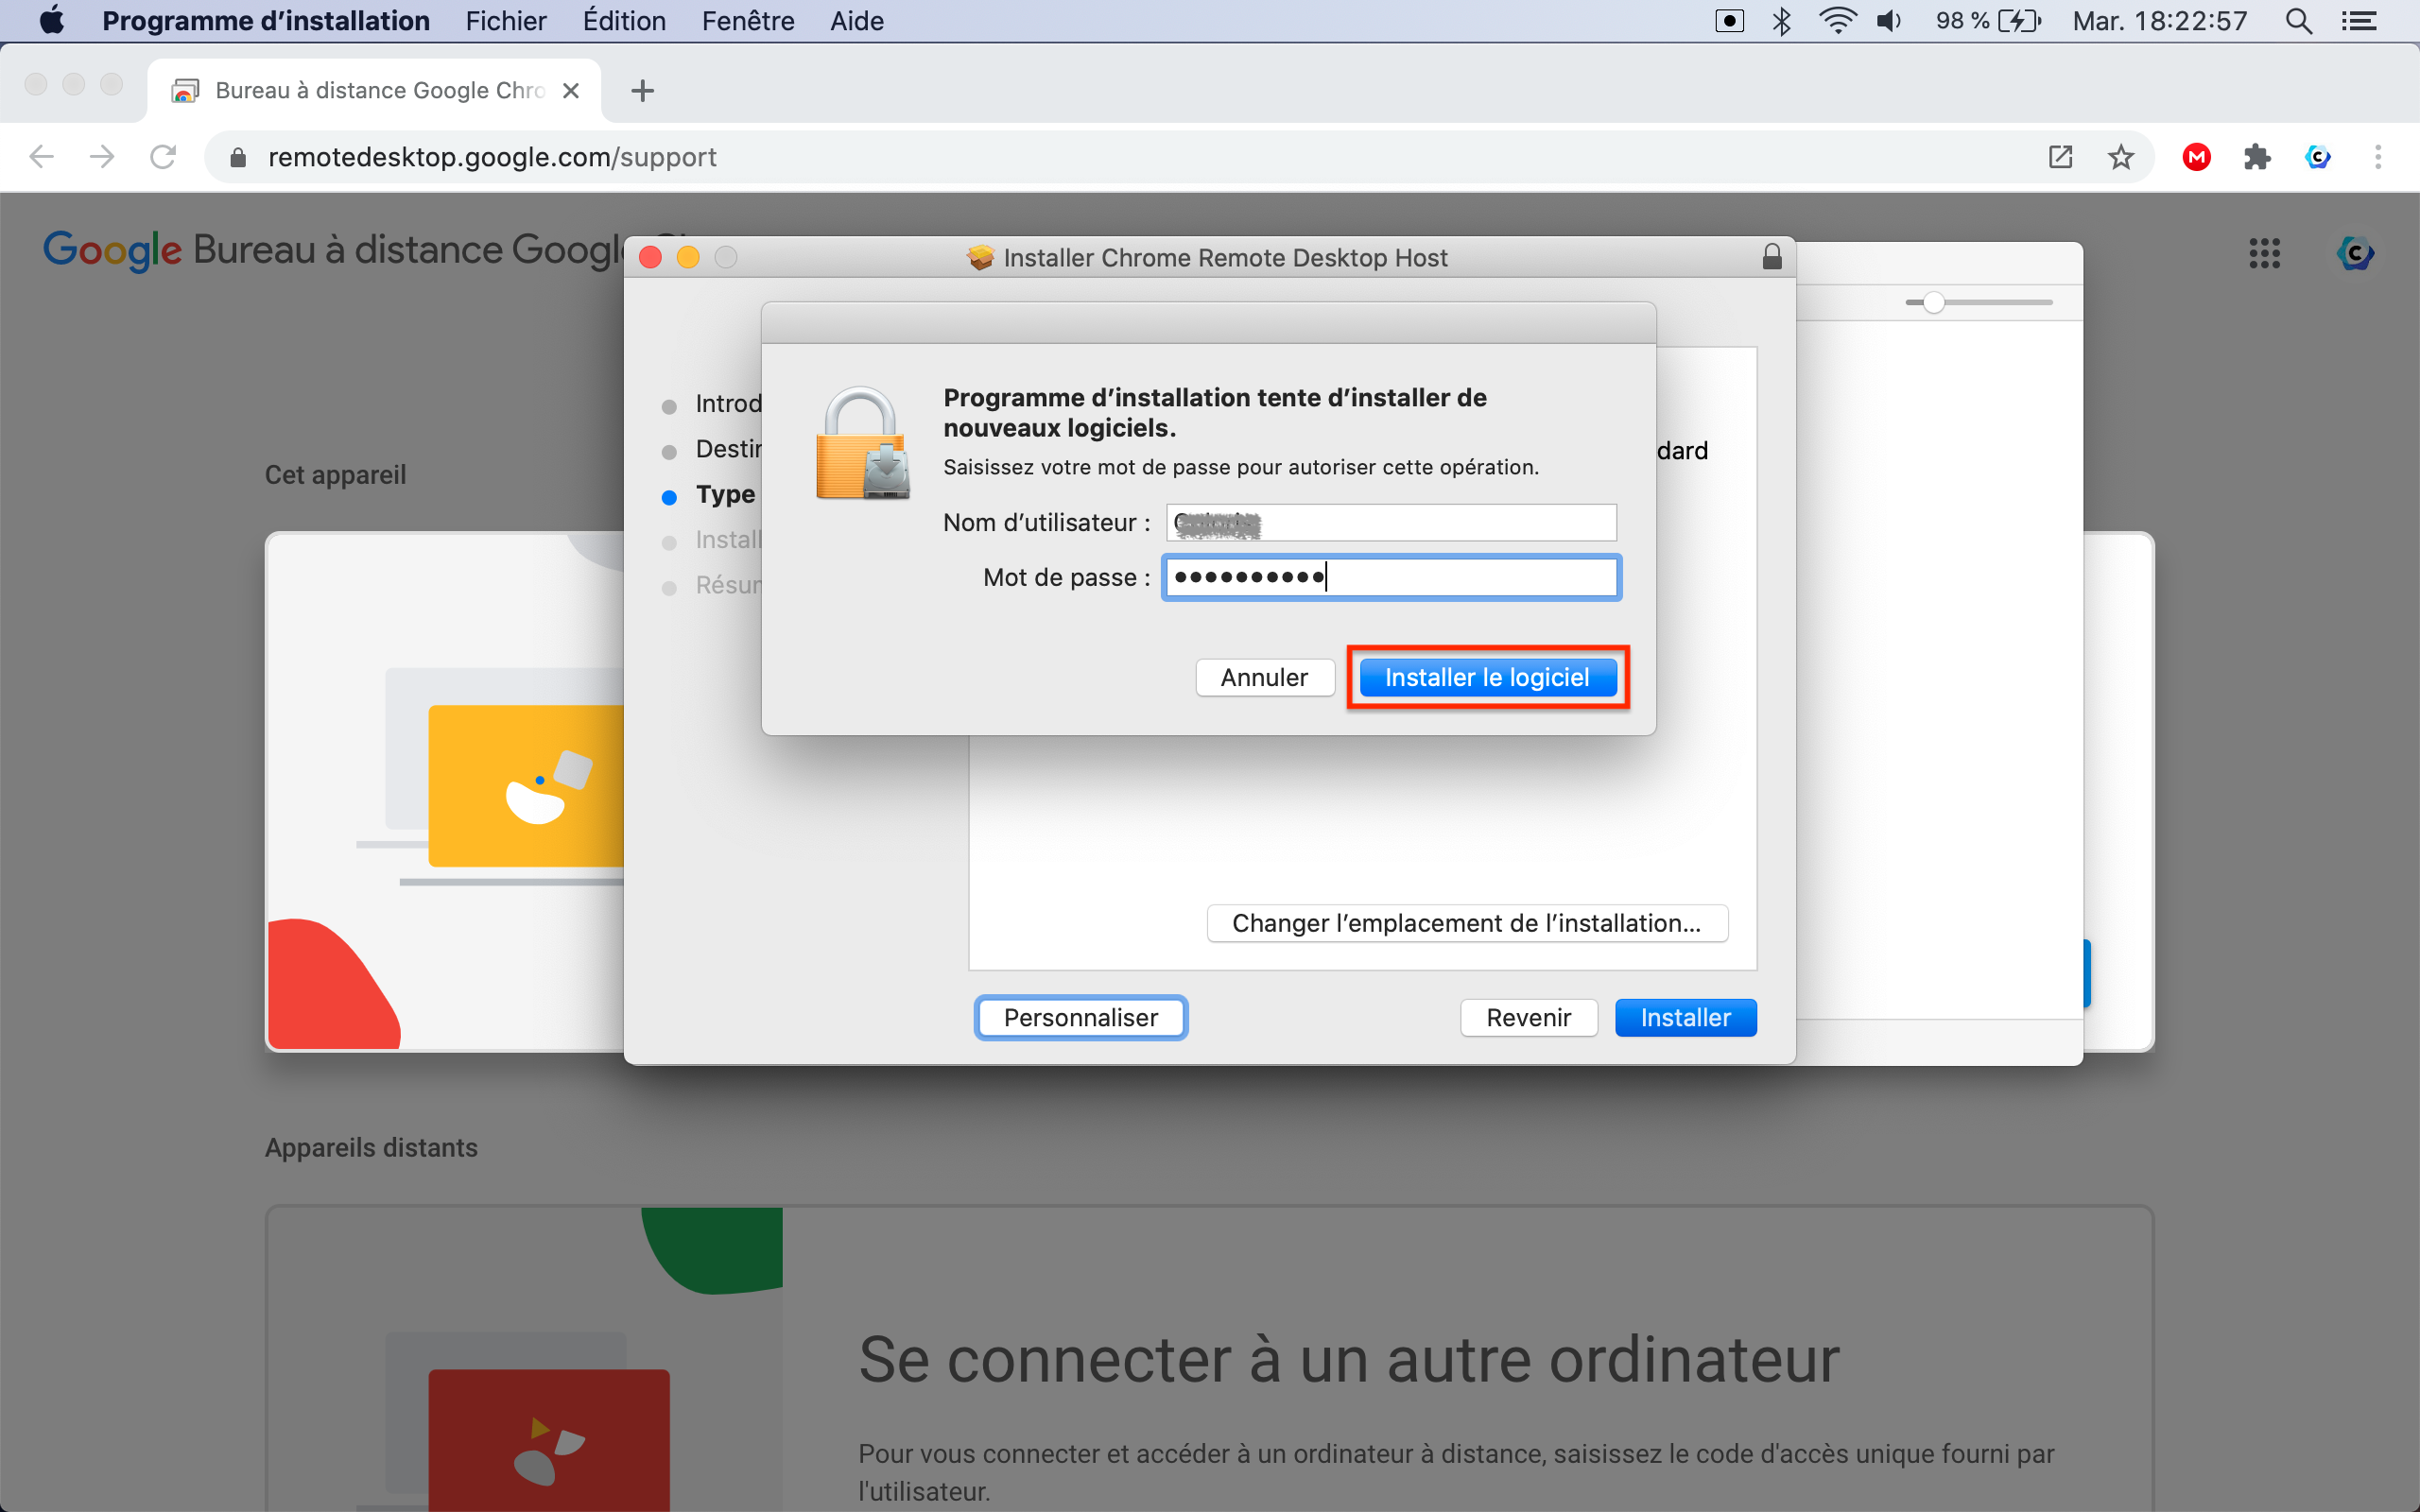
Then click on " Install "

Enter your login (Username) and password to allow the software to be installed.
Installation is in progress

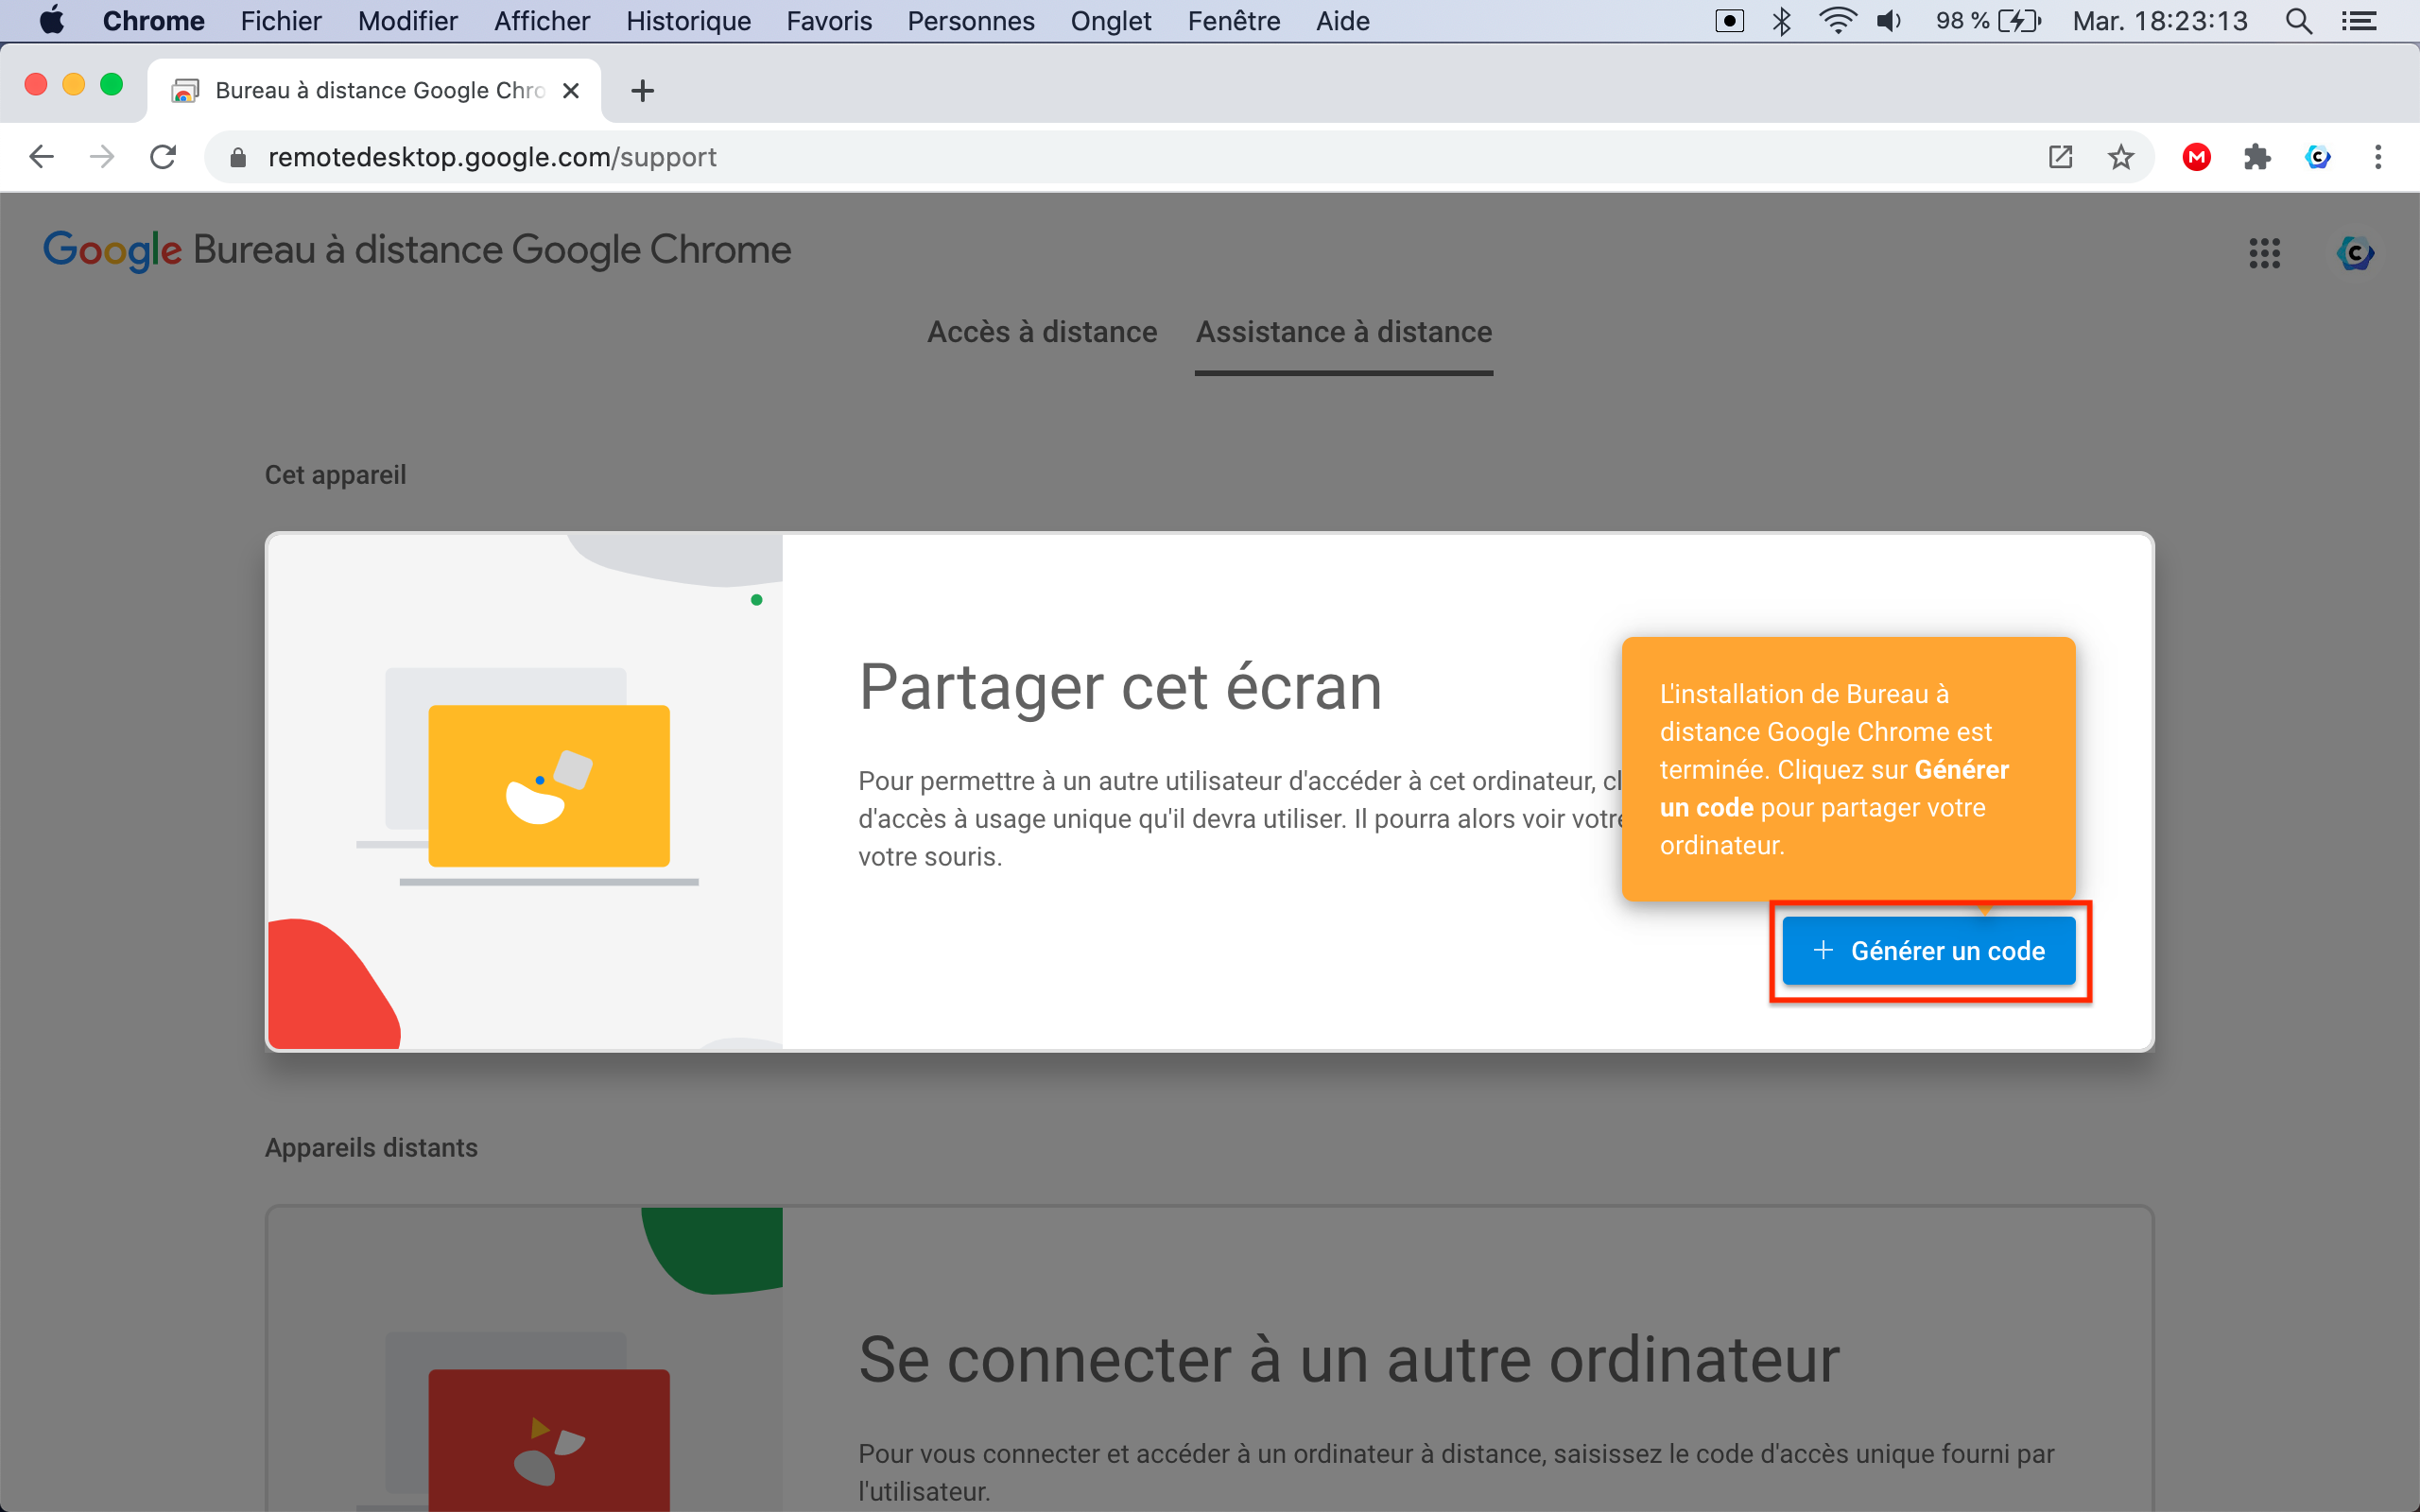
Once the software is installed, click on the button " Generate a code "
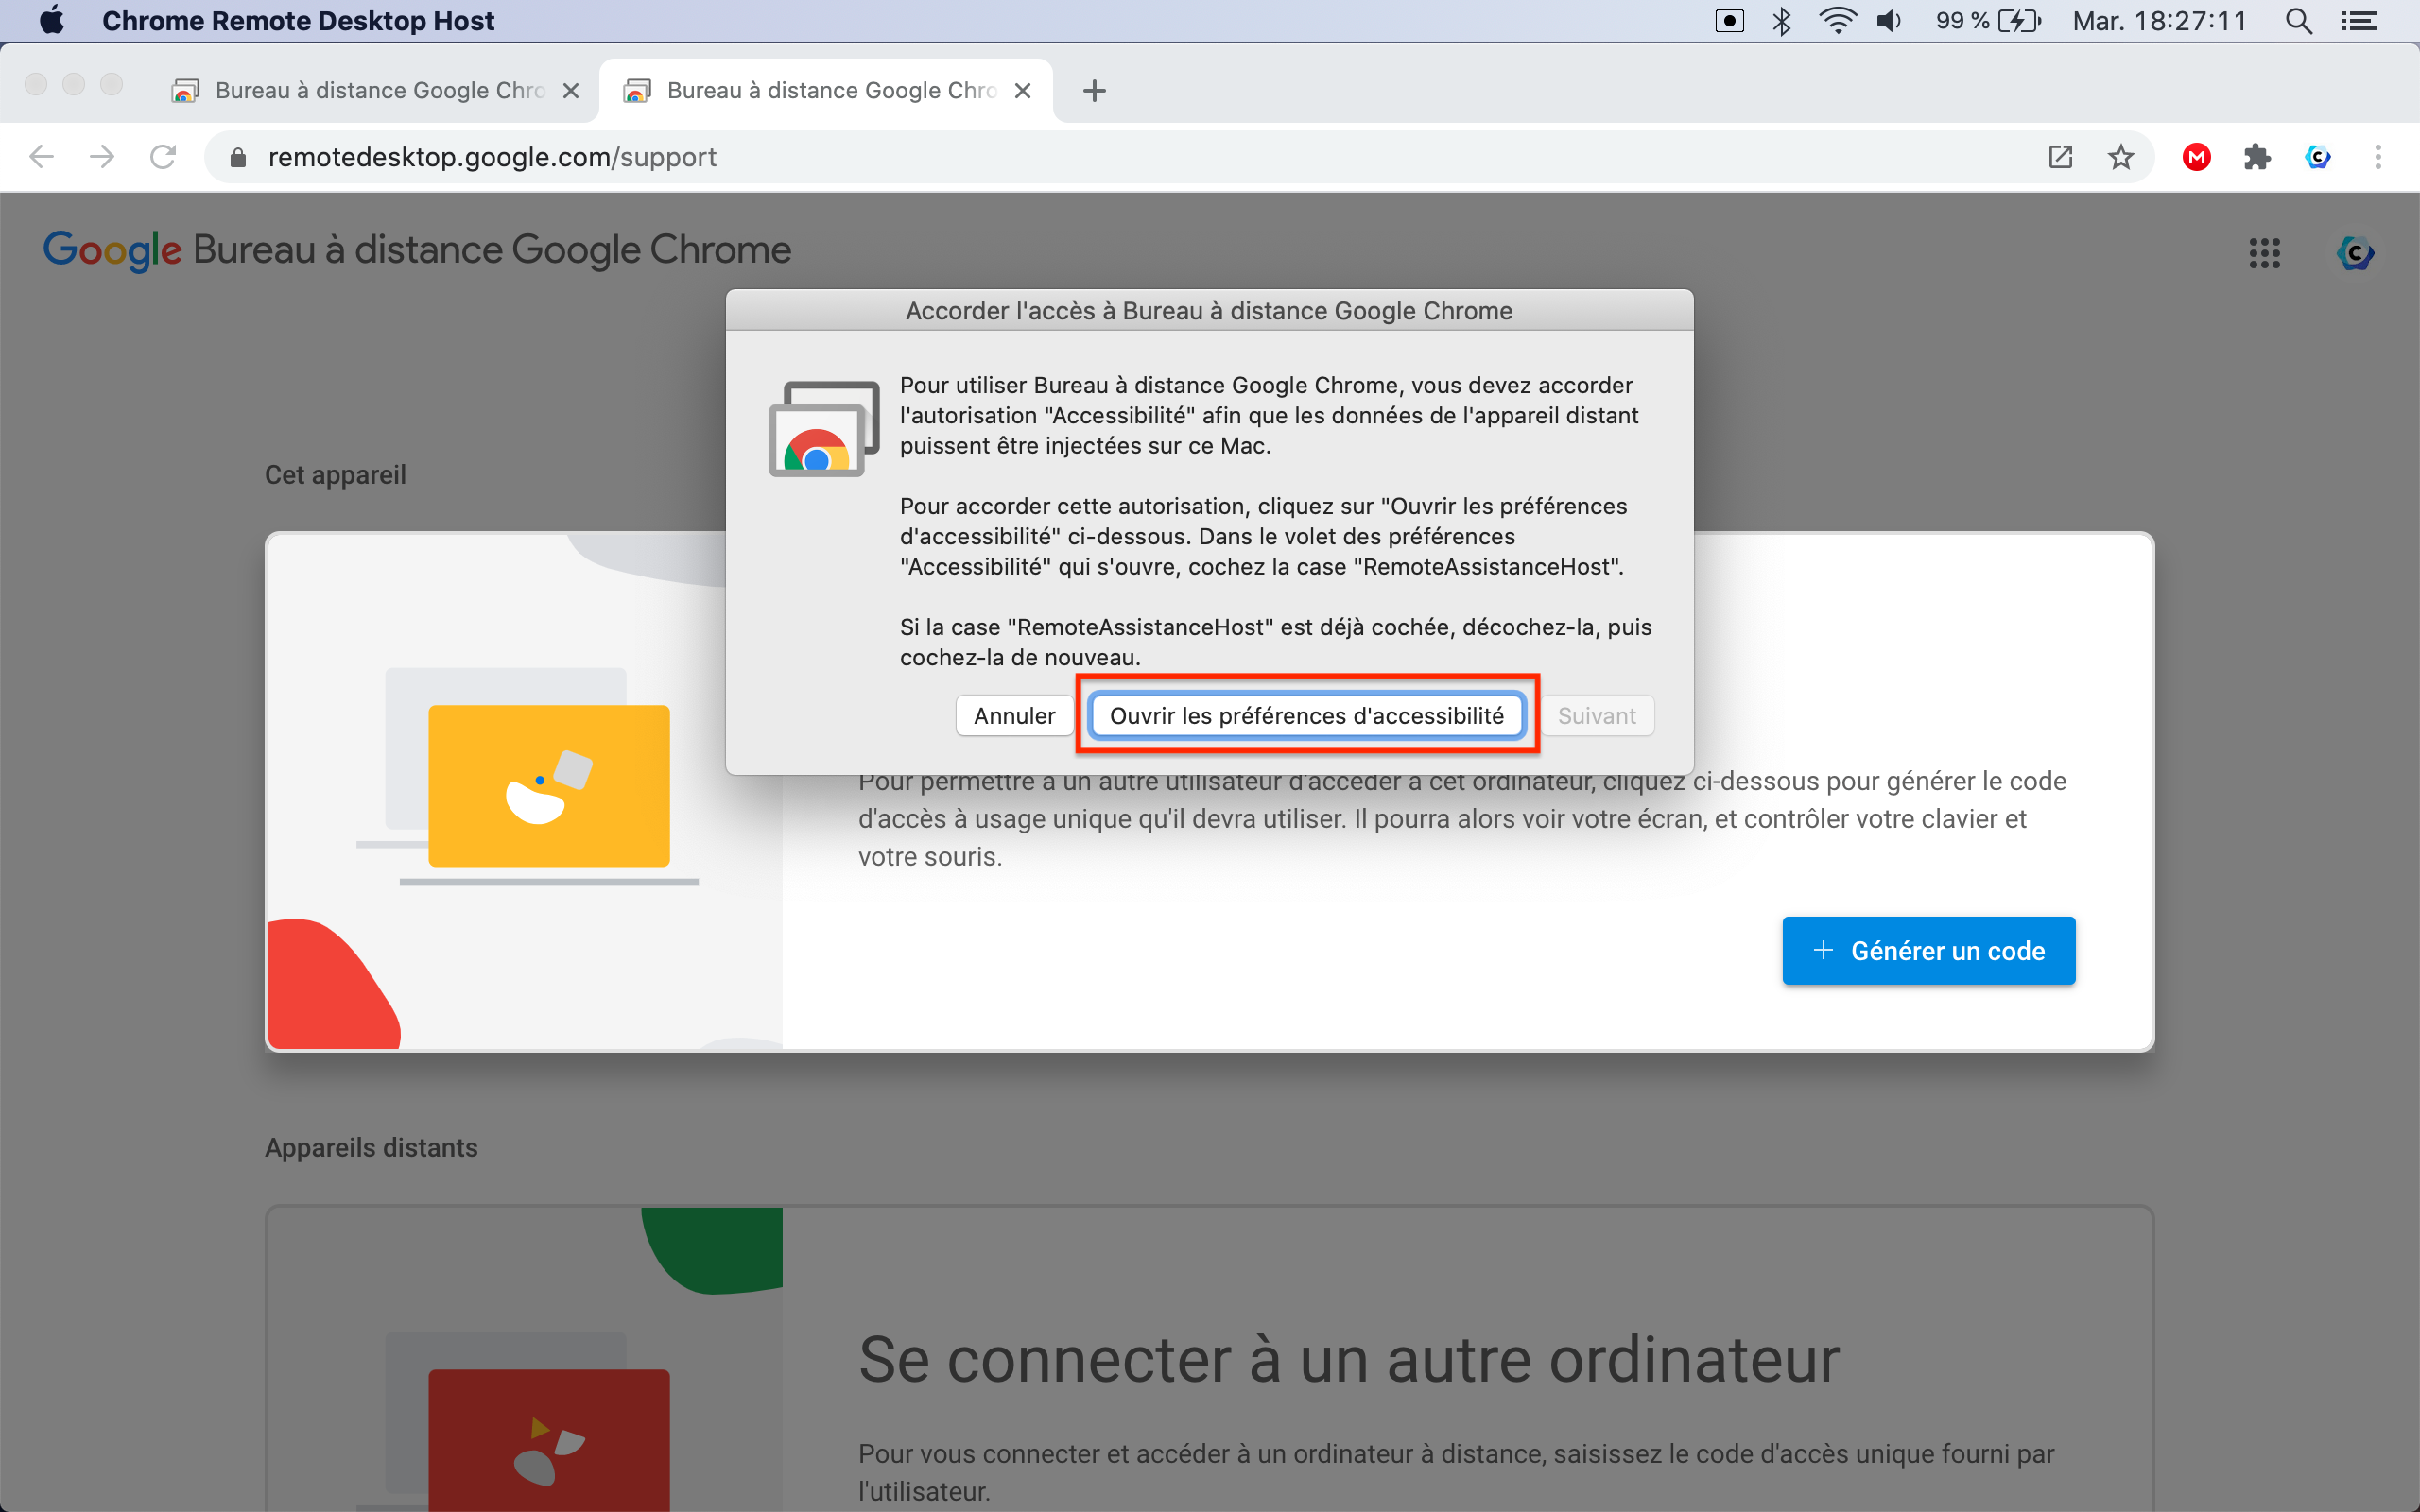
When you launch " Chrome Remote Desktop Host " for the first time, a window will appear asking you to open accessibility preferences.
Click the " Open Accessibility Preferences " button.
Unlock the padlock located at the bottom left of the window by clicking on it and entering your login (Username) and password.
Then in " Accessibility " check the box corresponding to " RemoteAssistanceHost "
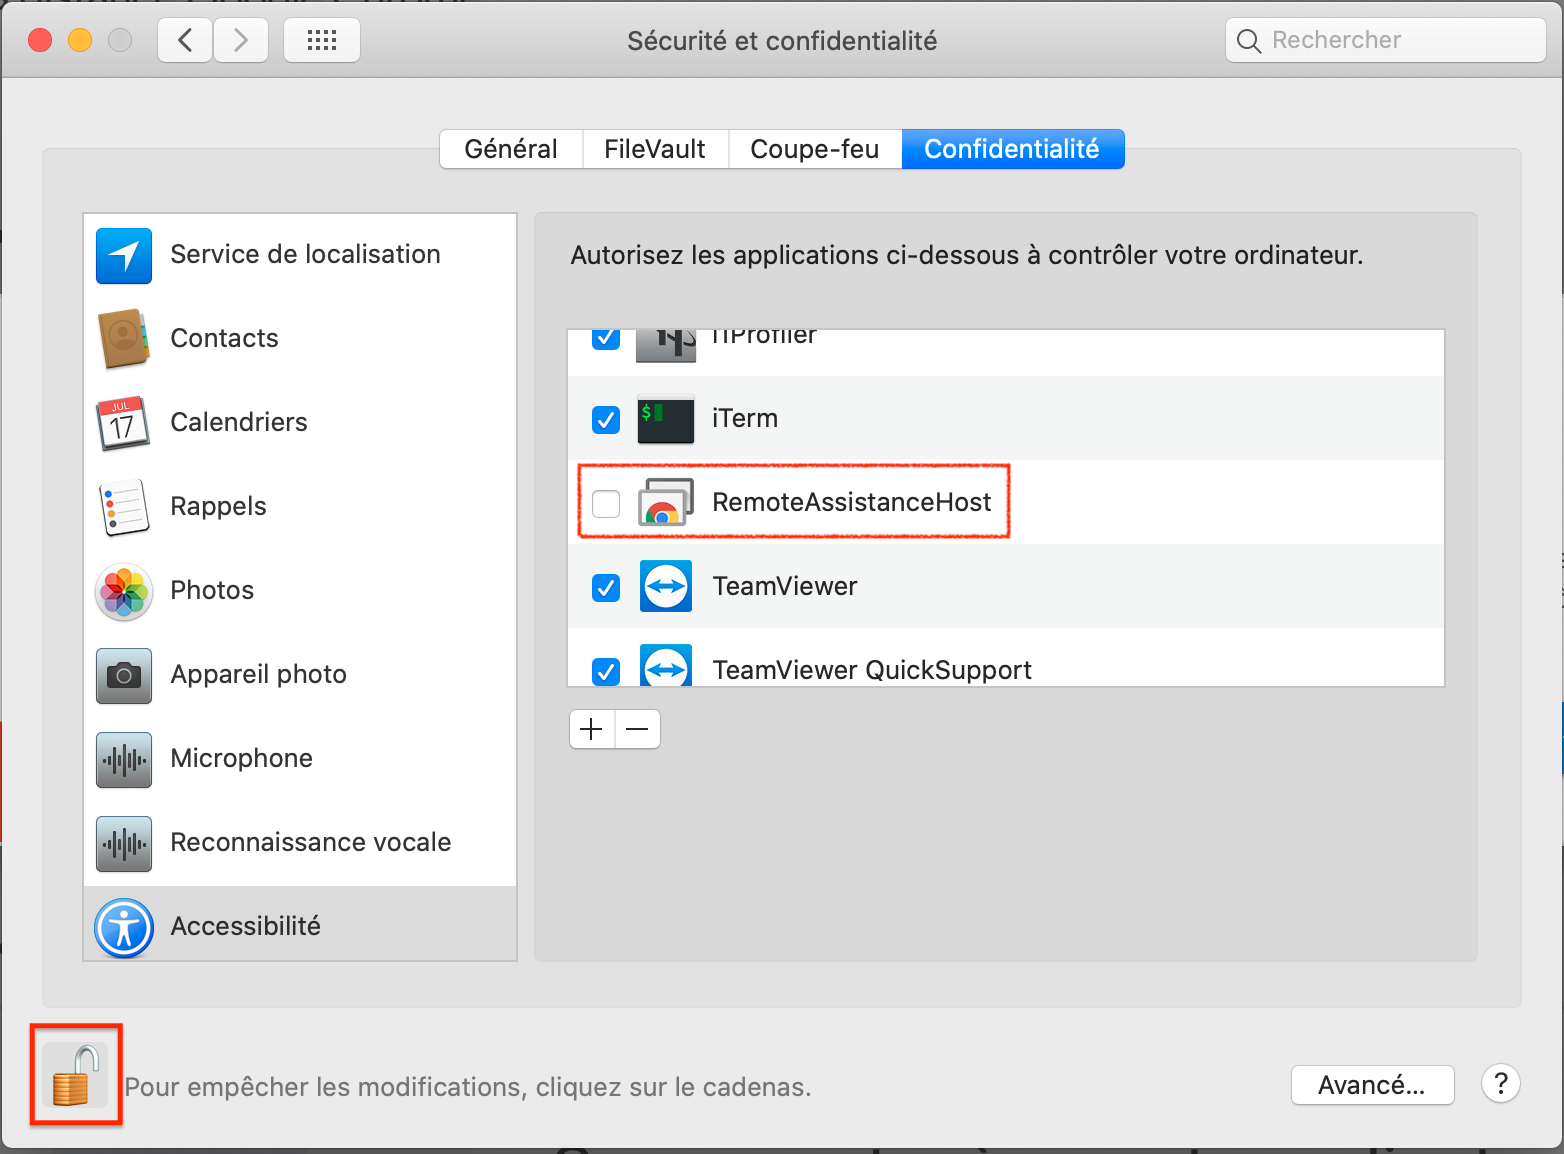
A new window appears, click on " OK "

Screen sharing with RemoteDesktop
That's it we will be able to connect to your computer to help you resolve your difficulties. But before that we still need you ...
Open a browser (Google Chrome for example), then type the address below in the address bar
https://remotedesktop.google.com/support

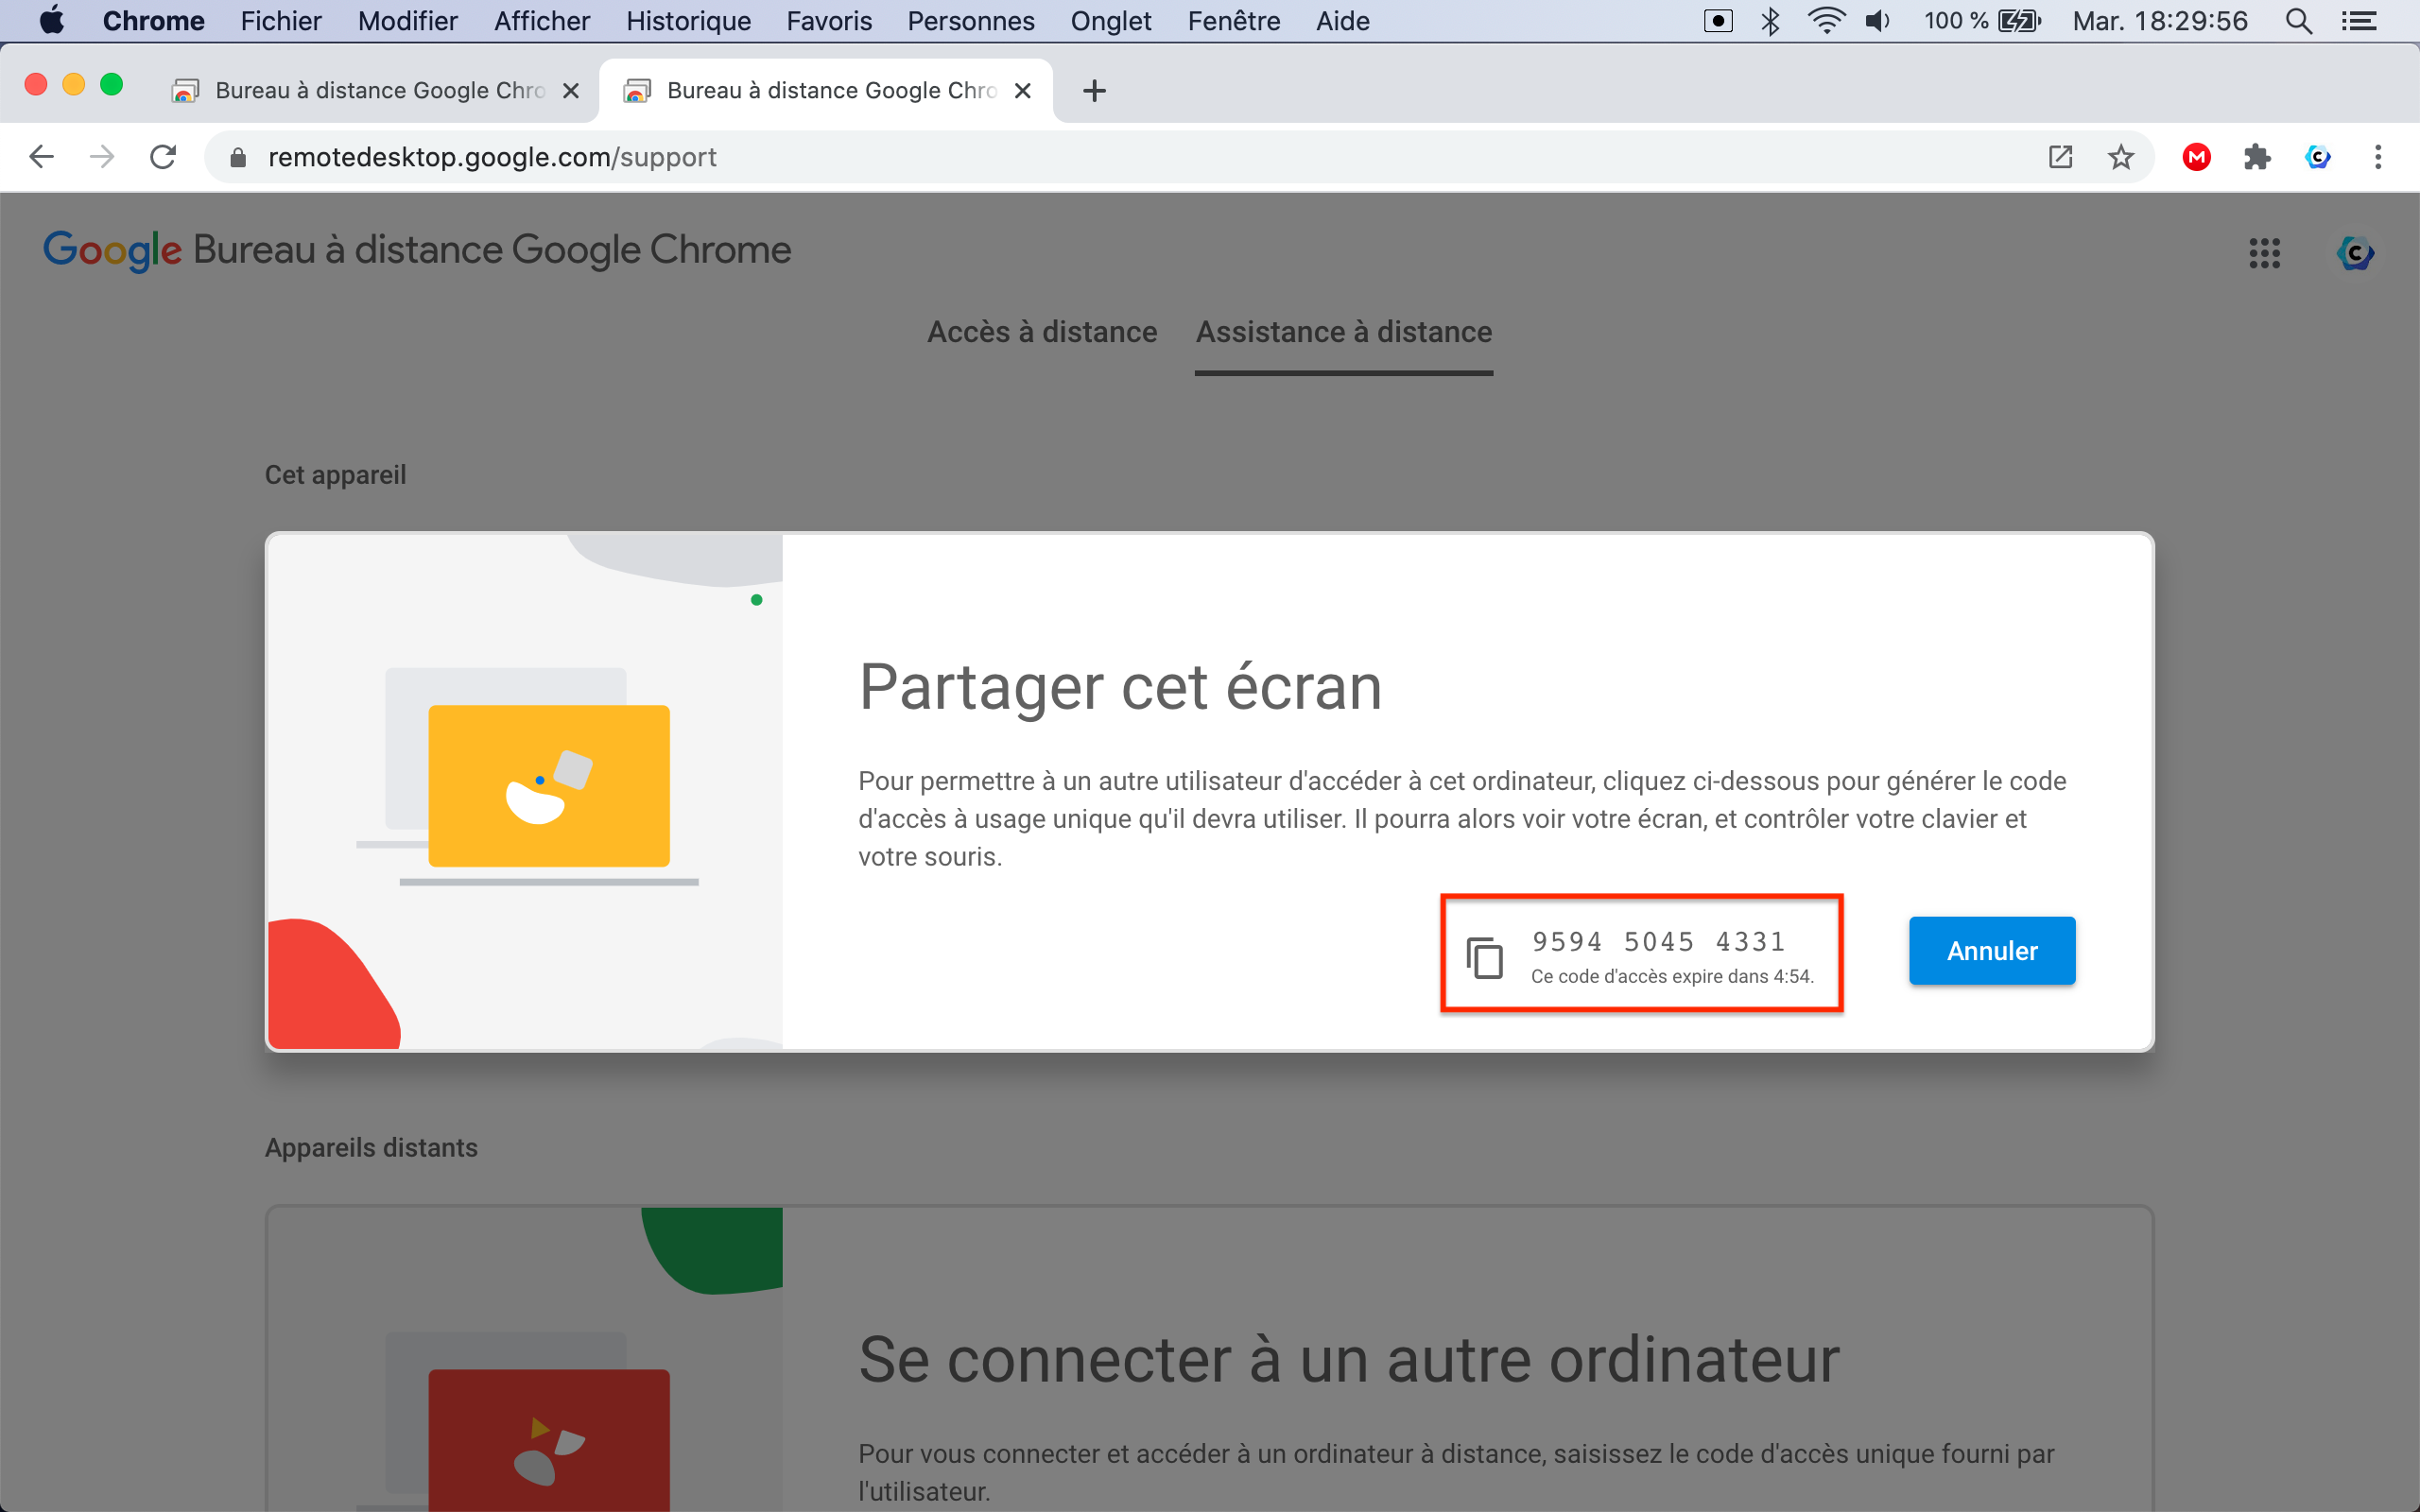
Send us this 12-digit code and we can take control of your computer.
Please note the code is only valid for 5 minutes
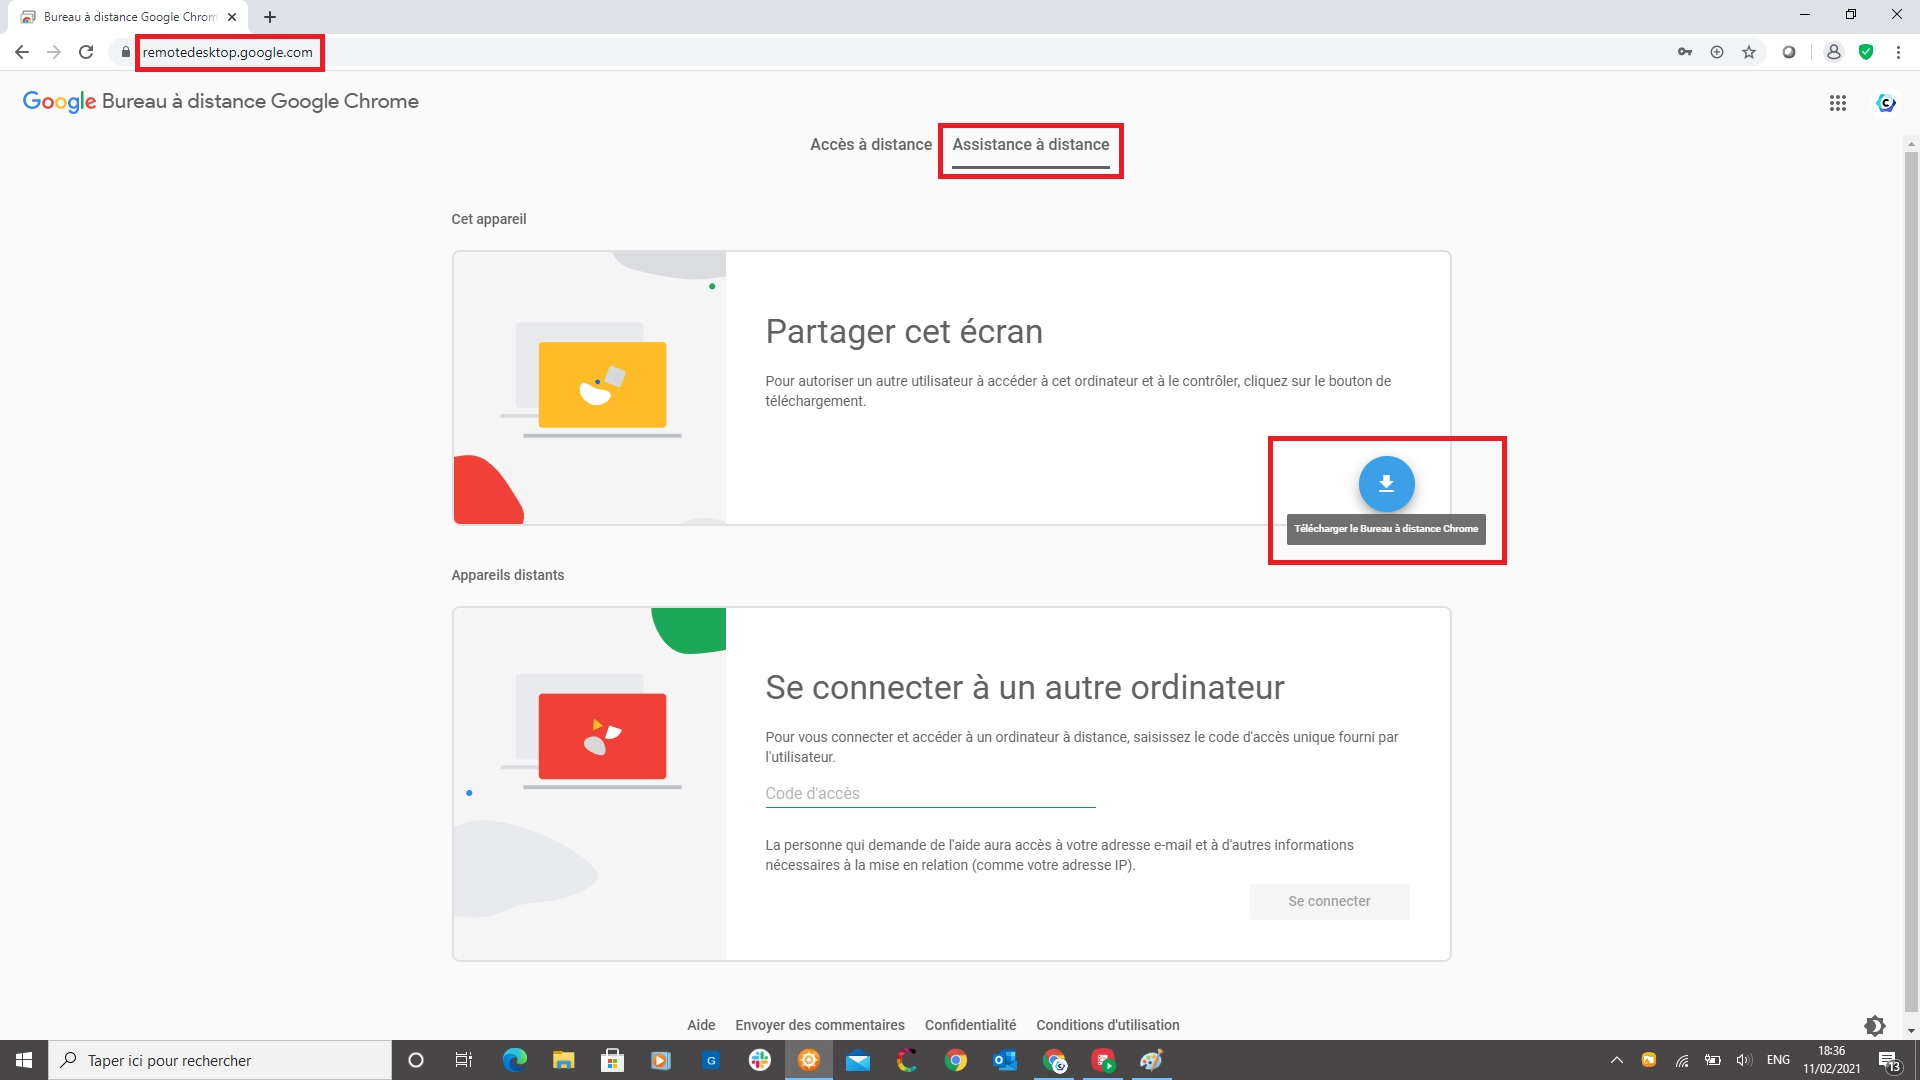
Windows remote assistance
This tutorial will help you install Google Remote Desktop on your PC.
Before any remote assistance request, please install this module before contacting us.
Installing Google Remote Desktop on Windows 10 operating system
Prerequisite:
Installation of the Google Chrome browser:
The first step is to open a browser (Google Chrome for example), then type the address below in the address bar.
https://remotedesktop.google.com/support
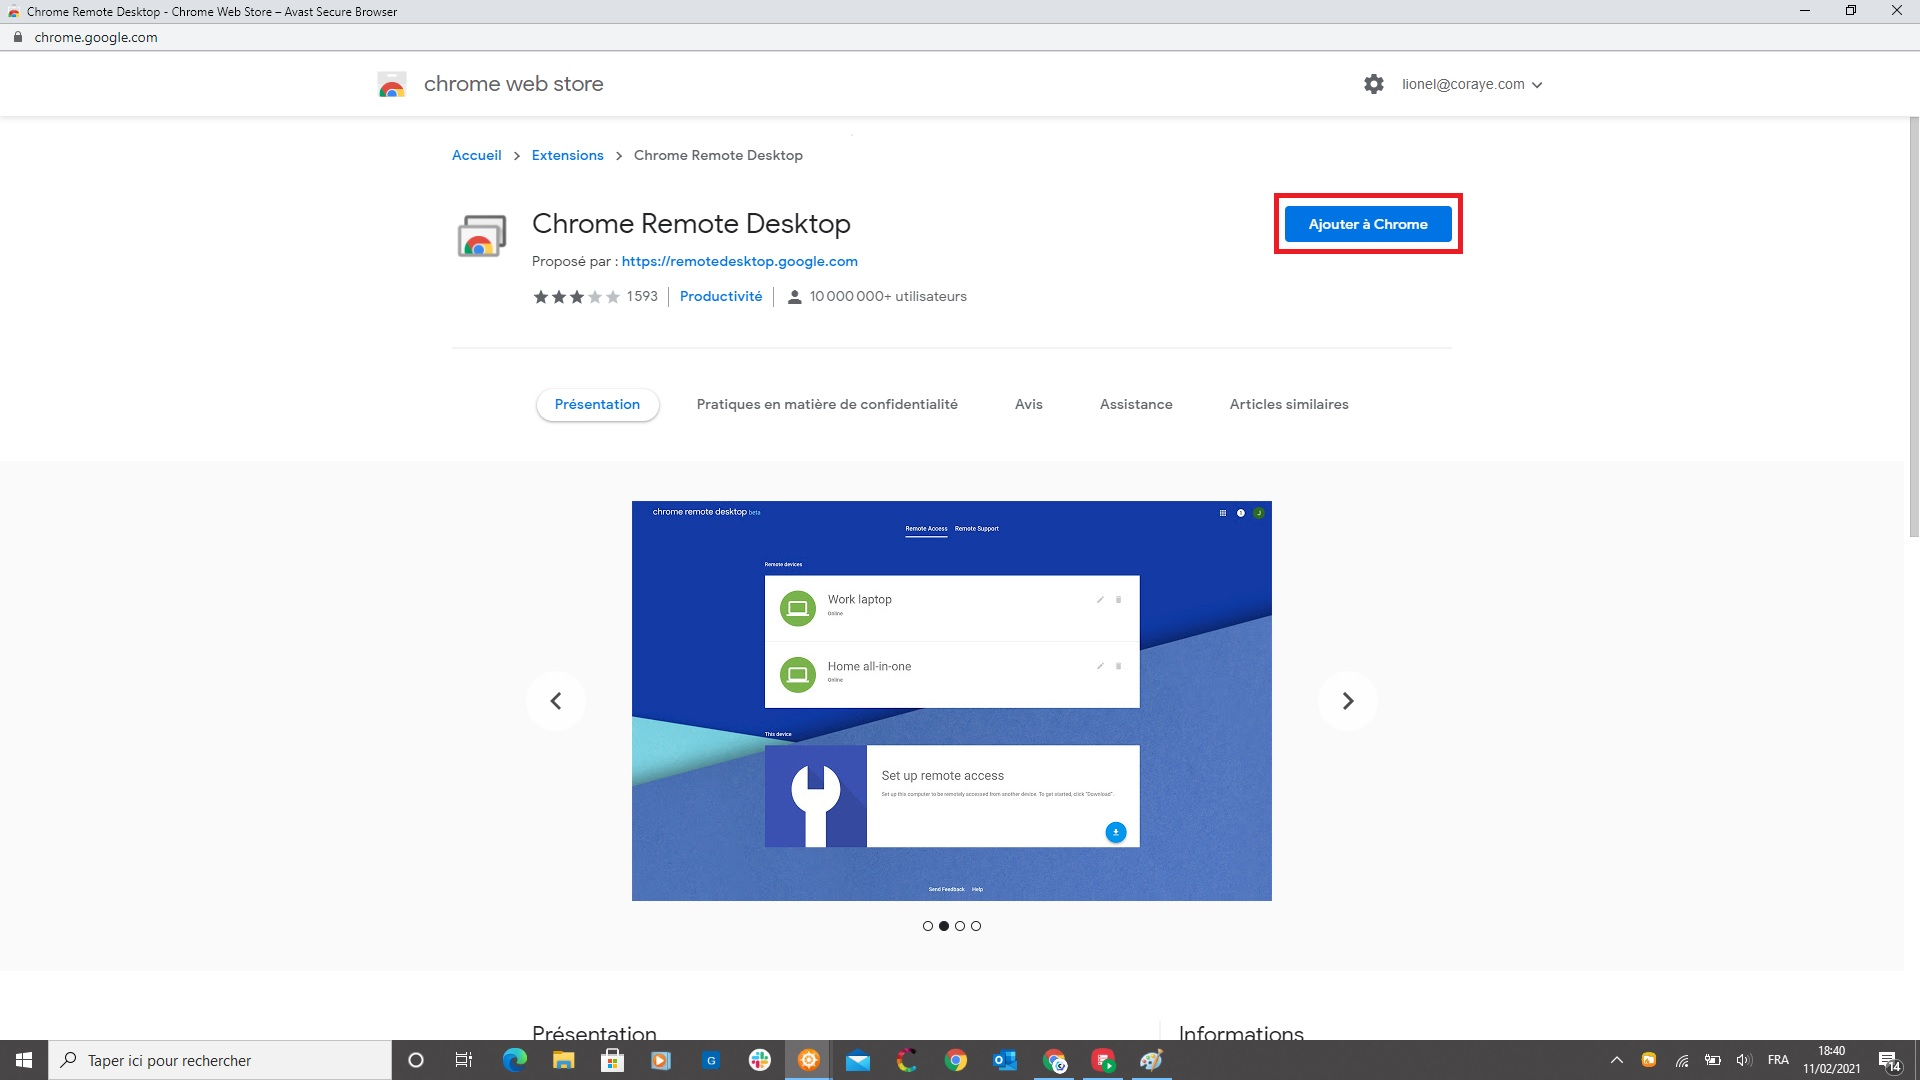
Click on the " Download Chrome Remote Desktop " button to be directed to the " Chrome web store "
On the Chrome web store, click on the " Add to Chrome " button to start downloading the "Chrome Remote Desktop" module.
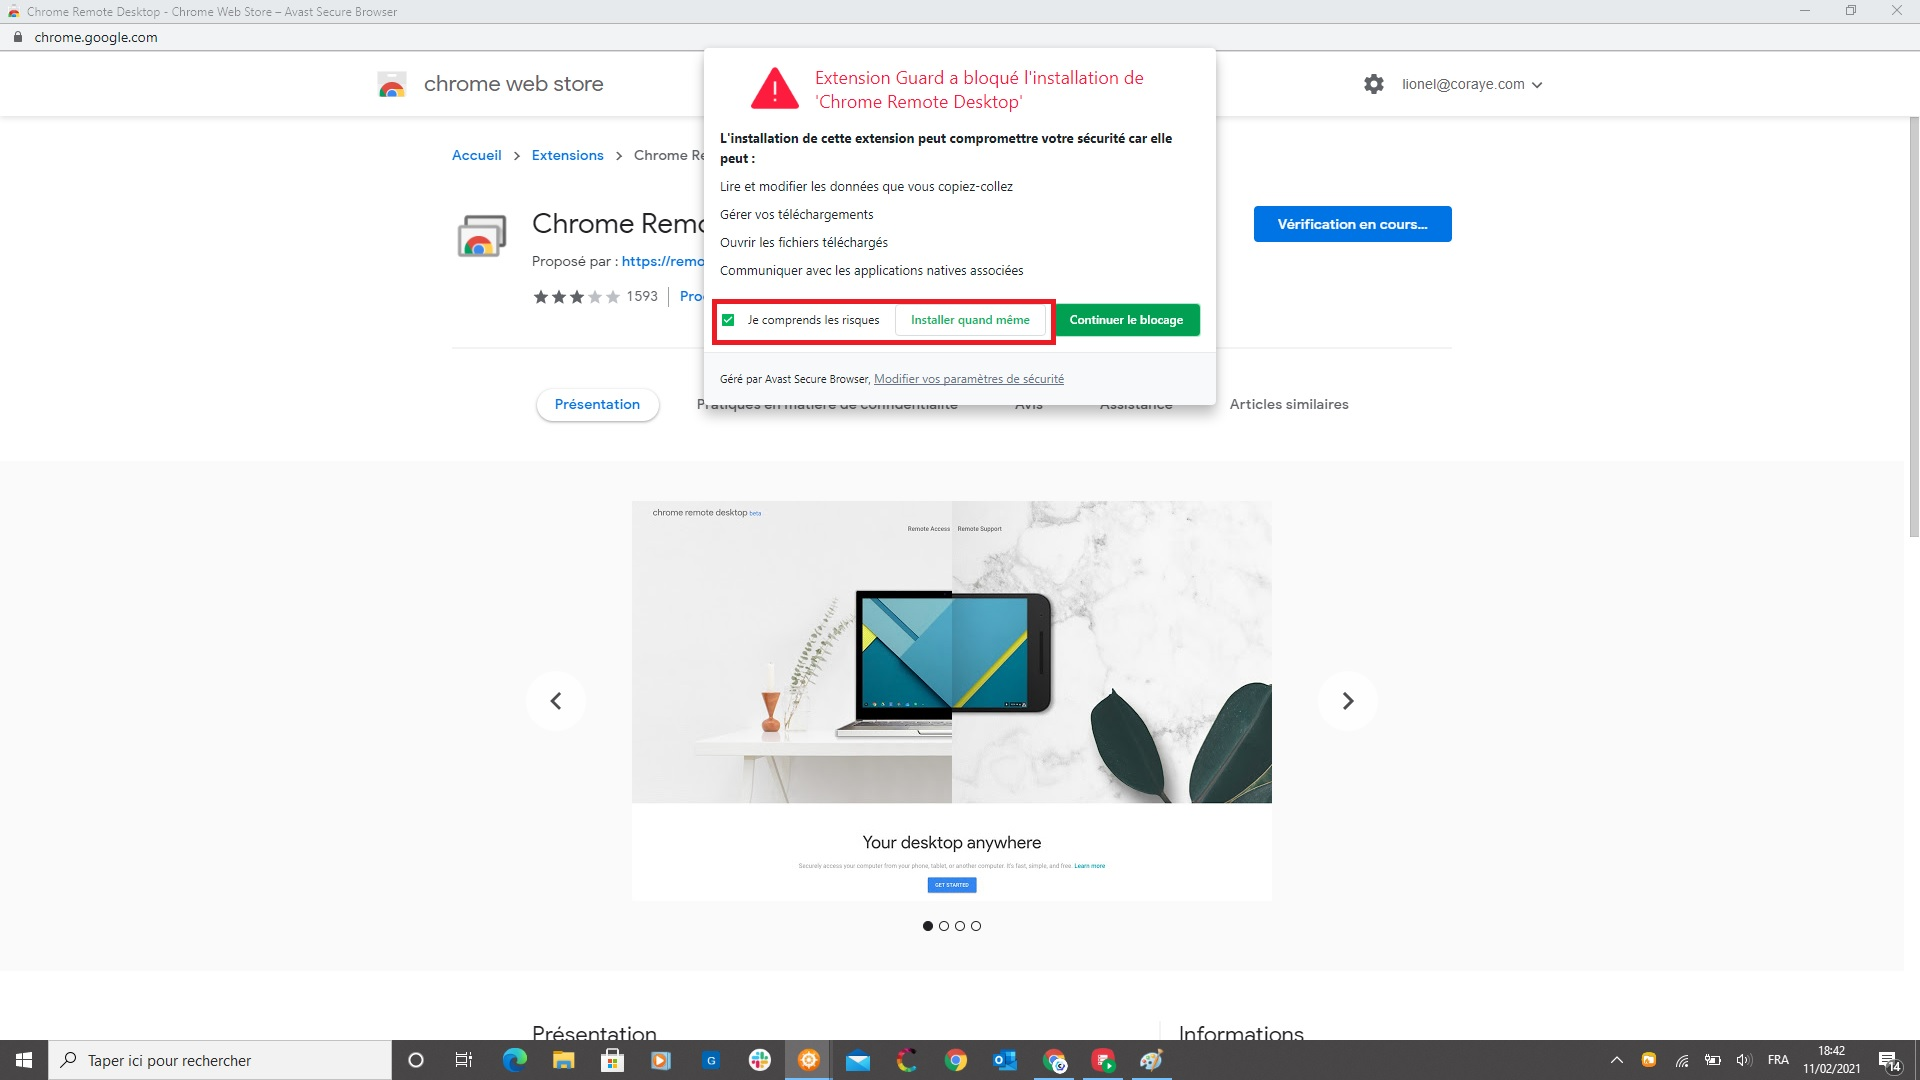
If a security window appears, force the download.
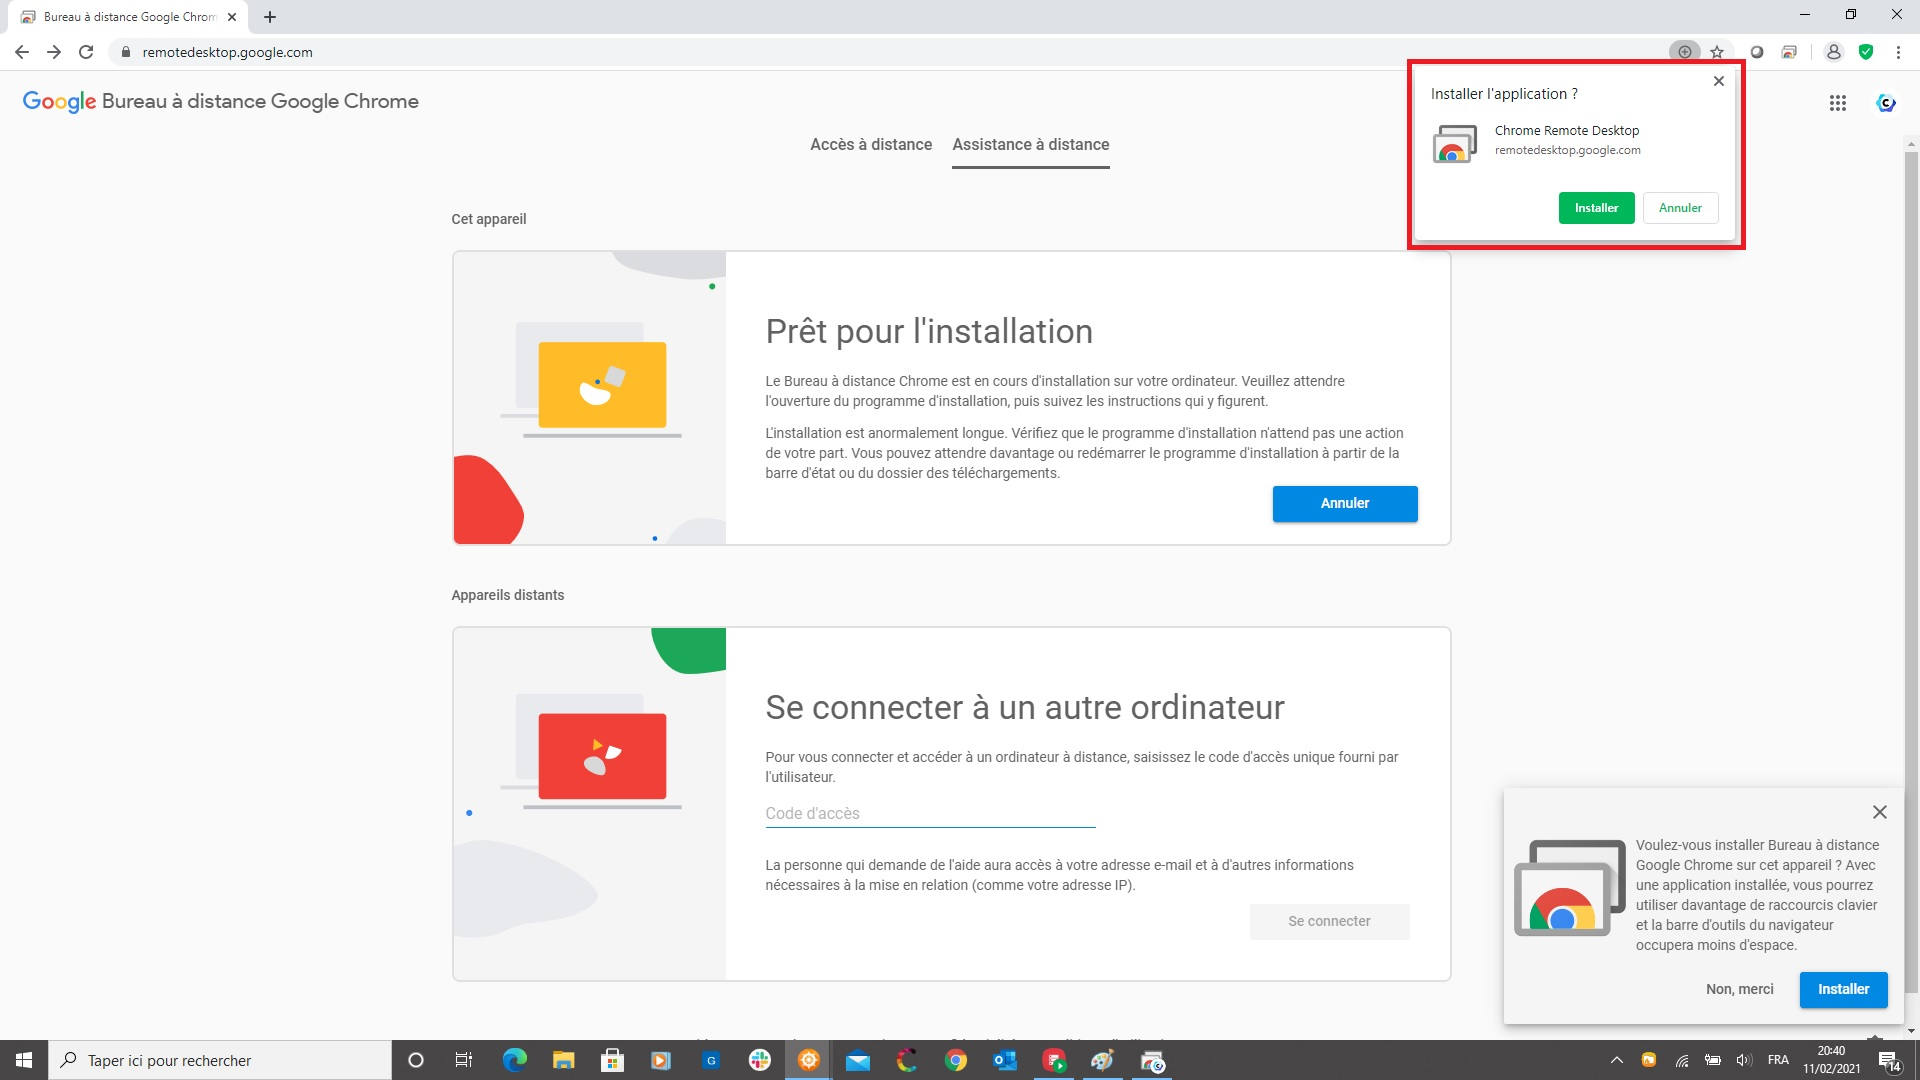
Click on the " Accept and Install " button
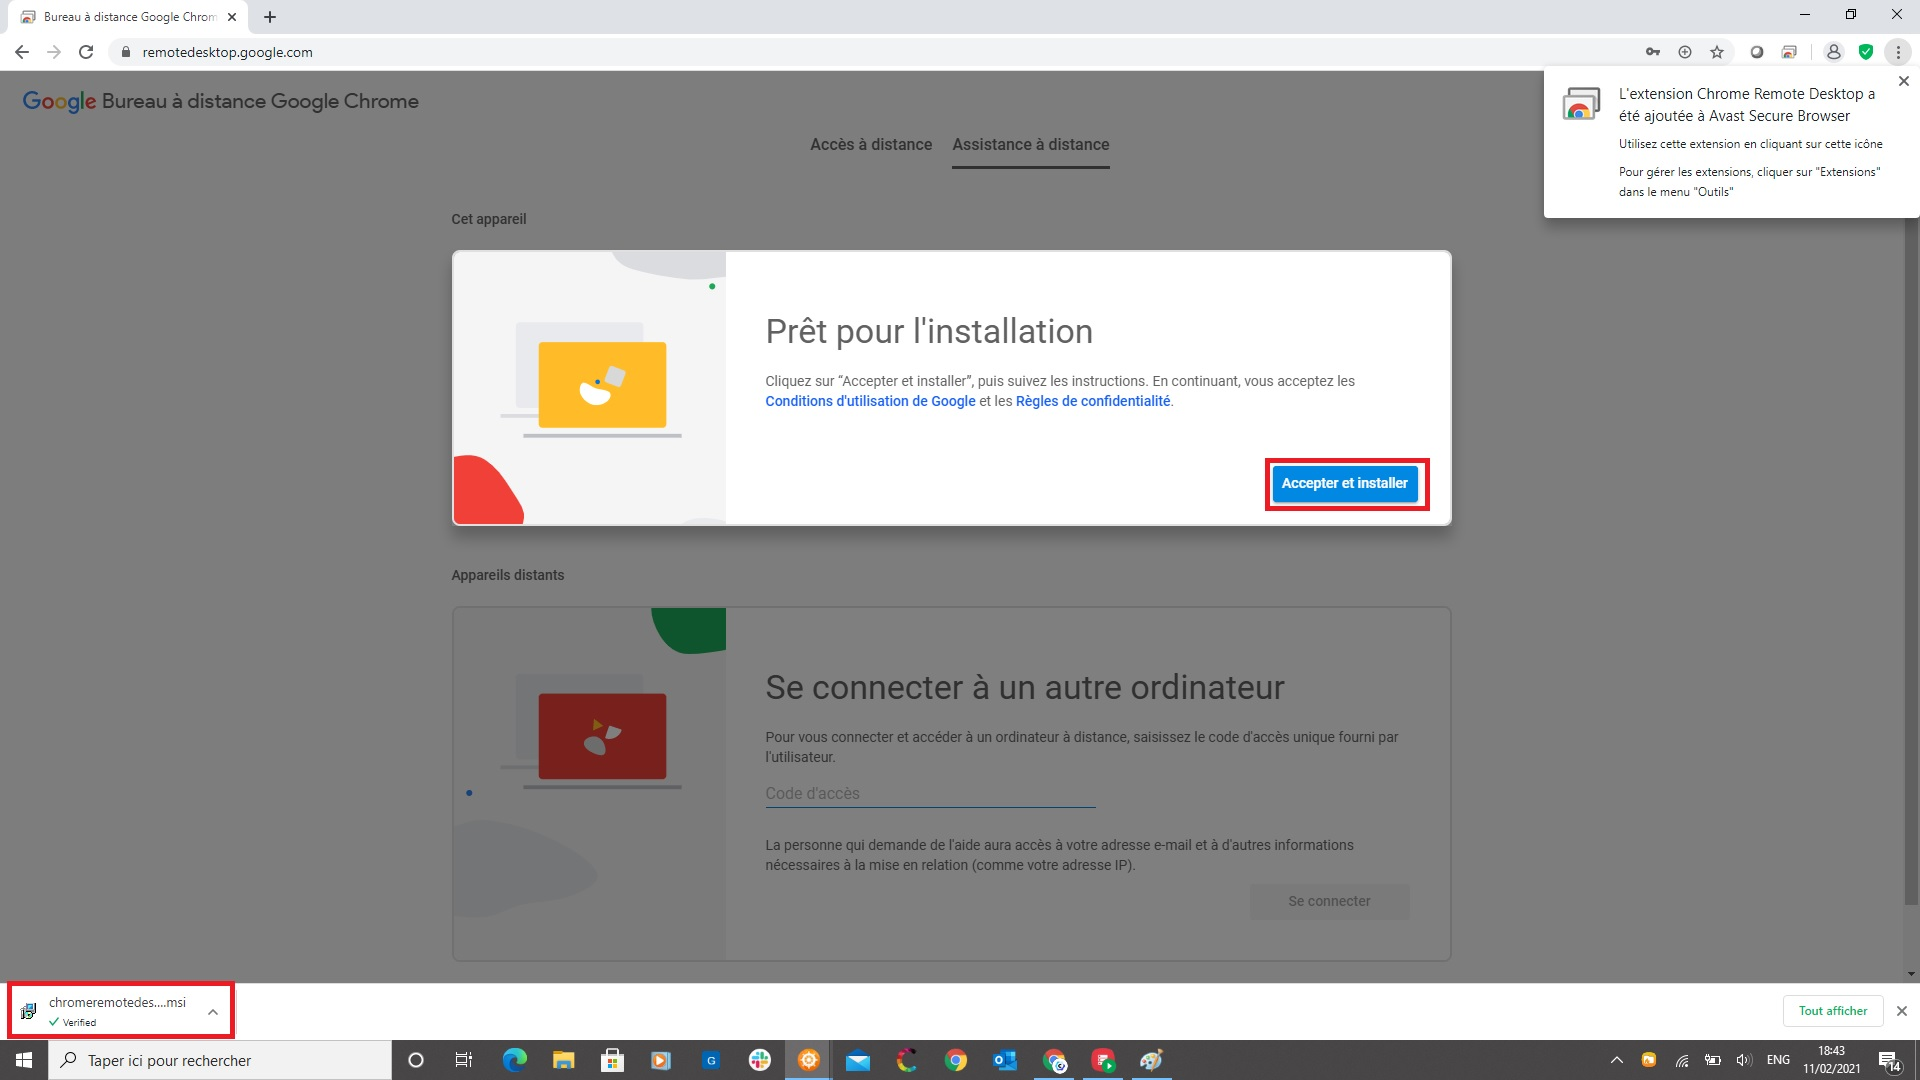
Validate the opening of the downloaded file.
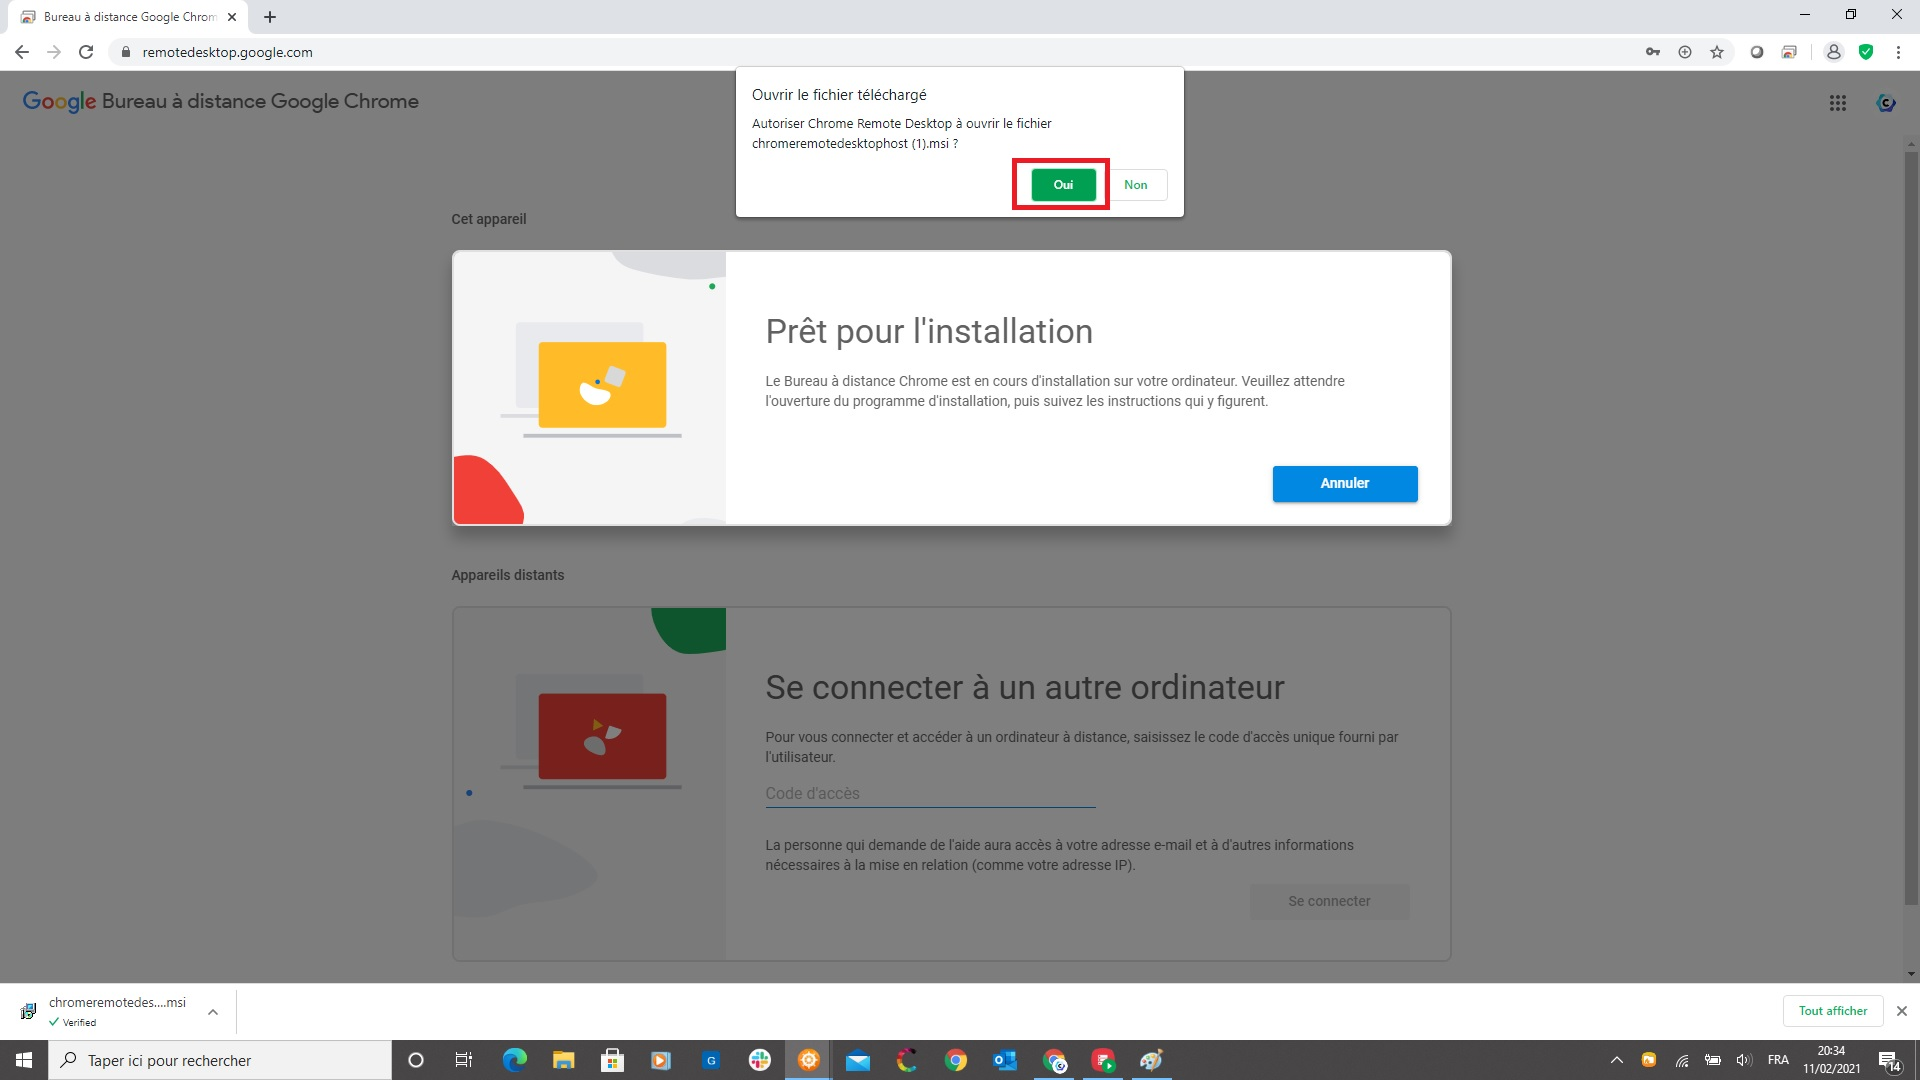
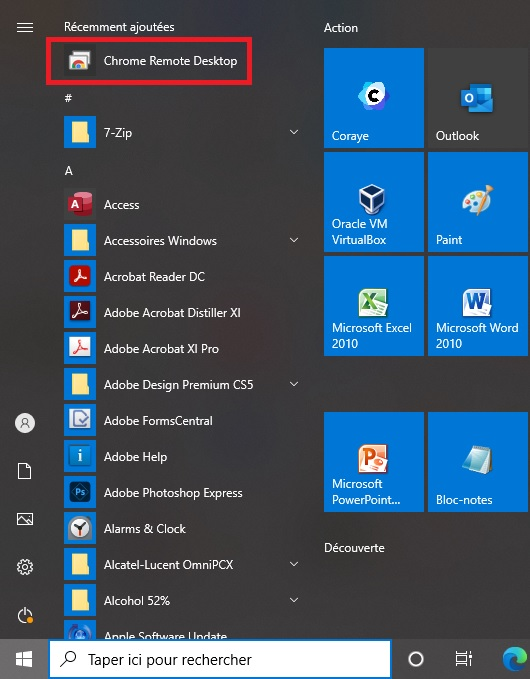
Installation of "Chrome Remote Desktop Host"
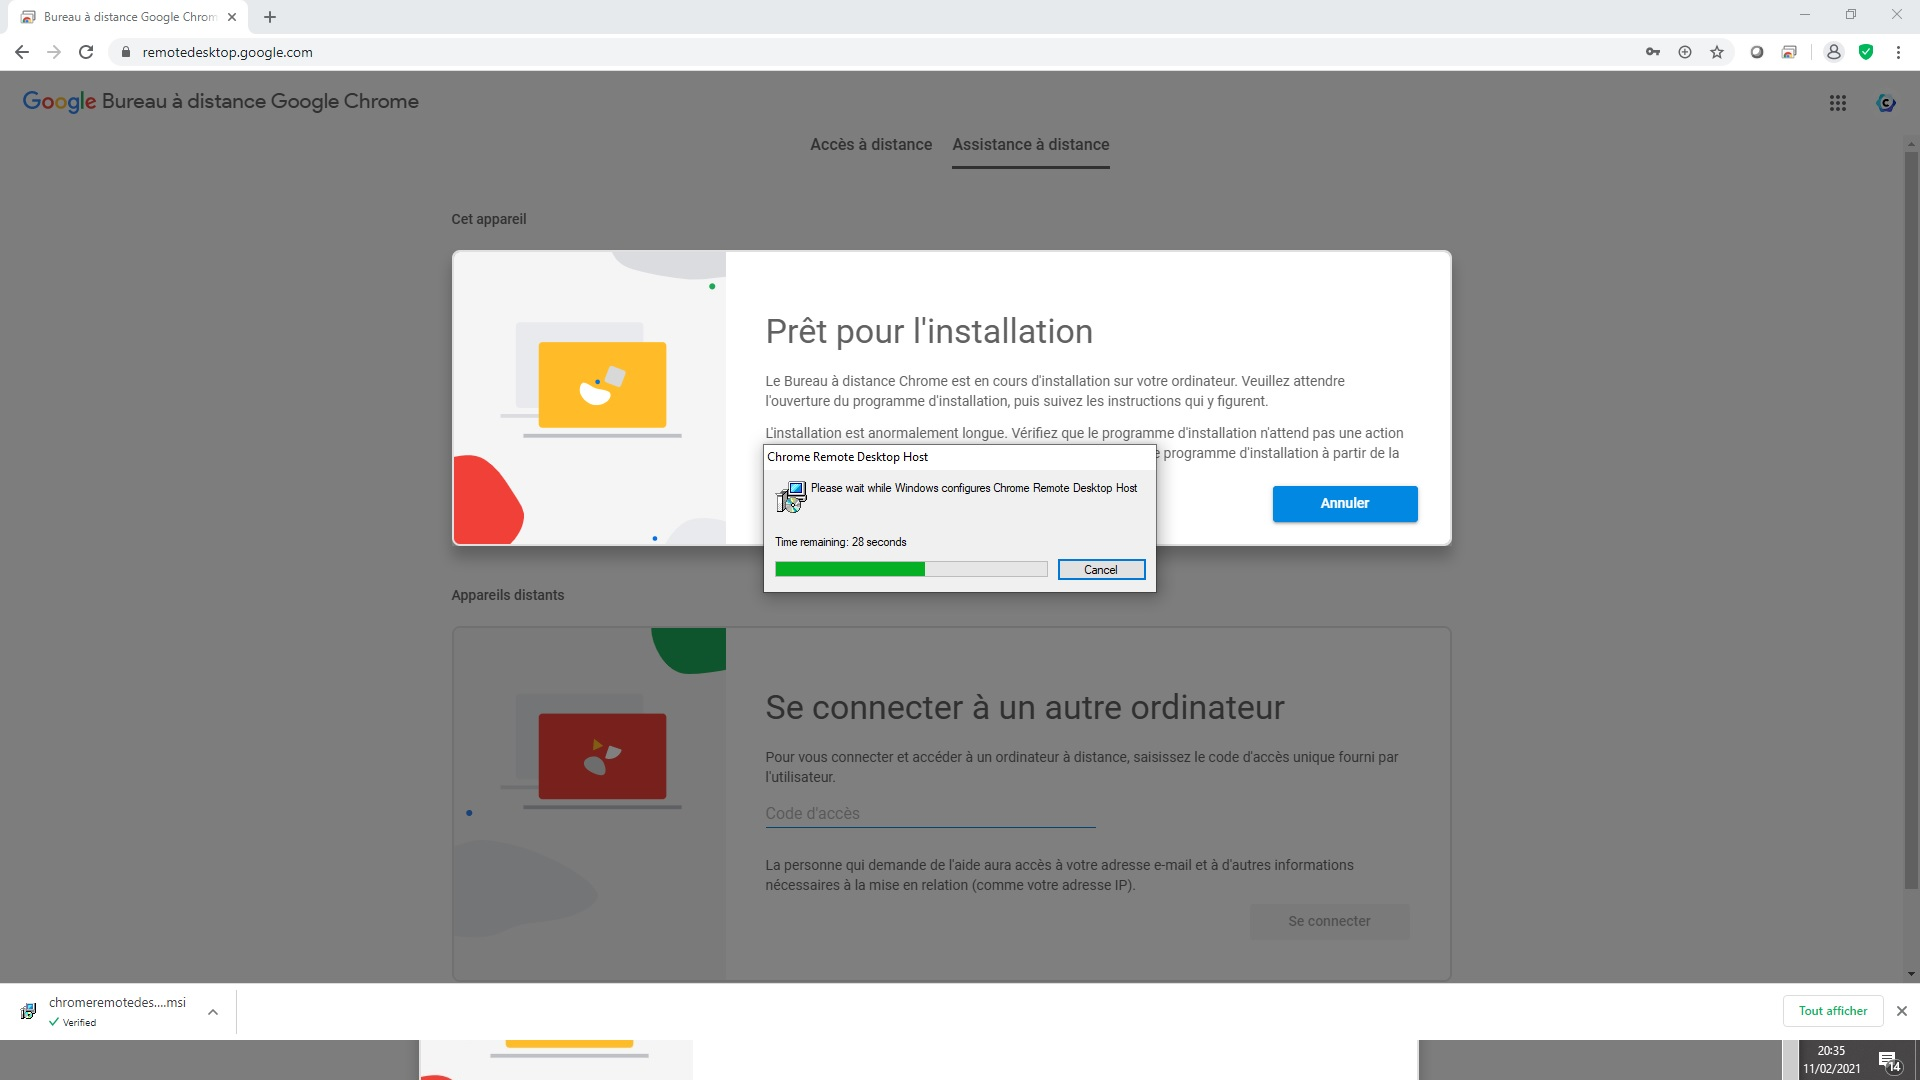
Accept the installation of the Google Chrome remote desktop.
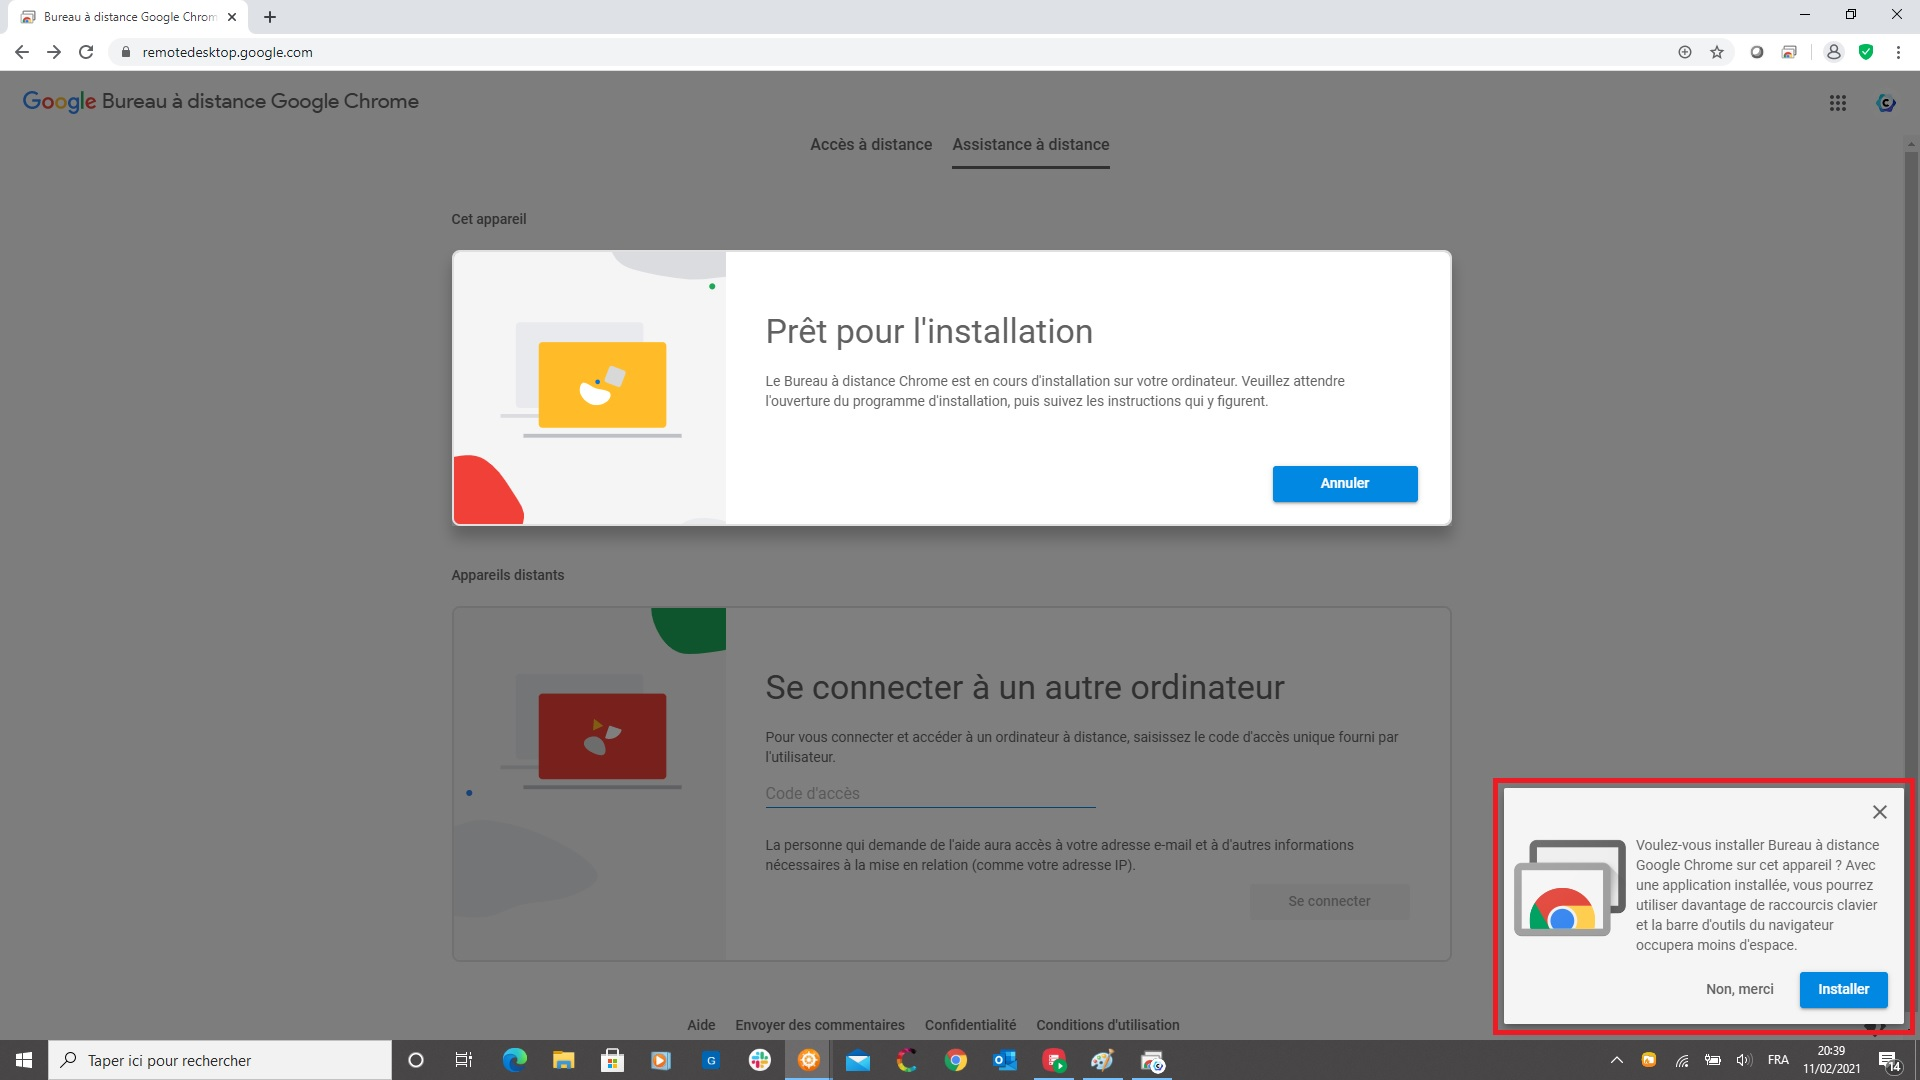
Validate the installation
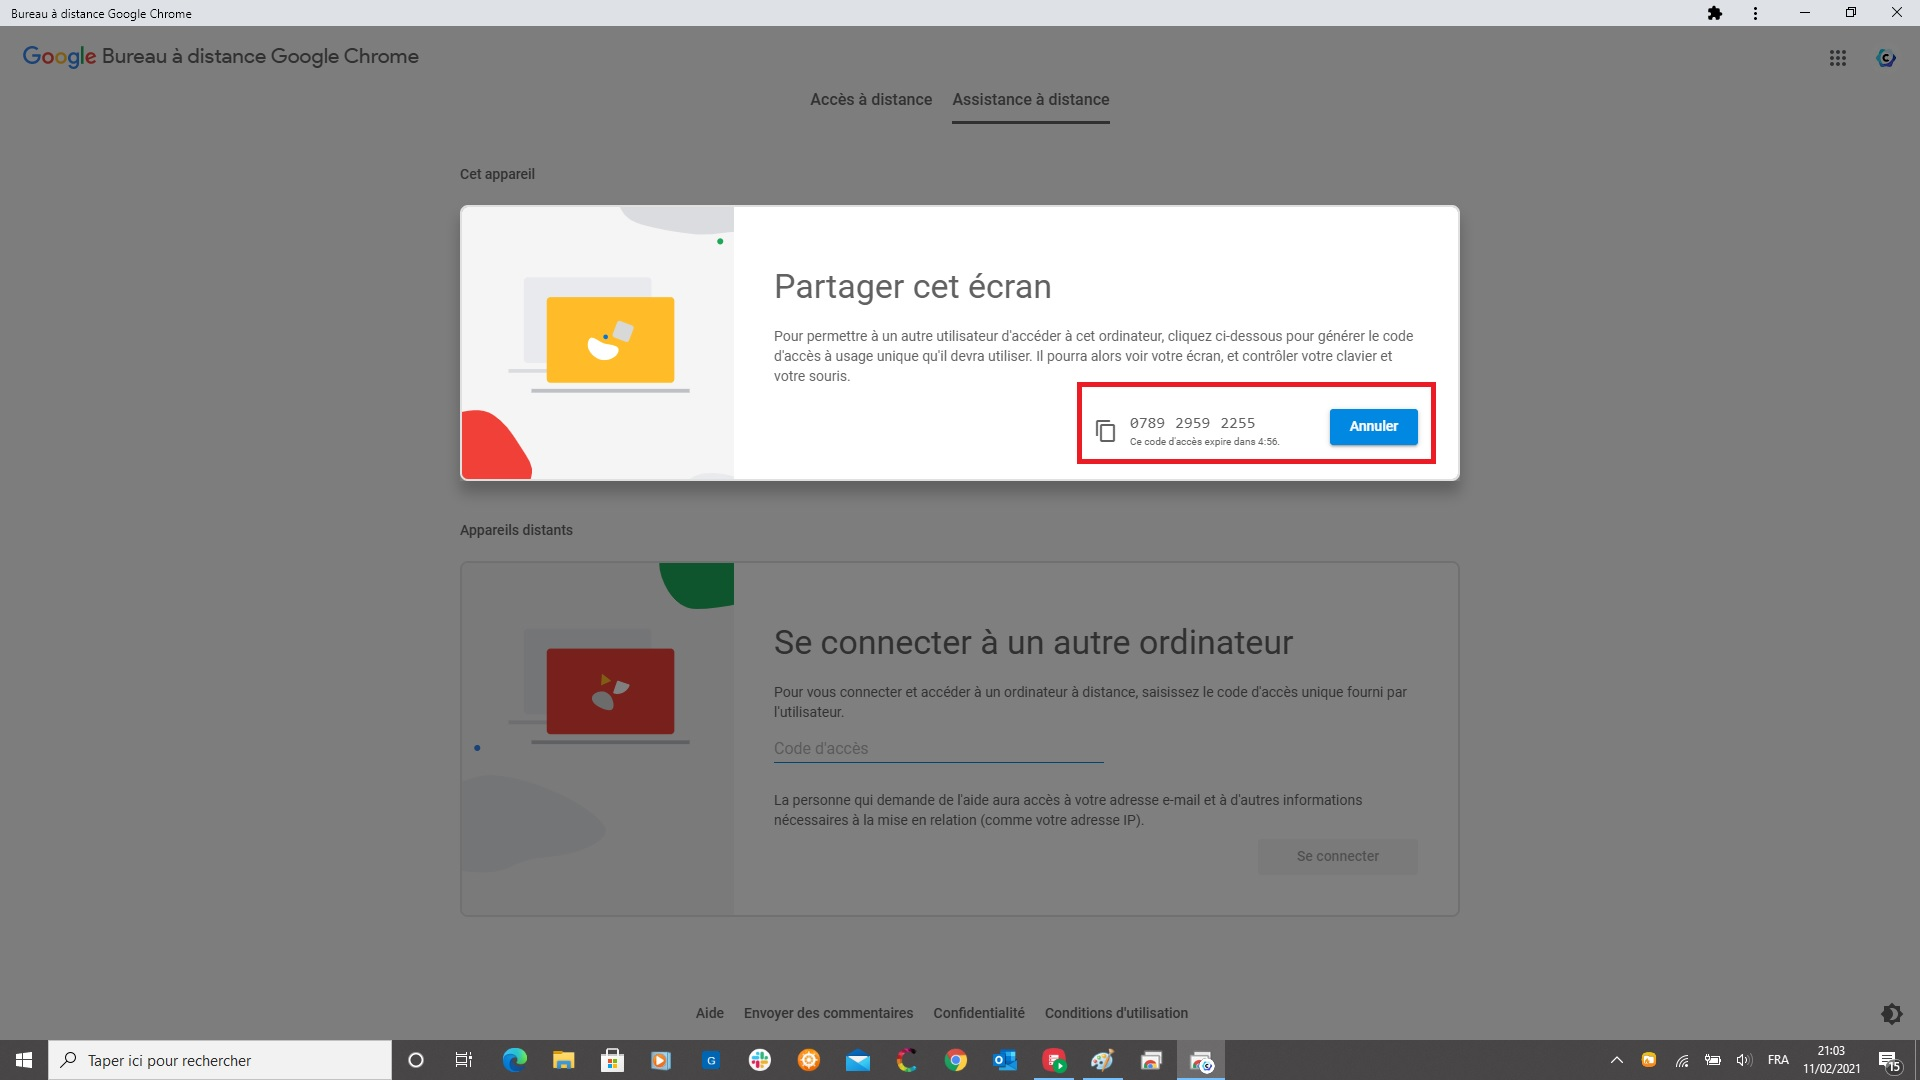
Screen sharing with
RemoteDesktop
To share your screen so that your Coraye contact can take control of your computer, simply click on this link:
https://remotedesktop.google.com/support
Or launch the " Chrome Remote Desktop " utility
When the Google Chrome remote desktop is displayed, go to the " Remote Assistance " tab then " Share this screen "

By clicking on the button " + Generate a code " an access code valid for 5 minutes appears.
Communicate this code to us when asked to allow us to take control of your computer.
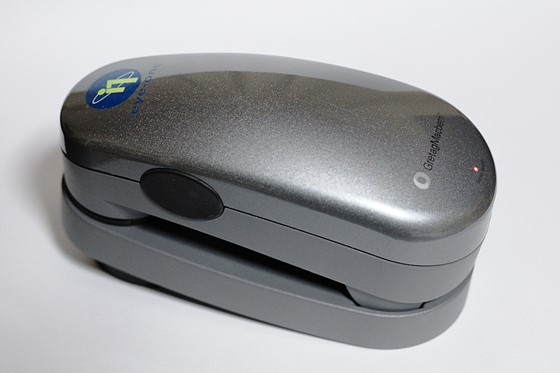
Spectrophotometers
Spectrophotometers controlled by Coraye
XRite I1 Pro 3
XRite I1 Pro 3 PLUS
EFI ES3000
XRite I1 Pro 2
EFI ES 2000
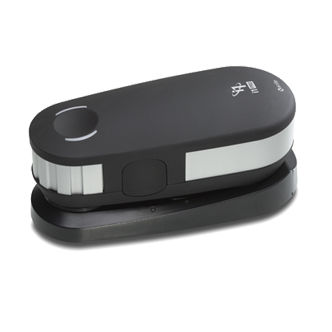
XRite I1 Pro
EFI ES 1000
Konica Minolta Myiro

Konica Minolta CM-26
Konica MinoltaCM-25
Barbieri LFP qb

Barbieri LFP qb Sensing Unit

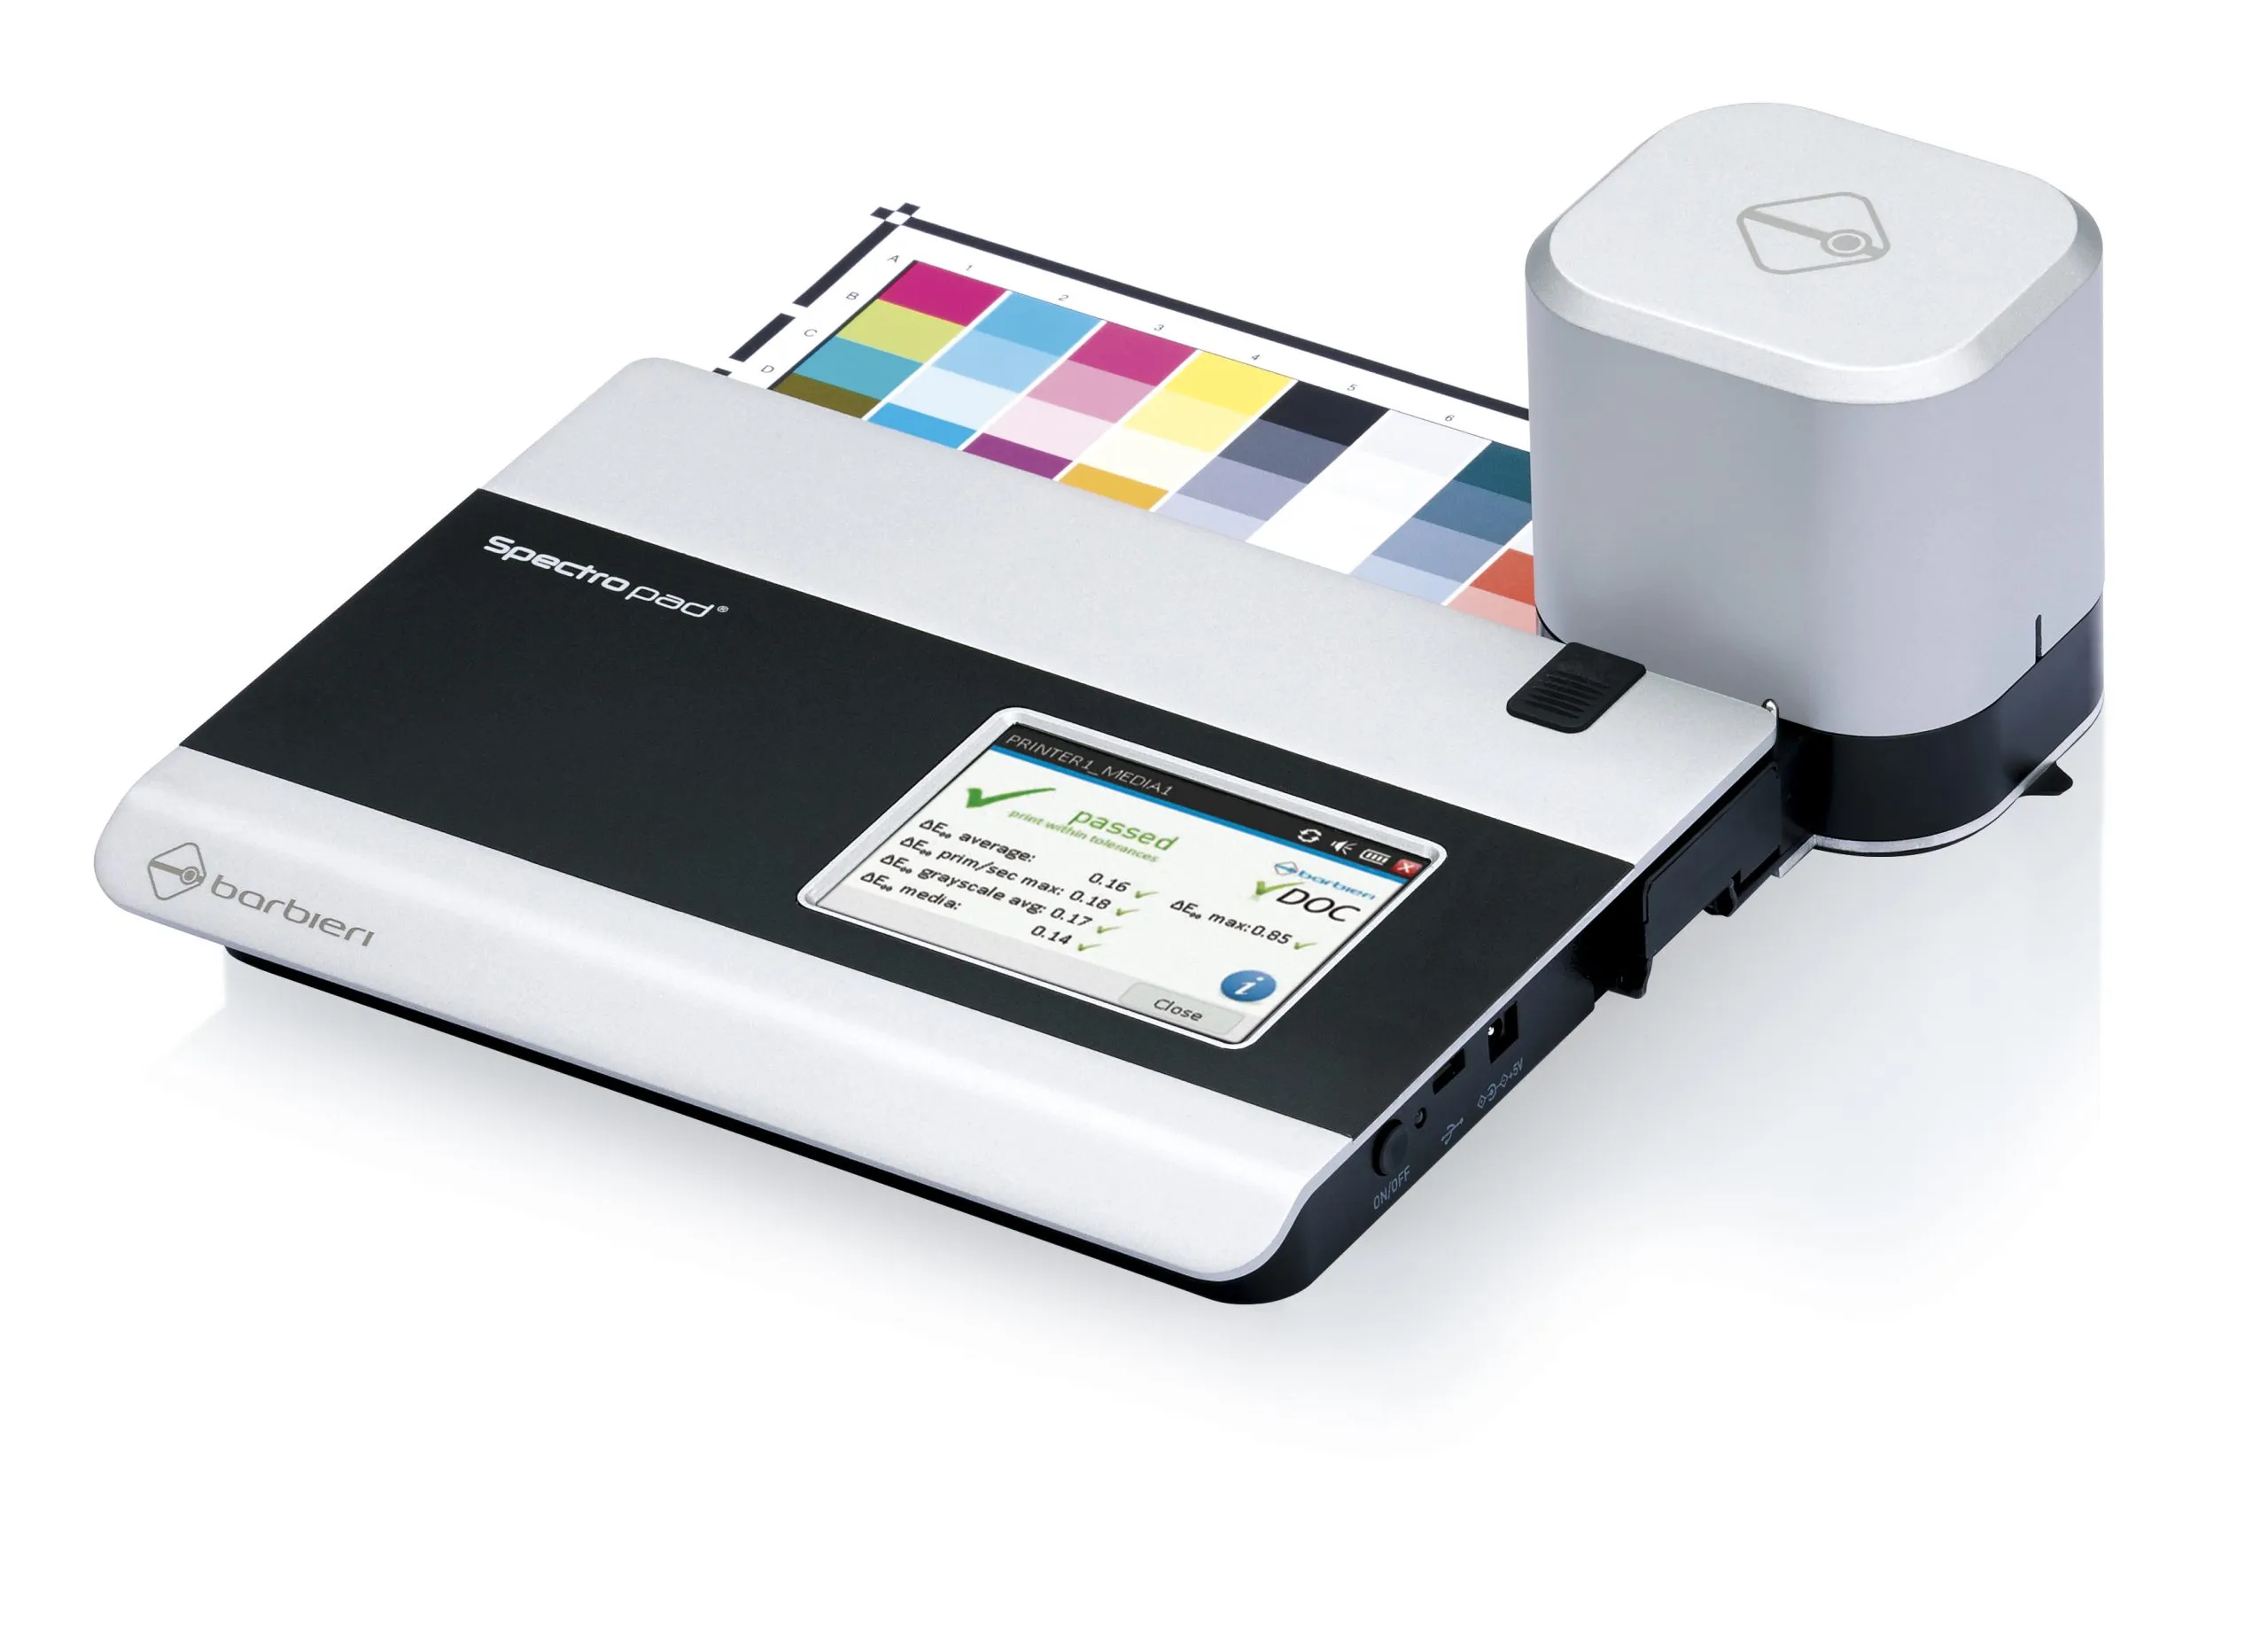
Barbieri Spectropad