For more information, see the chapter: [Creating a reference from a printed RGB MediaWedge](https://wiki.coraye.com/books/coraye-manual-en/page/create-a-baseline-from-a-printed-rgb-mediawedge "Creating a reference from a printed RGB MediaWedge")
[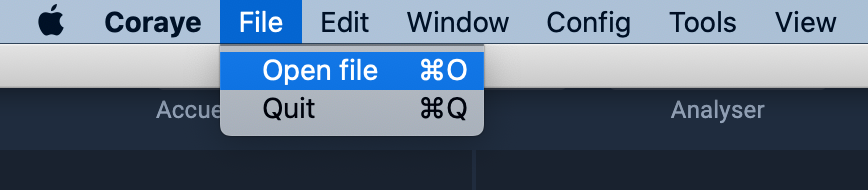](https://wiki.coraye.com/uploads/images/gallery/2021-08/image-1629206215413.png) Once imported into Coraye, the "Print Control" file appears in the left column with a check mark. [](https://wiki.coraye.com/uploads/images/gallery/2021-08/3REprint-control-rvb-2.png) #### Start the procedure To start the measurement, all you have to do is right click on the file and select "Start control" [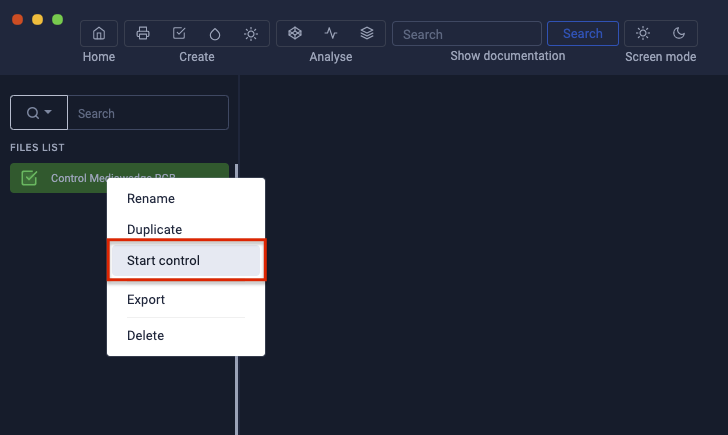](https://wiki.coraye.com/uploads/images/gallery/2021-08/print-control-rvb-3.png) If the range is not already printed, you can download it in Tif or Pdf format To start the measurement, click on the "Start reading" button [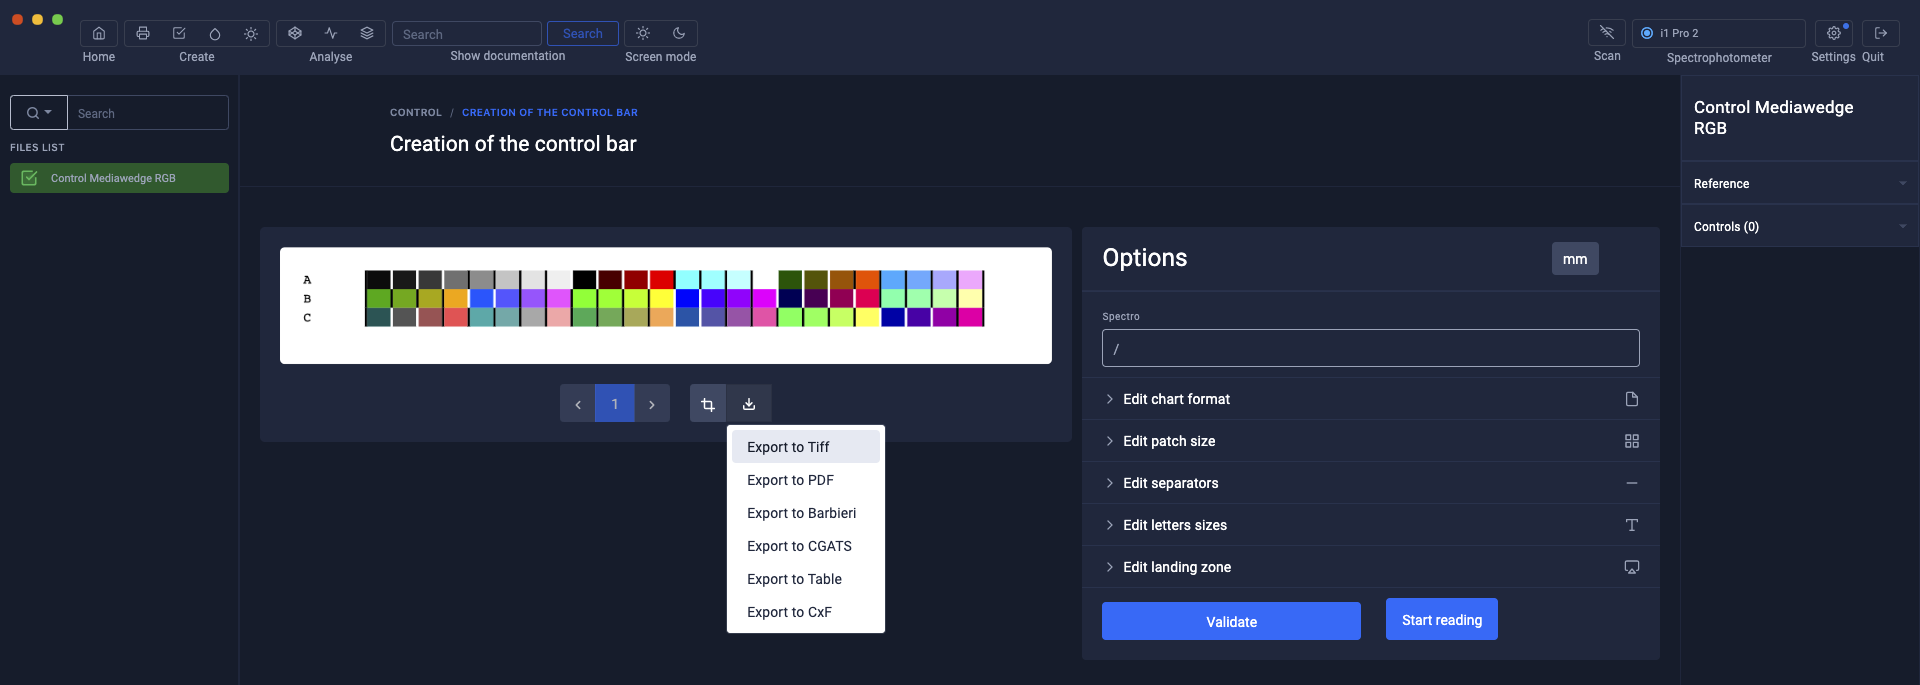](https://wiki.coraye.com/uploads/images/gallery/2021-08/print-control-rvb-4.png) Select the measurement options, then click the "I'm ready" button [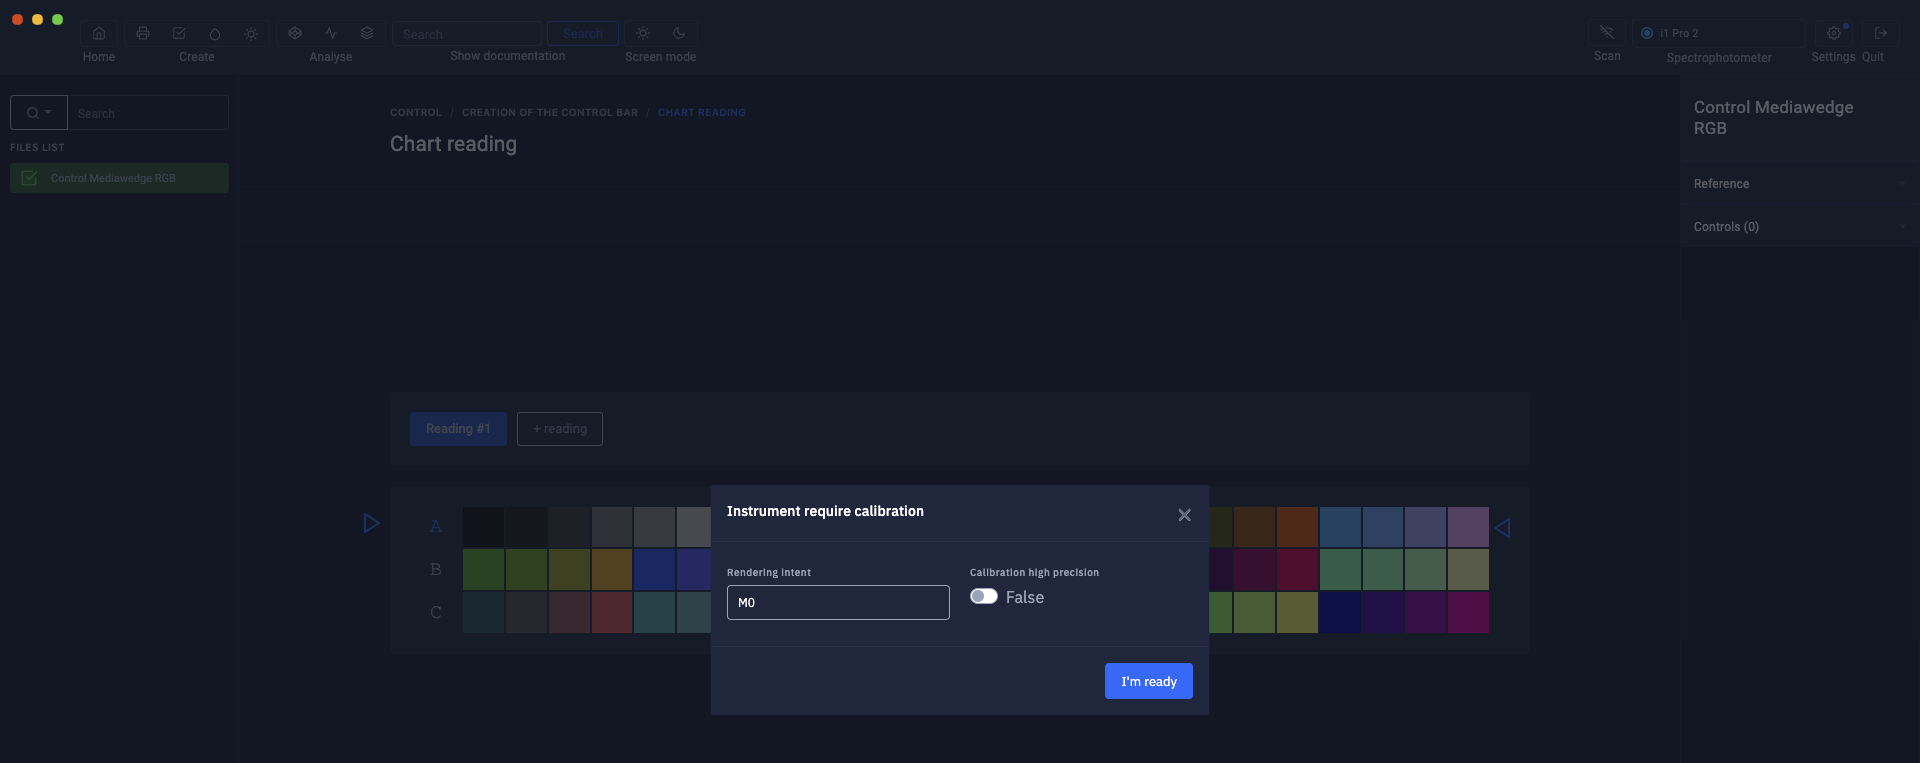](https://wiki.coraye.com/uploads/images/gallery/2021-08/print-control-rvb-5.png) Position your spectrophotometer in its calibration position [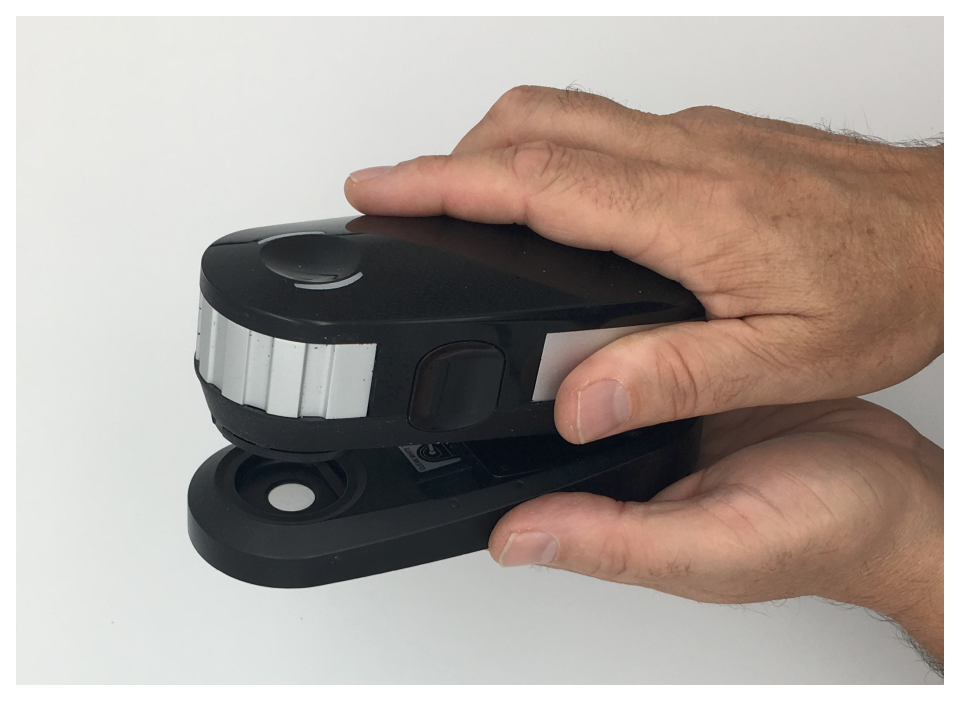](https://wiki.coraye.com/uploads/images/gallery/2021-08/image-1629199850021.png) Click on the "Start calibration" button [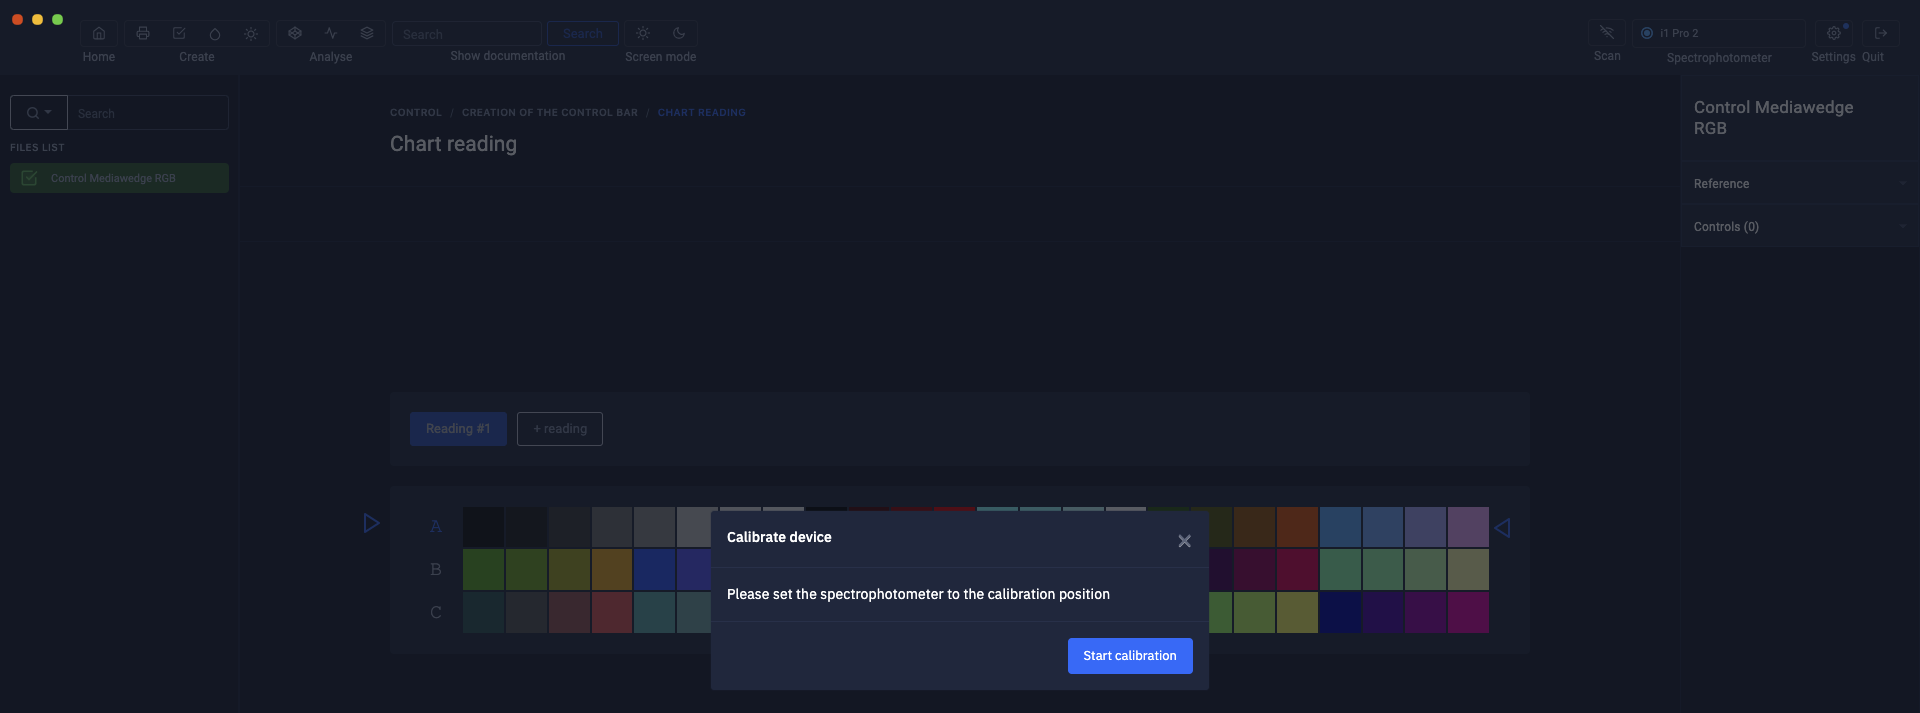](https://wiki.coraye.com/uploads/images/gallery/2021-08/print-control-rvb-6.png) #### Measure the range The procedure for measuring an RGB gamut is identical to that of a CMYK gamut For more details, we invite you to read the chapter: [Checking a standardized CMYK Mediawedge gamut](https://wiki.coraye.com/link/58#bkmrk-impression-de-la-gam "Control of a standardized CMYK Mediawedge range")For more information, see the chapter: [Controlling a CMYK Mediawedge range](https://wiki.coraye.com/books/coraye-manual-en/page/control-a-standardized-cmyk-mediawedge-range "Measurement of a Mediawedge range")
[](https://wiki.coraye.com/uploads/images/gallery/2021-08/print-control-rvb-7.png) When the range measurement is finished, the report is displayed. A history of controls is saved in the "Print Control .pctrl" file and appears in the right column when the Print Control file is selected in the left column. [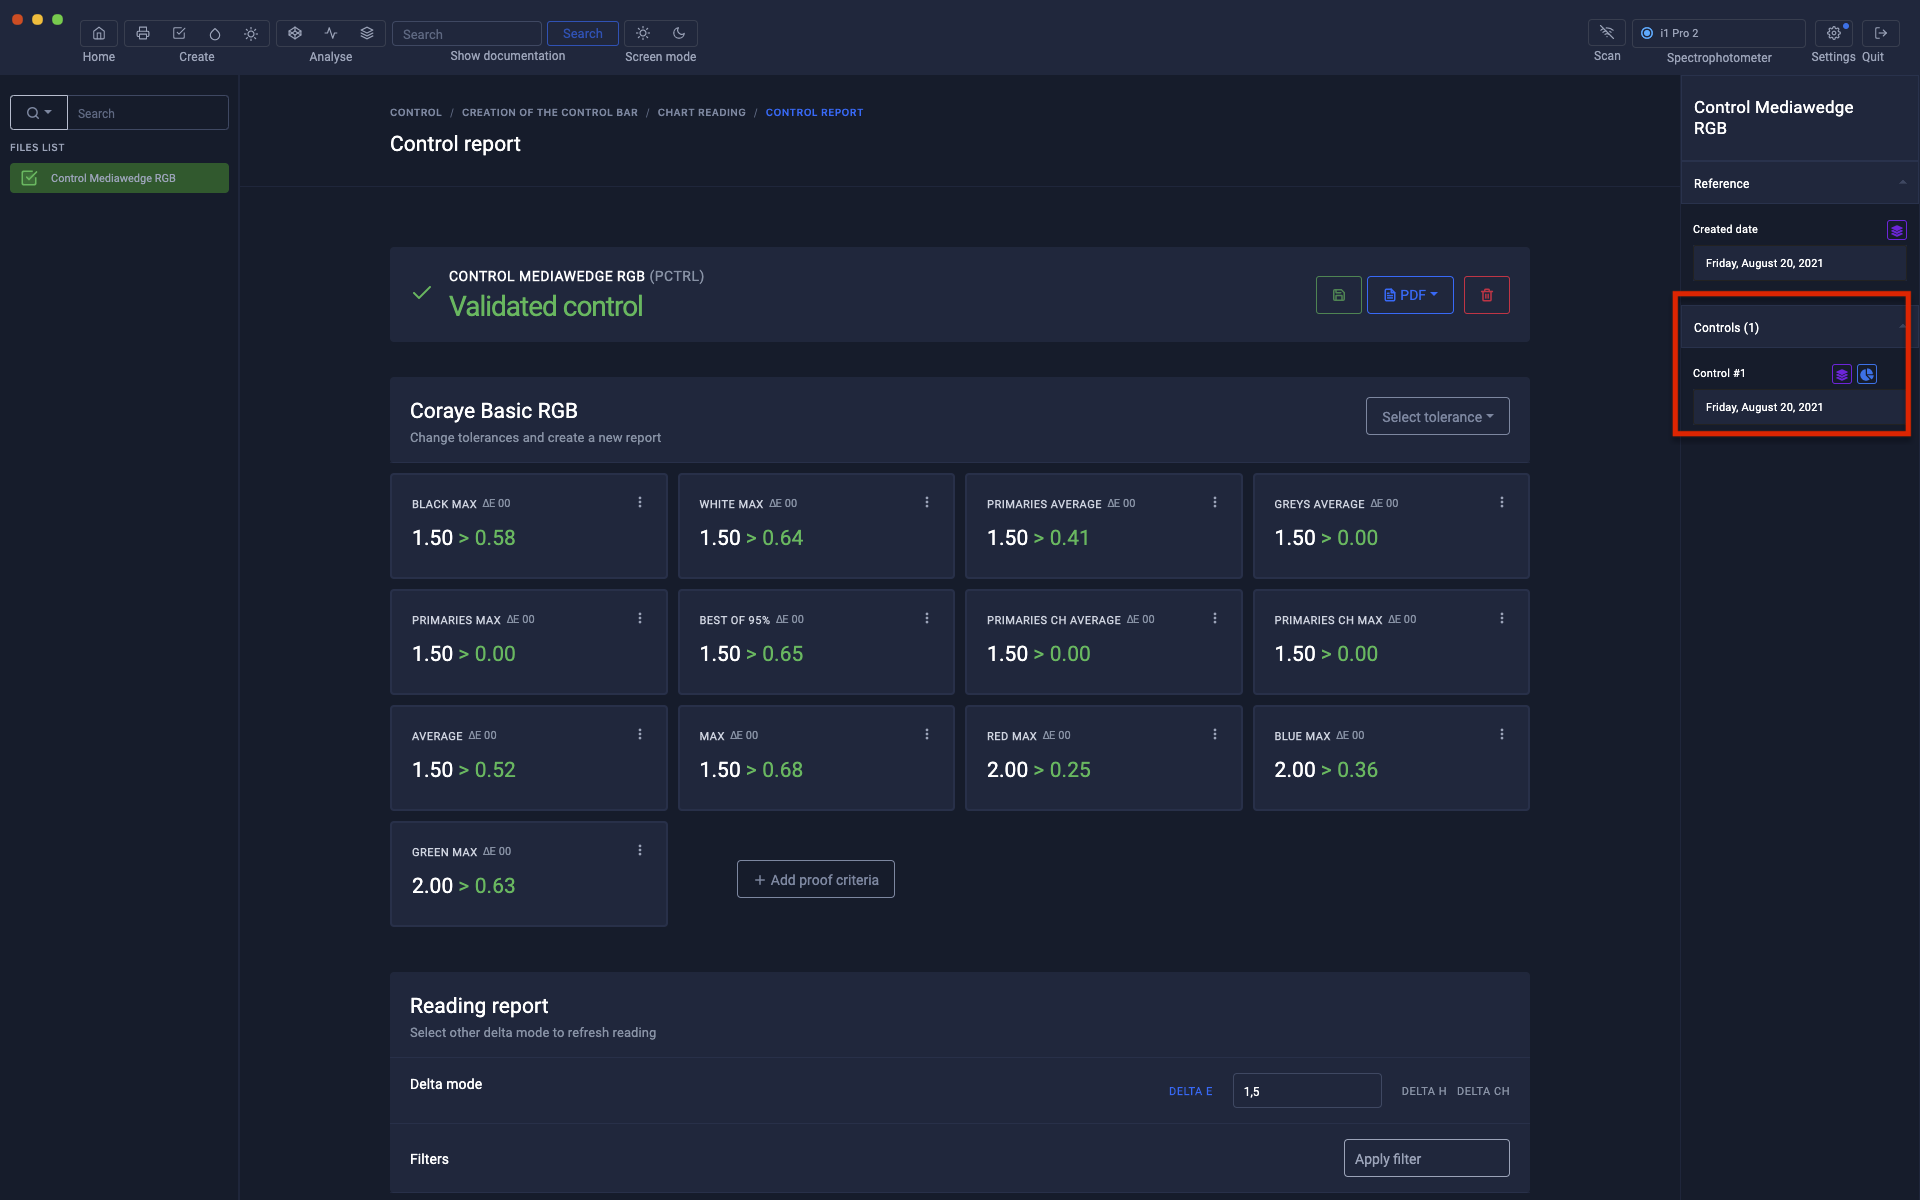](https://wiki.coraye.com/uploads/images/gallery/2021-08/print-control-rvb-8.png) To perform other checks, just "Start control" on the .pctrl file ...[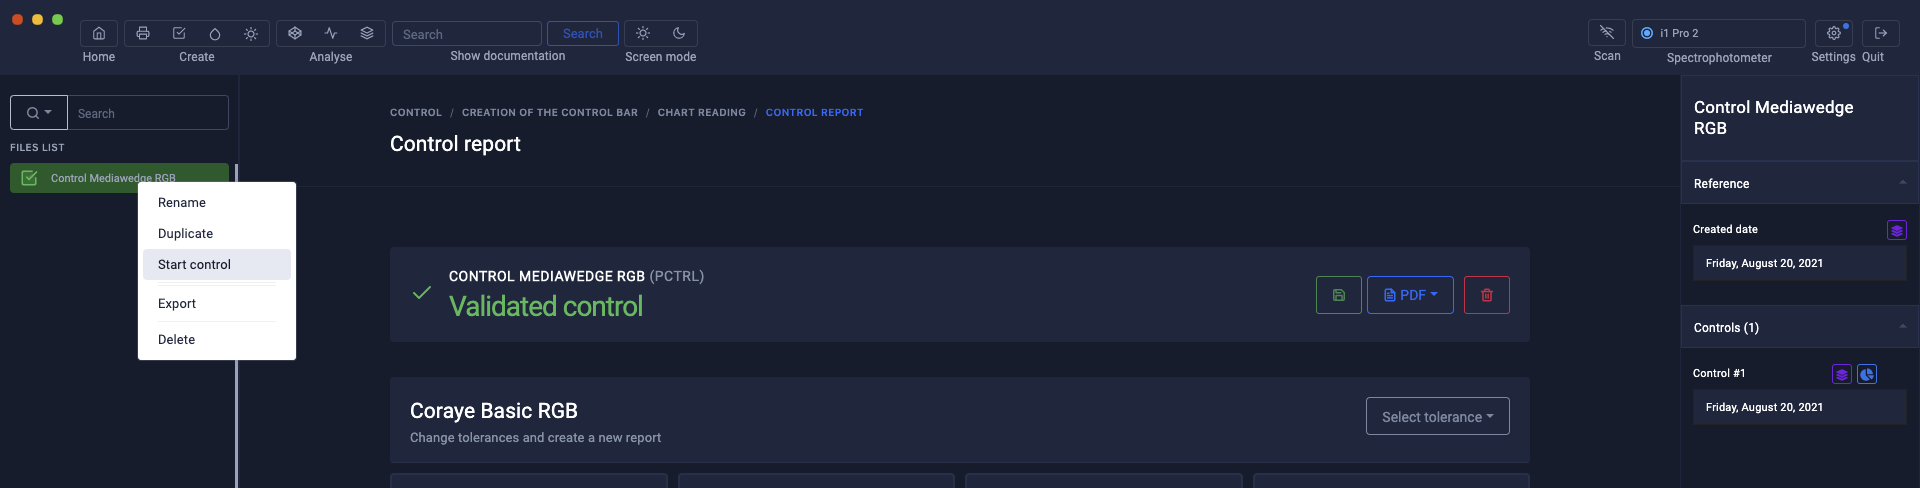](https://wiki.coraye.com/uploads/images/gallery/2021-08/print-control-rvb-10.png) ... and measure the Mediawedge range. [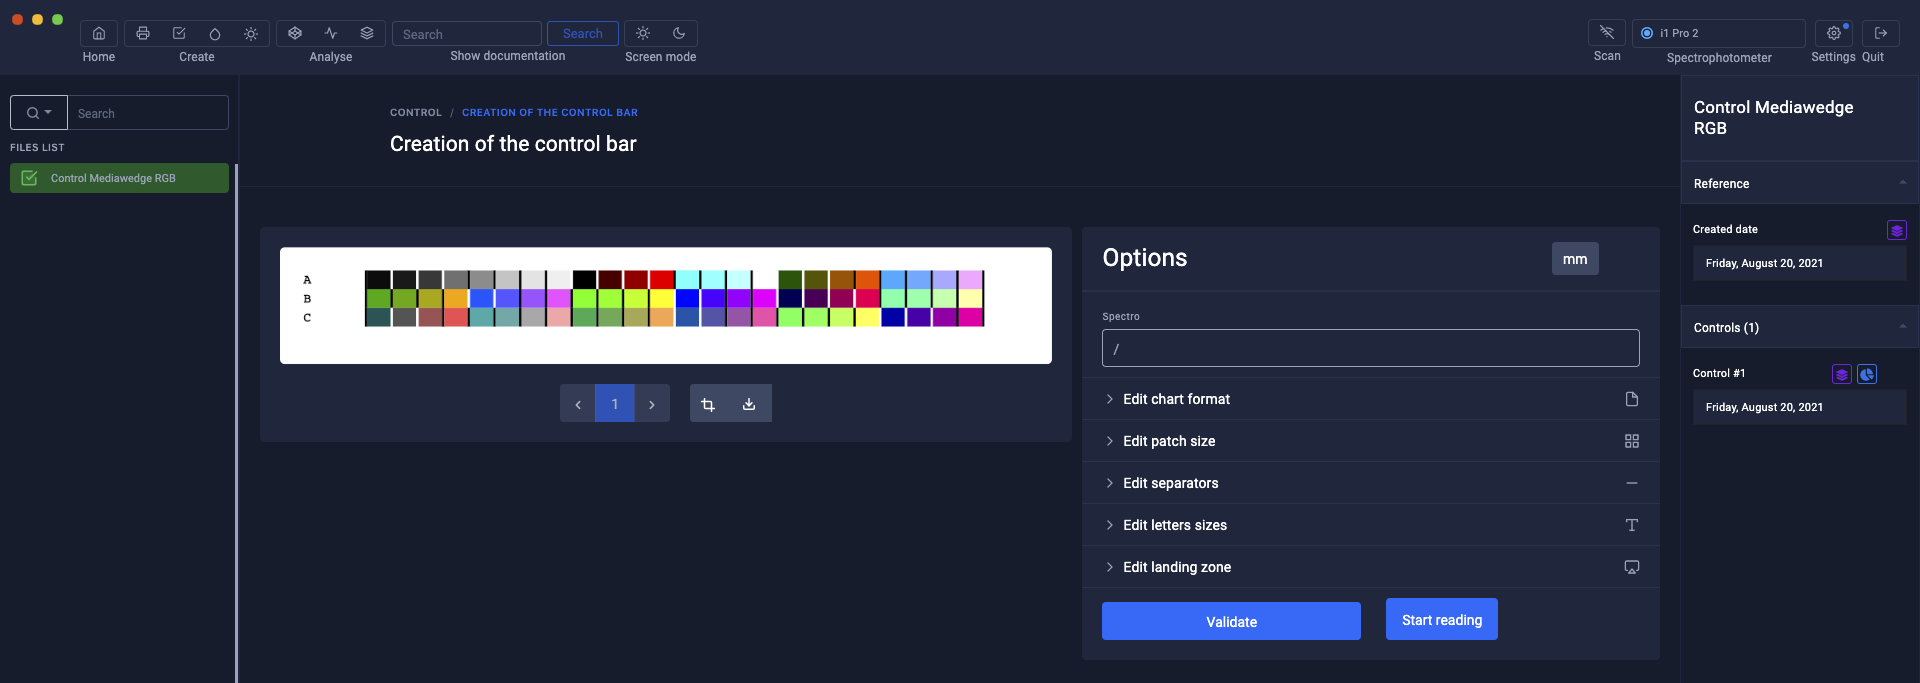](https://wiki.coraye.com/uploads/images/gallery/2021-08/print-control-rvb-11.png) Each new control is added to the history of the .pctrl file. The measurements and the results of the control are stored in the file. [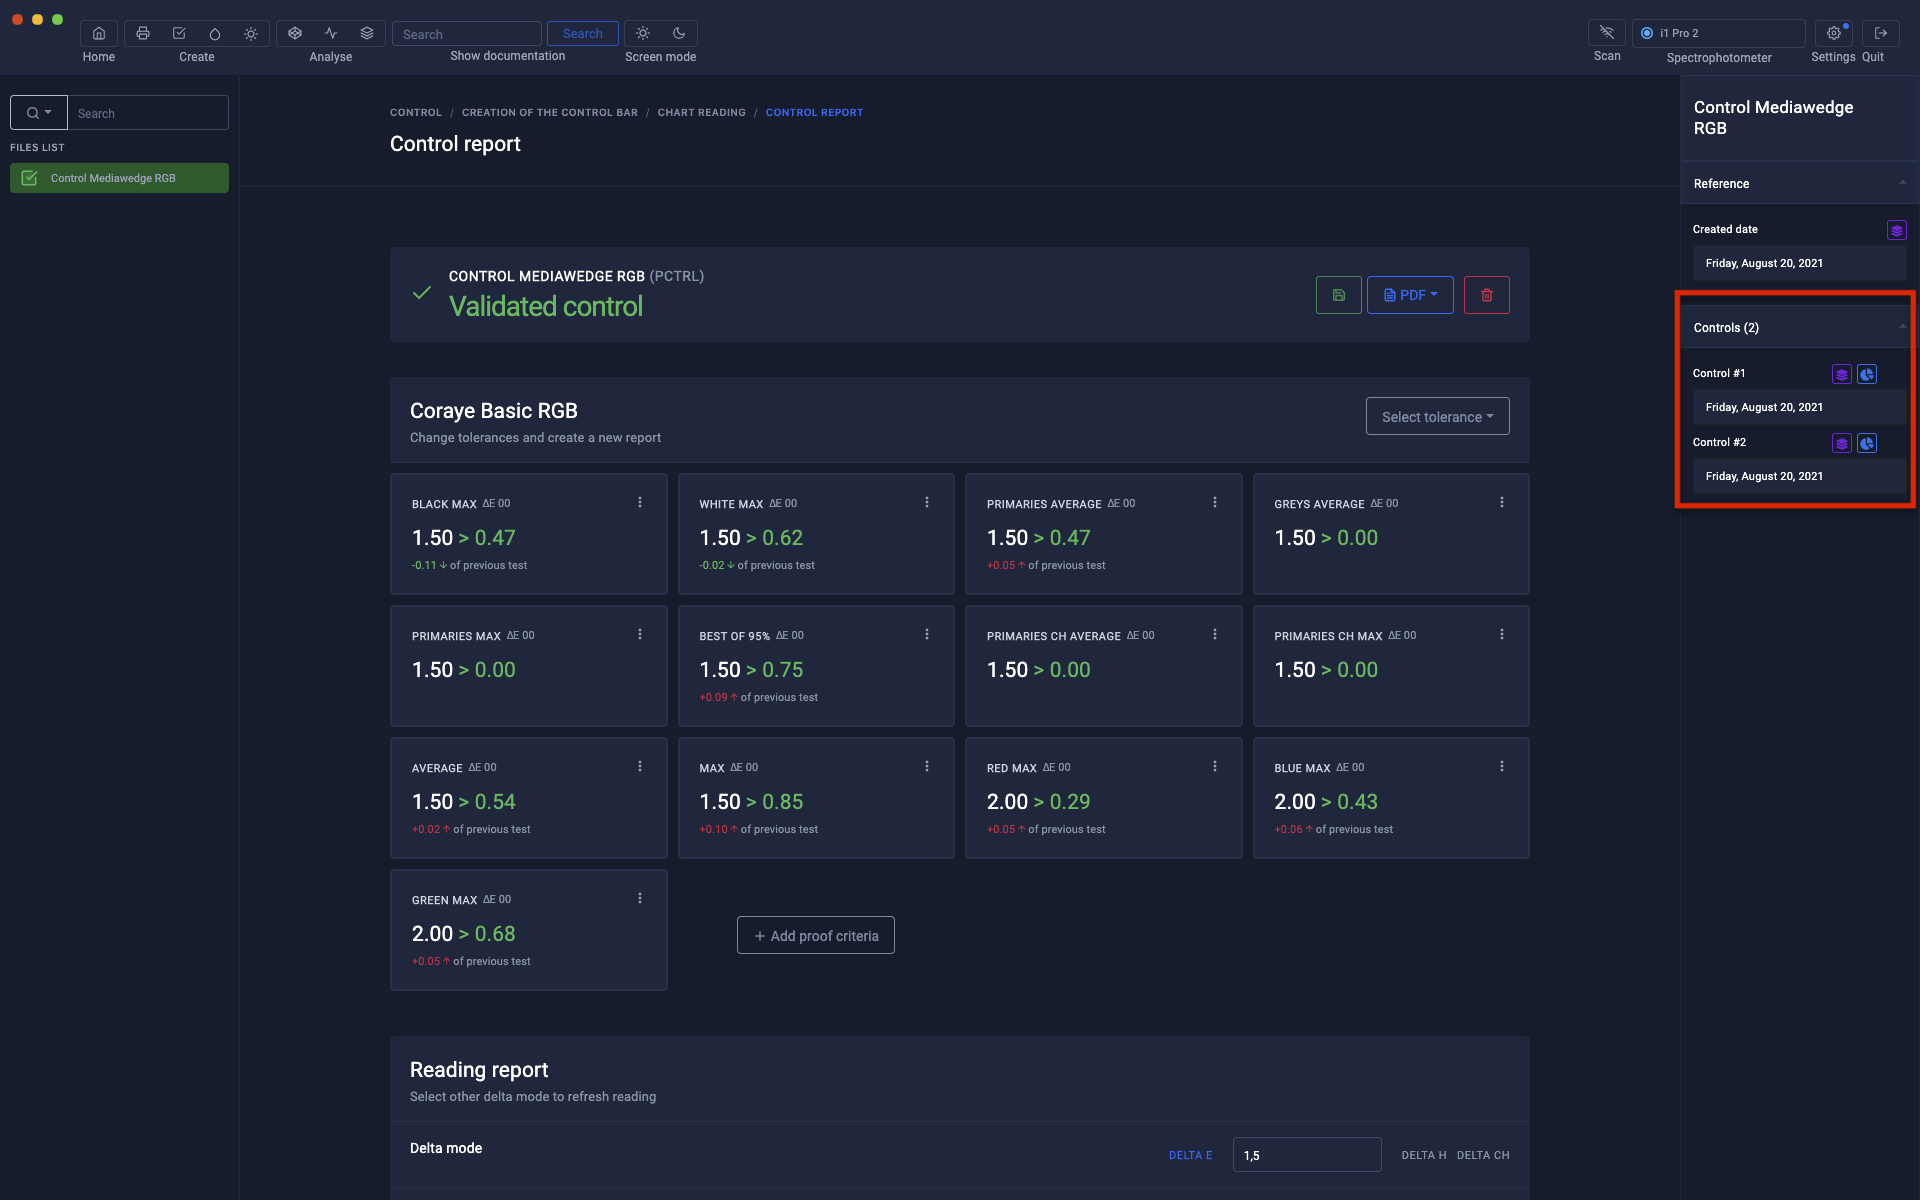](https://wiki.coraye.com/uploads/images/gallery/2021-08/print-control-rvb-13.png) #### Extraction of previously performed measurements Just click on the purple icon. [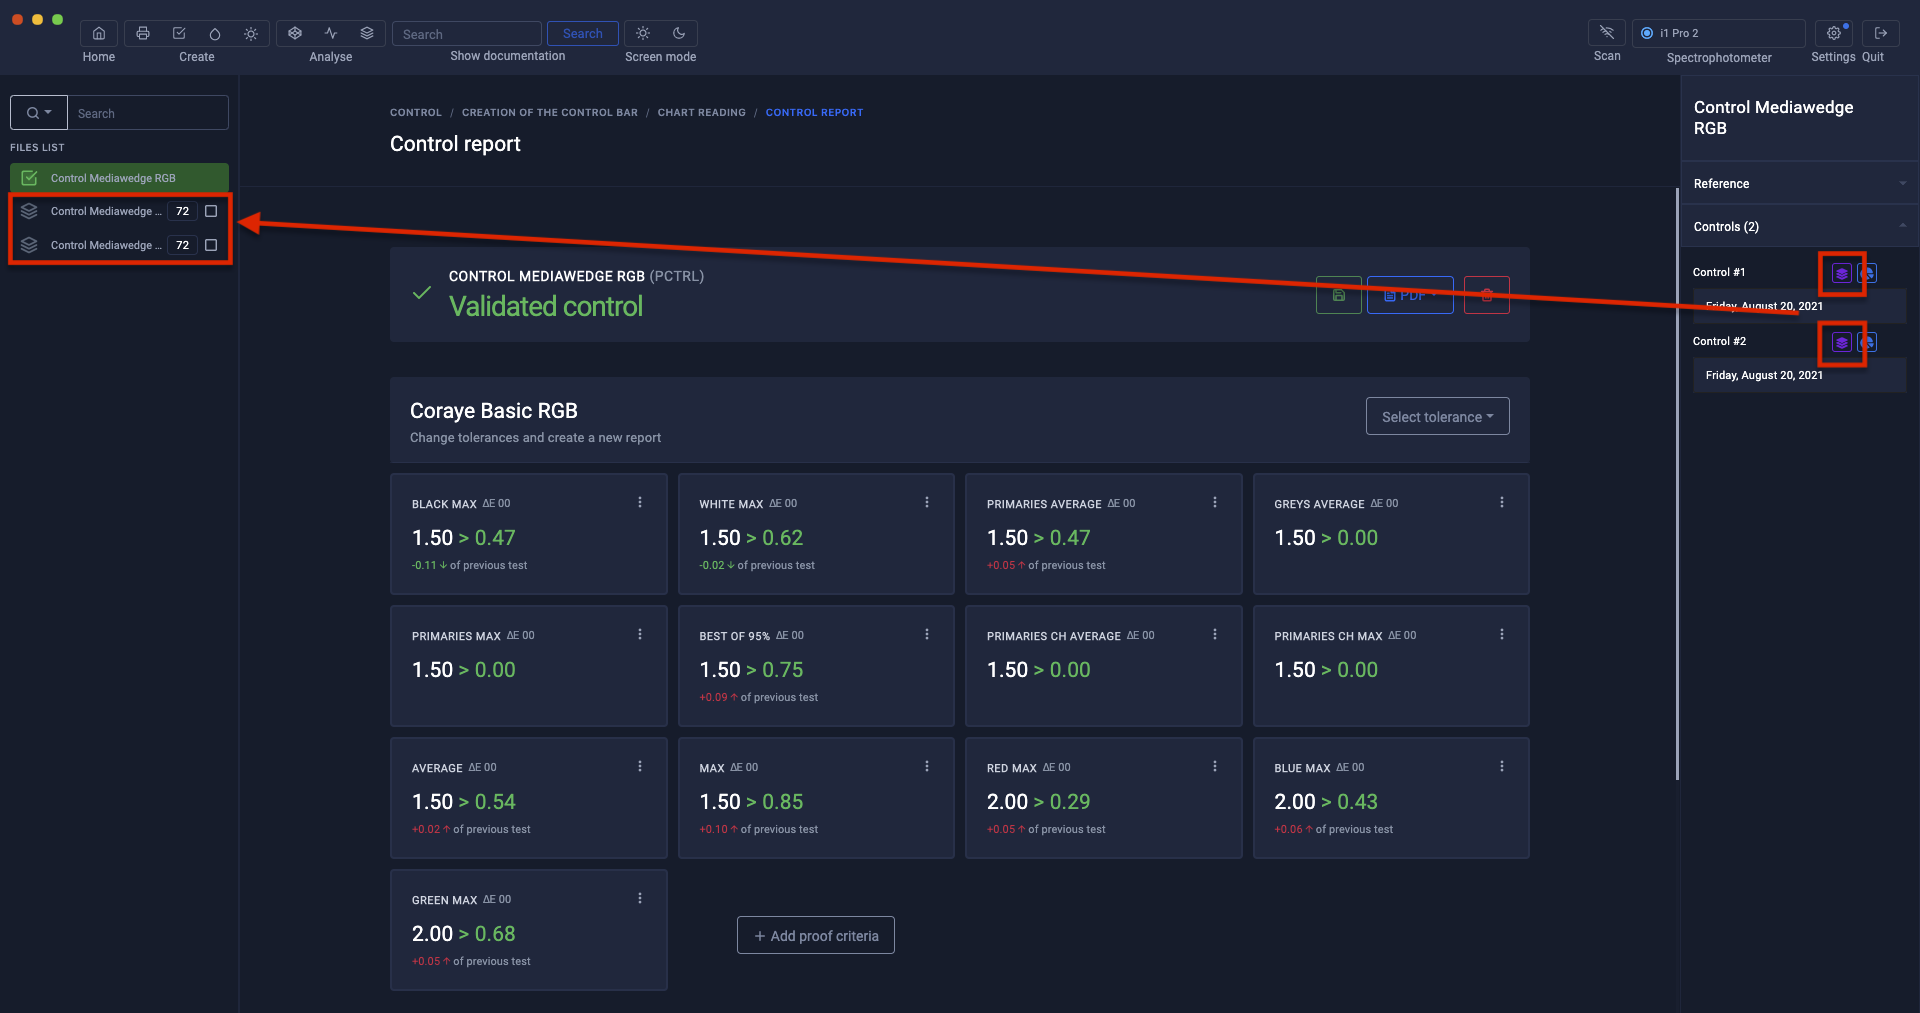](https://wiki.coraye.com/uploads/images/gallery/2021-08/print-control-rvb-14.png) To compare the measurements in 3D, it is possible to display them in the [Gamut Viewer](https://wiki.coraye.com/books/manuel-coraye-fr/page/gamut-viewer "Gamut Viewer") [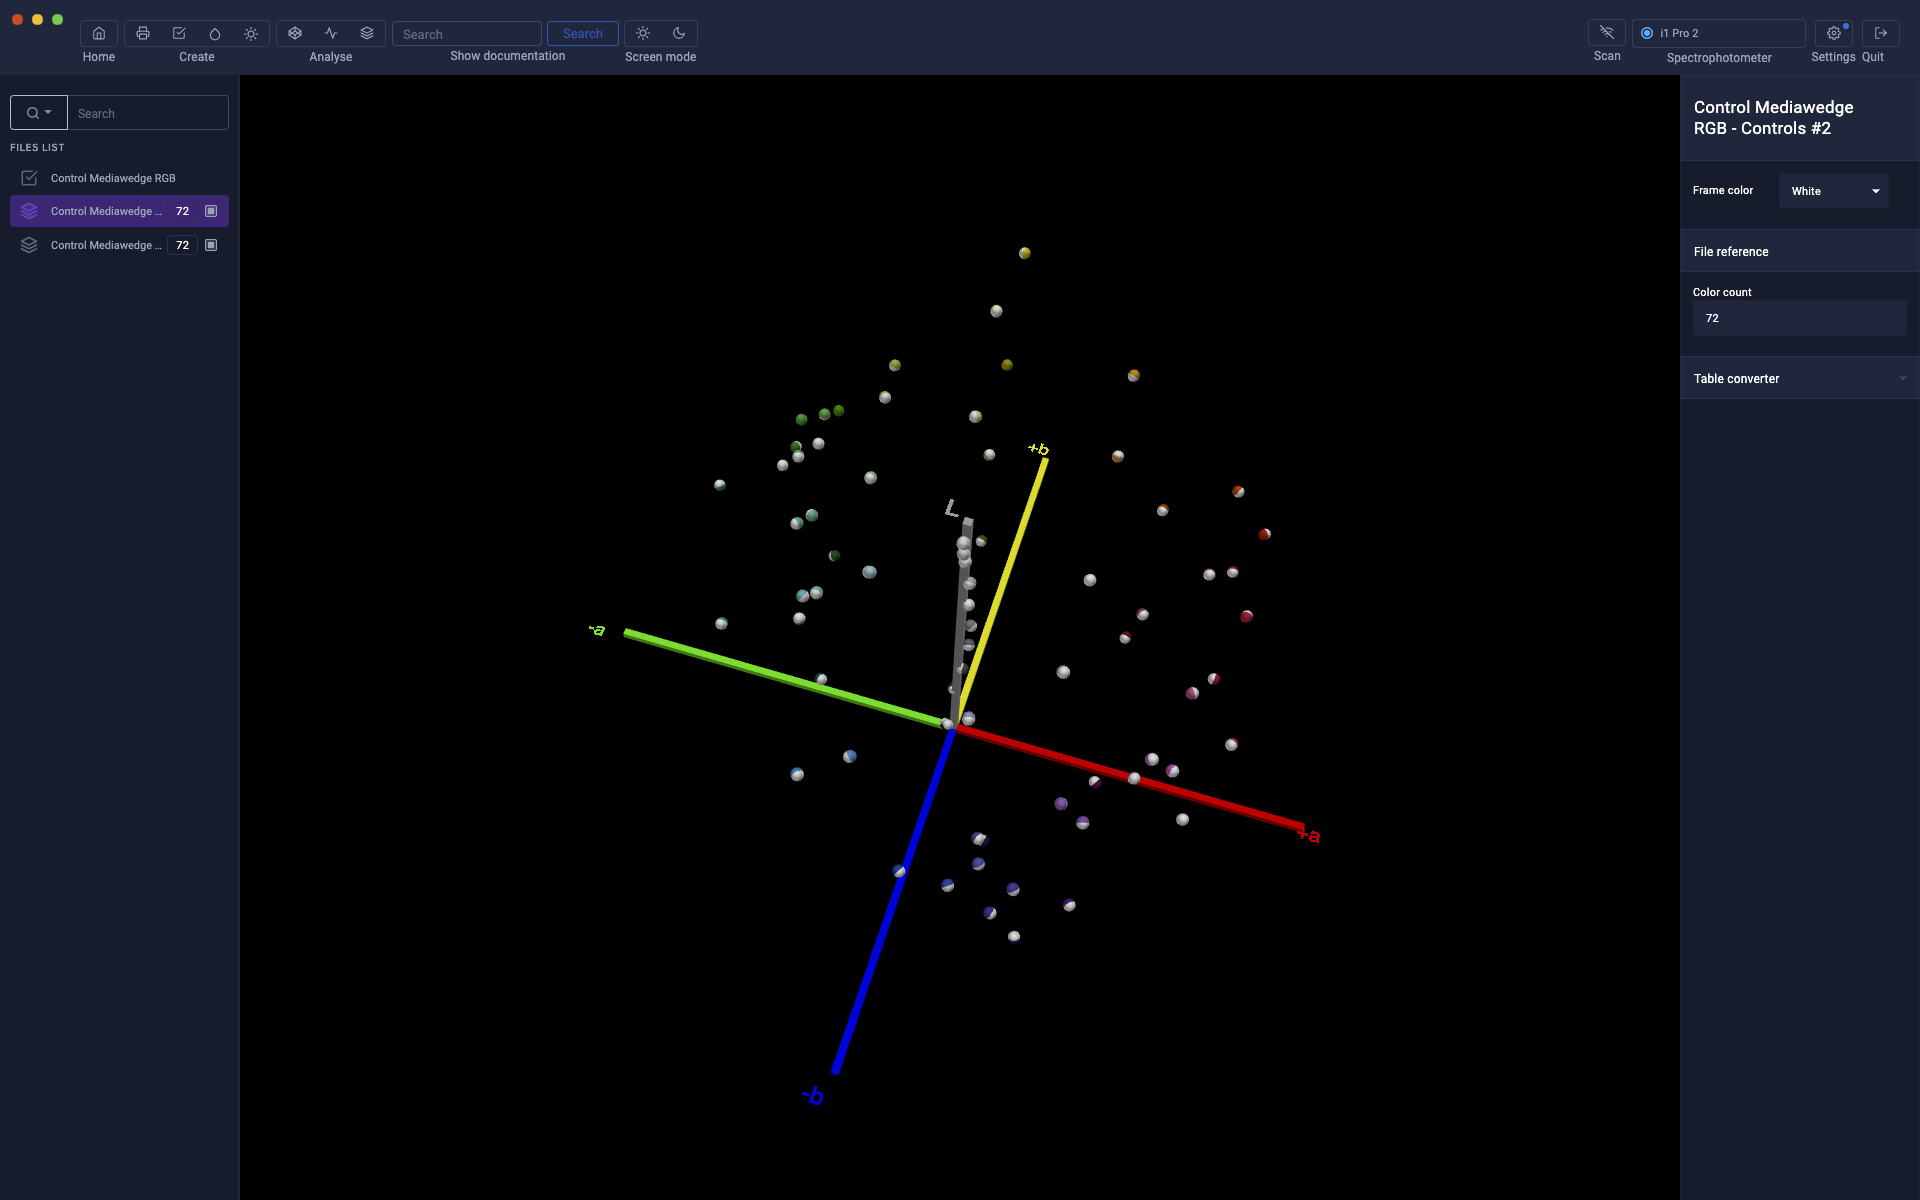](https://wiki.coraye.com/uploads/images/gallery/2021-08/print-control-rvb-15.png) #### Delete a measure To delete a measurement, you must click on the blue icon then on the trash can icon. [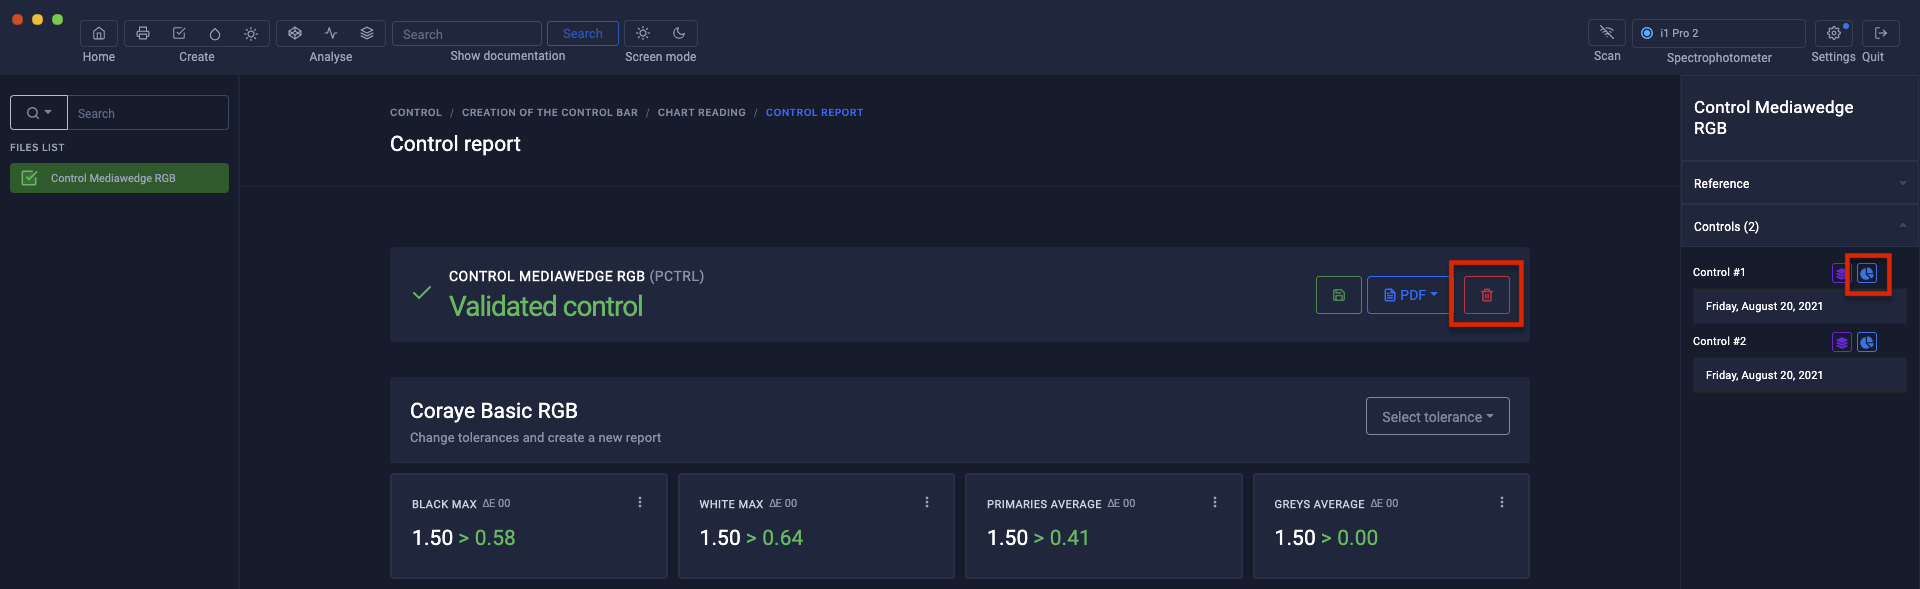](https://wiki.coraye.com/uploads/images/gallery/2021-08/print-control-rvb-17.png) #### Creation of a label or report in pdf format [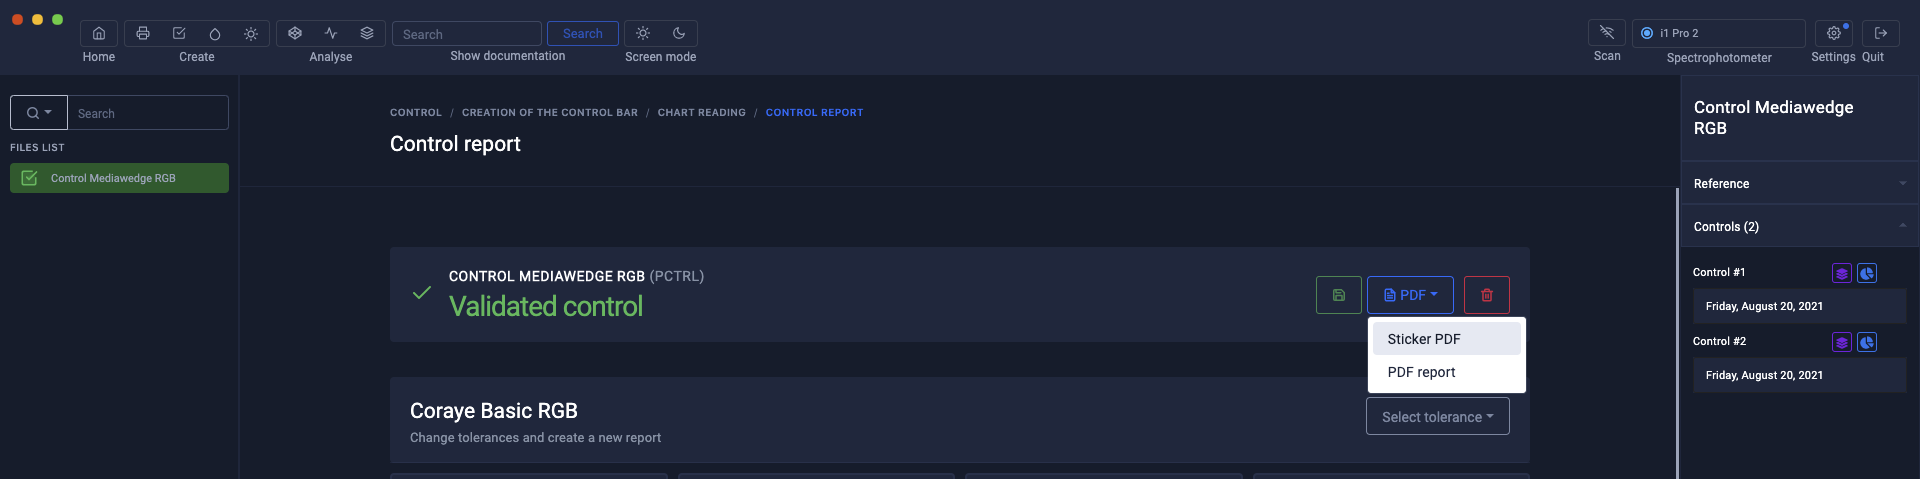](https://wiki.coraye.com/uploads/images/gallery/2021-08/print-control-rvb-18.png) Short report label [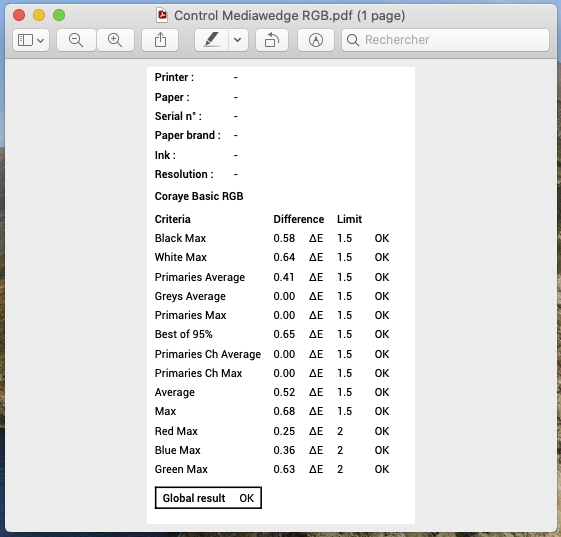](https://wiki.coraye.com/uploads/images/gallery/2021-08/print-control-rvb-21.png) Control report [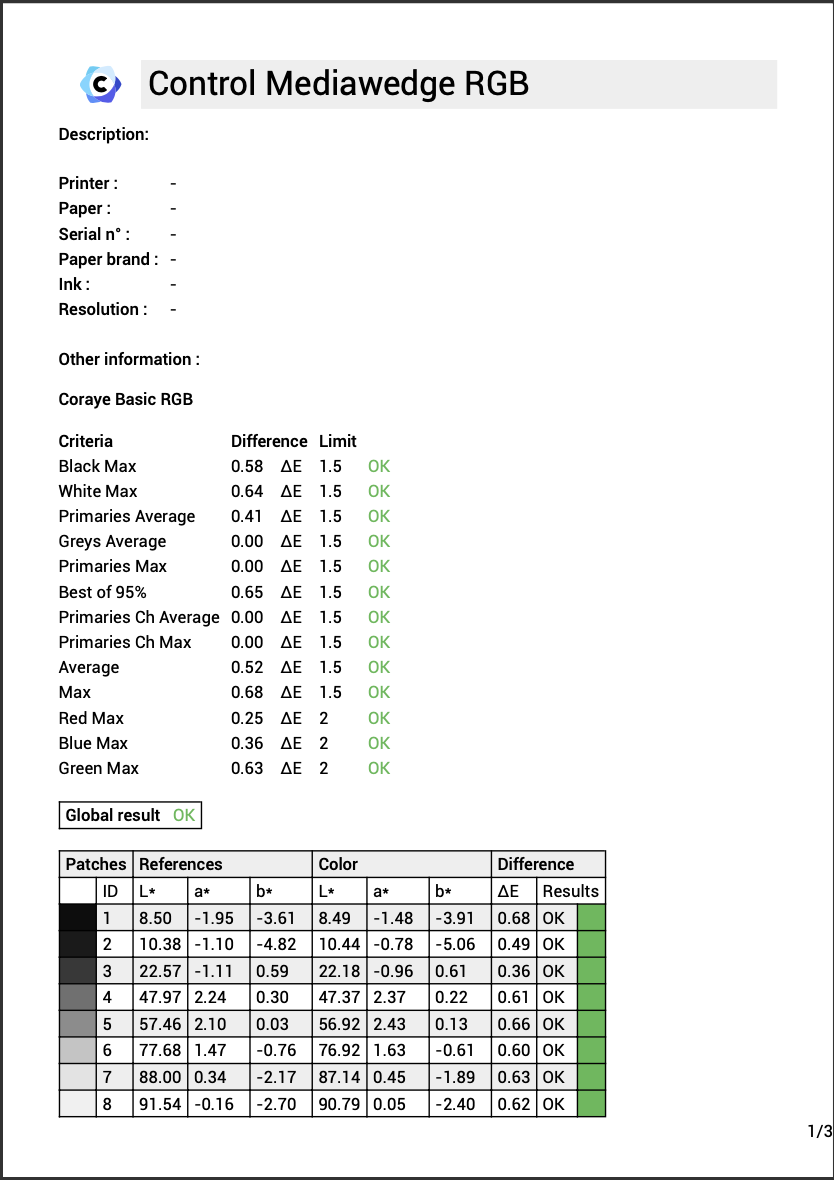](https://wiki.coraye.com/uploads/images/gallery/2021-08/print-control-rvb-19.png) [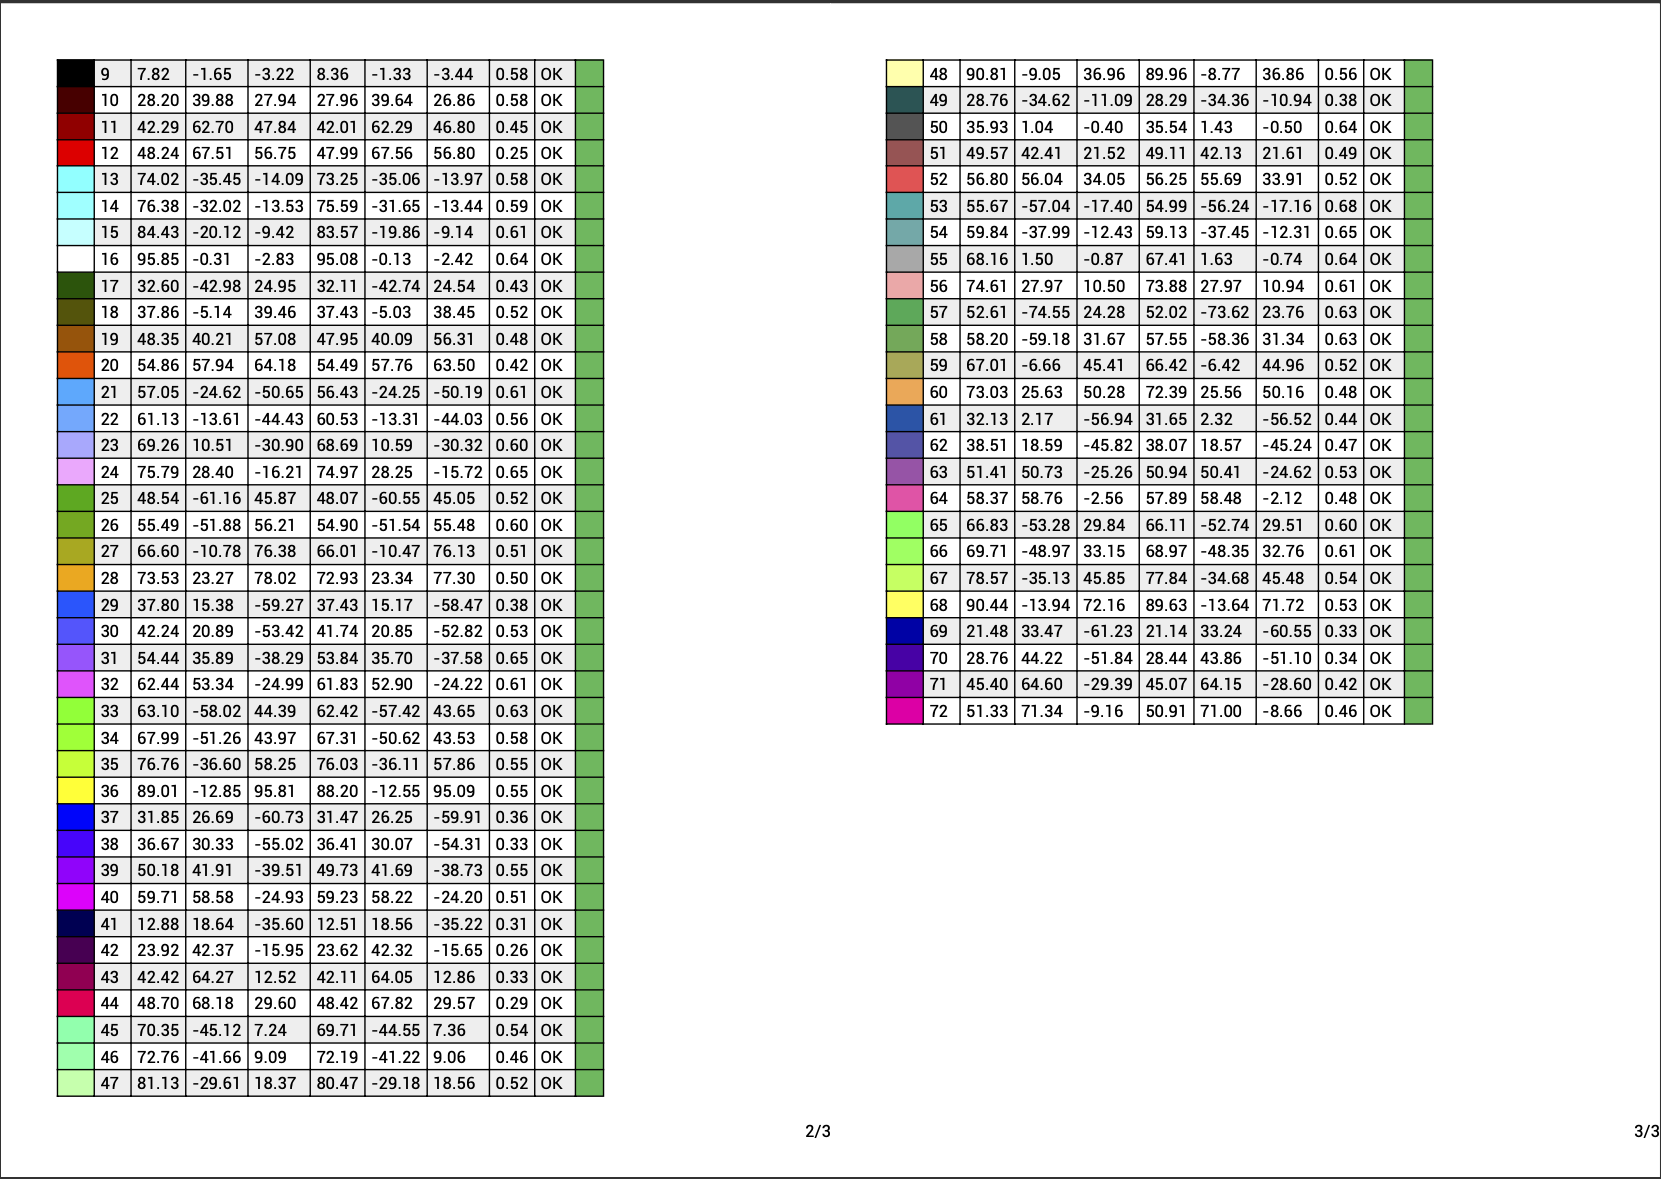](https://wiki.coraye.com/uploads/images/gallery/2021-08/print-control-rvb-20.png) #### Saving the Print Control file To save the .pctrl file on your computer, right click on the Print Control file then select the "Export" option [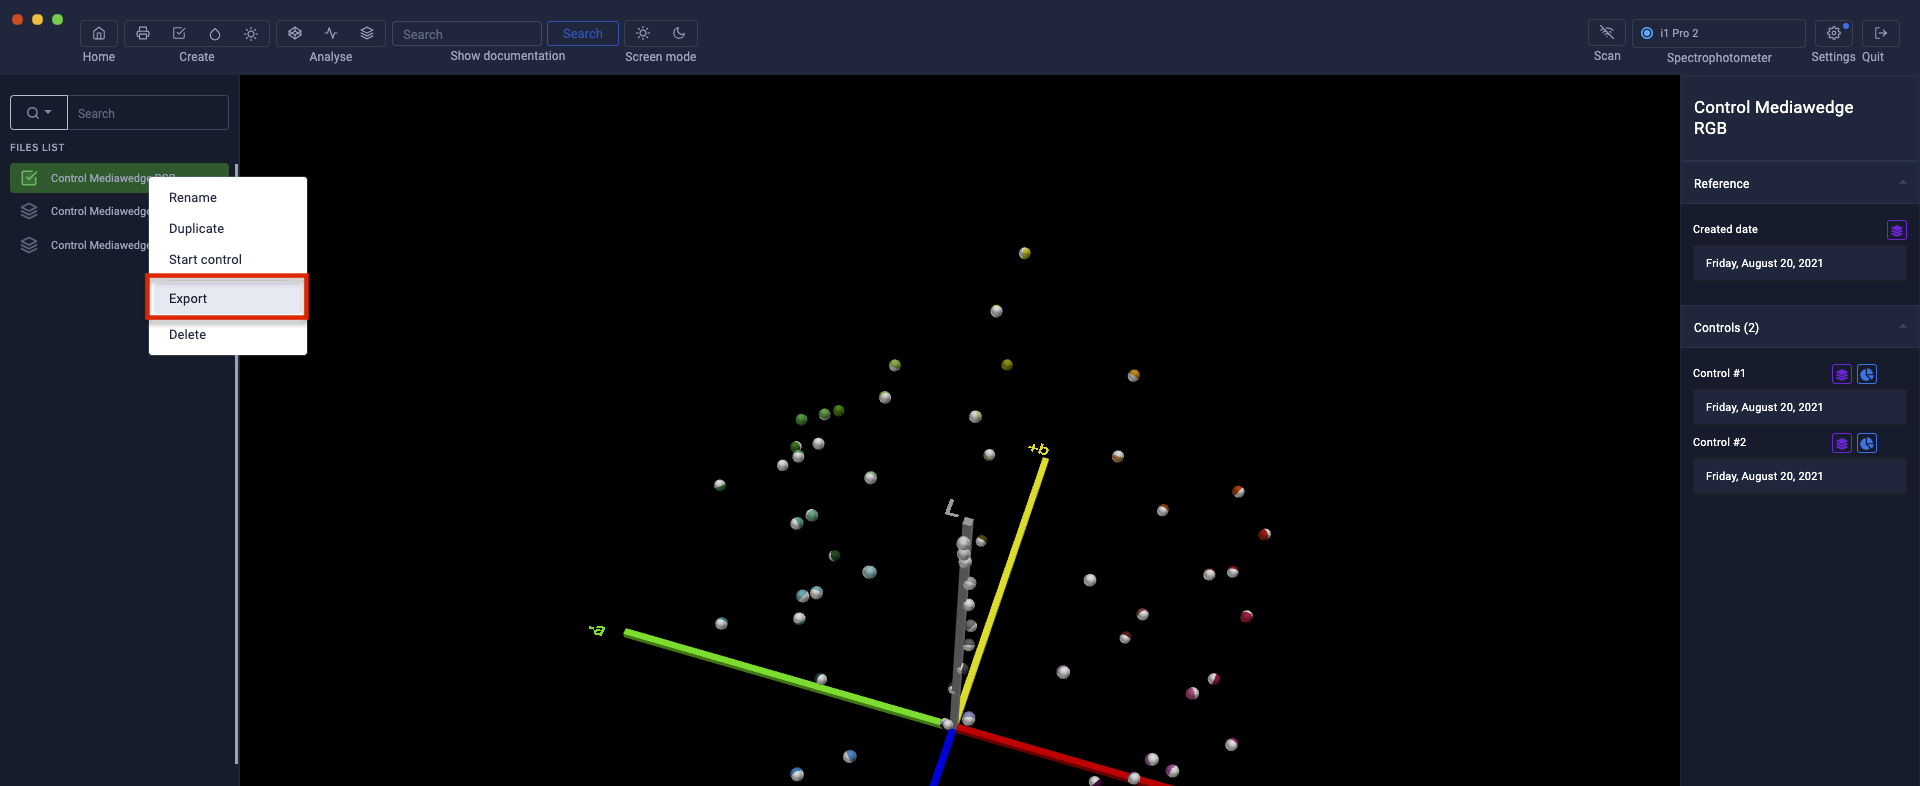](https://wiki.coraye.com/uploads/images/gallery/2021-08/print-control-rvb-16.png)